
Related Manuals for Korg ZERO4


Summary of Contents for Korg ZERO4
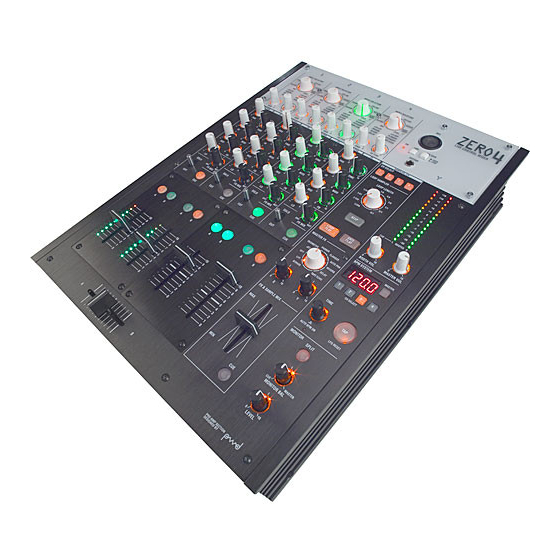
- Page 1 KORG ZERO4 SERVICE MANUAL TABLE OF CONTENTS ASSEMBLY SKETCH (HOOKUP): 2 BLOCK DIAGRAM: 3 SCHEMATIC DIAGRAM: 4-13 TEST MODE and CHECK: 14-26 SYSTEM UPDATE: 27-31 PARTS LIST: 32-34 Issued Jul.4, 2007 Ver.1...
- Page 6 *MODE1[A,A]の場合、X-5810パネルエンコーダー用 SLOTはSCANしない...
- Page 14 QCI-5800 Page ZERO4 (X-5800) Check before Shipping Date 2007/6/18 1/1 Revised ・About this check After repairing, you need not do all these checks. Please do the necessary checks corresponding to the repairing. When you do the checks of Page1/10-Page4/10, do the checks according to this manual.
- Page 15 QCI-5800 Page ZERO4 (X-5800) Check before Shipping Date 2007/4/23 1/10 Revised Equipments: ・AC cord ・Audio analyzer or oscillator ・MIDI cable×1 ・D3200 x1 ・XLR cable×2 ・TRS standard (unbalance)--TRS standard (unbalance) cable x2 TRS standard (unbalance)--RCA Pin cable x2 ・Headphones (both Standard plug and mini-plug) 1.Start of the Check...
- Page 16 QCI-5800 Page ZERO4 (X-5800) Check before Shipping Date 2007/4/23 2/10 Revised Table1 LED Check LEDs which are checked. All LEDs light 1 All LEDs light 2 Orange Green 1-4CH INPUT SELECTOR - FX TYPE - PAN - HI - MID - LO each volume 1-4CH FX TYPE display"LFO LPF"...
- Page 17 QCI-5800 Page ZERO4 (X-5800) Check before Shipping Date 2007/4/23 3/10 Revised 5. TIME Rotary Encoder Check 0. The check comes to this check the segments display is like fig.1 Fig..1 1. Set the pointer of the encoder knob to the reference position of bottom, push the Encoder knob and reset the count to "0"...
- Page 18 QCI-5800 Page ZERO4 (X-5800) Check before Shipping Date 2007/4/23 4/10 Revised 7.A/D(volume) Check (others) Confirm that you can move the volumes smoothly. Fig..17<LOOP LENGTH> 1.<LOOP LENGTH> → 2.<MASTER FX> (11points' clicks The click points are <left>1-2-3-4-5-6-7-8-9-10-11<right>) (0) Confirm that the segments display is like Fig.17-18.
- Page 19 Take out the headphone plug from the mini jack and connect to the standard jack. *Before CH4 the demo song Take out the cable which is connected to the CH1 LINE L/MONO of ZERO4, of the D3200 finished, then connect it to the CH2 LINE RL/MONO Pressing the STOP of D3200 Press the REW switch.
- Page 20 Set the CH1,2,3,4 INPUT SELECTORs to "CD/LINE". Press the PLAY switch of D3200. (Demo song starts.) Connect the headphones to the standard jack of ZERO4 MONITOR. (front left side) You can hear the demo song of the D3200, confirm that there is not noise and fragmentary sound.
- Page 21 Set the CH1 CH FADER to "0". Pull out the cable from the CH1 PHONO L (ZERO4) and connect to the CH2 PHONO L.. Pull out the cable from the CH1 PHONO R (ZERO4) and connect to the CH2 PHONO R.
- Page 22 ・Confirmation of GUITAR INPUT(TRS) *This check uses D3200, instead of a guitar. Connect the ZERO4 and the D3200 like following. If you have a guitar, please use it. ZERO4 GUITAR terminal - D3200 MASTER L Set the MASTER FADER of the D3200 to "20".
- Page 23 Set the MASTER FADER of D3200 to "40". Set the CH1,2,3,4 INPUT SELECTORs to "MIC". Confirm that the MIC GAIN switch of the ZERO4 (under right of MIC IN) is "HIGH". Set the CH1,2,3,4 GAIN to the center. Press the PLAY switch of D3200. (Demo song starts.) Set the CH1 module FADER to "10".
- Page 24 2007/4/23 10/10 Revised Press the "+48V" switch of ZERO4 (under left of MIC IN). Confirm that the "ON" LED left side of the switch turned on. Press the "+48V" switch of ZERO4 (under left of MIC IN). *In this OUTPUT check, you can use other equipments ・Check of OUTPUT terminal...
- Page 25 Press the clickable pointer. After few seconds, a new song has been made. Clickable pointer Remember the name of this song. This new song is needed only one. After this please use this song for the check of ZERO4 or ZERO8. KORG INC.
-
Page 26: Cross Fader
QCI-5800 Page ZERO4 (X-5800) Check before Shipping Date 2007/4/23 Revised Name of knobs CH FADER( from left CH1 CH2 CH3 CH4) CROSS FADER Rotary Encoder of TIME 1-4ch toggle switches (from left CH1 CH2 CH3 Ch4) Toggle switch of X-FADER CURVE... -
Page 27: System Update
WindowsXP computer (HomeEdition or ProfessionalEdition) with Firewire terminal Firewire cable KORG System update utility "kmupdate.exe" (software) System file(*.vsb file) *When system update KORG Firewire Audio/MIDI driver is needed for the WindowsPC (for the details see owner's manual.) [1.2:ZERO4/ZERO8 process of the system update] In case ofZERO8... - Page 28 [ZERO4] Connect ZERO4 and the WindowsPC by a Firewire cable. Pressing the "BPM Select" and the "KEEP", turn the power on. Confirm that "SYS.U" is displayed in the 7segments LED. Wait until the "FirewireLED" lights (about 15seconds). Double click the "kupdate.exe" and start.(Fig1) Click the "Config"...
- Page 29 1_1 " New hardware device detected" is displayed, select "No, this time not connect". 1_2 Dialog of "not passed the compatibility to Windows logo test" is displayed, click the "continue". Double click the KORG DM1500 Updater("DM1500UpdDaterSetup[e].exe"), and do the install. Do the install until the dialog of the install completed is displayed.
- Page 30 Connect the WindowsPC and ZERO4/ZERO8 (Fig14). After detected ZERO4/8, "Fig15" is displayed, then click the "Start" button. Click the "OK" button (Fig16). GUID writing screen is displayed. (Fig17)。 "Fig18" is displayed the writing has completed. Then turn the power off (ZERO4/8).
- Page 31 Fig12 Fig13 Fig15 Fig14 Fig17 Fig16 Fig18...
- Page 32 KORG ZERO4 Parts List Part Number Category Part Name Note 510300510506 TRANSISTOR 2SA1648-Z-E1-AZ KLM-2708 510300511005 DIGITAL TR DTC114EUA T106 (S) KLM-2708 510300513001 TRANSISTOR MMBTSA1505YLT1 KLM-2708 510306510501 FET SI2333DS-T1-E3 (S) KLM-2708 510310511501 DIODE 1SR154-400 TE25 (PMDS) (S) KLM-2708 510310511512 SCHOTTKY DIODE...
- Page 33 Part Number Category Part Name Note 510374510505 TACT SW EVQ11A05R KLM-2767/68/69/70/76 510374522020 TOGGLE SW TS-23E06-AC16-NI KLM-2767/68/69/70/76 510374522021 TOGGLE SW TS-22E03-AC13-NI KLM-2767/68/69/70/76 510374524025 ROTARY VR RV110CF-40-25A-B5K-0D53 KLM-2767/68/69/70/76 510360520025 ROTARY VR RK09K1130CA8 KLM-2767/68/69/70/76 510360520024 ROTARY VR RK09K1130D5D KLM-2767/68/69/70/76 510374524033 ROTARY VR RV112BCF-40-25A-B50K KLM-2767/68/69/70/76 510360520022 ROTARY VR RS4511SA...
- Page 34 Part Number Category Part Name Note 500324026013 SDRAM MT48LC4M16A2P-6:G KLM-2778 510C90112778 PCB ASS'Y KLM-2778 X-5800(ZER04) ASS'Y 510374527501 POWER SW MR-22-N1BB-F2V-A Sub-Ass'y 510405540022 POWER SUPPLY UNIT 3B-455XX01-020 Sub-Ass'y 510450500001 AC INLET TU-301-A-A-Y1 Sub-Ass'y 510470522510 HARNESS* HNS-3675 POWER SW/POWER SUPPLY UNIT Sub-Ass'y 510470522513 HARNESS* HNS-3679 KLM-2776(CN12A)/KLM-2769(CN12B) Sub-Ass'y...
- Page 35 ZERO4 Factory Setting before shipping PANEL +48V:OFF MIC:HIGH Center MINI POSITION FREE Bottom LEFT END FRONT REAR MIN(LEFT END)
Need help?
Do you have a question about the ZERO4 and is the answer not in the manual?
Questions and answers