Advertisement
Advertisement

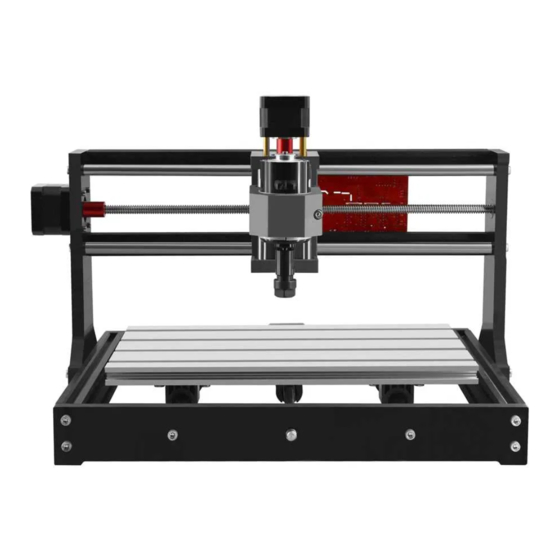
Related Manuals for CNC 3018-PRO


Summary of Contents for CNC 3018-PRO
-
Page 2: Table Of Contents
Contents Parts list························································· 1 Machine Installation·········································· 4 Grblcontrol···················································· 11 Getting Started··············································· 14 Lasergrbl······················································ 15 Offline controller·············································18 Common Problem············································21... -
Page 3: Parts List
Parts list Serial Name Type Picture number working desk 15*180*300mm Aluminum 20*40*290mm Aluminum 20*20*290mm X Linear guide Φ10*360mm Y Linear guide Φ10*290mm X screw T8(365mm) Y screw T8(295mm) Bakelite Stepper motor 42*34mm Spindle 775ER\100w\8000rmp X Z-Parts Y-Axis slider 10mm... - Page 4 Y-Axis nut seat T8-4 Milling Cutter Φ3.175mm\20°\0.1mm Spindle wires 60mm Stepper wires 60mm Offline controller(Optional) Power Supply 24V\5A Control Board USB Cable 1.5m Plate Clamp Winding Tube U Disk Allen Wrench 2.5mm...
- Page 5 Bolt M5*10mm M5*16mm M4*14mm Copper Nut T Nut M5*20 Slider Nut M5*30 Spring 0.8*12*30mm Coupling& Set Screw 5*8mm ER Wrench 13*87*2mm 17*88*2mm Brush Rolled Strip...
-
Page 6: Machine Installation
Machine Installation Bakelite: STEP1 Base Installation... - Page 7 Step2 Table Installation Note: First fix one end of the coupling to the 42 stepper motor, and then fix the 42 stepper motor to the aluminum profile Completed...
- Page 8 Step3 Base & Bakelite-C Installation Note: the distance between Bakelite-C and 2040 aluminum profile is 37.5mm, and Bakelite-C should be kept at 90° from the bottom Tips: First put the T-nut in the gap of 4040 aluminum profile, corresponding to the hole, and then tighten the screw Completed...
- Page 9 Step4 X-Z Axis Assembly Installation Note: 1. First fix the coupling to the 42 stepper motor, and then fix the 42 stepper motor to the bakelite-C. 2. First fully insert the spring and brass nut into the Z-X axis assembly, and then tighten the X screw. Step5 Bakelite-D Installation...
- Page 10 Completed Step6 Spindle Installation...
- Page 11 Note: The screw M4*30mm here requires a 3mm hexagon wrench. When connecting the spindle motor cable, observe the direction of spindle rotation and turn clockwise to indicate that the connection is correct. Otherwise, change the connection position. Step7 Control Board Installation Note: only need to fix the screws in the upper row...
- Page 12 Step8 Wiring Diagram...
-
Page 13: Grblcontrol
Grblcontrol 1 、Install the driver(software->Drive->CH340SER.exe) Note: You need to exit the anti-virus software before installing the driver 2、Determine your Machine's COM port: Windows XP: Right click on "My Computer", select "Properties", select "Device Manager". Windows 7: Click "Start" -> Right click "Computer" -> Select "Device Manager" -> "Ports (COM & ... - Page 14 3、Open GrblControl software(software -> Grblcontrol -> grblControl.exe) Tips: Right-click "Send to", select "Desktop Shortcut", and then you can open it directly on the desktop. ●Console window print ” [CTRL+X] < Grbl 1.1f ['$' for help]” If the connection is successful. ●Console window print ”...
- Page 15 Grblcontrol Use Toll setting Note: When performing knife setting, when the moving knife just touches the object, click "Zero xy" and...
-
Page 16: Getting Started
"Zero z", and finally click "Send". Getting Started After the machine is assembled, you can perform basic machine tests. The following is the recommended start up sequence for the system: 1.Confirm that the USB cable of the control board is plugged into your computer, and then start the computer. 2.Start the Candle software and verify in the status window that no errors are displayed. -
Page 17: Lasergrbl
Lasergrbl 1.Install lasergrbl software: Before installing the software, we have to install the CH340SER driver on the computer , Then use the USB cable to connect to the computer (don't plug it offline), open the Lasergrbl software (laser->Lasergrbl) and install ●... - Page 18 3.RASTER IMAGE IMPORT Raster import allows you to load an image of any kind in LaserGRBL and turn it GCode instructions without the need of other software. LaserGRBL supports photos, clip art, pencil drawings, logos, icons and try to do the best with any kind of image. It can be recalled from “File, Open File”...
- Page 19 Click this button to start if use the computer control. Notice: speed and S value are different with material,it is recommended that the speed of engraving mode is 500~1000, the power is 500~800, the speed of cutting mode is 50~300, and the power is 900~1000. Tips: Enter "$32=1 in the control window ,It can be set to M4 laser mode for better engraving effect.
-
Page 20: Offline Controller
Offline controller 1.Connect offline controller to computer via USB cable( can not connect offline controller line Note: Use USB cable to transfer files, don't insert SD card into card reader to transfer, it is easy to crash. 2.Copy the NC file to offline controller... - Page 21 3.Offline control connected to the control board Note: When using offline controller, you need to unplug the USB cable from the computer, because offline and computer cannot be used together. 4.Press the [X+/X-/Y+/Y-/Z+/Z-] key to move the spindle to the machine origin (tool setting method: the cutter just touches the object, press the [Exit] key), select the engraving file and click [ok ] Key to start carving...
- Page 22 B. Ctrl Page C. File Page...
-
Page 23: Common Problem
Support Gcode files of nc, ncc, ngc, tap, txt 2.What file formats does the Lasergrbl software support? Support nc, cnc, tap, gcode, ngc, bmp, png, jpg, gif, svg 3.What should I do if the control board cannot be connected? Exit the software, unplug the wire, and reconnect it. Or update the firmware.
Need help?
Do you have a question about the 3018-PRO and is the answer not in the manual?
Questions and answers