Table of Contents
Advertisement
Advertisement
Table of Contents

Related Manuals for Simplicity 1695665


Summary of Contents for Simplicity 1695665
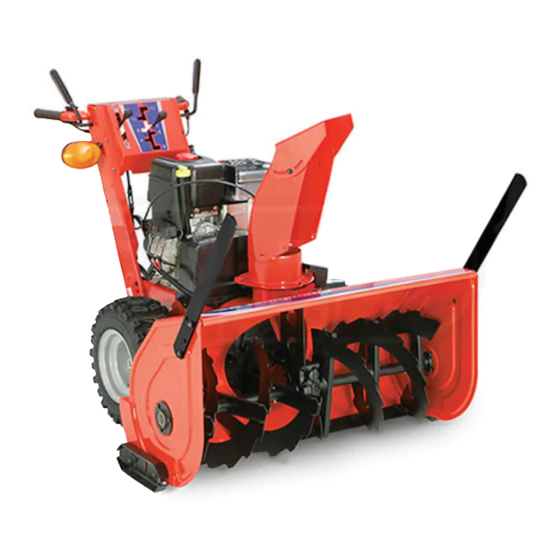
- Page 1 Walkbehind Snowthrower Mfg. No. Description 1695665 Dual Stage Snowthrower, 14.5 TP, 24 Inch 1695666 Dual Stage Snowthrower, 15.5 TP, 28 Inch 1695667 Dual Stage Snowthrower, 16.5 TP, 32 Inch 1695668 Dual Stage Snowthrower, 16.5 TP, 38 Inch 1738504 Revision C...
- Page 2 Thank you for purchasing this quality-built Simplicity snowthrower. We’re pleased that you’ve placed your confidence in the Simplicity brand. When operated and maintained according to the instructions in this manual, your Simplicity product will provide many years of dependable service.
-
Page 3: Table Of Contents
TABLE OF CONTENTS OPERATOR SAFETY ..................FEATURES AND CONTROLS ................10 OPERATION ..................... 13 BEFORE OPERATING SNOWTHROWER ....................13 OPERATE THE SNOWTHROWER....................... 13 STOP THE SNOWTHROWER........................13 EASY-TURN TRACTION CONTROL ......................14 DISCHARGE CHUTE, DEFLECTOR, AND GRIP WARMER ................. 15 CHECK THE OIL (BEFORE STARTING ENGINE) .................. -
Page 4: Operator Safety
OPERATOR SAFETY Hazard Symbols and Meanings DANGER - Amputation Hazard The discharge chute contains a rotating Safety Alert – Identifies safety information about impeller to throw snow. Never clear or unclog hazards that can result in personal injury. the discharge chute with your hands. Fingers can quickly become caught and traumatic Operator’s Manual –... - Page 5 OPERATOR SAFETY Control Symbols on Equipment Read the Manual DANGER Read, understand, and follow all the instructions on the snowthrower and in the operator’s manual before operating this unit. Fuel Forward Failure to observe the safet y instructions in this manual will result in death or serious injury.
- Page 6 OPERATOR SAFETY Fuel Handling Operation and Equipment Safety DANGER DANGER Fuel and its vapors are extremely flammable and explosive. This snowthrower is only as safe as the operator. If it is Always handle fuel with extreme care. misused, or not properly maintained, it can be dangerous. Remember you are responsible for your safety and that of Failure to observe these safety instructions can cause a fire those around you.
- Page 7 OPERATOR SAFETY Moving Parts Children DANGER DANGER Keep hands, feet, and clothing away from rotating parts. Tragic accidents can occur if the operator is not alert to the Rotating parts can contact or entangle hands, feet, hair, presence of children. Children are often attracted to the unit clothing, or accessories.
- Page 8 OPERATOR SAFETY Maintenance and Storage Engine Safety (Continued) WARNING WARNING This snowthrower must be properly maintained to ensure safe Starting engine creates sparking. operation and performance. Failure to observe the safety Sparking can ignite nearby flammable gases. instructions in this manual could result in death or serious Explosion and fire could result.
- Page 9 OPERATOR SAFETY Look for this symbol to indicate important safety WARNING: I I f any safety decals become worn or damaged and pre cautions. This symbol indicates: “Attention! cannot be read, order replacement decals from your local dealer. Become Alert! Your Safety Is At Risk.” Before operating your snowthrower, read the safety decals as shown on your snowthrower.
-
Page 10: Features And Controls
FEATURES AND CONTROLS Snowthrower Controls Figure 2... - Page 11 FEATURES AND CONTROLS SNOWTHROWER CONTROLS F. Easy-Turn Traction Control — When engaged, allows the oper- ator to release the left traction wheel, but allows the right wheel to A. Speed Select Lever — Allows the operator to use one of five (5) continue driving for easy turning.
- Page 12 FEATURES AND CONTROLS STOP Engine Controls Figure 3 SNOWTHROWER AND ENGINE CONTROLS F. Throttle Control Lever — Used to control engine speed. For best ENGINE CONTROLS performance, the throttle control should be set to the FAST position. A. Choke Control Knob — Used to start a cold engine (see Figure 3). Use the SLOW position only for warming the engine.
-
Page 13: Operation
OPERATION NOTE: This snowthrower was shipped WITH OIL in the engine. BEFORE OPERATING SNOWTHROWER See “Before Starting Engine” instructions in the OPERATION ■ ■ Check the fasteners. Make sure all fasteners are tight. section of this manual before starting engine. ■... -
Page 14: Easy-Turn Tm Traction Control
OPERATION EASY-TURN TRACTION CONTROL WARNING: Read Operator’s Manual before operating machine. This machine can be dangerous if used For easy turning when using the snowthrower, squeeze the Easy-Turn carelessly. lever (see Figure 5). • Never operate the snowthrower without all guards, covers, shields in place. -
Page 15: Discharge Chute, Deflector, And Grip Warmer
OPERATION DISCHARGE CHUTE, DEFLECTOR, AND GRIP Grip Warmer (High/Low) WARMER 1. Press the grip warmer switch to the LEFT position for the HIGH setting (see, Figure 8). Discharge Chute Rotation (Left/Right) 2. Move the switch to the CENTER position to turn the grip warmer OFF. 1. -
Page 16: Check The Oil (Before Starting Engine)
OPERATION CHECK THE OIL (BEFORE STARTING ENGINE) NOTE: The engine was shipped from the factory filled with oil. Check the level of the oil. Add oil as needed. 1. Make sure the unit is level. Use a high quality detergent oil classified “For Service SF, SH, SJ, SL, or higher”. -
Page 17: Start The Engine
OPERATION START THE ENGINE Be sure that engine oil is at FULL mark on the oil fill cap/dipstick. The snowthrower engine is equipped with an A.C. electric starter and recoil starter. Before starting the engine, be certain that you have read the following information. If engine floods, set the choke to the OPEN/RUN position and crank until the en- gine starts. -
Page 18: Stop The Engine
OPERATION 9. E E lectric Start: First connect the extension cord to the power cord receptacle and then into a wall receptacle. If additional extension cord is required, make sure it is three-wire. WARNING: If the extension cord is damaged, it must be replaced by the manufacturer (or its service agent) or a similarly qualified person to avoid a hazard. -
Page 19: Clear A Clogged Discharge Chute
OPERATION CLEAR A CLOGGED DISCHARGE CHUTE OPERATING TIPS 1. Most efficient snowthrowing is accomplished when snow is removed DANGER: Hand contact with the rotating impeller inside immediately after it falls. the discharge chute is the most common cause of injury 2. -
Page 20: Maintenance
MAINTENANCE SERVICE RECOMMENDATIONS FIRST BEFORE AFTER EVERY EVERY EVERY BEGINNING BEFORE PROCEDURE EACH EACH EACH STORAGE HOURS HOURS HOURS HOURS SEASON Check to Make Sure Auger Blade Stops Within ✓ 5 Seconds After Right Control Lever is Released SAFETY ✓ ✓... -
Page 21: Lubricate Auger Gear Box
MAINTENANCE LUBRICATE AUGER GEAR BOX The auger gear box is lubricated at the factory and should not require additional lubrication. If for some reason the lubricant should leak out, or if the auger gear box has been serviced, add Lubriplate GR132 Grease or equivalent. -
Page 22: Engine Maintenance
MAINTENANCE ENGINE MAINTENANCE Check Crankcase Oil Level - Before starting engine and after each 8 hours of continuous use. Add the recommended motor oil as required. NOTE: Over filling the engine can affect performance. Tighten the oil fill cap securely to prevent leakage. Full Change Oil - Every 50 hours of operation or at least once a year, even if the snowthrower is not used for fifty hours. -
Page 23: Change The Spark Plug
MAINTENANCE CHANGE THE SPARK PLUG Remove the Snow Hood To access the spark plug, the snow hood must be removed as follows: 1. Remove the choke control knob (A A , Figure 20). 2. Remove the safety key (B B ). 3. -
Page 24: Adjust Skid Height
MAINTENANCE Check and Replace Spark Plug Check the spark plug every twenty-five (25) hours. Replace the spark plug (Figure 24) if the electrodes are pitted or burned or if the porcelain is cracked. 1. Remove snow hood (see “Remove the Snow Hood” section). 2. -
Page 25: Belt Adjustment
MAINTENANCE BELT ADJUSTMENT Traction Drive Belt The traction drive belt has constant spring pressure and does not require an adjustment. If the traction drive belt is slipping, replace the belt. See authorized dealer. Auger Drive Belt If your snowthrower will not discharge snow, check the control cable adjustment. -
Page 26: Check And Adjust The Cables
MAINTENANCE CHECK AND ADJUST THE CABLES 2. To adjust, loosen nut by holding the adjusting flats and turning nut. Turn adjustment flats and hold screw. The adjustment screw is a The cables are adjusted at the factory and no adjustment should be phillips screw and the head can be held or turned by inserting a necessary. -
Page 27: Traction Control Cable Adjustment
MAINTENANCE TRACTION CONTROL CABLE ADJUSTMENT Initial Adjustment 1. Lift the bellcrank arm up as far as it will go (see Figure 31). 2. While holding the bell crank arm up, adjust the cable until all the slack is removed. 3. Back the adjustment screw out 7-8 turns. Tighten nut. 4. -
Page 28: Easy-Turn Tm Cable Adjustment
MAINTENANCE EASY-TURN™ CABLE ADJUSTMENT If the Easy-Turn™ cable has stretched, the gears will not disengage when the control lever is activated. Adjust the cable using the following proce- dure. 1. Turn the engine off and disconnect the spark plug wire. 2. -
Page 29: Check The Tires
MAINTENANCE CHECK THE TIRES Check tires for damage. Check the air pressure in the tires with an accurate gauge (see Figure 35). CAUTION: Avoid Injury! Explosive separation of tire and rim parts is possible when they are serviced incorrectly. • Do not attempt to mount a tire without the proper equipment and experience to perform the job. -
Page 30: Storage
STORAGE LUBRICATE HEX SHAFT AND CHAINS OFF SEASON STORAGE WARNING: Never store the engine, with fuel in the tank, CAUTION: Do not allow grease or oil to contact the indoors or in a poor ventilated enclosure where fuel rubber friction wheel or the disc drive plate. If the disc fumes could reach an open flame, spark or pilot light drive plate or friction wheel come in contact with as on a furnace, water heater, clothes dryer, etc. -
Page 31: Troubleshooting Chart
TROUBLESHOOTING PROBLEM LOOK FOR REMEDY Free-Hand control is ACTIVE. Release both auger control and Free-Hand control to stop auger. Auger does not stop within 5 seconds after right Auger drive belt out of Adjust auger belt. control lever is released. adjustment. - Page 32 TROUBLESHOOTING PROBLEM LOOK FOR REMEDY Scraper bar does not clean Skid shoes improperly adjusted. Raise or lower skid shoes. hard surface. Drive belt loose or damaged. Replace drive belt. See authorized dealer. Unit fails to propel itself. Incorrect adjustment of traction Adjust traction drive cable.
-
Page 33: Warranties
BRIGGS & STRATTON POWER PRODUCTS GROUP, L.L.C. OWNER WARRANTY POLICY LIMITED WARRANTY Briggs & Stratton Power Products Group, LLC will repair and/or replace, free of charge, any part(s) of the equipment that is defective in material or workmanship or both. Briggs & Stratton Corporation will repair and/or replace, free of charge, any part(s) of the Briggs and Stratton engine* (if equipped) that is defective in material or workmanship or both. - Page 34 CALIFORNIA, U.S. EPA, AND BRIGGS & STRATTON CORPORATION EMISSIONS CONTROL WARRANTY STATEMENT YOUR WARRANTY RIGHTS AND OBLIGATIONS Effective November 2008 The California Air Resources Board, U.S. EPA, and Briggs & Stratton (B&S) Owner’s Warranty Responsibilities: are pleased to explain the emissions control system warranty on your Model •...
-
Page 35: Specifications
SPECIFICATIONS Model No. Model No. Model No. Model No. 1695665 1695666 1695667 1695668 ENGINE: Brand Briggs & Stratton Briggs & Stratton Briggs & Stratton Briggs & Stratton Model Series Snow Series MAX Snow Series MAX Snow Series MAX Snow Series MAX Gross Torque* 14.50 T.P. - Page 36 Simplicity Manufacturing, Inc. P.O. 702 Milwaukee, WI 53201-0702 1-800-233-3723 simplicitymfg.com...
Need help?
Do you have a question about the 1695665 and is the answer not in the manual?
Questions and answers