Table of Contents
Advertisement
Advertisement
Table of Contents

Related Manuals for Aim MyChron5 660


Summary of Contents for Aim MyChron5 660
- Page 1 User Manual MyChron5 660 – 660 Release 1.00...
- Page 2 3.3 – Installing Exhaust Gas thermocouple 3.4 – Installing the Cylinder Heat Thermocouple 3.5 – Installing the speed sensor 3.6 – Connecting MyChron5 660 to sensors and LCU-One CAN expansion 3.7 – Powering MyChron5 660 4 – MyChron5 660 keyboard and configuration 4.1 –...
- Page 3 Is MyChron5 660 an expandable logger? Yes, MyChron 5 660 can be connected to AiM LCU-One CAN and no configuration is needed. MyChron5 660 detects it at the only condition that the connection is made before switching the logger on.
-
Page 4: What Is In The Kit
2 – What is in the kit MyChron5 660 kit includes: MyChron5 660 (1) • CAN Extension Module (2) • Dragster split cable (3) • Phonic wheel kit (4) made up of Teflon and composed of two parts: an internal ring that includes 4 magnets and an external •... - Page 5 3 – Installation, connections and powering Each item of the kit needs to be carefully installed, MyChron5 660 first. Incorrect installation may result in system malfunction. 3.1 – Installing MyChron5 660 MyChron5 660 allows the mechanics to set up the engine carburetion immediately before the race. For this reason it is important to install it in a place where the mechanics can see its display while working on the dragster engine.
- Page 6 3.3 – Installing Exhaust Gas thermocouple Install EGT (Exhaust Gas Thermocouple) inside the exhaust header pipe at a distance of approximately 5.9” (150 mm) from the exhaust port and between 25% and 50% inside the exhaust gas header. For a correct installation follow these steps: drill a 0.2”...
- Page 7 3.4 – Installing the Cylinder Heat Thermocouple To install the cylinder head thermocouple: remove the spark plug washer • insert the sensor • tighten the sensor but be careful to minimise movement in order to avoid damage. • plug the thermocouple male Mignon connector to the sensor 2 temperatures split cable (part number V02CCB04MDR). •...
-
Page 8: Installing The Speed Sensor
– the distance • between the sensor and the phonic wheel – is to be 4-8mm (0.15”-0.3”) plug the speed sensor male connector in the 4 pins Binder 712 female connector rear of MyChron5 660 highlighted here • below. - Page 9 3.6 – Connecting MyChron5 660 to sensors and LCU-One CAN expansion To connect MyChron5 660 to the temperature sensors included in the kit: connect the 5 pins Binder 712 male connector of the dragster split cable to the 7 pins Binder 712 female connector placed •...
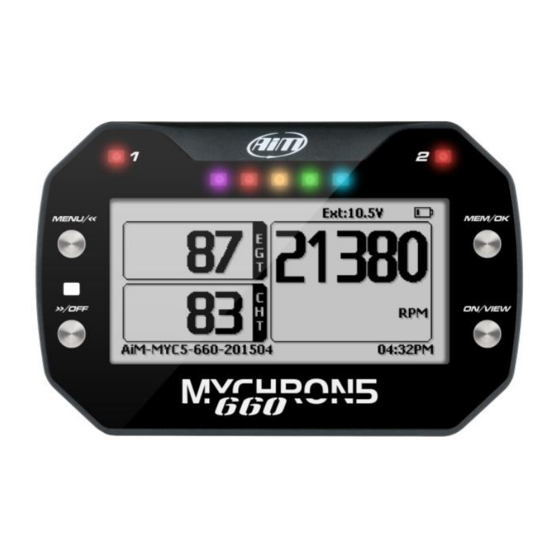
- Page 11 3.7 – Powering MyChron5 660 MyChron5 660 is powered by a rechargeable lithium battery. When the battery level is low the corresponding icon blinks on the display (left image below) Disregarding this blinking can cause logger shut down during the race. Before shutting down a warning message appears on the display.
- Page 12 MyChron5 660 serial number bottom left of the page (right image below). Please note: MyChron5 660 has an auto power off features that switches it off after 10 minutes of inactivity.
-
Page 13: Configuration Wizard
It allows to quickly configure language, temperature and speed measure unit as well as RPM scale. Please note: it will start each time MyChron5 660 is switched on until it is completed at least once. On the contrary once completed it is possible to restart it scrolling the icons in “MENU”... -
Page 14: Configuration Menu
4.2 – Configuration Menu All MyChron5 660 configuration option can be set via keyboard. Press “MENU/<<” to enter the Menu and this page shows up. The icons are for: Setting MyChron5 660 backlight Setting MyChron5 660 Wi-Fi Enter MyChron5 660 “System setting” menu... - Page 15 • o ON o AUTO: the ambient light sensor placed central left od MyChron5 660 switches the backlight ON/OFF according to the ambient light conditions o OFF Use: “CHANGE” button to change the setting •...
-
Page 16: System Settings
To set MyChron5 660 select the icon shown here above in “MENU” page and press “ENTER”. This menu allows to set the main functions of MyChron5 660 as well as to see the information of your MyChron5 660. Drive Setup... -
Page 17: Drive Setup
4.3.1 – Drive Setup To set MyChron5 660 Drive select the icon shown here above in “System Setting” page and press “ENTER”. This page allows to setup the following parameters: Tire Rollout or wheel circumference (range 10.00-120.00 inches): this parameter is fundamental to correlate wheel angular •... -
Page 18: Unit Of Measure
4.3.3 – Unit of measure To set MyChron5 660 RPM select the icon shown here above in “System Setting” page and press “ENTER”. This page allows to setup the temperature Unit of measure. Available options are: Fahrenheit and Celsius. 4.3.4 – LED Setup To set MyChron5 660 LED select the icon shown here above in “System Setting”... -
Page 19: System Info
To see MyChron5 660 information select the icon shown here above in “System Setting” page and press “ENTER”. 4.4 – Engine Pass Counters MyChron5 660 is equipped with 4 engine pass counters. To activate/reset any of them press the icon above in “MENU” page and the related page shows up. - Page 20 To set MyChron 5 660 Wi-Fi select the icon shown here above in “MENU” page and press “ENTER”. Here you can manage Wi-Fi as well as reset its configuration. Wi-Fi modes are: Auto: switches Wi-Fi on when the vehicle is stopped and automatically switches it off when MyChron5 660 starts recording • ON: Wi-Fi always on •...
-
Page 21: Clear Memory
Use “CHANGE” button to scroll the options and “EXIT” button to quit and save. 4.8 – Configuration Wizard (see paragraph 4.1) This function is the fist one that activates when switching on MyChron5 660 for the very first time. See paragraph 4.1 to know how it works. -
Page 22: Data Recall
5 – Data Recall After a test session it is possible to recall sampled data pressing “MEM/OK” button. Data recall is made up of four pages shown here below: Test Sessions (top left): • press ENTER to enter test summary. press “EXIT”... -
Page 23: Connection To The Pc
6 – Connection to the PC You can connect MyChron5 660 to a PC only via Wi-Fi. To do it: check that MyChron5 660 Wi-Fi is set on “AUTO” • (paragraph 4.6) or on “ON”. read your MyChron5 660 name – bottom of MyChron5 660 •... - Page 24 • the cell becomes editable Logo: transmit/receive the logo that shows up when switching MyChron5 660 on; supported image format are JPEG or BMP; • always use the most recent Windows versions (Windows8 or Windows10) whose graphic libraries are more updated Firmware: to see connected expansions and check or update MyChron5 660 firmware version.
-
Page 25: Data Download And Analysis
7 – Data download and Analysis Once MyChron5 660-PC connection is established activate “Download” tab to download sampled data. This page shows all the files stored in the system available for download. Select one or more files and press “Download” to download and analyse them. - Page 26 8 – W-Fi Configuration Here you can manage Wi-Fi as well as reset its configuration. As said in paragraph 4.6 available Wi-Fi modes are: ON: Wi-Fi always on • AUTO: switches Wi-Fi on when the kart is stopped and automatically switches it off when the kart starts recording (RPM •...
- Page 27 1 – As an Access Point (AP – default setting) This is the ideal configuration if you have one only device and one only computer. In this situation, your MyChron5 660 creates a Wi-Fi network and works as an Access Point you can connect your PC to.
- Page 28 If you forget the password, you can reset Wi-Fi configuration from MyChron5 660 menu as explained at the beginning of this chapter.
- Page 29 This is MyChron5 660 default configuration and is the easiest and most direct connection mode, ideal if you want to communicate with one MyChron5 660 using one PC. It is free and so completely accessible by anyone. Please set an access password as soon as possible.
- Page 30 If, for example, you add the driver’s name, Tom Wolf, the network name (SSID) becomes:” AiM-MYC5-660-201504-Tom Wolf”. Once all parameters set click “Transmit”. MyChron5 660 reboots and is configured with the new parameters. If MyChron5 660 is protected by a password, as recommended, RaceStudio3 will ask that password to authenticate.
- Page 31 Once the device has been authenticated in the Wi-Fi network you can communicate with it using RaceStudio3.
- Page 32 This situation is ideal for a team with multiple drivers and staff members and allows the communication among more AiM devices using the same PC network. Each MyChron5 660 can have its password that adds another security and privacy level to the network.
- Page 33 To obtain connectivity on the device the PC has to be authenticated to the same network as shown here below. When the PC is authenticated to the network called “AiM” it can see all devices you configured to access the same network. In...
-
Page 34: Wi-Fi Network Settings
8.3 – Wi-Fi network settings In this chapter is a short description of how to configure a WLAN including AiM devices and a PC. Here below is an example of configuration. For better network performances we suggest the use of a network device equipped with a DHCP server and using 3x3 MIMO technology like, for example a Linksys AS3200. -
Page 35: The Internet Connectivity
192.168.0.1 – 6 8.4 – The Internet connectivity For an optimal speed of AiM device(s) it is recommended not to allow the Internet on the same network and to set the WLAN in the same way. The Internet access can of course be allowed on the network but this would degrade the communication. - Page 36 8.6 – Working on Mac with virtualized Windows RaceStudio3 only works on Windows operative systems; Mac users can use a virtualized Windows machine. The main problem is that the host OS (Mac) must share its Wi-Fi interface with the virtualized operative system (Windows) as Ethernet interface and not as Wi-Fi interface.
- Page 37 To ensure that the communication works select “Open Network preferences…” menu. Verify that the status in the window that shows up is “Connected” and that the IP address associated is, for example, 10.0.0.10 (could be 10.0.0.11, 10.0.0.12, or generically 10.0.0.x). To enable Race Studio 3 correctly working on a Mac with virtualized Windows press Wi-Fi icon •...
-
Page 38: Connected Device Visualization Issues
This is why we always suggest using an Wi-Fi (WLAN) router. This router works as an Access Point allowing the connection of more external devices to its network. MyChron5 660 Wi-Fi... - Page 39 9 – Firmware and software upgrading Our technicians and engineers are constantly working to improve both the firmware (the application that manages your device) and the software (the application you install on your PC). Each time a new firmware and/or software version is available the icon here above appears with an arrow indicating that something is available for download (otherwise the icon only shows the cloud).
-
Page 40: Technical Specifications And Drawings
Glass fibre reinforced Nylon • Pushbuttons Metal • Battery Rechargeable 2900 mAh Lithium Ion • Internal memory • Dimensions 137x88,4x47 mm • Weight 390g battery included • Waterproof IP67 • Analysis software Race Studio Analysis freely downloadable from www.aim-sportline.com •... - Page 41 MyChron5 660 dimensions in mm [inches]...
- Page 42 MyChron5 660 pinout Phonic wheel dimensions in mm [inches]...
- Page 43 CAN Extension dimensions in mm [inches] CAN Extension pinout...
Need help?
Do you have a question about the MyChron5 660 and is the answer not in the manual?
Questions and answers