Table of Contents
Advertisement
Quick Links
Advertisement
Table of Contents

Related Manuals for M-Audio Oxygen Pro Series


Summary of Contents for M-Audio Oxygen Pro Series
- Page 1 User Guide English ( 2 – 102 ) Appendix English ( 103 – 109 )
-
Page 2: Table Of Contents
Oxygen Pro 61 ........................18 Top Panel ........................18 Rear Panel ........................21 Operation ..........................22 Oxygen Pro Series Basic Concepts .................. 22 Keyboard ......................... 22 Octaves and Transposition ....................23 Tempo Control ......................23 Note Repeat/Latch Button ....................23 Presets .......................... - Page 3 Smart Chord Control ....................... 28 Smart Scale Control ......................28 DAW Knob Control ......................29 DAW Shortcuts ........................ 29 ARP Knob Control ......................29 Zones ..........................30 Oxygen Pro 25 Preset Edit Mode ..................31 Storing a Preset ....................... 31 Channel Definitions ......................
- Page 4 Oxygen Pro 25 Advanced Settings ..................62 ARP/Latch Button ......................62 Smart Chord/Smart Scale Button ................... 63 Oxygen Pro 49 and 61 Preset Edit Mode ................65 Storing a Preset ....................... 65 Channel Definitions ......................65 Editable Preset Controls ....................66 Pitch Wheel .........................
- Page 5 Oxygen Pro 49 and 61 Advanced Settings ..............103 ARP and Latch Buttons ....................103 Smart Chord Button ...................... 104 Smart Scale Button ....................... 105 Oxygen Pro Global Settings ..................... 106 Appendix ..........................107 Velocity Curves ......................... 107 Keyboard Sensitivity ...................... 107 Pad Sensitivity .......................
-
Page 6: Introduction
Setup Connection To start using your Oxygen Pro series keyboard, you need to connect your equipment, get your software properly configured, and then set the keyboard’s operation Mode. To connect your Oxygen Pro series keyboard to your computer, use the included USB cable. -
Page 7: Initial Setup
Oxygen Pro’s controls as a control surface in DAW mode, and virtual instrument controller in Preset mode. If your DAW does not automatically configure your Oxygen Pro series keyboard, please follow the setup steps listed in the Oxygen Pro DAW Setup... -
Page 8: Initial Setup - Virtual Instrument/Plugin Setup
Initial Setup – Hardware Synth If you will be using your Oxygen Pro series keyboard with a hardware synth rather than your computer, connect the keyboard’s MIDI Out port to a synth with a standard 5-pin MIDI cable. Then... -
Page 9: Installing Your Included Software
Series Software Manager. The Preset Editor software can be used to create custom DAW and Preset mappings for you to load onto your Oxygen Pro series keyboard. For more information on operating the keyboard with one of the custom DAW or Presets, see the following section and the Operation section. -
Page 10: Connection Diagram
Connection Diagram Remember to select your Oxygen Pro series keyboard as the controller in the Setup, Preferences, or Options of your digital audio workstation (DAW). Items not listed in Introduction > Box Contents are sold separately. Sustain Pedal (optional) Computer... -
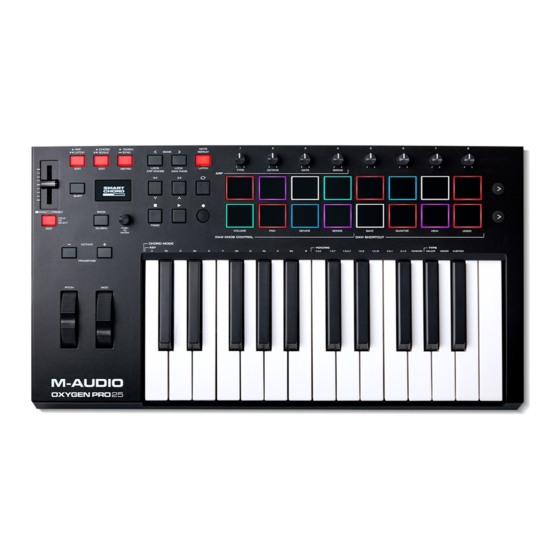
Page 11: Features
Features Oxygen Pro 25 Top Panel 23 24 13 14 15 Note: Text below accompanying keyboard controls indicates secondary functions that can be accessed by pressing SHIFT while using the control. Keybed: This velocity-sensitive keybed is the primary method of sending Note On/Off MIDI data. In addition to being velocity sensitive, the keybed also includes channel aftertouch, which means you can affect the sound a virtual instrument plugin makes by varying how much pressure you apply on the key after initially pressing the key. - Page 12 Select/Scroll Encoder: If you are entered into one of the Display’s Edit menus, turn this knob to change settings/parameters and press the knob to confirm a selection. If you are not viewing any of the edit menus, turning the Encoder and pressing the Encoder will each function as separate MIDI controls.
-
Page 13: Rear Panel
23 24 13 14 15 22. Knobs: Turn these knobs left/right to perform their assigned controls. When operating with a DAW, the assigned controls will be predetermined. When operating with a preset or the User DAW selected, the controls can be edited. Hold SHIFT while turning Knobs 1–4 to edit arpeggiator settings. -
Page 14: Oxygen Pro 49
Oxygen Pro 49 Top Panel 11 12 14 15 16 Note: Text accompanying keyboard controls indicates secondary functions that can be accessed by pressing SHIFT while using the control. Keybed: This velocity-sensitive keybed is the primary method of sending Note On/Off MIDI data. In addition to being velocity sensitive, the keybed also includes channel aftertouch, which means you can affect the sound a virtual instrument plugin makes by varying how much pressure you apply on the key after initially pressing the key. - Page 15 Back Button: If entered into one of the Display’s Edit menus, press this button to go back to the main Display screen. If you are not viewing one of the Edit menus, this button will be assigned to control. When operating with a DAW, the assigned control will be predetermined.
- Page 16 11 12 14 15 16 23. Knobs (1–8): Turn these knobs left/right to perform their assigned controls. When operating with a DAW, the assigned controls will be predetermined. When operating with a preset or the User DAW selected, the controls can be edited. Hold SHIFT while turning Knobs 1–4 to edit arpeggiator settings.
-
Page 17: Rear Panel
Rear Panel Power Switch: Use this switch to power Oxygen Pro 49 on or off. Sustain Pedal Input: This input accepts a momentary- contact foot pedal (not included). When pressed, the pedal by default will sustain the sound you are playing without you having to keep your fingers pressed down on the keys. -
Page 18: Oxygen Pro 61
Oxygen Pro 61 Top Panel 11 12 14 15 16 Note: Text accompanying keyboard controls indicates secondary functions that can be accessed by pressing SHIFT while using the control. Keybed: This velocity-sensitive keybed is the primary method of sending Note On/Off MIDI data. In addition to being velocity sensitive, the keybed also includes channel aftertouch, which means you can affect the sound a virtual instrument plugin makes by varying how much pressure you apply on the key after initially pressing the key. - Page 19 Back Button: If entered into one of the Display’s Edit menus, press this button to go back to the main Display screen. If you are not viewing one of the Edit menus, this button will be assigned to a control. When operating with a DAW, the assigned control will be predetermined.
- Page 20 23. Knobs (1–8): Turn these knobs left/right to perform their assigned controls. When operating with a DAW, the assigned controls will be predetermined. When operating with a preset or the User DAW selected, the controls can be edited. Hold SHIFT while turning Knobs 1–4 to edit arpeggiator settings. Hold SHIFT and Pads 9 –...
-
Page 21: Rear Panel
Rear Panel Power Switch: Use this switch to power Oxygen Pro 61 on or off. Sustain Pedal Input: This input accepts a momentary- contact foot pedal (not included). When pressed, the pedal by default will sustain the sound you are playing without you having to keep your fingers pressed down on the keys. -
Page 22: Operation
Operation This chapter describes the features of your Oxygen Pro Series keyboard. Oxygen Pro Series Basic Concepts This section gives an overview of some fundamental concepts that will help you understand and use your Oxygen Pro series keyboard. Keyboard Octaves and Transposition... -
Page 23: Octaves And Transposition
Octaves and Transposition By using the Key Octave –/+ buttons, the keyboard can access the full range of 127 available MIDI notes (10 octaves). Additionally, you can transpose the keyboard up to 12 semitones (1 octave) in either direction. To change the octave of the keyboard, use the Key Octave –/+ buttons to lower or raise the octave, respectively. -
Page 24: Presets
DAW preset for your digital audio workstation (DAW). We recommend registering your Oxygen Pro on m-audio.com and downloading the Oxygen Pro Series Software Manager. In the Software Manager you'll have access to all of your included software as well as the Oxygen Pro Preset Editor. -
Page 25: Shift Button
Oxygen Pro’s controls as a control surface in DAW mode, and virtual instrument controller in Preset mode. If your DAW does not automatically configure your Oxygen Pro series keyboard, please follow the setup steps listed in the Oxygen Pro DAW Setup Guides. -
Page 26: Back Button
Back Button When in any of the keyboard’s available editing modes, this button will send a message to go back to a previous menu. When not in any of the edit modes, this button will send a separate MIDI, Mackie or Mackie/HUI message in DAW mode. When in PRESET mode, this button will send a separate user editable MIDI message when preset 1-16 is selected. -
Page 27: Arp And Arp Latch Control
Preset Mode • Off/No LEDs: Fader Buttons will activate the following options: ARP On/Off, ARP Edit Enter/Exit ARP Latch On/Off Chord On/Off, Chord Edit Enter/Exit Scales On/Off, Scales Edit Enter/Exit 1/4, 1/4T 1/8, 1/8T 1/16, 1/16T 1/32, 1/32T • MIDI/White LED: Fader Buttons will send predetermined MIDI messages when in a factory preset, or any user assignable MIDI message when in the user presets. -
Page 28: Smart Chord Control
Smart Chord Control On the Oxygen Pro 25, when the CHORD/SCALE button is pressed, it will activate the keyboard’s internal Smart Chord functionality. The Smart Chord functionality can function on notes being played on the keyboard or pads, or both depending on the selection in the GLOBAL SETTINGS menu. -
Page 29: Daw Knob Control
DAW Knob Control Using the SHIFT button and Pads 9-12 (on the 25-key), or 9-11 (on the 49-key and 61-key) will enable you to change the function of knobs in DAW mode. DAW Mode • Volume: Will change the knobs function to control the channel faders in your DAW. •... -
Page 30: Zones
Zones The keybed (the piano keys) on your Oxygen Pro can be divided into 1–4 “zones.” When zones are active each zone can send its controls’ MIDI messages over its own MIDI channel. You can assign the parameters for the keybed/zones in Preset Edit mode only. Tip: This feature is great for dividing your keyboard between different virtual instruments or synthesizers. -
Page 31: Oxygen Pro 25 Preset Edit Mode
Oxygen Pro 25 Preset Edit Mode When SHIFT is pressed and held and the DAW/PRESET button is pressed, it will enter into editing the Preset or User DAW. Press the Encoder on “Preset” and the preset controls will be available for editing. The default parameter to be edited will be the current Preset’s Pitch Wheel assignment. -
Page 32: Editable Preset Controls
Editable Preset Controls Pitch Wheel To edit the Pitch Wheel control when in Preset Edit Mode, move the Pitch Wheel. You can scroll through the available parameter values using the Encoder. Select what parameter you would like to edit by pressing the Encoder. Channel: The Pitch Wheel will send its messages over this channel. -
Page 33: Keybed
Keybed To edit your Oxygen Pro’s Zone and Aftertouch assignments when in Preset Edit Mode, press a key on the keyboard. You can scroll through the available parameter values using the Encoder. Select what parameter you would like to edit by pressing the Encoder. Zones: The keybed (the piano keys) on your Oxygen Pro can be divided into 1–4 “zones.”... -
Page 34: Fader
Fader To edit the Fader control when in Preset Edit Mode, move the Fader. You can scroll through the available parameter values using the Encoder. Select what parameter you would like to edit by pressing the Encoder. Channel: The Fader will send its messages over this channel. Select the global channel (Global), a specific channel (Channel 1–16), a zone (Zone 1–4), or all channels (Omni). -
Page 35: Sustain Pedal
Sustain Pedal To edit the Sustain Pedal when in Preset Edit Mode, press a connected Sustain Pedal. You can scroll through the available parameter values using the Encoder. Select what parameter you would like to edit by pressing the Encoder. Channel: The Sustain Pedal will send its messages over this channel. -
Page 36: Pads
Pads To edit one of the Pads when in Preset Edit Mode, press a Pad. You can scroll through the available parameter values using the Encoder. Select what parameter you would like to edit by pressing the Encoder. Channel: The pad will send its messages over this channel. Select the global channel (Global), a specific channel (Channel 1–16), a zone (Zone 1–4), or all channels (Omni). - Page 37 Note Off: When Latch is active, the pad will send the MIDI note number with this velocity when you press it to turn it off. Available Values: 0-127 When set to CC, these are the available parameters: CC: The pad will send its MIDI messages using this CC number. Available Values: 0-127 Press: The pad will send the MIDI CC number with this value when you press it.
- Page 38 When set to CC IN/DC, these are the available parameters: CC: The pad will send its MIDI messages using this CC number. Available Values: 0-127 Type: The pad will send the next (Increment) or previous (Decrement) value number in the range of values when you press it.
-
Page 39: Encoder Turn
When set to Program IN/DC (PG IN/DC), these are the available parameters: Type: The pad will send the next (Increment) or previous (Decrement) value number in the range of values when you press it. Min: The lowest Program value in the range of values will correspond with this setting. Available Values: 0-127 Max: The highest Program value in the range of values will correspond with this setting. - Page 40 When set to Program Cycle, these are the available parameters: Values: The Encoder will cycle through this many Program values (one at a time) when you turn it: 2 Values, 3 Values, or 4 Values. Available Values: • 2 Values •...
- Page 41 Second: The Encoder will send the MIDI CC number with this value at the second notch of the turn. Available Values: 0-127 Third: The Encoder will send the MIDI CC number with this value at the third notch of the turn. Available Values: 0-127 Last: The Encoder will send the MIDI CC number with this value at the final notch of the turn.
-
Page 42: Encoder Press
Encoder Press To edit the press functionality of the Encoder when in Preset Edit Mode, press and hold the SHIFT button and press the ENCODER. You can scroll through the available parameter values using the Encoder. Select what parameter you would like to edit by pressing the Encoder. Channel: The Encoder will send its messages over this channel. -
Page 43: Back Button
Back Button To edit the functionality of the Back button when in Preset Edit Mode, press and hold the SHIFT button and press the Back button. You can scroll through the available parameter values using the Encoder. Select what parameter you would like to edit by pressing the Encoder. -
Page 44: Clip Buttons
Clip Buttons To edit the functionality of a Clip button when in Preset Edit Mode, press a Clip button. You can scroll through the available parameter values using the Encoder. Select what parameter you would like to edit by pressing the Encoder. Note: What some parameter values are set to will affect what parameters are available for editing. - Page 45 Values: The Clip button will send the value with this CC number when you press it, one at a time, cycling through them with each press. Available Values: • 2 Values • 3 Values • 4 Values First Value: Available Values: 0-127 Second Value: Available Values: 0-127 Third Value:...
- Page 46 When set to Program Cycle, these are the available parameters: Values: The Clip button will cycle through this many Program values (one at a time) when you press it: 1 Values, 2 Values, 3 Values, or 4 Values. Available Values: •...
-
Page 47: Saving A Preset
Note Off: When Latch is active, the Clip button will send the MIDI note number with this velocity when you press it to turn it off. Available Values: 0-127 Saving a Preset To store a Preset: 1. Press SHIFT and the DAW/Preset button to enter Edit Mode. The OLED will display “EDIT”... -
Page 48: Oxygen Pro 25 Daw Edit Mode
Oxygen Pro 25 DAW Edit Mode When SHIFT is pressed and held and the DAW/PRESET button is pressed, it will enter into editing the Preset or User DAW. Press the Encoder on “DAW” and the DAW controls will be available for editing. The default parameter to be edited will be the current User DAW’s Fader 1 assignment. -
Page 49: Knobs
CC: The fader will send its MIDI messages using this CC number. Available Values: 0-127 Minimum Value: The fader’s minimum position will correspond with this value. You can reverse the fader’s polarity by making this value larger than the Maximum value. Available Values: 0-127 Maximum Value: The fader’s maximum position will correspond with this value. -
Page 50: Pads
Pads To edit one of the Pads when in DAW Edit Mode, press a Pad. You can scroll through the available parameter values using the Encoder. Select what parameter you would like to edit by pressing the Encoder. Channel: The pad will send its messages over this channel. Select the global channel (Global), or a specific channel (Channel 1–16). -
Page 51: Encoder Turn
Press: The pad will send the MIDI CC number with this value when you press it. Available Values: 0-127 Release: The pad will send the MIDI CC number with this value when you release it. Available Values: 0-127 Encoder Turn To edit the turn functionality of the Encoder when in DAW Edit Mode, press and hold the SHIFT button and move the ENCODER. -
Page 52: Encoder Press
Encoder Press To edit the press functionality of the Encoder when in DAW Edit Mode, press and hold the SHIFT button and press the ENCODER. You can scroll through the available parameter values using the Encoder. Select what parameter you would like to edit by pressing the Encoder. Channel: The Encoder will send its messages over this channel. -
Page 53: Back Button
Back Button To edit the functionality of the Back button when in DAW Edit Mode, press and hold the SHIFT button and press the Back button. You can scroll through the available parameter values using the Encoder. Select what parameter you would like to edit by pressing the Encoder. Channel: The Back button will send its messages over this channel. -
Page 54: Bank < And > Buttons
Bank < and > Buttons To edit the functionality of the Bank < or > buttons when in DAW Edit Mode, press and hold the SHIFT button and press the BANK < or BANK > button. You can scroll through the available parameter values using the Encoder. -
Page 55: Transport Control Buttons
Transport Control Buttons To edit the functionality of the <<, >>, Loop, Stop, Play or Record buttons when in DAW Edit Mode, press the <<, >>, Loop, Stop, Play or Record button. You can scroll through the available parameter values using the Encoder. Select what parameter you would like to edit by pressing the Encoder. -
Page 56: Clip Buttons
Clip Buttons To edit the functionality of a Clip button when in DAW Edit Mode, press a Clip button. You can scroll through the available parameter values using the Encoder. Select what parameter you would like to edit by pressing the Encoder. Note: What some parameter values are set to will affect what parameters are available for editing. - Page 57 Values: The Clip button will send the value with this CC number when you press it, one at a time, cycling through them with each press. Available Values: • 2 Values • 3 Values • 4 Values First Value: Available Values: 0-127 Second Value: Available Values: 0-127 Third Value:...
- Page 58 When set to Program Cycle, these are the available parameters: Values: The Clip button will cycle through this many Program values (one at a time) when you press it: 2 Values, 3 Values, or 4 Values. Available Values: • 2 Values •...
-
Page 59: Shortcuts And Hot Keys
Shortcuts and Hot Keys To edit the functionality of a Hot Key control – Metronome, or Pads 1 - 16 when in DAW Edit Mode, press and hold the SHIFT button and press the TEMPO/METRO button or one of the PADs. -
Page 60: Daw/Preset Button
DAW/Preset Button Editing the DAW/Preset button requires pressing and holding the SHIFT button and pressing the DAW/Preset button. You can then scroll through the available parameter values using the Encoder. Select what parameter you would like to edit by pressing the Encoder. Note: What some parameter values are set to will affect what parameters are available for editing. -
Page 61: Saving A User Daw
Saving a User DAW To store a User DAW: 1. Press SHIFT and the DAW/Preset button to enter Edit Mode. The OLED will display “EDIT” in the top row, and depending on the current DAW/Preset mode selection, will have Preset or DAW highlighted in the second row. Note: When Preset or DAW is highlighted you can turn the Encoder to change from editing DAW or Preset mode, changing the current selection. -
Page 62: Oxygen Pro 25 Advanced Settings
Oxygen Pro 25 Advanced Settings ARP/Latch Button When this button is pressed, it will activate the keyboard’s internal arpeggiator. The arpeggiator’s rate is based on the current Tempo and Time Division settings – Tempo settings are editable using the Tempo button. Time Division settings can be accessed by pressing and holding the Note Repeat button and turning the Encoder. -
Page 63: Smart Chord/Smart Scale Button
Select Last, to set the highest key that will correspond to the arp range. Note: When the First or Last Note is selected in Arp Edit mode you can press a key on the keybed to enter the First or Last note. The enables you to make a quick selection and avoid using the Encoder to make a selection. - Page 64 • KEY: Selects what key Smart Chord is in. • Type: Selects what scale the chord will use, Major or Minor. • Voicing: This lets you choose what fingerings are active in Smart Chord mode. You can also edit parameters quickly using the keyboard’s keys, while pressing and holding the SHIFT button.
-
Page 65: Oxygen Pro 49 And 61 Preset Edit Mode
Oxygen Pro 49 and 61 Preset Edit Mode When SHIFT is pressed and held and the PRESET button is pressed, it will enter into editing the currently selected Preset. The default parameter to be edited will be the current Preset’s Pitch Wheel assignment. However, once a different control is moved, or pressed, for example Knob 1, it will activate that selected control for editing. -
Page 66: Editable Preset Controls
Editable Preset Controls Pitch Wheel To edit the Pitch Wheel control when in Preset Edit Mode, move the Pitch Wheel. You can scroll through the available parameter values using the Encoder. Select what parameter you would like to edit by pressing the Encoder. Channel: The Pitch Wheel will send its messages over this channel. -
Page 67: Keybed
Keybed To edit your Oxygen Pro’s Zone and Aftertouch assignments when in Preset Edit Mode, press a key on the keyboard. You can scroll through the available parameter values using the Encoder. Select what parameter you would like to edit by pressing the Encoder. Zones: The keybed (the piano keys) on your Oxygen Pro can be divided into 1–4 “zones.”... -
Page 68: Faders
Faders To edit a Fader’s controls when in Preset Edit Mode, move a Fader. You can scroll through the available parameter values using the Encoder. Select what parameter you would like to edit by pressing the Encoder. Channel: The Fader will send its messages over this channel. Select the global channel (Global), a specific channel (Channel 1–16), a zone (Zone 1–4), or all channels (Omni). -
Page 69: Fader Buttons
Fader Buttons To edit one of the Fader Buttons when in Preset Edit Mode, press a fader button. You can scroll through the available parameter values using the Encoder. Select what parameter you would like to edit by pressing the Encoder. Channel: The fader button will send its messages over this channel. - Page 70 Values: The fader button will send the value with this CC number when you press it, one at a time, cycling through them with each press. Available Values: • 2 Values • 3 Values • 4 Values First Value: Available Values: 0-127 Second Value: Available Values: 0-127 Third Value:...
- Page 71 When set to Program Cycle, these are the available parameters: Values: The fader button will cycle through this many Program values (one at a time) when you press it: 2 Values, 3 Values, or 4 Values. Available Values: • 2 Values •...
-
Page 72: Sustain Pedal
Note Off: When Latch is active, the fader button will send the MIDI note number with this velocity when you press it to turn it off. Available Values: 0-127 Sustain Pedal To edit the Sustain Pedal when in Preset Edit Mode, press a connected Sustain Pedal. You can scroll through the available parameter values using the Encoder. -
Page 73: Pads
Pads To edit one of the Pads when in Preset Edit Mode, press a Pad. You can scroll through the available parameter values using the Encoder. Select what parameter you would like to edit by pressing the Encoder. Channel: The pad will send its messages over this channel. Select the global channel (Global), a specific channel (Channel 1–16), a zone (Zone 1–4), or all channels (Omni). - Page 74 Note Off: When Latch is active, the pad will send the MIDI note number with this velocity when you press it to turn it off. Available Values: 0-127 When set to CC, these are the available parameters: CC: The pad will send its MIDI messages using this CC number. Available Values: 0-127 Press: The pad will send the MIDI CC number with this value when you press it.
- Page 75 When set to CC IN/DC, these are the available parameters: CC: The pad will send its MIDI messages using this CC number. Available Values: 0-127 Type: The pad will send the next (Increment) or previous (Decrement) value number in the range of values when you press it.
-
Page 76: Encoder Turn
When set to Program IN/DC (PG IN/DC), these are the available parameters: Type: The pad will send the next (Increment) or previous (Decrement) value number in the range of values when you press it. Min: The lowest Program value in the range of values will correspond with this setting. Available Values: 0-127 Max: The highest Program value in the range of values will correspond with this setting. - Page 77 When set to Program Cycle, these are the available parameters: Values: The Encoder will cycle through this many Program values (one at a time) when you turn it: 1 Values, 2 Values, 3 Values, or 4 Values. Available Values: • 2 Values •...
- Page 78 Second: The Encoder will send the MIDI CC number with this value at the second notch of the turn. Available Values: 0-127 Third: The Encoder will send the MIDI CC number with this value at the third notch of the turn. Available Values: 0-127 Last: The Encoder will send the MIDI CC number with this value at the final notch of the turn.
-
Page 79: Encoder Press
Encoder Press To edit the press functionality of the Encoder when in Preset Edit Mode, press and hold the SHIFT button and press the ENCODER. You can scroll through the available parameter values using the Encoder. Select what parameter you would like to edit by pressing the Encoder. Channel: The Encoder will send its messages over this channel. -
Page 80: Back Button
Back Button To edit the functionality of the Back button when in Preset Edit Mode, press and hold the SHIFT button and press the Back button. You can scroll through the available parameter values using the Encoder. Select what parameter you would like to edit by pressing the Encoder. -
Page 81: Clip Buttons
Clip Buttons To edit the functionality of a Clip button when in Preset Edit Mode, press a Clip button. You can scroll through the available parameter values using the Encoder. Select what parameter you would like to edit by pressing the Encoder. Note: What some parameter values are set to will affect what parameters are available for editing. - Page 82 Values: The Clip button will send the value with this CC number when you press it, one at a time, cycling through them with each press. Available Values: • 2 Values • 3 Values • 4 Values First Value: Available Values: 0-127 Second Value: Available Values: 0-127 Third Value:...
- Page 83 When set to Program Cycle, these are the available parameters: Values: The Clip button will cycle through this many Program values (one at a time) when you press it: 2 Values, 3 Values, or 4 Values. Available Values: • 2 Values •...
-
Page 84: Saving A Preset
Note On: When Latch is active, the Clip button will send the MIDI note number with this velocity when you press it to turn it on. Available Values: 0-127 Note Off: When Latch is active, the Clip button will send the MIDI note number with this velocity when you press it to turn it off. -
Page 85: Oxygen 49 And 61 Daw Edit Mode
Oxygen 49 and 61 DAW Edit Mode When SHIFT is pressed and held and the DAW button is pressed, it will enter into editing the User DAW. The default parameter to be edited will be the current User DAW’s Fader 1 assignment. However, once a different control is moved or pressed, for example Knob 1, it will activate that selected control for editing. -
Page 86: Knobs
Maximum Value: The fader’s maximum position will correspond with this value. You can reverse the fader’s polarity by making this value smaller than the Minimum value. Available Values: 0-127 Knobs To edit one of the Knobs when in DAW Edit Mode, move a Knob. You can scroll through the available parameter values using the Encoder. -
Page 87: Fader Buttons
Fader Buttons To edit one of the Fader Buttons when in DAW Edit Mode, press a fader button. After you’ve selected which button you would like to edit you will need to select what button you are editing per Mode. This enables you to have 4 different button messages for 1 button depending on the MODE –... - Page 88 LSB: The fader button will send this Bank LSB (Least Significant Byte) number when you press Available Values: 0-127 When set to Program Cycle, these are the available parameters: Values: The fader button will cycle through this many Program values (one at a time) when you press it: 1 Values, 2 Values, 3 Values, or 4 Values.
- Page 89 When set to CC Cycle, these are the available parameters: CC: The fader button will send its MIDI messages using this CC number. Available Values: 0-127 Press: The fader button will send the MIDI CC number with this value when you press it. Available Values: 0-127 Release: The fader button will send the MIDI CC number with this value when you release it.
-
Page 90: Pads
When set to Note, these are the available parameters: Note: The fader button will send its MIDI messages using this Note number. Available Values: C-2 – G8 Latch: When set to Latch On, the fader button will send one value when pressed and a different value when pressed a second time, alternating between the two values with each press. - Page 91 When set to Note, these are the available parameters: Note: The pad will send its MIDI messages using this Note number. Available Values: C-2 – G8 Latch: When set to Latch On, the pad will send one value when pressed and a different value when pressed a second time, alternating between the two values with each press.
-
Page 92: Encoder Turn
Encoder Turn To edit the turn functionality of the Encoder when in DAW Edit Mode, press and hold the SHIFT button and move the ENCODER. You can scroll through the available parameter values using the Encoder. Select what parameter you would like to edit by pressing the Encoder. Channel: The Encoder will send its messages over this channel. -
Page 93: Encoder Press
Encoder Press To edit the press functionality of the Encoder when in DAW Edit Mode, press and hold the SHIFT button and press the ENCODER. You can scroll through the available parameter values using the Encoder. Select what parameter you would like to edit by pressing the Encoder. Channel: The Encoder will send its messages over this channel. -
Page 94: Back Button
Back Button To edit the functionality of the Back button when in DAW Edit Mode, press and hold the SHIFT button and press the Back button. You can scroll through the available parameter values using the Encoder. Select what parameter you would like to edit by pressing the Encoder. Channel: The Back button will send its messages over this channel. -
Page 95: Bank < And > Buttons
Bank < and > Buttons To edit the functionality of the Bank < or > buttons when in DAW Edit Mode, press and hold the SHIFT button and press the BANK < or BANK > button. You can scroll through the available parameter values using the Encoder. -
Page 96: Transport Control Buttons
Transport Control Buttons To edit the functionality of the <<, >>, Loop, Stop, Play or Record buttons when in DAW Edit Mode, press the <<, >>, Loop, Stop, Play or Record button. You can scroll through the available parameter values using the Encoder. Select what parameter you would like to edit by pressing the Encoder. -
Page 97: Clip Buttons
Clip Buttons To edit the functionality of a Clip button when in DAW Edit Mode, press a Clip button. You can scroll through the available parameter values using the Encoder. Select what parameter you would like to edit by pressing the Encoder. Note: What some parameter values are set to will affect what parameters are available for editing. - Page 98 Release: The Clip button will send the MIDI CC number with this value when you release it. Available Values: 0-127 Values: The Clip button will send the value with this CC number when you press it, one at a time, cycling through them with each press. Available Values: •...
- Page 99 LSB: The Clip button will send this Bank LSB (Least Significant Byte) number when you press Available Values: 0-127 When set to Program Cycle, these are the available parameters: Values: The Clip button will cycle through this many Program values (one at a time) when you press it: 2 Values, 3 Values, or 4 Values.
-
Page 100: Shortcuts And Hot Keys
When set to Note, these are the available parameters: Note: The Clip button will send its MIDI messages using this Note number. Available Values: C-2 – G8 Latch: When set to Latch On, the Clip button will send one value when pressed and a different value when pressed a second time, alternating between the two values with each press. -
Page 101: Daw And Preset Buttons
DAW and Preset Buttons Editing the DAW and Preset button requires pressing and holding the SHIFT button and pressing either the DAW or Preset button. You can then scroll through the available parameter values using the Encoder. Select what parameter you would like to edit by pressing the Encoder. -
Page 102: Saving A User Daw
Saving a User DAW To store a User DAW: 1. Press SHIFT and the DAW button to enter Edit Mode. 2. Edit a control as outlined in the DAW Edit Mode section of this guide. 3. Press the DAW button. 4. -
Page 103: Oxygen Pro 49 And 61 Advanced Settings
Oxygen Pro 49 and 61 Advanced Settings ARP and Latch Buttons When the ARP button is pressed, it will activate the keyboard’s internal arpeggiator. The arpeggiator’s rate is based on the current Tempo and Time Division settings – Tempo settings are editable using the Tempo button. -
Page 104: Smart Chord Button
To set a Split for the arp, click the Encoder in Split, and select On. With Split active/on, the Arp can be assigned to a specific section of the keybed, like a Zone assignment. Select First, to set the lowest key that will correspond to the arp range. Select Last, to set the highest key that will correspond to the arp range. -
Page 105: Smart Scale Button
Select First, to set the lowest key that will correspond to the Smart Chord range. Select Last, to set the highest key that will correspond to the Smart Chord range. Note: When the First or Last Note is selected in Chord Edit mode you can press a key on the keybed to enter the First or Last note. -
Page 106: Oxygen Pro Global Settings
Oxygen Pro Global Settings Pressing SHIFT and the BACK/GLOBAL button (25-key) or SHIFT and the MODE/GLOBAL button (49 and 61 key) will enter into the Oxygen Pro’s Global settings. The Global Settings affect the overall operation of your Oxygen Pro, regardless of the current preset. -
Page 107: Appendix
Appendix Velocity Curves Keyboard Sensitivity K.SENS. will appear in the display when you are selecting the keyboard velocity curve. Oxygen Pro Display Description This is a low-sensitivity setting, useful for playing notes with mostly low velocities. Medium This is a medium-sensitivity setting (the default), useful for playing with an average amount of force. -
Page 108: Pad Sensitivity
Pad Sensitivity PD.SENS. will appear in the display when you are selecting the pads’ velocity curve. Oxygen Pro Display Description This is a low-sensitivity setting, useful for playing notes with mostly low velocities. Medium This is a medium-sensitivity setting (the default), useful for playing with an average amount of force. -
Page 109: Pad Led Color List
Pad LED Color List NAME COLOR LED OFF CHARTREUSE CHAR. GREEN GREEN AQUA AQUAMARINE CYAN CYAN AZURE AZURE BLUE BLUE VIOLET VIOLET MAGENTA MAGENTA ROSE ROSE ORANGE ORANGE YELLOW YELLOW WHITE WHITE Preset List 1. MPC Pl (MPC Plugin) Preset 2. -
Page 110: Midi Ports
MIDI Ports Oyxgen Pro Output Ports Messages Windows macOS Preset Mode Controls, Keys, Pads, Timing Clock Oxygen Pro ## USB MIDI Messages DAW Mode Controls, Pads MIDIOUT3 (Oxygen Pro ##) MACKIE/HUI Preset Editor MIDIOUT4 (Oxygen Pro ##) EDITOR Oyxgen Pro Input Ports Messages Windows macOS... - Page 111 Num 1 NUM. 1 ‘ ‘ Num 2 NUM. 2 Num 3 NUM. 3 Num 4 NUM. 4 Num 5 NUM. 5 Num 6 NUM. 6 Num 7 NUM. 7 Num 8 NUM. 8 Num 9 NUM. 9 Num 0 NUM.
-
Page 112: Factory Reset
KEY MODIFIERS - macOS CTRL OPT No Message NO MSG. M - CTRL and Option CMD OPT M - SHIFT SHIFT M - CMD and OPT M - SHIFT, Ctrl, and S CTL CD M - Ctrl CTRL M - SHIFT, CTRL, and S CTL OPT M - Command COMMND... -
Page 113: Technical Specifications
Specifications are subject to change without notice. Trademarks and Licenses M-Audio is a trademark of inMusic Brands, Inc., registered in the U.S. and other countries. AAX, Avid, and Pro Tools are registered trademarks of Avid Technology, Inc. in the U.S. and other countries. - Page 114 Manual Version 1.1...
Need help?
Do you have a question about the Oxygen Pro Series and is the answer not in the manual?
Questions and answers
The octave/transpose keys do not work on my oxygen pro 61. Please help!
The octave/transpose keys on the M-Audio Oxygen Pro 61 may not work if the keyboard is already at its maximum or minimum octave/transposition range. The Oxygen Pro 61 can shift 3 octaves down or 3 octaves up. If the keyboard has reached these limits, pressing the octave buttons will have no effect. Similarly, transposition is limited to ±12 semitones. If the keyboard is already transposed to these limits, further adjustments will not work.
This answer is automatically generated