
Related Manuals for Zanussi ZGG76524XA


Summary of Contents for Zanussi ZGG76524XA
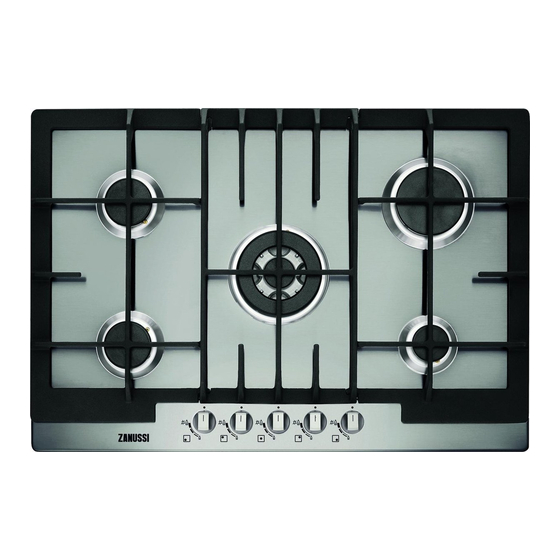
- Page 1 User Manual GETTING STARTED? EASY. ZGG76524XA NL Gebruiksaanwijzing Kookplaat EN User Manual FR Notice d'utilisation Table de cuisson...
-
Page 2: Veiligheid Van Kinderen En Kwetsbare Mensen
VEILIGHEIDSINFORMATIE Lees zorgvuldig de meegeleverde instructies voor installatie en gebruik van het apparaat. De fabrikant is niet verantwoordelijk voor letsel of schade veroorzaakt door een verkeerde installatie of verkeerd gebruik. Bewaar de instructies altijd op een veilige en toegankelijke plaats voor toekomstig gebruik. VEILIGHEID VAN KINDEREN EN KWETSBARE MENSEN Dit apparaat kan worden gebruikt door kinderen van 8 jaar en... - Page 3 WAARSCHUWING: Zonder toezicht koken op een kookplaat • met vet of olie kan gevaarlijk zijn en brandgevaar opleveren. Probeer brand NOOIT met water te blussen, maar schakel in • plaats daarvan het apparaat uit en bedek de vlam bijv. met een deksel of blusdeken.
-
Page 4: Aansluiting Aan Het Elektriciteitsnet
MONTAGE • Zorg ervoor dat er een schokbescherming wordt geïnstalleerd. WAARSCHUWING! Alleen een • Gebruik het klem om spanning op het snoer te erkende installatietechnicus mag het voorkomen. apparaat installeren. • Zorg ervoor dat de stroomkabel of stekker (indien van toepassing) het hete apparaat of WAARSCHUWING! Gevaar voor heet kookgerei niet aanraakt als u het apparaat letsel of schade aan het apparaat. - Page 5 GEBRUIK • Zorg dat de vlam niet uit gaat als u de knop snel van de maximale stand naar de minimale stand WAARSCHUWING! Gevaar op letsel, draait. brandwonden of elektrische schokken. • Gebruik alleen de accessoires die zijn meegeleverd met het apparaat. •...
-
Page 6: Montage
• Neem contact met uw plaatselijke overheid voor SERVICEDIENST informatie m.b.t. correcte afvalverwerking van • Neem contact op met een erkende het apparaat. servicedienst voor reparatie van het apparaat. • Haal de stekker uit het stopcontact. • Gebruik uitsluitend originele reserveonderdelen. •... -
Page 7: Vervanging Spuitmonden (Alleen Voor België)
WAARSCHUWING! Controleer WAARSCHUWING! Zorg dat de vlam wanneer de installatie is voltooid of niet uit gaat als u de knop snel van de alle leidingfittingen goed zijn afgedicht. maximale stand naar de minimale Gebruik een zeepoplossing, geen stand draait. vlam! AANSLUITING OP HET ELEKTRICITEITSNET VERVANGING SPUITMONDEN (ALLEEN •... -
Page 8: Mogelijkheden Voor Inbouw
INBOUW MOGELIJKHEDEN VOOR INBOUW Het paneel geïnstalleerd onder de kookplaat moet eenvoudig te verwijderen zijn en eenvoudig toegang bieden indien technische hulp nodig is. Keukenmeubel met min. min. 650 mm 450 mm min. 55 mm 30 mm 480 mm 560 mm min 6 mm 10 mm min 30 mm... -
Page 9: Beschrijving Van Het Product
BESCHRIJVING VAN HET PRODUCT INDELING KOOKPLAAT Normale brander Driekronenbrander Snelle brander Sudderbrander Bedieningsknoppen BEDIENINGSKNOP Symbool Beschrijving Symbool Beschrijving minimale gastoevoer geen gastoevoer / uit-stand ontstekingsstand / maximale gastoevoer DAGELIJKS GEBRUIK WAARSCHUWING! Raadpleeg de hoofdstukken Veiligheid. BRANDEROVERZICHT A. Branderdeksel B. Branderkroon C. -
Page 10: Aanwijzingen En Tips
ONTSTEKING VAN DE BRANDER LET OP! Bij afwezigheid van Ontvlam de brander altijd vóór u het elektrische stroom kunt u de brander kookgerei erop plaatst. ontsteken zonder elektrische inrichting. Breng in dat geval een vlam in de buurt van de brander, draai de WAARSCHUWING! Ga voorzichtig regelknop tegen de wijzers van de klok te werk bij het gebruik van branders... -
Page 11: Onderhoud En Reiniging
Diameter van de Diameter van de Brander Brander pannen (mm) pannen (mm) Driekronenbrander 180 - 260 Normaal (achter) 120 - 220 Rapid (Snel) 180 - 260 Sudderbrander 80 - 160 Normaal (voor) 120 - 180 ONDERHOUD EN REINIGING Ga zeer voorzichtig te werk bij het WAARSCHUWING! Raadpleeg de vervangen van de pannendrager, hoofdstukken Veiligheid. -
Page 12: Periodiek Onderhoud
PERIODIEK ONDERHOUD Reinig deze onderdelen altijd grondig, om moeilijkheden bij het aansteken te voorkomen, en Raadpleeg regelmatig uw lokale serviceafdeling, controleer of de branderkroonopeningen niet om de staat van de gastoevoerleiding en de verstopt zijn. drukregelaar (indien gemonteerd) te controleren. PROBLEEMOPLOSSING WAARSCHUWING! Raadpleeg de hoofdstukken Veiligheid. -
Page 13: Technische Gegevens
LABELS MEEGELEVERD IN DE ZAK MET ACCESSOIRES Bevestig de stickers zoals hieronder weergegeven: MOD. MOD. MOD. TYPE PROD.NO. IP20 PROD.NO. PROD.NO. SER.NO. 0049 SER.NO SER.NO 03 IT DATA DATA MADE IN ITALY A. Plak het op de garantiekaart en verstuur dit C. - Page 14 GASBRANDERS VOOR LPG G30/G31 28-30/37 mbar NOMINALE GASSTROMING g/h NORMAAL MINIMUM INSPUITER- BRANDER VERMOGEN VERMOGEN MARKERING 1/100 mm G30 28-30 mbar G31 37 mbar Driekronen- brander Snel 0,75 Normale 0,45 brander Sudderbran- 0,33 ENERGIEZUINIGHEID PRODUCTINFORMATIE VOLGENS EU-RICHTLIJN 66/2014 Modelidentificatie ZGG76524XA...
-
Page 15: Energie Besparen
Type kooktoestel Ingebouwde kook- plaat Aantal gasbranders Centraalmidden - Driekronenbran- 52.0% Linksachter - Normale brander 54.7% Energiezuinigheid per gasbrander (EE gas burner) Rechtsachter - Snelle brander 56.3% Linksvoor - Normale brander 54.7% Rechtsvoor - Sudderbrander niet van toepassing Energiezuinigheid voor de gaskook- 54.4% plaat (EE gas hob) -
Page 16: Safety Information
SAFETY INFORMATION Before the installation and use of the appliance, carefully read the supplied instructions. The manufacturer is not responsible for any injuries or damages that are the result of incorrect installation or usage. Always keep the instructions in a safe and accessible location for future reference. -
Page 17: Safety Instructions
CAUTION: The cooking process has to be supervised. A short • term cooking process has to be supervised continuously. WARNING: Danger of fire: Do not store items on the cooking • surfaces. Metallic objects such as knives, forks, spoons and lids should •... -
Page 18: Electrical Connection
appliance and the upper drawer, is sufficient for must have a contact opening width of minimum air circulation. 3 mm. • The bottom of the appliance can get hot. Make GAS CONNECTION sure to install a non-combustible separation panel under the appliance to prevent access to •... -
Page 19: Installation
CARE AND CLEANING WARNING! Risk of damage to the appliance. WARNING! Do not remove the buttons, knobs or gaskets from the control panel. Water may get inside • Do not keep hot cookware on the control panel. the appliance and cause damage. •... -
Page 20: Injectors Replacement (Only For Belgium)
pipes, be careful they do not come in touch with WARNING! When installation is mobile parts or they are not squeezed. Also be complete, make sure that the seal of careful when the hob is put together with an oven. each pipe fitting is correct. -
Page 21: Connection Cable
ELECTRICAL CONNECTION • Make sure that the rated voltage and type of power on the rating plate agree with the voltage and the power of the local power supply. • This appliance is supplied with a mains cable. It has to be supplied with a correct plug which can hold the load that the rating plate rates. -
Page 22: Product Description
A. Removable panel min 30 mm B. Space for connections Kitchen unit with oven The electrical connection of the hob and the oven min 20 mm must be installed separately for safety reasons and (max 150 mm) to let easy remove oven from the unit. 60 mm PRODUCT DESCRIPTION COOKING SURFACE LAYOUT... -
Page 23: Burner Overview
BURNER OVERVIEW 1. Push the control knob down and turn it counterclockwise to the maximum gas supply position ( 2. Keep the control knob pushed for equal or less than 10 seconds. This lets the thermocouple warm up. If not, the gas supply is interrupted. 3. -
Page 24: Hints And Tips
HINTS AND TIPS WARNING! Refer to Safety chapters. CAUTION! Make sure that the pots are placed centrally on the burner in order to get maximum stability and to get lower gas consumption. COOKWARE DIAMETERS OF COOKWARE CAUTION! Do not use cast iron pans, potstones, earthenware, grill or toaster Use cookware with diameters plates. -
Page 25: Periodic Maintenance
metallic discoloration. Clean the hob with a 4. For the burner to operate correctly, make sure moist cloth and non-abrasive detergent. After that the arms of the pan supports are aligned cleaning, wipe the hob dry with a soft cloth. with the centre of the burner. -
Page 26: Technical Data
conditions of guarantee are in the guarantee booklet. LABELS SUPPLIED WITH THE ACCESSORIES Stick the adhesive labels as indicated below: MOD. MOD. MOD. TYPE PROD.NO. IP20 PROD.NO. PROD.NO. SER.NO. 0049 SER.NO SER.NO 03 IT DATA DATA MADE IN ITALY A. Stick it on Guarantee Card and send this part C. -
Page 27: Energy Efficiency
GAS BURNERS FOR LPG G30/G31 28-30/37 mbar NOMINAL GAS FLOW g/h INJECTOR NORMAL MINIMUM BURNER MARK 1/100 POWER kW POWER kW G30 28-30 mbar G31 37 mbar Triple Crown Rapid 0,75 Semi-rapid 0,45 Auxiliary 0,33 ENERGY EFFICIENCY PRODUCT INFORMATION ACCORDING TO EU 66/2014 Model identification ZGG76524XA... -
Page 28: Energy Saving
Type of hob Built-in hob Number of gas burners Centre middle - Triple Crown 52.0% Left rear - Semi-rapid 54.7% Energy efficiency per gas burner Right rear - Rapid 56.3% (EE gas burner) Left front - Semi-rapid 54.7% Right front - Auxiliary not applicable Energy efficiency for the gas hob 54.4%... -
Page 29: Informations De Sécurité
INFORMATIONS DE SÉCURITÉ Avant d'installer et d'utiliser cet appareil, lisez soigneusement les instructions fournies. Le fabricant ne pourra être tenu pour responsable des blessures et dégâts résultant d'une mauvaise installation ou utilisation. Conservez toujours les instructions dans un lieu sûr et accessible pour vous y référer ultérieurement. SÉCURITÉ... - Page 30 Ne faites pas fonctionner l'appareil avec un minuteur externe ou • un système de commande à distance. AVERTISSEMENT : Il peut être dangereux de laisser chauffer • de la graisse ou de l'huile sans surveillance sur une table de cuisson car cela pourrait provoquer un incendie. N'essayez JAMAIS d'éteindre un feu avec de l'eau.
-
Page 31: Consignes De Sécurité
CONSIGNES DE SÉCURITÉ • Assurez-vous que l'appareil est bien installé. Un Cet appareil est adapté aux marchés suivants: câble d'alimentation lâche et inapproprié ou une BE LU fiche (si présente) non serrée peuvent être à l'origine d'une surchauffe des bornes. INSTALLATION •... - Page 32 • Les informations concernant l'alimentation en • Ne laissez pas de récipients chauds sur le gaz se trouvent sur la plaque signalétique. bandeau de commande. • Cet appareil n'est pas raccordé à un dispositif • Ne laissez pas le contenu des récipients de d'évacuation des produits de combustion.
-
Page 33: Maintenance
• Éteignez l'appareil et laissez-le refroidir avant de • Contactez votre service municipal pour obtenir le nettoyer. des informations sur la marche à suivre pour • Débranchez l’appareil de l'alimentation mettre l'appareil au rebut. électrique avant toute opération de • Débranchez l'appareil de l'alimentation maintenance. -
Page 34: Remplacement Des Injecteurs (Pour La Belgique Uniquement)
• il n'est soumis à aucune traction ni aucune torsion ; • il n'entre pas en contact avec des bords ni des coins tranchants ; • il peut être facilement contrôlé sur toute sa longueur afin de vérifier son état. Vérifiez les points suivants pour contrôler le bon état du tuyau flexible : •... -
Page 35: Câble D'alimentation
CÂBLE D'ALIMENTATION A. joint fourni B. équerres fournies Pour remplacer le câble d'alimentation, utilisez uniquement le câble spécial ou son équivalent. Le ATTENTION! Installez l'appareil type de câble est : H05V2V2-F T90. uniquement sur un plan de travail dont Assurez-vous que la section du câble convient à la la surface est plane. -
Page 36: Description De L'appareil
DESCRIPTION DE L'APPAREIL DESCRIPTION DE LA TABLE DE CUISSON Brûleur semi-rapide Brûleur à triple couronne Brûleur rapide Brûleur auxiliaire Manettes de commande MANETTE DE COMMANDE Symbole Description Symbole Description alimentation en gaz minimale pas d'alimentation en gaz / position Arrêt position d'allumage / alimen- tation en gaz maximale UTILISATION QUOTIDIENNE... -
Page 37: Allumage Du Brûleur
ALLUMAGE DU BRÛLEUR ATTENTION! En cas de coupure Allumez toujours le brûleur avant de d'électricité, vous pouvez allumer le poser un récipient dessus. brûleur sans dispositif électrique : pour cela, approchez une flamme du brûleur, tournez la manette vers la AVERTISSEMENT! Faites très gauche jusqu'à... -
Page 38: Entretien Et Nettoyage
ATTENTION! Assurez-vous que les Diamètre du réci- récipients de cuisson sont bien Brûleur pient (mm) centrés sur le brûleur afin de garantir leur stabilité et de réduire la consommation de gaz. Rapide 180 - 260 DIAMÈTRES DES RÉCIPIENTS Semi-rapide (avant) 120 - 180 Semi-rapide (arrière) 120 - 220... -
Page 39: Dépannage
séchez la table de cuisson à l'aide d'un chiffon doux. • Nettoyez les éléments en émail, le chapeau et la couronne avec de l'eau chaude savonneuse et séchez-les soigneusement avant de les remettre en place. NETTOYAGE DE LA BOUGIE D'ALLUMAGE Cette fonctionnalité... -
Page 40: Étiquettes Fournies Dans Le Sachet Des Accessoires
SI VOUS NE TROUVEZ PAS DE SOLUTION... facturé, même en cours de garantie. Les instructions relatives au service après-vente et aux Si vous ne trouvez pas de solution au problème, conditions de garantie figurent dans le livret de veuillez contacter votre revendeur ou un service garantie. - Page 41 Alimentation 220-240 V ~ 50-60 Hz électrique : Catégorie de II2E+3+ (BE) l'appareil : I2E (LU) Raccordement R 1/2" au gaz : Classe de l'ap- pareil : DIAMÈTRES DES VIS DE RÉGLAGE BRÛLEUR Ø VIS DE RÉGLAGE 1/100 mm Triple couronne Rapide Semi-rapide Auxiliaire...
-
Page 42: Rendement Énergétique
RENDEMENT ÉNERGÉTIQUE INFORMATIONS DE PRODUIT SELON LA NORME EU 66/2014 Identification du modèle ZGG76524XA Type de table de cuisson Table de cuisson intégrée Nombre de brûleurs à gaz Milieu central - Triple couronne 52.0% Arrière gauche - Semi-rapide 54.7% Efficacité énergétique selon le brûleur à... - Page 44 WWW.ZANUSSI.COM/SHOP...