
Related Manuals for Ubiquiti UniFi Cloud Key


Summary of Contents for Ubiquiti UniFi Cloud Key
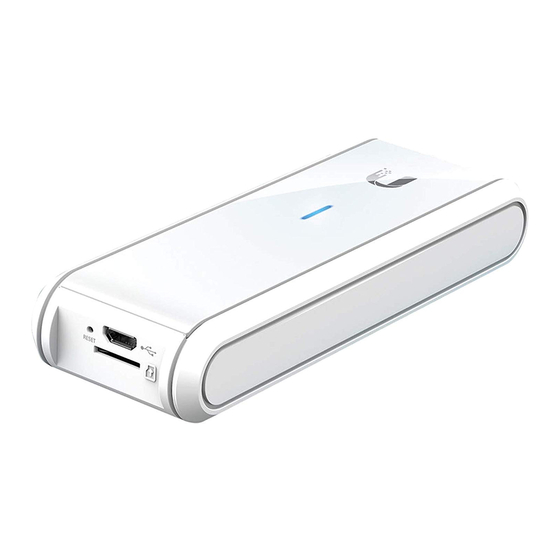
- Page 1 UCCK Quick Start Guide Package Contents UniFi Cloud Key Ethernet Cable microSD Card (8 GB) System Requirement Web Browser: Google Chrome (Other browsers may have limited functionality.) Hardware Overview...
- Page 2 White Factory defaults. Flashing White Initializing. Device is busy; do not touch or unplug it. This Alternating White/Blue usually indicates that a process such as a firmware upgrade is taking place. Blue Device is working properly. Shutdown Button Press the Shutdown button to initiate a graceful shutdown (all services will be shut down and the CPU will remain active). After pressing the button, wait until the LED goes off, and then unplug the Cloud Key. Ethernet Port This Gigabit Ethernet port is used to connect the power and should be connected to the LAN and DHCP server. Power can be provided by an 802.3af PoE switch, such as the UniFi PoE Switch. Reset Button The Reset Button serves two functions: Restart Press and release the Reset button quickly. Restore to Factory Default Settings Press and hold the Reset button for more than five seconds. USB Type C Power Port Optional power source (5V, minimum 1A) if PoE is not available. microSD Slot This slot is used to back up the Cloud Key configuration to the microSD card...
-
Page 3: Hardware Installation
(included). Hardware Installation 1. 2. Powering the UniFi Cloud Key Use an 802.3afcompliant switch, such as a UniFi Switch, or a USB power source (not included). UniFi Switch... -
Page 4: Software Installation
USB Power Source Software Installation The UniFi Controller software is preinstalled on the UniFi Cloud Key. Use one of the following methods to launch the software: If you are using Chrome, go to the Chrome Instructions section (recommended). If you are using a different web browser, go to the Instructions for Other Web Browsers section. Chrome Instructions 1. Ensure that your host system is on the same Layer2 network as the UniFi Cloud Key. 2. Launch the Chrome web browser and type https://unifi.ui.com in the address field. Press enter (PC) or return (Mac). 3. Enter the username and password for your Ubiquiti account. Click Sign In. - Page 5 4. Enable the Discover Cloud Key option at the top right. 5. If the Ubiquiti Device Discovery Tool is already installed, proceed to step 7. If the tool is not installed, you will be prompted to add it. Proceed to step 6. 6. To install the tool: a. Click Install.
- Page 6 7. The Ubiquiti Device Discovery Tool will search for the UniFi Cloud Key. Click Adopt in the Cloud Key’s Actions column to continue. 8. If the Cloud Key firmware is not the latest version, click Upgrade Firmware to upgrade the firmware.
- Page 7 9. Click Open Controller Wizard to set up the Controller on the Cloud Key. 10. The UniFi Setup Wizard screen appears. Follow the onscreen instructions. Then, click Finish to save your changes. Note: For stepbystep instructions, refer to the User Guide, which is available at ui.com/download/unifi 11. Enter your ui.com account credentials and click Enable Cloud Access.
- Page 8 12. Go back to the UniFi Controller tab (https://unifi.ui.com) in your browser and wait for the UniFi Controller to be adopted. 13. Click Launch to open the UniFi Controller remotely. The UniFi Controller management interface will appear. You can manage your UniFi devices and view network statistics using the UniFi Controller management interface. For information on configuring and using the UniFi Controller software, refer to the User Guide located on our website: ui.com/download/unifi Instructions for Other Web Browsers 1. Ensure that your host system is on the same Layer2 network as the UniFi Cloud Key. 2. The UniFi Cloud Key is set to DHCP by default, so it will try to automatically obtain an IP address. Assign a specific IP address to the UniFi Cloud Key, or check the DHCP server for its IP address. Note: The default fallback IP address of the UniFi Cloud Key is 192.168.1.30. 3. Launch the web browser. In the address field, type https:// followed by the appropriate IP address. Press enter (PC) or return (Mac).
- Page 9 4. Click Manage to run the UniFi Setup Wizard. Note: You can click Configure to change the settings of the UniFi Cloud Key. The default login is ubnt/ubnt. 5. The UniFi Setup Wizard screen appears. Follow the onscreen instructions. Then, click Finish to save your changes. Note: For stepbystep instructions, refer to the User Guide, which is available at ui.com/download/unifi After the UniFi Setup Wizard is finished, the UniFi Controller management...
-
Page 10: Specifications
After the UniFi Setup Wizard is finished, the UniFi Controller management interface will appear. Log in with the Admin Name and Password that you created, and then you can manage your UniFi devices and view network statistics using the UniFi Controller management interface. For information on configuring and using the UniFi Controller software, refer to the User Guide. Specifications UCCK Dimensions 21.7 x 43.4 x 121.9 mm (0.85 x 1.71 x 4.80") Weight 110 g (3.88 oz) Networking Interface (1) 10/100/1000 Ethernet Port Buttons (1) Reset to Defaults Shutdown Power Method 48V 802.3af or Passive PoE (Pairs 4, 5+; 7, 8) USBC Power Supply 802.3af PoE or USBC 5V, Minimum 1A Max. Power Consumption Operating Temperature 0 to 40° C (32 to 104° F) Operating Humidity 20 to 90% Noncondensing Certifications CE, FCC, IC Safety Notices 1. Read, follow, and keep these instructions. 2. Heed all warnings. 3. Only use attachments/accessories specified by the manufacturer. WARNING: Do not use this product in location that can be submerged by water. WARNING: Avoid using this product during an electrical storm. There may be a remote risk of electric shock from lightning. Electrical Safety Information 1. Compliance is required with respect to voltage, frequency, and current requirements indicated on the manufacturer’s label. Connection to a different power source than those... -
Page 11: Limited Warranty
indicated on the manufacturer’s label. Connection to a different power source than those specified may result in improper operation, damage to the equipment or pose a fire hazard if the limitations are not followed. 2. There are no operator serviceable parts inside this equipment. Service should be provided only by a qualified service technician. Limited Warranty ui.com/support/warranty The limited warranty requires the use of arbitration to resolve disputes on an individual basis, and, where applicable, specify arbitration instead of jury trials or class actions. Compliance Changes or modifications not expressly approved by the party responsible for compliance could void the user’s authority to operate the equipment. This device complies with Part 15 of the FCC Rules. Operation is subject to the following two conditions. 1. This device may not cause harmful interference, and 2. This device must accept any interference received, including interference that may cause undesired operation. This equipment has been tested and found to comply with the limits for a Class A digital device, pursuant to part 15 of the FCC Rules. These limits are designed to provide reasonable protection against harmful interference when the equipment is operated in a commercial environment. This equipment generates, uses, and can radiate radio frequency energy and, if not installed and used in accordance with the instruction manual, may cause harmful interference to radio communications. Operations of this equipment in a residential area is likely to cause harmful interference in which case the user will be required to correct the interference at his own expense. This radio transmitter has been approved by FCC. ISED Canada CAN ICES3(A)/NMB3(A) This device complies with ISED Canada licenceexempt RSS standard(s). Operation is subject to the following two conditions: 1. This device may not cause interference, and 2. This device must accept any interference, including interference that may cause undesired operation of the device. This radio transmitter has been approved by ISED Canada. CAN ICES3(A)/NMB3(A) Le présent appareil est conforme aux CNR d’ISDE Canada applicables aux appareils radio exempts de licence. L’exploitation est autorisée aux deux conditions suivantes : 1. l’appareil ne doit pas produire de brouillage;... -
Page 12: Australia And New Zealand
1. l’appareil ne doit pas produire de brouillage; 2. l’appareil doit accepter tout brouillage radioélectrique subi, même si le brouillage est susceptible d’en compromettre le fonctionnement. Le présent émetteur radio a été approuvé par ISDE Canada. IMPORTANT NOTE Radiation Exposure Statement This equipment complies with radiation exposure limits set forth for an uncontrolled environment. This equipment should be installed and operated with minimum distance 20 cm between the radiator and your body. This transmitter must not be colocated or operating in conjunction with any other antenna or transmitter. AVIS IMPORTANT Déclaration sur l’exposition aux rayonnements Cet équipement est conforme aux limites prévues pour l’exposition aux rayonnements dans un environnement non contrôlé. Lors de l’installation et de la mise en fonctionnement de l’équipement, assurezvous qu’il y ait une distance minimale de 20 cm entre l’élément rayonnant et vous. Cet émetteur ne doit être installé à proximité d’aucune autre antenne ni d’aucun autre émetteur, et ne doit être utilisé conjointement à aucun autre de ces appareils. Australia and New Zealand Warning: This equipment is compliant with Class A of CISPR 32. In a residential environment this equipment may cause radio interference. Brazil Nota: Este equipamento não tem direito à proteção contra interferência prejudicial e não pode causar interferência em sistemas devidamente autorizados. CE Marking CE marking on this product represents the product is in compliance with all directives that are applicable to it. Country List BFWA (Broadband Fixed Wireless Access) members noted in blue... -
Page 13: Weee Compliance Statement
BFWA (Broadband Fixed Wireless Access) members noted in blue Note: This device meets Max. TX power limit per ETSI regulations. The following apply to products that operate in the 5 GHz frequency range: Note: This device is restricted to indoor use only when operating in the 5150 5350 MHz frequency range within all member states. Note: All countries listed may operate at 30 dBm. BFWA member states may operate at 36 dBm. Note: Operation in the 5.8 GHz frequency band is prohibited in BFWA member states. Other countries listed may use the 5.8 GHz frequency band. WEEE Compliance Statement Declaration of Conformity Online Resources © 2021 Ubiquiti Inc. All rights reserved.
Need help?
Do you have a question about the UniFi Cloud Key and is the answer not in the manual?
Questions and answers