Table of Contents
Advertisement
Advertisement
Table of Contents

Related Manuals for AEG LAVATHERM 59800


Summary of Contents for AEG LAVATHERM 59800
- Page 1 LAVATHERM 59800 Condenser Dryer with Heat Pump User Information...
-
Page 2: Dear Customer
Dear customer, Please read this User Information carefully and keep it to refer to at a later date. Pass it on to any subsequent owner of the appliance. The following symbols are used in the text: Safety instructions Warning! Notes that concern your personal safety. Important! Notes that show how to avoid damage to the appliance. -
Page 3: Table Of Contents
Contents Operating Instructions Safety ............Disposal . - Page 4 Installation and connection instructions ....27 Installation safety instructions ........27 Transporting the appliance .
-
Page 5: Operating Instructions
Operating Instructions 1 Safety Before first starting up • Note the ”Installation and connection instructions” • Before first starting up, check the machine for any damage incurred during transport. Never connect up a damaged machine. If parts are damaged, contact your supplier. Intended use •... -
Page 6: General Safety
• The covering bonnet of the bulb for the drum light must be screwed down tightly. Child safety • Keep packaging away from children. Risk of suffocation! • Children can often not see the dangers associated with electric ma- chines. Never leave unsupervised children near the dryer. •... -
Page 7: Disposal
Disposal Packaging material The packaging materials are environmentally friendly and can be recy- cled. The plastic components are identified by markings, e.g. >PE<, >PS<, etc. Please dispose of the packaging materials in the appropriate container at the community waste disposal facilities. Old appliance The symbol on the product or on its packaging indicates that this... -
Page 8: Environmental Tips
2 Environmental tips • In the dryer, laundry becomes fluffy and soft. Fabric softeners are not therefore needed when washing. • Your dryer will function most economically if you: – always keep the ventilation slots on the base of the dryer unob- structed;... -
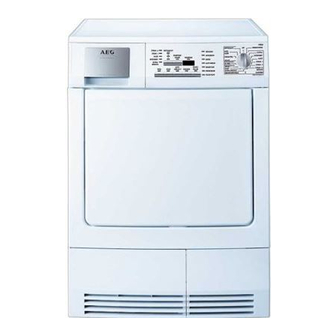
Page 9: Product View
Description of machine Water reservoir Lamp for interior illumination Micro-fine filter (lint filter) Rating plate Base door upstream of fluff filter and heat exchanger Operating screen INTENSITY button Display showing DELAY TIMER level of dryness Block of buttons and displays Air slots Multi-display Programme progress display... -
Page 10: Programme Overview
Programme overview Programmes EXTRA DRY (EXTRA- DROOG) INTENSIVE DRY (INTEN- SIEFDROOG) STORAGE DRY (KASTDROOG) DAMP (STRIJKDROOG ¢) HAND IRON (STRIJKDROOG £) MACHINE IRON (STRIJKDROOG ¤) EXTRA DRY (EXTRA- DROOG) STORAGE DRY (KASTDROOG) DAMP (STRIJKDROOG ¢) Additional functions Application/properties Thorough drying of thick or •... - Page 11 Additional functions Programmes 30 MIN LEISURE • (JEANS) EASY IRON (STRIJKVRIJ) WOOL • (WOL) SILK • (ZIJDE) REFRESH (OPFRISSEN) Application/properties For further drying of individual items of • • laundry or for small volumes of less than 1kg. Special programme for leisure clothing, such as jeans, sweatshirts, etc., of dif- •...
-
Page 12: Before The First Drying Cycle
Before the first drying cycle If the appliance was not transported in an upright position, leave it to stand for 12 hours before connecting it to the electricity supply and us- ing it for the first time, so that the oil can flow back to the compressor. Otherwise the compressor could be damaged. -
Page 13: Drying
Drying Switching machine on / switching light on Turn the programme selector to any programme or turn it to LIGHT (VERLICHTING). The machine has been switched on. When the loading door is opened, the drum is illuminated. Opening loading door / loading laundry 1. -
Page 14: Selecting Additional Functions
Selecting additional functions INTENSITY (RESTVOCHT) For precise setting of the residual moisture content of the laundry, the degrees of dryness +, ++ or +++ can be set in addition to most programmes. Laundry becomes dri- er from + to +++. 1. -
Page 15: Setting Time Delay
Setting time delay With the DELAY TIMER (STARTTIJDKEUZE) button, you can delay the start of a programme by between 30 minutes (30' and a maximum of 23 hours (23h). 1. Select the programme 2. Press the DELAY TIMER (STARTTIJDKEUZE) button as many times as nec- essary until the required start delay appears on the multi display, e.g. -
Page 16: Putting In Extra Items Or Taking Items Out Before End Of Programme
Putting in extra items or taking items out before end of programme 1. Open loading door Warning! Laundry and drum can become hot. Risk of burns! 2. Load or remove laundry items. 3. Close loading securely. Lock must audibly lock. 4. -
Page 17: Cleaning And Maintenance
Cleaning and maintenance Cleaning fluff filter To ensure that the dryer works perfectly, the fluff filters (micro-fine fil- ter and fine strainer) must be cleaned after every drying cycle. Caution! Never operate the dryer without fluff filters or with damaged or blocked fluff filters. -
Page 18: Cleaning The Door Seal
Clean the entire filter area The strainer area does not have to be cleaned after every drying cycle, but should be checked regularly and cleaned of fluff if necessary. 6. To do this, grip the top of the large mesh filter and pull it forwards un- til it comes loose from the two brackets. -
Page 19: Emptying The Condensate Tank
Emptying the condensate tank Empty condensate tank after every drying cycle. If the condensate tank is full, an active programme will break off auto- matically and the EMPTY WATER (RESERVOIR) display will light up. In order to continue the programme, the condensate tank must first be emptied. -
Page 20: Cleaning The Fluff Filter
Cleaning the fluff filter If the indicator CLEAN BASE FILTER (REINIG SOKKELFILTER) lights up, the fluff filter and the filter mat in the base of the appliance must be cleaned. To protect the heat pump from dirt, the dryer is fitted with a special fil- ter mat, which is located in the filter housing. - Page 21 6. To clean the filter mat: Remove filter mat from filter hous- ing. To do this, press the pressure points on the sides and pull the fil- ter mat and frame up and out of the housing. 7. Take the filter mat out of the frame and wash it by hand or use a vacu- um cleaner, when it is has dried out.
-
Page 22: Cleaning The Drum
Cleaning the drum Caution! Do not use abrasives or steel wool to clean the drum. Lime in the water or cleaning agents may form a barely visible lining on the inside of the drum. The degree to which the laundry has been dried is then no longer detected reliably. - Page 23 Problem Wrong programme selected. Lint filters clogged. Fluff filter clogged. Overloading of laundry. Drying results unsatis- factory. Ventilation slots in base area covered up. Residue on inside surface of drum or drum ribs. Fine strainer not in place Loading door does not and/or large mesh filter not close.
-
Page 24: Changing The Bulb For Interior Lighting
Problem Drying cycle lasts an unusually long time. Note: After around 5 hours the drying cycle ends automatically (see „Drying cycle com- plete“). Changing the bulb for interior lighting Only use a special bulb which is designed specially for dryers. The spe- cial bulb can be obtained from the Customer Care Department, ET no. -
Page 25: Programming Options
Programming options Objective Permanently programme in the audible signal which reminds you that the programme is com- plete. Adjust “level of dryness” detection: If the laundry is slightly drier or slightly damper at the end of the pro- gramme than with the standard setting. -
Page 26: Technical Data
Technical data This appliance conforms with the following EU Directives: – 73/23/EEC dated 19.02.1973 Low Voltage Directive – 89/336/EEC dated 03.05.1989 EMC Directive inclusive of Amending Directive 92/31/EEC – 93/68/EEC dated 22.07.1993 CE Marking Directive Height x width x depth Depth with loading door open Height can be adjusted by Weight when empty... -
Page 27: Installation And Connection Instructions
Installation and connection instructions 1 Installation safety instructions • Before first starting up, all parts of the transport safety equipment must be removed. The machine may otherwise be damaged. • Before starting up for the first time, ensure that the nominal voltage and type of current specified on the machine type plate match the nominal voltage and type of current at the installation site. -
Page 28: Transporting The Appliance
Transporting the appliance Important: Only tip the appliance on its left side to transport (see il- lustration), if it cannot be trans- ported in an upright position. -
Page 29: Removing Transport Safety Equipment
Removing transport safety equipment Caution! Before first starting up, all parts of the transport safety equipment must be removed. 1. Open loading door 2. Pull off adhesive strips from inside machine on top of drum. 3. Remove foil hose and polystyrene padding from the machine. -
Page 30: Changing Door Stop
Changing door stop Warning! The door stop may only be changed by a specialist. If neces- sary, please contact our after-sales service or your specialist dealer. Warning! Before changing the door stop, disconnect the mains plug; with a permanent connection: fully unscrew or deactivate the fuse. 1. - Page 31 7. Unscrew cover plates E from the front of the machine, rotate through 180, screw on the opposite side. 8. Unscrew door lock F, push down slightly and remove from the front of the machine. 9. Press snap-in button G in and down, press cover down slightly and re- move from front of the machine.
-
Page 32: Special Accessories
These intermediate installation kits can be used to arrange the dryer and an automatic AEG-Electrolux washing machine (60cm wide, front loading) as a space-saving washer/dryer stack. The automatic washing machine is at the bottom and the dryer is at the top. -
Page 33: Guarantee Conditions
Guarantee conditions Belgium DECLARATION OF GUARANTEE TERMS. Our appliances are produced with the greatest of care. However, a defect may still occur. Our con- sumer services department will repair this upon request, either during or after the guarantee peri- od. The service life of the appliance will not, however, be reduced as a result. This declaration of guarantee terms is based on European Union Directive 99/44/EC and the provi- sions of the Civil Code. -
Page 34: Customer Services
withstand the local climatic and environmental conditions. For appliances purchased abroad, the user must first ensure that they meet the qualifications required in Belgium. Non-essential or re- quested adjustments are not covered by the guarantee and are not possible in all cases. Our consumer services department is always at your disposal, even after the guarantee period has expired. -
Page 35: Service
Service In the event of technical faults, please first check whether you can remedy the problem yourself with the help of the operating instruc- tions (section “What to do if…”). If you were not able to remedy the problem yourself, please contact the Customer Care Department or one of our service partners. - Page 36 USD 14 billion in more than 150 countries around the world. AEG Hausgeräte GmbH Postfach 1036 D-90327 Nürnberg http://www.aeg-electrolux.de © Copyright by AEG 822 944 726-01-280306-03 Subject to change without notice...
Need help?
Do you have a question about the LAVATHERM 59800 and is the answer not in the manual?
Questions and answers