Cognex DataMan 8600 Reference Manual
Hide thumbs
Also See for DataMan 8600:
- Quick reference manual (46 pages) ,
- Reference manual (45 pages) ,
- Quick reference manual (8 pages)
Table of Contents
Advertisement
Quick Links
Advertisement
Table of Contents

Related Manuals for Cognex DataMan 8600


Summary of Contents for Cognex DataMan 8600
- Page 1 ® DataMan 8600 Reference Manual 2019 October 08 Revision: 6.1.6SR1.5...
-
Page 2: Legal Notices
Copyright © 2019. Cognex Corporation. All Rights Reserved. Portions of the hardware and software provided by Cognex may be covered by one or more U.S. and foreign patents, as well as pending U.S. and foreign patents listed on the Cognex web site at: cognex.com/patents. -
Page 3: Table Of Contents
Connecting a DataMan 8600 Through RS-232 Connecting a DataMan 8600 Through USB Using Your Device Through USB Using DataMan 8600 Wireless Reader Connecting to a Wireless DataMan 8600 Through a Base Station Pairing Strategy (DMA-IBASE-BT-XX) Base Station Routing Capabilities Ad-hoc Mode... - Page 4 Table of Contents Compliance Information, Warnings and Notices Laser Information Regulations/Conformity Compliance Statements: DataMan Base Station 中 国 大 陆 RoHS (Information for China RoHS Compliance) Reader Control Codes Keyboard Language (Corded Readers Only) Precautions...
-
Page 5: Symbols
Symbols Symbols The following symbols indicate safety precautions and supplemental information: WARNING: This symbol indicates a hazard that could cause death, serious personal injury or electrical shock. CAUTION: This symbol indicates a hazard that could result in property damage. Note: This symbol indicates additional information about a subject. Tip: This symbol indicates suggestions and shortcuts that might not otherwise be apparent. -
Page 6: Getting Started
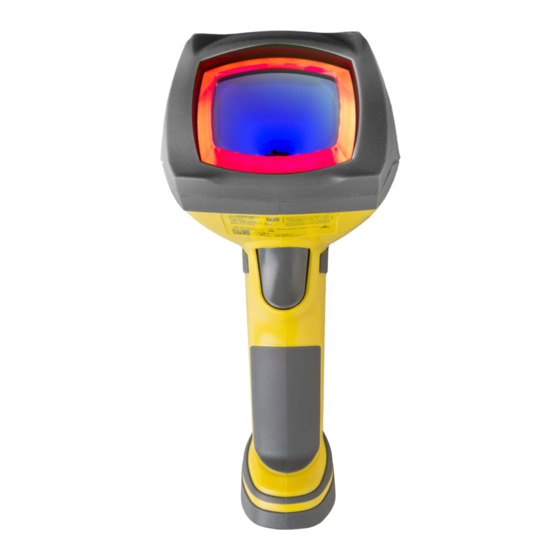
This section provides general information about the DataMan 8600 readers and the DataMan 8000 series base stations. You can also find information on the DataMan 8600 accessories and the physical layout of the reader and the base stations in this section. -
Page 7: Dataman 8600 Accessories
√ √ DMA-IBASE-BT-02 √ √ √ √ DMA-IBASE-01 √ √ √ √ DataMan 8600 Accessories DataMan 8600 Other Accessories DMCM-SERIALM-00 Serial/USB slide-in Ethernet slide-in DMCM-ENETM-00 Bluetooth slide-in DMCM-BTM-00 Wireless slide-in DMCM-WLESSM-00 Charging Base Station DMA-CBASE-01 Intelligent Base Station DMA-IBASE-01 Intelligent Bluetooth Base Station... -
Page 8: Dataman 8600 Reader Cables
Stand DM-STAND-00 Rubber sleeve DM8600-SLEEVE-00 *XX can be US, EN, UK, or JP DataMan 8600 Reader Cables RS-232 coiled cable for reader, 2.5 m DM8000-RS232-02 RS-232 industrial cable for reader, 2.5 m DM8000-RS232IND-02 RS-232 coiled cable for reader, 4 m DM8000-RS232-05 USB cable, 2.5 m... -
Page 9: Dataman 8000 Series Base Station Cables
Getting Started *Collimated cable length including DM8000-ECABLE-X should not exceed 50 m. DataMan 8000 Series Base Station Cables RJ25 (RJ12) to DSUB9 cable for base station, 5 m DMA-RS232RJ-05 Straight 10ft USB cable DMA-USB-00 USB cable for base station: Use any standard USB-A to USB-B 2.0 cable up to 3 meters. Ethernet cable for base station: Use any standard CAT5/5e, SF/FTP or S/FTP cable. -
Page 10: Physical Layout Of The Reader
Extended Read Attempts button By default, the Extended Read Attempts button of the DataMan 8600 is used for Tuning Optimization. Tuning Optimization automatically picks the best Read Setup for the current decode and sets it as Read Setup 4 in the DataMan Setup Tool, locking in Symbology, Exposure, Lighting Settings, Focus, etc. -
Page 11: Physical Layout Of The Base Station
Getting Started Physical Layout of the Base Station DMA-IBASE-01 Base station status indicators Spare battery charger Spare battery charger status indicator Connection point with the reader: pairing reader and base station non-wireless communication charging RS-232 Power plug (24V, max. 13W) Ethernet (with optional Class 3 PoE power) DMA-IBASE-BT-XX Base station status indicators... - Page 12 Getting Started Connection point with the reader: pairing reader and base station non-wireless communication charging RS-232 Power plug (24V, max. 15W) Alternative power supply connector (24V, max. 15W, polarity marked on the plastic part near the connector) Recommended wire diameter is 14-18 AWG Ethernet Base station status indicators: Power: RED = base powered / BLINK = wrong reader in base...
-
Page 13: Setting Up Your Dataman 8600
This section provides information on how to set up and start working with your DataMan 8600 reader. It also describes how to install the DataMan Setup Tool and at the end of the section, you will find the DataMan 8600 and DataMan 8000 series base station specifications. -
Page 14: Dataman 8600 Specifications
303 g (without slide-in), Weight 345 g (with tethered slide-in) 0ºC — 45ºC (32ºF — 113ºF) Operating Temperature DataMan 8600 wireless: -10ºC — 45ºC (14ºF — 113ºF), Storage Temperature DataMan 8600 tethered: -40ºC — 60ºC (-40ºF — 140ºF) Maximum Humidity < 95% (non-condensing) -
Page 15: Dataman 8600 Imager Specifications
Setting Up Your DataMan 8600 DataMan 8600 Imager Specifications Specification DataMan 8600 Imager 1/1.8 inch CMOS Image Sensor 5.3 μm square pixels Image Sensor Properties 1280 x 1024 Image Resolution (Pixels) DataMan Base Station Specifications DMA-IBASE-BT-XX DMA-IBASE-01 Weight 300 g... -
Page 16: Connection Options
3. Insert the plug and slide the cable lock up to the reader, and twist the cable lock in place. Use the DM8000-ECABLE-05 (5 meters) or the DM8000-ECABLE-30 (30 meters). You also need a Power Over Ethernet Adapter (CPS-AC-POE1A-xx). Note: Disconnect the DataMan 8600 reader from power before inserting/removing communication modules. -
Page 17: Troubleshooting An Ethernet Connection
2. If you do not know the IP address, use the Force Network Settings option. Either method should allow the DataMan 8600 reader to appear in the list of Network devices so that you can connect to it through the DataMan Setup Tool and your Ethernet connection. - Page 18 Use the DM8000-RS232-02 cable (2.5 meters) or the DM8000-RS232-05 cable (5 meters). For power supply, use the DataMan 8000 Power Supply (DM100-PWR-000). Note: Disconnect the DataMan 8600 reader from power before inserting/removing the communication modules. Observe the following electrical requirements: 6VDC power supply (DM100-PWR-000), a 5.5 mm x 2.1 mm DC Power Plug...
-
Page 19: Connecting A Dataman 8600 Through Usb
3. Insert the plug, slide the cable lock up to the reader and twist the cable lock in place. Use the DM8500-USB-00 cable (2.5 meters) or the DM8500-USBC-02 cable (2.5 meters). Note: Disconnect the DataMan 8600 reader from power before inserting/removing the communication modules. Using Your Device Through USB If you connect your reader with the coiled USB cable, you must use your device in USB 1.1 mode. - Page 20 Connection Options Change the USB Connection in the Serial tab of the Communication Settings pane in DataMan Setup Tool, or scan the appropriate code from the DataMan Configuration Codes document. You can also switch the USB mode (CDC or HID) of both the reader and the base station with a pair of RP codes. Perform the following steps: In the case of a corded reader: 1.
-
Page 21: Using Dataman 8600 Wireless Reader
1. Connect the wireless slide-in (DMCM-BTM-00) to your DataMan 8600. 2. With a 2.5 mm Allen wrench, tighten the screws so that the slide-in is firmly locked. 3. Insert the battery. Note: Remove the battery from your DataMan 8600 before inserting/removing the communication module. - Page 22 Connection Options 4. Insert the plug and twist it in place. 5. Power up the DMA-IBASE-BT-XX base station using a 24V power supply (DMA-24VPWR-XX). In the case of a DMA-IBASE-01 base station, use either a 24V power supply, or a Class 3 Power Over Ethernet adapter. 6.
-
Page 23: Pairing Strategy (Dma-Ibase-Bt-Xx)
Configure wireless communication settings by connecting to the base station. In order for the changed settings to be synchronized between the DataMan 8600 wireless reader and the base station, place your reader in the base station after your changes are saved. To assign a static IP address to the base station or the reader when communicating via Ethernet, connect to the base station in the DataMan Setup Tool. - Page 24 Connection Options The reader then blinks green/blue until it gets paired with the base station (or until the end of the 20 second timeout period). When the reader is put on the base station, the base station drops its pairing with its old reader and pairs with the new reader.
-
Page 25: Base Station Routing Capabilities
Connection Options The base station that is paired with a certain reader signals a bad reader alert (beeps and flashing red indicators) also when another, unassigned reader is put into it. Base Station Routing Capabilities The base station is visible as connected through either RS-232, USB or Ethernet, but it routes data through the wireless interface to the reader. -
Page 26: Infrastructure Mode
Connection Options Infrastructure Mode It is possible to connect to the reader in infrastructure mode using WiFi connection. You need to reset the reader to factory defaults, connect to the device in ad-hoc mode, and then use the Wireless tab under Communication Settings to activate and configure infrastructure mode. - Page 27 Connection Options Note: The images acquired by the reader when it is out of the wireless range are never saved, and cannot be retrieved. Open a connection with the reader in a terminal program so that you gain the buffered data when wireless connection is established again.
-
Page 28: Summary Of Wireless Buffering Indicators
Connection Options When the reader is offline, good reads are indicated with 2 short beeps and the selected good read status indicator color (green by default). The status indicator beeps twice: your reader is offline while decoding symbols. When the buffer is full, no more codes are read. The reader does not discard the oldest read. When the buffer is full, the reader beeps and the status indicator becomes white. -
Page 29: Wireless Reader: Charging
Connection Options Condition Status Indicator: Reader Status Indicator: Base Station Sounds Offline: When the reader wakes up Long beep when you Reader out of Reader offline: steady out of the wireless range, there is leave the wireless wireless range of no indicator. - Page 30 Connection Options Paired Reader Charging Paired Reader Fully Charged Refer to the following table for a summary of indicators regarding charging: Condition Status Indicator: Reader Status Indicator: Base Station steady blue, indicating connection flashing red Battery low indicators flashing blue, indicating data transfer steady green, indicating connection Reader is charging in the base station steady...
-
Page 31: Wireless Reader: Changing Batteries
The battery used in these devices may present a risk of fire or chemical burn if mistreated. Do not disassemble, heat above 60ºC (140ºF), or incinerate. Replace battery with Cognex DMA-HHBATTERY- 01 only. The use of another battery may present a risk of fire or explosion. - Page 32 Connection Options 4. Put the end cap back on and twist it. Make sure that the triangle aligns with the circle when the cover is locked. 5. If using DMA-CBASE-01, place the battery in the spare battery charger in the direction of the small triangle of the battery.
- Page 33 Connection Options 6. Dispose of used battery promptly. Keep it away from children. Do not disassemble and do not burn it. Use the appropriate separate take-back systems for battery disposal.
-
Page 34: Reading Codes With The Dataman 8600
This section contains descriptions about trigger types as well as about the field of view and reading distances and the industrial protocols supported by the DataMan 8600 reader. Industrial Protocols The DataMan 8600 readers support the following industrial protocols: EtherNet/IP™ PROFINET SLMP Protocol... -
Page 35: Trigger Types
Reading Codes with the DataMan 8600 Trigger Types The DataMan 8600 trigger mode determines when the reader attempts to read a code. Use the DataMan Setup Tool or the appropriate reader configuration codes to change trigger types. The following trigger types are supported: Presentation: The LED aimer is always on. -
Page 36: Cleaning And Maintenance
Cleaning and Maintenance Cleaning and Maintenance Cleaning the Reader Housing To clean the outside of the reader housing, use a small amount of mild detergent cleaner or isopropyl alcohol on a cleaning cloth. Do not pour the cleaner directly onto the reader housing. CAUTION: Do not attempt to clean any DataMan product with harsh or corrosive solvents, including lye, methyl ethyl ketone (MEK) or gasoline. -
Page 37: Compliance Information, Warnings And Notices
For assistance, contact Cognex Corporation at http://support.cognex.com. Regulations/Conformity The DataMan 8600 has Regulatory Model 1AAT, the the wireless slide-in has Regulatory model 1ABB, and the Bluetooth slide-in has Regulatory model 1AAJ, and meets or exceeds the requirements of all applicable standards organizations for safe operation. - Page 38 EN55024 For wifi: EN300 328 EN61000-6-2 Safety and Regulatory Cognex Corporation Manufacturer One Vision Drive Natick, MA 01760 USA This is a class A product. In a domestic environment this product may cause radio interference in which case the user may be required to take immediate measures. This equipment complies with the essential requirements of the EU Directive 2014/30/EU.
-
Page 39: Compliance Statements: Dataman Base Station
Class 2 Laser device. For European Community Users Cognex complies with Directive 2012/19/EU OF THE EUROPEAN PARLIAMENT AND OF THE COUNCIL of 4 July 2012 on waste electrical and electronic equipment (WEEE). - Page 40 Compliance For European Community Users Cognex complies with Directive 2012/19/EU OF THE EUROPEAN PARLIAMENT AND OF THE COUNCIL of 4 July 2012 on waste electrical and electronic equipment (WEEE). This product has required the extraction and use of natural resources for its production. It may contain hazardous substances that could impact health and the environment, if not properly disposed.
-
Page 41: 中 国 大 陆 Rohs (Information For China Rohs Compliance)
Compliance Information, Warnings and Notices 中 国 大 陆 RoHS (Information for China RoHS Compliance) 根据中国大陆《 电子信息产品污染控制管理办法》 ( 也称为中国大陆RoHS), 以下部份列出了本产品中可能包含的有 毒有害物质或元素的名称和含量。 Table of toxic and hazardous substances/elements and their content, as required by China’s management methods for controlling pollution by electronic information products. Hazardous Substances 有害物质... -
Page 42: Reader Control Codes
Reader Control Codes Reader Control Codes Keyboard Language (Corded Readers Only) -
Page 43: Precautions
LASER LIGHT, DO NOT STARE INTO BEAM: CLASS 2 LASER PRODUCT. FAILURE TO FOLLOW THESE INSTRUCTIONS MAY CAUSE SERIOUS INJURY. To reduce the risk of injury or equipment damage, observe the following precautions when you install the Cognex product: Route cables and wires away from high-current wiring or high-voltage power sources to reduce the risk of damage or malfunction from the following causes: over-voltage, line noise, electrostatic discharge (ESD), power surges, or other irregularities in the power supply. - Page 44 Copyright © 2019 Cognex Corporation. All Rights Reserved.
Need help?
Do you have a question about the DataMan 8600 and is the answer not in the manual?
Questions and answers