Table of Contents
Advertisement
Quick Links
Advertisement
Table of Contents

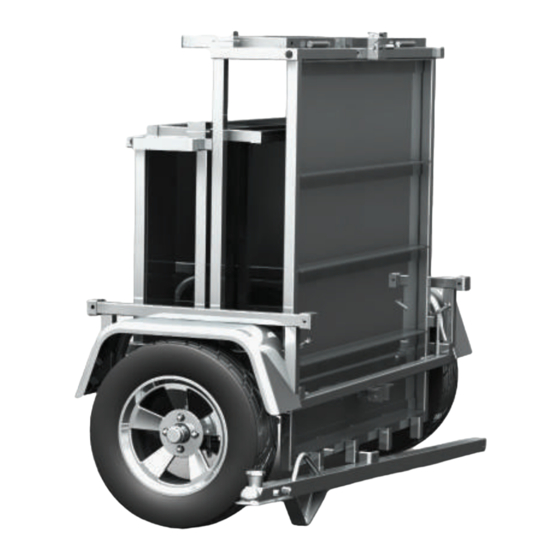
Summary of Contents for Apogee Adapt-X Optimax
- Page 1 USER MANUAL Optimax FOR THE...
- Page 2 THANK YOU FOR CHOOSING APOGEE Apogee is a company based on innovation and excellence, which aims to bring to market products that stand out. We aim to redefine the standard of excel- lence of the utility trailer with Optimax , unique trailers that will satisfy you. We...
-
Page 3: Table Of Contents
CONTENTS Important information ...........................4 Specification ...............................5 Storage (Closing) .............................6 1. Closing the rear section .......................6 2. Closing the front section......................10 Unfolding the trailer ..........................14 1. Hitch extender and opening the front section ..............14 2. Opening the rear section ......................16 Loading/unloading methods ...................... -
Page 4: Important Information
IMPORTANT INFORMATION If you suffer from a bad back, joint pains or have any other physical condition which effects your ability to handle heavy loads, we strongly recommend you do not use this trailer. In this manual, the level of risk of a potential hazard is indicated as follows: WARNING: Indicates a hazardous situation which if not avoided could result in death or serious injury. -
Page 5: Specification
Pressure: 550 kPa (80 psi) max Wheel torque: 75 N.m (55 ft-lb) Inside Inside Overall Load Mass GVWR dimensions dimensions width capacity Model (lbs/kg) (lbs/kg) (in) (cm) (in/cm) (lbs/kg) Adapt-X Optimax 49.5 x 98.5 125.7 x 250.2 71.5/181.6 325/147 1984/900 1659/753... -
Page 6: Storage (Closing)
STORAGE (CLOSING) To securely close your Optimax trailer and avoid any damages to it, please carefully follow the instructions below. OBSERVATION: First close the rear section then the front section. The closing operations must be performed on a flat surface. 1. - Page 7 Figure 1: Remove the hitch pins Figure 2: Rear section...
- Page 8 Figure 3: Lift up the rear section Figure 4: Close the rear section...
- Page 9 Figure 5: Storage location for hitch pins when in the closed position Figure 6: Storage location for hitch pins when in the closed position (continued)
-
Page 10: Closing The Front Section
3. CLOSING THE FRONT SECTION To close the front section follow the instructions below. If necessary, consult Figures 7 to 12. 3.1. Remove the hitch pins from the front section. Fig. 1 3.2. Remove the tipping pin. Fig. 7 3.3. Disconnect the electrical wiring harness between the front section and the tongue. - Page 11 Figure 7: Tipping pin Figure 8: Lift up the front section...
- Page 12 Figure 9: Close the front section Figure 10: Storage location for hitch pins when in the locked position...
- Page 13 Figure 11: Tip the trailer onto the stops of the rear section Figure 12: Remove the tongue pin...
-
Page 14: Unfolding The Trailer
CAUTION: Be careful if you have to move the trailer when it is in the locked position because it could tip over. UNFOLDING THE TRAILER To securely open your Optimax trailer and avoid any damages to it, please carefully follow the instructions below. OBSERVATION: First you must attach the tongue, then open the front section followed by the rear section. - Page 15 1.4. Stand in front of the trailer and unfold the front section. 1.5. Insert the tipping pin. Fig. 7 1.6. Connect the electrical wiring harness between the front section and the tongue. Figure 13: Trailer tipped onto the stops on the rear section Rear stops Figure 14: Tongue attached to the trailer...
-
Page 16: Opening The Rear Section
Figure 15: Unfolded front section 2. OPENING THE REAR SECTION To open the rear section follow the instructions below. If necessary, consult Figures 16 and 17. 2.1. Remove the hitch pins from the rear section. 2.2. Check that the tailgate pins are in position. Fig. 16 CAUTION: If the tailgate pins are not in position, the tailgate could open when you at- tempt to open the rear section. - Page 17 Figure 16: Tailgate pins Figure 17: Opening the rear section Figure 18: Trailer unfolded with hitch pins in position The trailer is now ready to use.
-
Page 18: Loading/Unloading Methods
EXTENDING THE FLOOR OF THE TRAILER Opening of the front and rear panels The front and rear panels can be opened in order to extend the floor of the trailer. 1.1. Take out the pins of the panel you wish to open. 1.2. -
Page 19: Tipping
TIPPING The trailer can also be used in a tipping position as illustrated in Figure 20. OBSERVATION: Remember to disconnect the electrical wiring harness between the front sec- tion and the tongue when using the trailer in the tipping position. 1.1. -
Page 20: Towing
TOWING Apogee Trailers uses a two-inch coupler (2", 5.08 cm) Check that the size of the trailer ball of the towing vehicle is the same size as the coupler. To attach your trailer follow the instructions below. 1. Open the clamping device on the coupler and attach the trailer to it. -
Page 21: Load Distribution
LOAD DISTRIBUTION When loading the trailer it is important to distribute the load. To do this, check that the weight on the trailer ball is not too small (risk of jackknifing), or too heavy (restricted by the capacity of the hitch and the towing vehicle). This weight must be approximately 10% of the load and must not exceed 15%. -
Page 22: Warranty Information
This warranty is not transferable. Apogee Trailers offers a warranty of two (2) years from the date of purchase on the aluminium frame which includes any damages to the frame, welding defects or electrical wiring faults subject to normal use of the trailer. - Page 24 Apogee Trailers 519 –103, Rue J Oswald Forest Saint-Roch-de-l’Achigan, (Quebec) J0K 3H0 450.588.3845 Monday to Friday: 8:30 am - 5:00 pm...

Need help?
Do you have a question about the Adapt-X Optimax and is the answer not in the manual?
Questions and answers