Table of Contents
Advertisement
Advertisement
Table of Contents

Related Manuals for Audi RS 3 LMS DSG


Summary of Contents for Audi RS 3 LMS DSG
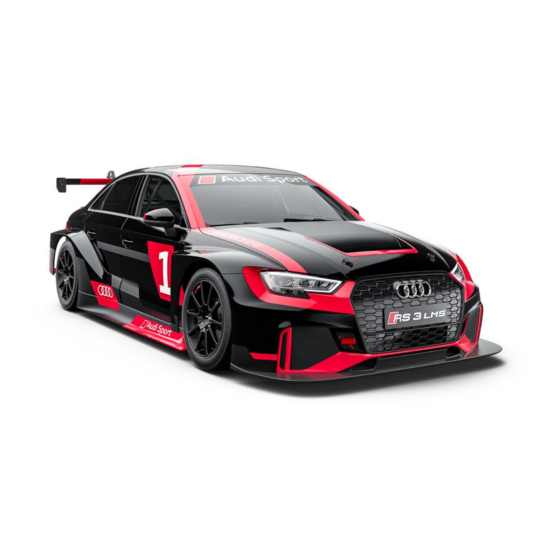
- Page 1 Audi RS 3 LMS DSG USER MANUAL 2018...
-
Page 2: Table Of Contents
INDEX TECHNICAL INFORMATION ................... 4 AUDI RS 3 LMS DSG display ................... 4 Dimensions and weight ....................5 Bodywork ........................5 Engine ........................... 6 Fuel tank ........................7 Power transmission..................... 7 Chassis ......................... 8 Electronic units ......................9 DRIVER CONTROLS ......................9 Main panel ........................ - Page 3 Kinematics ........................35 Brakes ......................... 37 Aerodynamics ......................38 Driving position ......................39 WORKSHOP MAINTENANCE ..................42 First roll-out ........................ 42 Check-list ........................42 Body-shell and engine identification ............... 43 Fluids ........................... 44 Engine ......................... 44 Air filter ........................44 DSG gearbox ......................
-
Page 4: Technical Information
TECHNICAL INFORMATION AUDI RS 3 LMS DSG display Engine \ Type Four-cylinder in line 2.0 TFSI \ Layout Transversally mounted in front axle \ Capacity 1984 cc \ Bore / stroke 82.5 mm / 92.8 mm \ Output 257 kW (350 hp) / 6250 rpm... -
Page 5: Dimensions And Weight
Distribution weight/power 3,47 kg/hp Notes: Measured from the rear bumper to the end of rear wing profile. ** The scrutineering dimensions and minimum weight are the ones on the Audi RS 3 LMS DSG Technical Form. Bodywork Part number Description... -
Page 6: Engine
Windscreen Glass Left / right front door window Glass Left / right rear door window Glass Left / right rear triangle window Glass Rear window Glass Engine Engine features Description... -
Page 7: Fuel Tank
Type 2,0 TFSI / Turbocharged and direct fuel injection Engine identification Cylinder capacity 1984 cc Corrected cylinder capacity 1984x1,7 = 3372,8 cc Maximum power 257 kW (350 hp) at 6250 rpm Maximum torque 420 Nm / from 2500 to 5500 rpm Maximum rpm 6800 rpm Specific power... -
Page 8: Chassis
Clutch Standard double clutch Gearbox Direct-shift gearbox (DSG) Gearbox mode control Electronic lever on main console Gearbox shift control Paddle-shift on steering wheel Gearbox control unit Mechatornic in oil bath Gearbox cooling system Oil-water exchanger Downshift over-rev protection Electronically activated with memory function Differential VAQ electro-hydraulic with 3 modes available Differential mode control... -
Page 9: Electronic Units
Modification allowed: Notes: Use always spare parts from Audi Sport. Although the mentioned parts derive from series cars, the software and codifications are different and modified by Audi Sport. All series modules used on the car are based in the MQB platform. Through the diagnostic tools available on the VW AG dealers, it is possible to diagnostic any malfunction. -
Page 10: Main Panel
Through the driver display you can check the front and rear brake pressure and the brake balance. Notes: To start the car, always proceed in this order: main switch, wait until display has booted (Audi Sport logo disappears), then ignition switch. The correct procedure to stop the car is the following: Stop the engine using only the yellow switch (ignition switch/KL-15). - Page 11 Button Function Remarks Driver voice activation Radio Maintain pushed to talk Full Course 4 variable* speeds (40/50/60/80) Yellow Short push to activate/deactivate Double short push to activate 120 limiter Single short push to deactivate Cockpit fan Short push to activate/deactivate Change display Short push to change display page / rolling change page...
-
Page 12: Speed Limiter (Pit Limiter/Full Course Yellow/120 Limiter)
LED 2: fast blinking red + POP UP: Very low oil pressure. Big risk to break the turbo or to damage the engine. Audi Sport recommends slowing down and entering to the pit-lane or stopping in a safe place. -
Page 13: Gearbox Functioning
LED 4 + LED 8: fast blinking green + POP UP: Hand brake is locked while you are driving. Audi Sport recommends unlocking the hand brake and entering to the pit-lane to check if the rear brake callipers have been damaged. -
Page 14: Standing Start Procedure
It is possible to put on this P mode if the car is complete stopped and brake pedal pressed. IMPORTANT: never try to put on P mode if the car is not completely stopped, it may cause fatal damages on the gearbox. ... -
Page 15: Driver Has To Consider
Rear brake pressure proportioning valve The lever type proportioning valve provides 7 distinct settings from which to produce the most suitable braking ratio. The brake balance should be biased towards the rear so that with the valve piped in to the rear line and set in position 7 where virtually no reductions occurs, the balance is as much to the rear as will ever be needed. - Page 16 Progressively start reducing again the brake pressure to cold down the brakes slowly during the in lap. Do not just stop braking because this can produce a very fast cooling and cause cracks because of thermal shocks. When returning to the track, come up progressively to race speed and pressure.
-
Page 17: Electronics
ELECTRONICS AIM MXG MXG is the AIM dash-logger designed to acquire and display in FHD data coming from your ECU, the internal accelerometer and gyro, as well as from the GPS module, analog/digital inputs and predefined math channels. Downloading data can be done through a data download cable, a memory stick or using the available Wi-Fi features. -
Page 18: Mxg Connection Schemes
Note: IMPORTANT: the change of the alarms or shift lights is under user responsibility. Car is delivered with Audi Sport recommendation. Before changing them it is advisable to do a backup of the standard configuration. MXG connection schemes Scheme 1: Data-logger standard connection scheme (car delivery). -
Page 19: Data Acquisition
Channel expansion module and sensors are available through AIM dealers, not Audi Sport. If for any reason it is necessary to send data acquisition files to Audi Sport, following data file extensions must be sent: .drk, .gpk and .xrk. -
Page 20: Fusebox
0 … 14 POS_GBOX Gearbox position 0 … 8 N_DSG_GEAR Gear 0 … 14 POS_GEAR_LEVER Gear lever position 80 … 145 T_DSG_OIL Gearbox oil temperature °C 1 … 3 POS_DIF_MAP Diff map position 80 … 145 T_DIF_LAMELLA Diff temperature °C 0 …... - Page 21 Internally, the thermal fuses reset automatically, so changing a fuse will never be necessary. In case of malfunction it has to be sent to Audi Sport. It is also possible to check if a fuse has blown in the fusebox, so you will know if the current or signal was sent.
- Page 22 Channel name Bit number Data value Description bit8 -------8 Sadev pump bit7 ------7- HR-ECU bit6 -----6-- HR-Fuel pump bit5 ----5--- Starter FLAG_FBX_F5 bit4 ---4---- Radio bit3 --3----- HR-Lambda bit2 -2------ HR-Miscellaneous bit1 1------- HR-Injectors bit8 -------8 MR-ignition coils bit7 ------7- Sadev-ELV bit6 -----6--...
-
Page 23: Fuel Level Display
Fuel level display All new Audi RS 3 LMS cars have a fuel display to control the fuel remaining at the tank. It is tied to the roll cage in the rear right door area. The display has to be set after each refuelling. This setting is very important to get the correct fuel level because it is calculated by the fuel consumption sent from the engine ECU. - Page 24 Terminology: Following, the terminology description to understand future command tables: Llp: Left long push (>1s) Rlp: Right long push (>1s) Lsp: Left short push (<1s) Rsp: Right short push (<1s) STout: Short Timeout (1s) LTout: Long Timeout (8s) Fuel level adjustment: This menu allows the following possibilities:...
-
Page 25: Auxiliary Connectors
Long left push will scroll menu on the other side. “Auto” will adjust automatically the brightness. Else, use right / left touch to increase / decrease light level. *** “dot” mode will light on only one led on the bar graph. “bAr” mode will light on all leds beginning from the left side up to the level point. - Page 26 Two connectors are available connected to the dash logger. Auxiliary analogic sensors Matching connector 191 972 713 Pin-out Terminal FS 2,8 x 0,8 signal FS 2,8 x 0,8 FS 2,8 x 0,8 #3: Additional power supply It can be used for any requirement. Additional power supply Matching connector 191 972 714...
- Page 27 #8: Additional headlights This auxiliary connector is placed behind the left front headlight, under the engine ECU. All Audi RS 3 LMS cars are provided without additional headlights but this connector is ready for a plug and play solution that allows the driver to turn additional headlights from the steering wheel.
-
Page 28: Fire Extinguisher
Fire extinguisher All Audi RS 3 LMS cars are delivered with an OMP fire extinguisher placed on the boot area. Fulfilling all FIA safety regulations, the extinguisher can be detonated from the cockpit area using the push button of the control box placed in the main console or from the outside by a switch on the lowest part of the windscreen. -
Page 29: Setting Adjustments
Standard set-up Notes: Due to production issues, this recommended set up may differ from the car delivery set up. Audi Sport recommends doing your own check. The use of ballast as fuel weight during set-up process is recommended to ensure the cross... -
Page 30: Steering Rack Centring
Steering rack centring As the steering rack is electric, the steering angle sensor has to be electronically aligned with the wheels at the aligning time. Before aligning, it is necessary fix the steering wheel. To do it, it is recommended to use straps fixed between the roll cage and the steering wheel. -
Page 31: Rear Camber And Toe Adjustments
Wishbone regulation Camber Toe regulation 1,5 turns = 10’ camber -5.8° 9,5 turns 12 turns -5,5° 7 turns 8,3 turns -5° 3,5 turns 4,5 turns -4,5° -4° -3,5 turns -4 turns -3,8° -6 turns -7 turns Note: Take care with the maximum and minimum camber. Although physically the camber adjuster can reach higher values, it is not recommended due the drive shaft limitations. - Page 32 170-60-100 Rear use recommended 170-60-90 (car delivery - rear) Rear use recommended The dampers specifications are the following: Front dampers Aluminium outer housing Bilstein damper 2-way adjustable with 10 clicks in bump and 10 in rebound 110 mm travel 20 mm upright height regulation 20 mm bump stop (5000 N / 4 mm) Rear dampers Aluminium outer housing Bilstein damper...
- Page 33 Adjustment range of front dampers:...
-
Page 34: Anti-Roll Bars
Adjustment range of rear dampers: Anti-roll bars Front anti-roll bars available: 22x2 and 22x3. Car delivery: 22x3. FRONT ARB ⌀ (mm) Thickness (mm) Chassis Roll Stiffness from ARB Hard (Nm/°Chassis) 1548 2021 Mid (Nm/°Chassis) 1293 Soft (Nm/°Chassis) Rear anti-roll bars available: 22x3 and 22x4. Car delivery: 22x3. - Page 35 Kinematics Front Rear Wheel ratio 1 mm wheel / 0,9 mm damper FRONT...
- Page 36 REAR...
- Page 37 Brakes ...
- Page 38 P_BRK_FRONT BRK_BALANCE = ∗ 100 P_BRK_FRONT + P_BRK_REAR Aerodynamics It is strongly recommended checking periodically that all bodyworks and their fixations are in good conditions.
- Page 39 On the following chapter how to adjust the driving position is explained. Seat Audi Sport customer racing PS-3 FIA GT3 homologated safety seat 2 sizes available upon request: Standard and S size 3 seat to chassis brackets different in length available: 30, and 80 mm.
- Page 40 Option A: recommended for small drivers Option B: recommended for tall drivers Notes: Check the homologation label expiry date. Check always that the belts and the driver are well fixed. Steering column Height and length adjustable 3 steering column hubs different in length available: 100, and 140 mm (car delivery) AIM MXG display bracket adjustable in 2 positions:...
- Page 41 AIM MXG adjustable bracket Pedal box Length adjustable in 5 position (car delivery - medium position) Tilton racing pedal assembly with brake balance bar 90° foot stopper on throttle pedal right side Pedal box adjustment points...
- Page 42 WORKSHOP MAINTENANCE First roll-out Audi Sport checks all the cars in a roll-out before customer delivery. This roll-out consists in: 5 circuit laps. High speed in a long straight. Start rev limiter checking simulating a standing start.
- Page 43 Body-shell and engine identification V.I.N. (Vehicle Identification Number) is welded on the roll cage. Engine number CJX-XXXXXX Engine seals: boost, distribution and oil sump...
- Page 44 Change the engine oil and oil filter at the indicated mileage. Engine spare parts must be from VW group or Audi Sport original parts, detailed on the Audi RS 3 LMS Spare Parts Catalogue. Use always the fluids detailed above, User Manual point 5.4.
- Page 45 Disassemble filter assembly by removing the four small screws at the bottom (intake side) of the outer-body and pull out the filter element. Tap the filter gently to dislodge the larger debris that have collected, do not use compressed air as you could damage the paper elements.
- Page 46 Oil filter and oil must be the recommended ones. All gearbox spares must be Audi Sport original parts, detailed on the Audi RS 3 LMS Spare Parts Catalogue. If there is no oil leakage it is not necessary any level control.
- Page 47 Contact Audi Sport and send it for service when the recommended service mileage is reached. Torque Remarks Oil level check cap 15 Nm Change every time How to change the VAQ oil: To replace the oil is recommended to disassemble the unit from the car.
- Page 48 Refuelling process: Prepare an external bottle with the desired amount of fuel. It is recommended using a ground cable on the bottle to avoid static electrical discharges. Open the fuel tank cover, connect the refuelling hose with the socket to the fuel tank plug (#1 on the picture below) and the fuel will flow inside.
- Page 49 Secondly, Audi Sport has developed a new electronic tool to activate the fuel tank pump both manually or with an automatic function. Fuel draining process: Connect the electronic tool on the fuel pump connector (#2 on the picture above), placed on the fuel tank, and the power supply on the auxiliary battery connector (#3).
- Page 50 Airjacks The Audi RS 3 LMS is provided with a three ⌀ 50mm Krontec airjack system. The connecting valve is placed on the rear right side, inside the road car refuelling cover. Airlance and car plug dismounted view:...
- Page 51 Airjack dismounted view: Notes: Maximum air pressure is 30 bar. Inlet thread of the airlance is M16x1.5 IMPORTANT: never work under a vehicle supported only by airjacks unless safety props are fitted. Jacks must be vertical during operation. Mounting brackets or clamps to be fitted to threaded section of body only.
- Page 52 PARTS MILEAGE To check the car mileage, use the odometer available on the AIM MXG display. A reset can be done through the display menu or using RaceStudio3 on a laptop.
Need help?
Do you have a question about the RS 3 LMS DSG and is the answer not in the manual?
Questions and answers