Fortinet FortiGate FortiGate-3016B Install Manual
Fortios 3.0 mr6
Hide thumbs
Also See for FortiGate FortiGate-3016B:
- Install manual (66 pages) ,
- Quick start manual (2 pages)
Table of Contents
Advertisement
Quick Links
Download this manual
See also:
Installation Manual
Advertisement
Table of Contents

Related Manuals for Fortinet FortiGate FortiGate-3016B


Summary of Contents for Fortinet FortiGate FortiGate-3016B
- Page 1 I N S T A L L G U I D E FortiGate-3016B FortiOS 3.0 MR6 www.fortinet.com...
- Page 2 FortiOS 3.0 MR6 18 March 2008 01-30006-0458-20080318 © Copyright 2008 Fortinet, Inc. All rights reserved. No part of this publication including text, examples, diagrams or illustrations may be reproduced, transmitted, or translated in any form or by any means, electronic, mechanical, manual, optical or otherwise, for any purpose, without prior written permission of Fortinet, Inc.
-
Page 3: Table Of Contents
Document conventions... 8 Typographic conventions ... 9 Further Reading ... 9 Fortinet Knowledge Center ... 10 Comments on Fortinet technical documentation ... 10 Customer service and technical support ... 10 Installing ... 11 Environmental specifications... 11 Cautions and warnings ... 12 Grounding ... - Page 4 Advanced configuration... 33 AMC modules ... 39 Configure a DNS server ... 24 Adding a default route and gateway ... 24 Adding firewall policies ... 25 Configuring Transparent mode... 25 Using the web-based manager ... 26 Switching to Transparent mode... 26 Configure a DNS server ...
- Page 5 Contents FortiGate Firmware ... 45 Downloading firmware ... 45 Using the web-based manager... 45 Upgrading the firmware ... 45 Reverting to a previous version... 46 Backup and Restore from a USB key ... 47 Using the USB Auto-Install... 47 Using the CLI... 48 Reverting to a previous version...
- Page 6 Contents FortiGate-3016B FortiOS 3.0 MR6 Install Guide 01-30006-0458-20080318...
-
Page 7: Introduction
Introduction Introduction Welcome and thank you for selecting Fortinet products for your real-time network protection. The FortiGate Unified Threat Management System improves network security, reduces network misuse and abuse, and helps you use communications resources more efficiently without compromising the performance of your network. -
Page 8: About The Fortigate-3016B
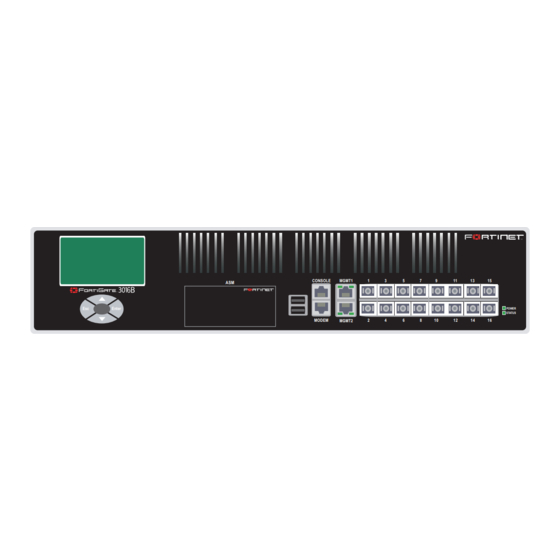
Ethernet interfaces and a full complement of network protection features. Each interface of the FortiGate-3016B provides wire-speed firewall performance using Fortinet's advanced FortiASIC network processor technology. Multiple FortiGate-3016Bs can be deployed in redundant clusters to ensure failsafe operation. All FortiGate-3016B fiber ports use hardware acceleration, for enhanced network performance. -
Page 9: Typographic Conventions
CLI command syntax Document names Menu commands Program output Variables Further Reading The most up-to-date publications and previous releases of Fortinet product documentation are available from the Fortinet Technical Documentation web site at http://docs.forticare.com. The following FortiGate • FortiGate QuickStart Guide Provides basic information about connecting and installing a FortiGate unit. -
Page 10: Fortinet Knowledge Center
Please send information about any errors or omissions in this document, or any Fortinet technical documentation, to techdoc@fortinet.com. Fortinet Technical Support provides services designed to make sure that your Fortinet systems install quickly, configure easily, and operate reliably in your network. -
Page 11: Installing
Installing Installing This chapter describes installing your FortiGate unit in your server room, environmental specifications and how to mount the FortiGate in a rack if applicable. This chapter contains the following topics: • Environmental specifications • Cautions and warnings • Plugging in the FortiGate •... -
Page 12: Cautions And Warnings
Cautions and warnings Cautions and warnings Grounding Rack mount instructions Mounting • Connect the equipment into an outlet on a circuit different from that to which the receiver is connected. • Consult the dealer or an experienced radio/TV technician for help. The equipment compliance with FCC radiation exposure limit set forth for uncontrolled Environment. - Page 13 For rack mounting, use the mounting brackets and screws included with the FortiGate unit. Note: Fortinet recommends purchasing side rail mounts or similar rack mount aids separately to ensure the FortiGate unit is attached safely to the rack. Caution: Depending on the size of your FortiGate unit, avoid personal injury, you may require two or more people to install the unit in the rack.
-
Page 14: Plugging In The Fortigate
Plugging in the FortiGate Plugging in the FortiGate The following photos illustrate how the mounting brackets and FortiGate unit should be attached to the rack. Figure 2: Mounting in a rack The FortiGate unit does not have an on/off switch. To power on the FortiGate unit Connect the power cables to the power connections on the back of the FortiGate unit. -
Page 15: Connecting To The Network
Installing Connecting to the network Using the supplied Ethernet cable, connect one end of the cable to your router or modem, whatever the connection is to the Internet. Connect the other end to the FortiGate unit. Connect to either the External, WAN port, or port 1. Connect additional cable to the Internal port or port 2 and your internal hub or switch. - Page 16 Turning off the FortiGate unit Installing FortiGate-3016B FortiOS 3.0 MR6 Install Guide 01-30006-0458-20080318...
-
Page 17: Configuring
VPN and firewall policies. NAT mode In NAT/Route mode, the FortiGate unit is visible to the network. Like a router, all its interfaces are on different subnets. In NAT mode, each port is on a different subnet, enabling you to have a single IP address available to the public Internet. -
Page 18: Transparent Mode
Router You typically use the FortiGate unit in Transparent mode on a private network behind an existing firewall or behind a router. The FortiGate unit performs firewall functions, IPSec VPN, virus scanning, IPS web filtering, and Spam filtering. To configure, maintain and administer the FortiGate unit, you need to connect to it. -
Page 19: Connecting To The Cli
Configuring To support a secure HTTPS authentication method, the FortiGate unit ships with a self-signed security certificate, which is offered to remote clients whenever they initiate a HTTPS connection to the FortiGate unit. When you connect, the FortiGate unit displays two security warnings in a browser. The first warning prompts you to accept and optionally install the FortiGate unit’s self-signed security certificate. -
Page 20: Configuring Nat Mode
IP addresses, use one of these IP addresses. Alternatively, you can use, or borrow, the IP address of a configured interface on the router. You may need to do this to minimize the number of unique IP addresses within your network. -
Page 21: Configure A Dns Server
Internet. A DNS server matches domain names with the computer IP address. This enables you to use readable locations, such as fortinet.com when browsing the Internet. DNS server IP addresses are typically provided by your internet service provider. -
Page 22: Adding Firewall Policies
Go to Router > Static. Select Edit for the default route In the Gateway field, type the IP address of the next-hop router where outbound traffic is directed. If the FortiGate unit reaches the next-hop router through a different interface (compared to the interface that is currently selected in the Device field), select the name of the interface from the Device field. -
Page 23: Using The Cli
Configuring Set the following and select OK. Source Interface Source Address Destination Interface Select the port connected to the network. Destination Address All Schedule Service Action Firewall policy configuration is the same in NAT/Route mode and Transparent mode. Note that these policies allow all traffic through. No protection profiles have been applied. -
Page 24: Configure A Dns Server
Internet. A DNS server matches domain names with the computer IP address. This enables you to use readable locations, such as fortinet.com when browsing the Internet. DNS server IP addresses are typically provided by your internet service provider. -
Page 25: Adding Firewall Policies
For details on adding additional static routes, see the FortiGate Administration Guide. To modify the default gateway config router static Adding firewall policies Firewall policies enable traffic to flow through the FortiGate interfaces. Firewall policies to define the FortiGate unit process the packets in a communication session. -
Page 26: Using The Web-Based Manager
Internet. A DNS server matches domain names with the computer IP address. This enables you to use readable locations, such as fortinet.com when browsing the Internet. DNS server IP addresses are typically provided by your internet service provider. -
Page 27: Using The Cli
Configuring To add an outgoing traffic firewall policy Go to Firewall > Policy. Select Create New. Set the following and select OK. Source Interface Source Address Destination Interface Select the port connected to the Internet. Destination Address All Schedule Service Action To add an incoming traffic firewall policy Go to Firewall >... -
Page 28: Configure A Dns Server
Internet. A DNS server matches domain names with the computer IP address. This enables you to use readable locations, such as fortinet.com when browsing the Internet. DNS server IP addresses are typically provided by your internet service provider. -
Page 29: Verify The Configuration
Configuring Verify the configuration Your FortiGate unit is now configured and connected to the network. To verify the FortiGate unit is connected and configured correctly, use your web browser to browse a web site, or use your email client to send and receive email. If you cannot browse to the web site or retrieve/send email from your account, review the previous steps to ensure all information was entered correctly and try again. -
Page 30: Restoring A Configuration
Restoring a configuration Restoring a configuration Additional configuration Set the time and date Set the Administrator password Should you need to restore the configuration file, use the following steps. To restore the FortiGate configuration Go to System > Maintenance > Backup & Restore. Select to upload the restore file from your PC or a USB key. -
Page 31: Configure Fortiguard
FortiGate unit. Before you can begin receiving updates, you must register your FortiGate unit from the Fortinet web page. For information about registering your FortiGate unit, “Register your FortiGate unit” on page... - Page 32 Additional configuration Configuring FortiGate-3016B FortiOS 3.0 MR6 Install Guide 01-30006-0458-20080318...
-
Page 33: Advanced Configuration
Advanced configuration Advanced configuration The FortiGate unit and the FortiOS operating system provide a wide range of features that enable you to control network and internet traffic and protect your network. This chapter describes some of these options and how to configure them. -
Page 34: Firewall Policies
Firewall policies Firewall policies Apply virus scanning and web content blocking to HTTP traffic. Unfiltered Apply no scanning, blocking or IPS. Use the unfiltered content profile if no content protection for content traffic is required. Add this protection profile to firewall policies for connections between highly trusted or highly secure networks where content does not need to be protected. -
Page 35: Configuring Firewall Policies
• Virus scan - The virus definitions are kept up to date through the FortiNet Distribution Network. The list is updated on a regular basis so you do not have to wait for a firmware upgrade. Note that you must register the FortiGate unit to and purchase FortiGuard services to use virus scanning through the FDN. -
Page 36: Antispam Options
FortiGuard is an antispam system from Fortinet that includes an IP address black list, a URL black list, and spam filtering tools. The FortiGuard Center accepts submission of spam email messages as well as well as reports of false positives. -
Page 37: Web Filtering
Advanced configuration Banned word lists are specific words that may be typically found in email. The FortiGate unit searches for words or patterns in email messages. If matches are found, values assigned to the words are totalled. If the defined threshold value is exceeded, the message is marked as spam. -
Page 38: Logging
To configure URL filters, go to Web Filter > URL Filter. FortiGuard web filtering is a managed web filtering solution provided by Fortinet. FortiGuard web filtering sorts hundreds of millions of web pages into a wide range of categories users can allow, block, or monitor. -
Page 39: Amc Modules
AMC modules AMC modules FortiGate AMC modules enable you to expand your FortiGate unit and network environment. These modules enable you to provide small packet performance though optical or copper transceivers. A hard disk module enables you to quarantine files and store log information. Modules are available in single-width and double-width components. -
Page 40: Removing Modules
Remove the panel block on the FortiGate unit using the hot swap latch. Pull the latch on the module to the extended position. Insert the FortiGate module into the empty slot in the chassis. Ensure the Fortinet logo is right-side up. It should be on the upper-right corner of the module. -
Page 41: Formatting The Hard Disk
AMC modules Note: The FortiGate-3810A supports only one FortiGate-ASM-S08 hard disk module. Formatting the hard disk When you first install the ASM-S08 in the FortiGate unit, the hard disk may not be formatted. This will result in an error in the console when starting up the FortiGate unit, indicating that the hard drive could not be mounted. -
Page 42: Log Configuration Using The Cli
Using the AMC modules ASM-FB4 and ADM-XB2 modules Upload rolled files in Select to compress the log files before uploading. gzipped format Delete files after Select to remove the log files once the FTP upoad has completed. uploading Log configuration using the CLI Configure the FortiGate unit to log to the ASM-S08 using the CLI within the FortiAnalyzer command config log disk setting enable. - Page 43 AMC modules For these multi-mode SFP interfaces, SerDes is the default mode. You can use a CLI command to change the interface to operate in SGMII mode. Depending on the type of transceivers you install, you need to configure the FortiGate unit or module for the transceiver using the CLI.
-
Page 44: Configure The Speed
You must also ensure the speed for the interface is correct for the installed transceiver. Forcing the speed could result in link failure and disrupted service. Fortinet recommends enabling link speed auto negotiation by setting speed to auto. Use the following command to configure the auto speed setting:... -
Page 45: Fortigate Firmware
• Testing new firmware before installing Downloading firmware Firmware images for all FortiGate units is available on the Fortinet Customer Support web site. You must register your FortiGate unit to access firmware images. Register the FortiGate unit by visiting select Product Registration. -
Page 46: Reverting To A Previous Version
Using the web-based manager Reverting to a previous version To upgrade the firmware Download the firmware image file to your management computer. Log into the web-based manager as the admin administrative user. Go to System > Status. Under System Information > Firmware Version, select Update. Type the path and filename of the firmware image file, or select Browse and locate the file. -
Page 47: Backup And Restore From A Usb Key
FortiGate Firmware Backup and Restore from a USB key Use a USB key to either backup a configuration file or restore a configuration file. You should always make sure a USB key is properly install before proceeding since the FortiGate unit must recognize that the key is installed in its USB port. Note: You can only save VPN certificates if you encrypt the file. -
Page 48: Using The Cli
Using the CLI Using the CLI Installing firmware replaces your current antivirus and attack definitions, along with the definitions included with the firmware release you are installing. After you install new firmware, make sure that antivirus and attack definitions are up to date. You can also use the CLI command execute update-now to update the antivirus and attack definitions. -
Page 49: Reverting To A Previous Version
FortiGate Firmware Reverting to a previous version This procedure reverts the FortiGate unit to its factory default configuration and deletes IPS custom signatures, web content lists, email filtering lists, and changes to replacement messages. Before beginning this procedure, it is recommended that you: •... -
Page 50: Installing Firmware From A System Reboot Using The Cli
Installing firmware from a system reboot using the CLI Installing firmware from a system reboot using the CLI The FortiGate unit uploads the firmware image file. After the file uploads, a message similar to the following appears: Get image from tftp server OK. Check image OK. - Page 51 FortiGate Firmware To confirm the FortiGate unit can connect to the TFTP server, use the following command to ping the computer running the TFTP server. For example, if the IP address of the TFTP server is 192.168.1.168: execute ping 192.168.1.168 Enter the following command to restart the FortiGate unit.
-
Page 52: Restoring The Previous Configuration
Installing firmware from a system reboot using the CLI Restoring the previous configuration Backup and Restore from a USB key Using the USB Auto-Install Type D. The FortiGate unit installs the new firmware image and restarts. The installation might take a few minutes to complete. Change the internal interface address, if required. -
Page 53: Additional Cli Commands For A Usb Key
FortiGate Firmware Note: You need an unencrypted configuration file for this feature. Also the default files, image.out and system.conf, must be in the root directory of the USB key. Note: Make sure at least FortiOS v3.0MR1 is installed on the FortiGate unit before installing. - Page 54 Testing new firmware before installing To test the new firmware image Connect to the CLI using a RJ-45 to DB-9 or null modem cable. Make sure the TFTP server is running. Copy the new firmware image file to the root directory of the TFTP server. Make sure the internal interface is connected to the same integer as the TFTP server.
- Page 55 FortiGate Firmware Enter the firmware image file name and press Enter. The TFTP server uploads the firmware image file to the FortiGate unit and the following appears. Save as Default firmware/Backup firmware/Run image without saving: [D/B/R] Type R. The FortiGate image is installed to system memory and the FortiGate unit starts running the new firmware image, but with its current configuration.
- Page 56 Testing new firmware before installing FortiGate Firmware FortiGate-3016B FortiOS 3.0 MR6 Install Guide 01-30006-0458-20080318...
-
Page 57: Index
53 testing new firmware 53 upgrade from CLI 48 upgrade with web-based manager 45 upgrading using the CLI 48 FortiGuard 31 Fortinet Knowledge Center 10 further reading 9 gateway 21, 24 grounding 12 humidity 11 Initial Disc Timeout 20... - Page 58 PADT timeout 21 password, changing 30 power off 15 PPPoE 24 protection profiles 33 registering 7 restore 30 restoring previous firmware configuration 52 reverting firmware 46 security certificate 19 shielded twisted pair 12 shut down 15 signatures, update 31 static route 21, 24 system reboot, installing 50 technical support 10 TFTP server 50...
- Page 59 Index FortiGate-3016B FortiOS 3.0 MR6 Install Guide 01-30006-0458-20080318...
- Page 60 Index FortiGate-3016B FortiOS 3.0 MR6 Install Guide 01-30006-0458-20080318...
- Page 61 www.fortinet.com...
- Page 62 www.fortinet.com...
Need help?
Do you have a question about the FortiGate FortiGate-3016B and is the answer not in the manual?
Questions and answers