ABB Welcome M22311 Series User Manual
4.3" video hands-free indoor station
Hide thumbs
Also See for Welcome M22311 Series:
- User manual (40 pages) ,
- Manual (52 pages) ,
- Product manual (32 pages)
Table of Contents
Advertisement
Quick Links
Advertisement
Table of Contents

Related Manuals for ABB Welcome M22311 Series


Summary of Contents for ABB Welcome M22311 Series
- Page 1 VER:1.1 │ │ 06.07.2016 ABB-Welcome Pos : 2 /Di nA4 - Anleitung en Online/Inhalt/KN X/D oorEntr y/83220- AP- xxx/Titelbl att - 83220-AP- xxx - ABB @ 19\mod_1323249806476_15.doc x @ 111084 @ @ 1 M22311-. M22313-. 4.3" Video hands-free indoor station...
-
Page 2: Table Of Contents
Pos : 4 /Busch-J aeger (Neus truktur)/M odul-Str uktur/Online-Dokumentation/Inhal ts verz eic hnis (--> Fü r alle D okumente <--)/Inhalts verz eichnis @ 19\mod_1320649044386_15.doc x @ 109653 @ @ 1 Safety ......................3 Intended use ....................3 Environment ....................3 ABB devices ................. 3 Operations ..................... 5 Standard operations ..............5 4.1.1 Control elements ................ -
Page 3: Safety
ABB devices Pos : 13 /Busc h-J aeg er (Neustr uktur)/Modul- Struktur /Online-Dokumentati on/U mwel t (--> Fü r alle D okumente <--)/Hinweis e/Hi nweis - U mwelt - ABB El ektr ogeräte @ 19\mod_1323162745839_15.doc x @ 110867 @ @ 1 All packaging materials and devices from ABB bear the markings and test seals for proper disposal. - Page 4 ABB-Welcome ABB products meet the legal requirements, in particular the laws governing electronic and electrical devices and the REACH ordinance. (EU-Directive 2002/96/EG WEEE and 2002/95/EG RoHS) (EU-REACH ordinance and law for the implementation of the ordinance (EG) No.1907/2006) — 4 —...
-
Page 5: Operations
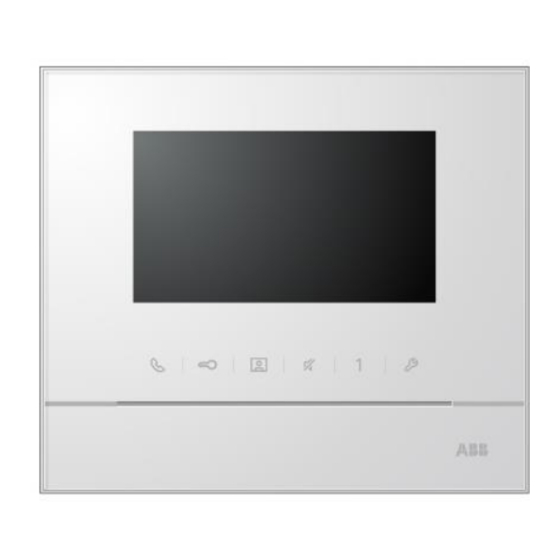
ABB-Welcome Pos : 18 /DinA4 - Anl eitungen Onli ne/Ueberschriften/1./Bedi enung @ 18\mod_1302613924165_15.doc x @ 103365 @ 1 @ 1 Operations Pos : 19 /DinA4 - Anl eitungen Onli ne/Ueberschriften/2./Nor maler Betrieb @ 18\mod_1302768820965_15.doc x @ 103540 @ 2 @ 1 Standard operations Pos : 20 /DinA4 - Anl eitungen Onli ne/Ueberschriften/3./Bedi enel emente @ 20\mod_1323260220559_15.doc x @ 111647 @ 3 @ 1... - Page 6 ABB-Welcome Functions 4.3" Color display Communication button 2A For incoming call, press this button within 30 seconds to activate communication. Press it again to end the call. 2B In standby mode, press this button to enter the communication menu. 2C In standby mode, hold this button to activate the broadcast function (if the multi-indoor station is installed in the same apartment).
- Page 7 ABB-Welcome Programmable button 1 6A Release the lock connected with an outdoor station (COM-NC-NO) (default function). 6B In standby mode, hold this button for 3 seconds to send SOS alarm to the guard unit. If LED flashes slowly, SOS alarm was sent to guard unit successfully.
-
Page 8: Control Actions
ABB-Welcome Pos : 26 /DinA4 - Anl eitungen Onli ne/Ueberschriften/2./Bedi enaktionen @ 20\mod_1323262294281_15.doc x @ 111911 @ 2 @ 1 Control actions Pos : 27 /DinA4 - Anl eitungen Onli ne/Ueberschriften/3./Sprec h- und Videover bindung @ 20\mod_1323262368700_15.doc x @ 111927 @ 3 @ 1 4.2.1... -
Page 9: Display And Volume Settings During A Call
ABB-Welcome Pos : 30 /DinA4 - Anl eitungen Onli ne/Ueberschriften/3./Tuer oeffnen @ 20\mod_1323263277453_15.doc x @ 111935 @ 3 @ 1 4.2.2 Display and volume settings during a call Pos : 31 /DinA4 - Anl eitungen Onli ne/Inhalt/KN X/D oor Entr y/83220-AP- xxx/T uer oeffnen - 83220- AP- xxx @ 20\mod_1323267958479_15.doc x @ 112109 @ @ 1... -
Page 10: Communication Menu
ABB-Welcome Pos : 33 /DinA4 - Anl eitungen Onli ne/Ueberschriften/3./Stumm s chalten @ 20\mod_1323263607142_15.doc x @ 111951 @ 3 @ 1 Pos : 66 /Busc h-J aeg er (Neustr uktur)/Modul- Struktur /Online-Dokumentati on/Steuermodul e - Onli ne-D okumentation (--> F ü r all e D okumente <--)/++++++++++++ Seitenumbruc h ++++++++++++ @ 9\mod_1268898668093_0.doc x @ 52149 @ @ 1 4.2.3... - Page 11 ABB-Welcome 4.2.3.3 Call to guard unit CALL GUARD UNIT Call Guard Unit Fig. 5: Call to guard unit 4.2.3.4 Broadcast BROADCAST Long-pressing “√“ button to broadcast Fig. 6: Broadcast call — 11 —...
- Page 12 ABB-Welcome 4.2.3.5 Switch actuator SWITCH ACTUATOR Actuator 1 (001) Fig. 7: Switch actuator Set the actuator list in the “system settings-switch actuator” menu first. After choosing a list, press button √ to enable the lock or light that is connected to the switch actuator.
-
Page 13: Settings
ABB-Welcome Settings 4.3.1 Overview Press button to enter the system settings menu. The following functions are available: Functions Intercom settings -Set intercom lists among different apartments or within the same apartment Switch actuator -Set the actuator list in this menu... -
Page 14: Intercom Call Settings
ABB-Welcome 4.3.2 Intercom call settings Intercom 1 (001) Intercom 2 Add New Fig. 8: Intercom settings menu Functions Choose the previous selection or scroll up Choose the next selection or scroll down Confirm the selection you choose or enter to edit it Return to the previous screen Add a new intercom list. - Page 15 ABB-Welcome Add a new list INTERCOM External Intercom Call Type Target Address Rename mike Save Cancel Fig. 9: Add a new intercom Functions Enter to choose the call type: -an external intercom means a call from different apartments -an internal intercom means a call within the same apartment Enter to change the target address, from 001 to 250.
-
Page 16: Switch Actuator Settings
ABB-Welcome 4.3.3 Switch actuator settings SWITCH ACTUATOR Actuator 1 (001) Add New Add a new list SWITCH ACTUATOR Target Address Rename light Save Cancel Fig. 10: Switch actuator settings Functions Existing switch actuator list. Press button √ to modify the settings. -
Page 17: Program Button Settings
ABB-Welcome 4.3.4 Program button settings PROGRAM BUTTON Button 1 Release 2nd-Lock Fig. 11: Program button settings Functions Set functions for the program button, e.g. releasing second lock, calling guard unit, intercom call, enabling the switch actuator. *Second lock means the lock is connected with an outdoor station (NC-NO-... -
Page 18: Call Forward Settings
ABB-Welcome 4.3.5 Call forward settings CALL FORWARD √ Call Forward Call Type Indoor Target Address Save Cancel Fig. 12: Call forward settings Functions Enable/disable the call forward function. Enter to choose a call type, including indoor or guard unit. Enter to change the target address if the call type is an indoor station. -
Page 19: Auto Unlock Settings
ABB-Welcome 4.3.6 Auto unlock settings AUTO UNLOCK √ Auto Unlock √ Time 1 Time 2 : : : : Fig. 13: Auto unlock settings Functions Enable/disable the auto unlock function. Enable/disable the auto unlock during Time 1. Set starting time and ending time for Time 1 Enable/disable auto unlock during Time 2. -
Page 20: Outdoor Station Password Settings
ABB-Welcome 4.3.7 Outdoor station password settings SET OS PASSWORD √ Enable Password 12345678 Enter Password (3-8 digits) Fig. 14: Outdoor station password settings Functions Enable/disable the password functions Enter a 3-8 digit password. *only available with the keypad. *The function can only be set in the master indoor station. -
Page 21: Ringtone Settings
ABB-Welcome 4.3.8 Ringtone settings RING TONE Ring Tone 1 Default Outdoor Ring Tone 2 Other Outdoors Ring Tone 3 Doorbell Ring Tone 4 Others Fig. 15: Ringtone Functions Select the bell sound for the default outdoor station. Select the bell sound for other outdoor stations. -
Page 22: Volume Settings
ABB-Welcome 4.3.9 Volume settings VOLUME Volume 3 Ringtone Volume √ Touchbutton Tone √ Repeated Tone Fig. 16: Volume settings Functions Set the volume of bell sound. Enable/disable the feedback tone that sounds when the touch button is pressed. The ringtone can be set as fixed or cycled. -
Page 23: Date And Time Settings
ABB-Welcome 4.3.10 Date and time settings DATE AND TIME 2013 Date(YYYY-MM-DD) : Time Summer Time √ Fig. 17: Date and time settings Functions Set the date. Set the time. Enable/disable the summertime function. — 23 —... -
Page 24: Other Settings
ABB-Welcome 4.3.11 Other settings OTHER SETTINGS Auto Full Screen √ √ Door Status Check √ Auto-snapshots √ Missed Call Fig. 18: Other settings Functions Enable/disable the auto full screen function. Enable/disable the door status check function (only available if sensor is installed with outdoor station);... -
Page 25: Blacklist Settings
ABB-Welcome 4.3.12 Blacklist settings BLACKLIST Blacklist 1 (001) Add New BLACKLIST Target Address Save Cancel Fig. 19: Blacklist settings Functions Existing blacklist: Press button √ to modify the settings. Add new blacklist(s). A total of 32 blacklists can be added. -
Page 26: History Review
ABB-Welcome 4.3.13 History review HISTORY 1/63 2013-03-21 Outdoor - 1 ● 16:45 ● 2013-03-21 Outdoor - 1 16:45 ● 2013-03-21 Outdoor - 1 14:24 Outdoor -1 Fig. 20: History review Functions Up to 100 events can be recorded in the history menu. - Page 27 ABB-Welcome means missed calls Press this button to view details of this event. Two photos are always made when a visitor rings the bell. Press this button to delete a recorded item. — 27 —...
-
Page 28: Camera List
ABB-Welcome 4.3.14 Camera list CAMERA LIST The list is disabled Outdoor1-1 Outdoor1-2 Camera1 CAMERA LIST- Camera 1 Enable √ Front door Rename √ Visible doorbell Save Cancel — 28 —... - Page 29 ABB-Welcome Functions Display status of the camera list. Only if the list is enable, user can make an surveilliance according to this list, and also user can edit each surveilliance object in the list. Display the camera from camera interface.
-
Page 30: Language Settings
ABB-Welcome 4.3.15 Language settings LANGUAGE English Franç aise Italiano Español Português Fig. 21: Language settings 4.3.16 Information INFORMATION Flash Version: V2.07_150629 MCU Version: V2.07_150703 M/S: Master Indoor St. Add.: Default Outdoor: Fig. 22: Information for outdoor station. (Scan QR code to get detailed instructions.) -
Page 31: Reseting Factory Default
ABB-Welcome 4.3.17 Reseting factory default RESET FACTORY DEFAULT Are you sure to reset? Reset All Settings √ Clear All Data × Cancel Fig. 23: Resetting factory defaults Functions Reset all settings: Reset the device and restore all default configurations. The operation does not delete the programmed data and history such as intercom lists and switch actuator lists. -
Page 32: Cleaning
ABB-Welcome Pos : 67 /DinA4 - Anl eitungen Onli ne/Ueberschriften/2./Rei nigung @ 19\mod_1310733980533_15.doc x @ 107853 @ 2 @ 1 Cleaning Pos : 68 /DinA4 - Anl eitungen Onli ne/Inhalt/KN X/D oor Entr y/Rei nigung/Rei nigung Touc hscreenmonitor @ 19\mod_1310734108978_15.doc x @ 107862 @ @ 1 Caution Risk of damage to the screen surface. -
Page 33: Adjusting The Device
ABB-Welcome Pos : 70 /DinA4 - Anl eitungen Onli ne/Ueberschriften/2./Geraeteei nstellungen @ 18\mod_1302768847744_15.doc x @ 103548 @ 2 @ 1 Adjusting the device Pos : 71 /DinA4 - Anl eitungen Onli ne/Ueberschriften/3./Absc hlus s widerstand @ 19\mod_1321958079906_15.doc x @ 110083 @ 3 @ 1 Pos : 72 /DinA4 - Anl eitungen Onli ne/Inhalt/KN X/D oor Entr y/Bedienung/Absc hl uss widerstand setzen 83220-AP- xxx @ 19\mod_1310723392369_15.doc x @ 107841 @ @ 1... -
Page 34: Technical Data
ABB-Welcome Pos : 76 /DinA4 - Anl eitungen Onli ne/Ueberschriften/1./Tec hnisc he D aten @ 18\mod_1302615863001_15.doc x @ 103416 @ 1 @ 1 Technical data Pos : 77 /DinA4 - Anl eitungen Onli ne/Inhalt/KN X/D oor Entr y/83220-AP- xxx/T ec hnische D aten - 83220-AP- xxx @ 18\mod_1303212854559_15.doc x @ 103705 @ @ 1... -
Page 35: Mounting/Installation
ABB-Welcome Pos : 79 /Busc h-J aeg er (Neustr uktur)/Modul- Struktur /Online-Dokumentati on/Übersc hriften (--> Fü r alle D okumente <--)/1. Ebene/M - O/Montage / Installation @ 18\mod_1302613966111_15.doc x @ 103373 @ 1 @ 1 Mounting/Installation Pos : 80 /Busc h-J aeg er (Neustr uktur)/Modul- Struktur /Online-Dokumentati on/Sic herheit (--> Fü r alle Dokumente <--)/Warnhinweis e/Sic herheit - Ni eders pannungs- und 230 V-Leitungen @ 18 \mod_1302617821491_15.doc x @ 103465 @ @ 1... -
Page 36: General Installation Instructions
ABB-Welcome General installation instructions • Terminate all branches of the wiring system via a connected bus device (e.g., indoor station, outdoor station, system device). • Do not install the system controller directly next to the bell transformer and other power supplies (to avoid interference). -
Page 37: Mounting
ABB-Welcome Pos : 84 /Busc h-J aeg er (Neustr uktur)/Modul- Struktur /Online-Dokumentati on/Übersc hriften (--> Fü r alle D okumente <--)/2. Ebene/M - O/Montage @ 18\mod_1302615960458_15.doc x @ 103424 @ 2 @ 1 Mounting Pos : 85.1 /DinA4 - Anl eitungen Onli ne/Inhalt/KN X/DoorEntr y/83220-AP- xxx/M ontag e - M odul e/Montage - Montagedose -- 83220-AP- xxx @ 19\mod_1323250406848_15.doc x @ 111098 @ @ 1 Recommended installation height 1.5 meters (4.9 feet) - Page 38 ABB-Welcome Installation dimension The bottom of the device has screw holes for fastening on the wall according to the above dimension instructions. In addition, the bottom of the device can be fixed to the existing flush -mounted box. The dimension of the compatible flush-mounted box is shown in illustration above.
- Page 39 ABB-Welcome Settings Set addresses of the preferred outdoor stations and the address of the indoor station on the jumper. (See Chapter 4.5, Adjusting the device.) Three types of installation: Surface-mounted Mounted on the wall Affix the bottom of the device to the wall.
- Page 40 ABB-Welcome Desktop-mounted Mounted with desktop bracket Affix the bottom of the device to the desktop bracket. Latch the upper part of the device onto the bottom part. Place the upper side of the device on the lock-in lugs and then press the bottom side onto the bottom part of the device until it is caught by the clamp.
- Page 41 ABB-Welcome Latch the upper part of the device onto the bottom part. Place the upper side of the device on the lock-in lugs and then press the bottom side onto the bottom part of the device until it is caught by the clamp.
- Page 42 ABB-Welcome 1. Attach a pair of supporting brackets to the back cover of the indoor station. Place 4 screws through the back cover and attach with 4 claw brackets. attach 2. Rotate 4 claw brackets to to the supporting brackets and pull the rubber bands around the corner of the claw brackets to fix the claws.
- Page 43 We reserve the right to, at any time, make technical changes or changes in the content of this document without prior notice. The detailed specifications agreed to at the time of ordering appl ies to all orders. ABB accepts no responsibility for possible errors or incompleteness in this document.