Table of Contents
Advertisement
Quick Links
Advertisement
Table of Contents

Related Manuals for Testifire 2000 Series


Summary of Contents for Testifire 2000 Series
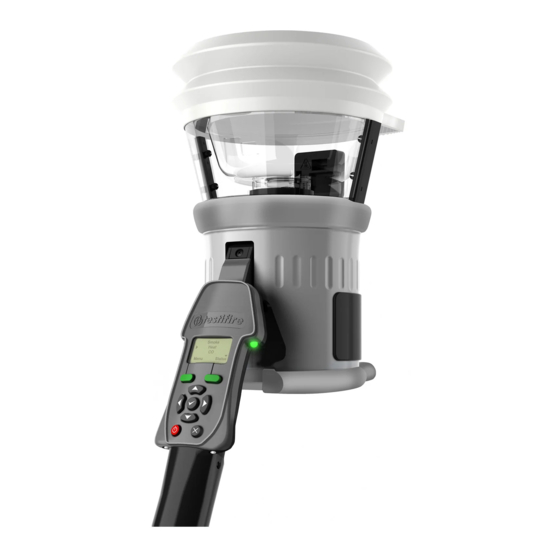
- Page 1 USER MANUAL 2000 SERIES www.detectortesters.com/testifire...
- Page 2 User Manual before using this ◦ Near to sources of static or radio waves. product. ◦ Wet or moist environments. Testifire is designed for indoor This symbol on the product indicates that this part of use only the device is susceptible to static damage.
-
Page 3: Table Of Contents
TESTIFRE INFRARED REMOTE CONTROL 1.3 RECYCLING SETTINGS 1.4 CE DECLARATION 10 REMOVING & REPLACING CONSUMABLES 28 1.5 CARE OF YOUR TESTIFIRE 10.1 REMOVING THE SMOKE CAPSULE 1.6 GENERAL CARE 10.2 REPLACING THE SMOKE CAPSULE TESTIFIRE 2000 SERIES INTRODUCTION 10.3 REMOVING THE CO CAPSULE KIT CONTENTS 10.4 REPLACING THE CO CAPSULE... -
Page 4: General Instructions
1.6 GENERAL CARE This product and its associated components are designed and DO NOT DROP OR EXPOSE TESTIFIRE TO WATER. manufactured to be fully compliant with the requirements of the Always store Testire, batteries and chargers in a suitable bag when following EU Directives for CE marking: not in use. -
Page 5: Testifire 2000 Series Introduction
Thank you for purchasing the Testifire Multi-Sensor Detector Tester This manual is designed to assist you to get the best and most efcient use of the Testire 2000 series and provides all the information required to perform routine service and maintenance tasks with ease. -
Page 6: Kit Contents
KIT CONTENTS TESTIFIRE 2001-1 SMOKE, HEAT & CO KIT CONTAINING: 1x TS3 SMOKE CAPSULE 1x TC3 CO CAPSULE 1x TESTIFIRE 2000 HEAD UNIT 1x SOLO 727 CHARGER www.detectortesters.com/testifire... - Page 7 TESTIFIRE 2001 SMOKE, HEAT & CO KIT CONTAINING: 1x TS3 SMOKE CAPSULE 1x TC3 CO CAPSULE 1x TESTIFIRE 2000 HEAD UNIT 1x SOLO 727 CHARGER www.detectortesters.com/testifire...
-
Page 8: Preparation For Use
tted to Solo Access Poles. CAUTION ENSURE CORRECT ORIENTATION WHEN INSERTING WARNING THE BATTERY BATON INTO TESTIFIRE. DO NOT USE UNDUE FORCE TO INSERT. REMOVE BATTERY FROM DO NOT ATTEMPT TO USE OR CHARGE THE BATTERY TESTIFIRE WHEN NOT IN USE. -
Page 9: Inserting The Smoke Capsule
Smoke Capsules & TC3 CO Capsules. It DAMAGE THEM AND CONTAMINATION OF THE is recommended the capsule should be CONTACTS MUST BE AVOIDED. removed from the unit when not in use for a few days. • ALLOW THE CO CAPSULE TO COOL DOWN BEFORE REMOVING www.detectortesters.com/testifire... -
Page 10: Getting Started
4 GETTING STARTED 4.1 POWERING ON TESTIFIRE Press and hold the red power button The rst time the unit is powered-on This will display a conrmation screen. for 2 seconds. you will be prompted to select the Press the menu key to select or Testire operating language for your... -
Page 11: Interface & Main Menu
Battery requires charging Solid Red = Error Clear = Clearing Flashing Green/Red = Flashing Blue/Red/Green = Testire TimeOut Smoke/Heat/CO simultaneous test Double Flashing Green = Solid Blue/Red & Green Alternating = CO Element Cooling Smoke in progress, Heat/CO sequential test www.detectortesters.com/testifire... -
Page 12: Adjusting Head Unit Angle
The inner clear cup has a semi-circular cut-out on the side nearest to the user interface. Place your nger in the cut-out and carefully lift out the cup. This will allow for correct positioning of the high prole detector within the cup. www.detectortesters.com/testifire... -
Page 13: Single Test
This is normal and completed, Testire will time-out, highlighted Capsule Empty part of the test procedure. by the status LED flashing Red/Green Smoke Heat NOTE The amount of smoke produced may Menu Status very throughout the test www.detectortesters.com/testifire... -
Page 14: Heat Testing
Heat should be directed to the Heat Status by the status LED flashing Red/Green thermal sensor of the detector. Hi Heat Timer Rotating Testire around the detector can speed up a test on detectors with offset thermistors. www.detectortesters.com/testifire... -
Page 15: Co Testing
2. This will speed up the testing of smoke detectors as the clearing process will remove Menu Status the possibility of the detector reactivating. See Section on sequential testing for details of how to set up a sequential test. www.detectortesters.com/testifire... -
Page 16: Sequential Testing
The rst stimulus selected will be indicated To delete a test sequence, simply press by the number 1 beside it. The next the escape key to cancel your selection. stimulus in the sequential test will be indicated by the number 2 beside it. www.detectortesters.com/testifire... - Page 17 After 2 seconds raise again to begin clearing Testire will return to idle. LOWER FOR 2 SECONDS NOTE If the detector does not re-enter the cup within 10 seconds, the test sequence will reset and return to the rst test of the programmed sequence. www.detectortesters.com/testifire...
-
Page 18: Smoke Test + Heat Test
Press the press the enter key to select. when the head unit is placed over the enter key to select smoke. detector, breaking the infrared beam. Smoke 1 Smoke 1 Heat Heat 2 Menu Status Menu Status www.detectortesters.com/testifire... - Page 19 After 2 seconds raise again to begin the heat test Testire will return to idle. LOWER FOR 2 SECONDS NOTE If the detector does not re-enter the cup within 10 seconds, the test sequence will reset and return to the rst test of the programmed sequence. www.detectortesters.com/testifire...
-
Page 20: Smoke Test + Clear + Heat Test
Press the press the enter key to select. tests are now programmed and ready to enter key to select smoke. begin. Smoke 1 Heat Heat 3 Heat Clear 2 Clear 2 Menu Status Menu Status Menu Status www.detectortesters.com/testifire... - Page 21 Breaking the infrared beam. LOWER FOR 2 SECONDS Raise Testire after desired clearing time to begin When the detector is activated, remove Testire by the heat test. lowering it gently. Testire will return to idle ready for the next detector. www.detectortesters.com/testifire...
-
Page 22: Smoke + Clear + Heat + Co Test
Status Move the cursor to heat and select. Move the cursor to CO and select. All four tests are now programmed and ready to begin. Heat 3 Heat 3 CO 4 Clear 2 Clear 2 Menu Status Menu Status www.detectortesters.com/testifire... - Page 23 CO heater element. The status LED will double flash Green with longer gaps between the flashes. Once the CO heater element temperature has been reduced LOWER FOR 2 SECONDS Testire will return to idle, ready for the next test. www.detectortesters.com/testifire...
-
Page 24: Simultaneous Testing
Depending on the detection system being tested, there may be no individual indication of the activation simply press the escape key to cancel of the separate sensors in the detector. The system may activate on one sensor only. your selection. www.detectortesters.com/testifire... -
Page 25: Testifre Infrared Remote Control
8 TESTIFIRE INFRARED REMOTE CONTROL (AVAILABLE SEPARATELY) 8.1 TESTIFIRE 25 Some types of detector may not automatically initiate a test as they enter the clear cup of Testire. The Infrared Remote Control can be used to manually start a test, and/or move on to the next test in the sequence. Aim the infrared beam LED at the Testire head unit when it is at height and use... -
Page 26: Settings
Testire support by emailing Serial Number, Software Version and the support@detectortesters.com Hardware Version. Warranty information Smoke can also be viewed. Heat Clear Menu Status System Info Warranty Testifire 1000 S.N. 4316049 Help Tech Support - V7.3.2 Info testifire.com/ V2.2.0 Test Counter support/... - Page 27 System Reset will remove all user customisable on the screen shows ‘Service Required’, but the unit is settings, including programmed test sequences, working, then disable the reminder and continue using the timer and selected language. your Testire. Service Reminder System Reset Cancel www.detectortesters.com/testifire...
-
Page 28: Removing & Replacing Consumables
Holding the capsule by the spring clips Close the access cover securely. cap from the capsule. with the label on the underside, insert the capsule. Ensure that the clips spring out positively on both sides of the capsule to engage correctly with the port. www.detectortesters.com/testifire... -
Page 29: Removing The Co Capsule
Holding the capsule by the spring clips Close the access cover securely. from the capsule. with the label facing upwards, insert the capsule. Ensure that the clips spring out positively on both sides of the capsule to engage correctly with the port. www.detectortesters.com/testifire... -
Page 30: Removing The Battery
CAUTION ENSURE CORRECT ORIENTATION WHEN INSERTING THE BATTERY BATON INTO TESTIFIRE. DO NOT USE UNDUE FORCE TO INSERT. REMOVE BATTERY FROM TESTIFIRE WHEN NOT IN USE. Hold the Testire head unit by the handle and press the upper spring button on the Battery Baton. -
Page 31: Removing & Replacing Spares
Line up the membrane with the two flat supports nearest the smoke/heat duct. Work the membrane round the plastic cup, making sure the cup ts into the slot in the membrane. Finally, pull the membrane over the last edge of the cup. www.detectortesters.com/testifire... -
Page 32: Consumables & Accessories
Membrane SPARE-1049-001 Inner Cup SPARE-1048-001 Battery Baton Solo 770-001 Charger Solo 727-001 Testifire 25 Infrared Remote Control Testifire 25-001 Additional Items Solo 100 Telescopic Access Pole Solo 100-001 Solo 101 Extension Pole Solo 101-001 Solo 110 Urban Telescopic Pole Solo110-001... -
Page 33: Technical Specifications
Power Source Battery Baton: nominal 7.2V 3.0Ah NiMH rechargeable battery pack with internal overcurrent protection connects directly to Testifire with no leads or wires. Must be charged by Solo 727 Battery Charger (using 100-230VAC or 12VDC input). Battery Charge Time Approx. -
Page 34: Troubleshooting & Support
& SUPPORT If you experience any type of problem with your Testire, turn the While your hand is inside the test cup, and Testifire pro- power off, wait for a few seconds and then turn the power back on. grammed to Clear, air will be blow out of the duct and aid This may clear the fault. - Page 35 www.detectortesters.com/testifire...
- Page 36 No Climb Products Ltd Edison House,163 Dixons Hill Road, www.detectortesters.com/testifire Welham Green Hertfordshire, AL9 7JE, United Kingdom Tel: +44 (0) 1707 282 760 Fax: +44 (0) 1707 282 777 Info@detectortesters.com As our policy is one of continuous improvement, details of products described within this publication are subject to change without notice. All information provided here is believed to be correct at the time of going to press.
Need help?
Do you have a question about the 2000 Series and is the answer not in the manual?
Questions and answers