Table of Contents
Advertisement
I
N
S
T
A
L
L
A
I
N
S
T
A
L
L
A
I
N
S
T
A
L
L
A
I
N
S
T
A
L
L
A
I
N
S
T
A
L
L
A
T
I
O
I
N
S
T
A
L
L
A
T
I
O
I
N
S
T
A
L
L
A
T
I
N
S
T
A
L
L
A
T
I
N
S
T
A
L
A
I
N
S
T
A
L
A
PHOTOELECTRIC
SAFETY BARRIER
VISION VX
Z
I
O
N
E
,
U
S
O
Z
I
O
N
E
,
U
S
O
T
I
O
N
,
U
S
E
A
N
T
I
O
N
,
U
S
E
A
N
,
U
T
I
L
I
S
A
T
I
N
,
U
T
I
L
I
S
A
T
I
I
O
N
,
B
E
D
I
E
N
U
I
O
N
,
B
E
D
I
E
N
U
C
I
Ó
N
,
U
S
O
Y
C
I
Ó
N
,
U
S
O
Y
www.reer.it
E
M
A
N
U
T
E
N
Z
E
M
A
N
U
T
E
N
Z
D
M
A
I
N
T
E
N
A
N
D
M
A
I
N
T
E
N
O
N
E
T
M
A
I
N
T
O
N
E
T
M
A
I
N
T
N
G
U
N
D
W
A
N
G
U
N
D
W
A
M
A
N
T
E
N
I
M
I
E
M
A
N
T
E
N
I
M
I
E
I
O
N
E
I
O
N
E
N
C
E
A
N
C
E
E
N
A
N
C
E
E
N
A
N
C
E
R
T
U
N
G
R
T
U
N
G
N
T
O
N
T
O
Advertisement
Table of Contents

Related Manuals for Reer VISION VX


Summary of Contents for Reer VISION VX
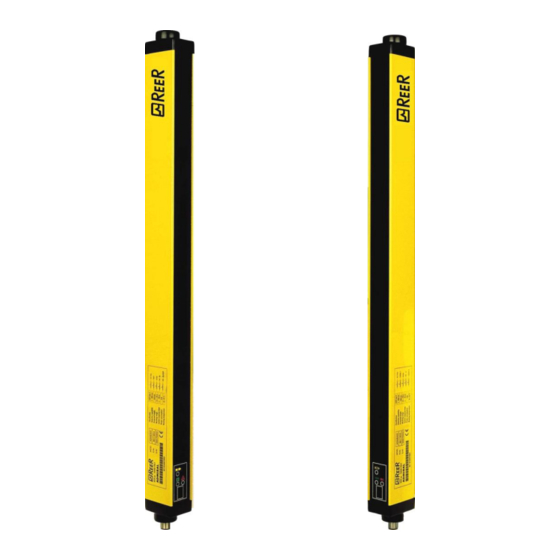
- Page 1 PHOTOELECTRIC SAFETY BARRIER VISION VX Ó Ó www.reer.it...
-
Page 2: Table Of Contents
PHOTOELECTRIC SAFETY BARRIER VISION VX INSTALLATION USE AND MAINTENANCE INDICE INTRODUCTION ........................2 NEW SAFETY PARAMETERS FOR TYPE 2 BARRIERS AND MANDATORY LABELLING ..3 OPERATION ......................... 4 INSTALLATION ........................5 POSITION ............................6 MASTER/SLAVE POSITIONING ....................6 SAFETY DISTANCE CALCULATION ....................8 VERTICAL POSITION OF THE BARRIER ..................9 HORIZONTAL POSITION OF THE BARRIER ................ -
Page 3: Introduction
Its non-observance can cause a very serious risk for the exposed personnel. INTRODUCTION The VISION VX photoelectric barrier is a multi-beam optoelectronic safety system. It belongs to the family of Type 2 electrosensitive devices for the protection of personnel exposed to risks arising from the use of hazardous machinery or plant, according to standards IEC 61496-1,2 and EN 61496-1. -
Page 4: New Safety Parameters For Type 2 Barriers And Mandatory Labelling
NEW SAFETY PARAMETERS FOR TYPE 2 BARRIERS AND MANDATORY LABELLING With the publication of Edition 3 of the harmonized EN 61496-1 standard it is no longer possible to use a Type 2 safety light barrier for safety functions assessed as SIL 2 / PL d. -
Page 5: Operation
– 50 mm and 90 mm (protected height from 300 mm to 1800 mm) PROTECTION OF ARMS AND LEGS VISION VX is available also in the Multibeam and Long Range configuration with the following lens pitch: – 500mm (2 beams), 400mm (3 beams), 300mm (4 beams). -
Page 6: Installation
INSTALLATION Before installing the VISION VX safety system, make sure that: The safety system is only used as a stopping device and not as a machine control device. The machine control can be actuated electrically. All dangerous machine movements can be interrupted immediately. In particular, the machine stopping times must be known and, if necessary, measured. -
Page 7: Position
The recommended Cf factors are shown in the table below: ENVIRONMENTAL CONDITION CORRECTION FACTOR Cf 0.25 Steam 0.50 Dust 0.50 Dense fumes 0.25 If the device is installed in places that are subject to sudden changes in temperature, the appropriate precautions must be taken in order to prevent the formation of condensation on the lenses, which could have an adverse effect on monitoring. - Page 8 In addition to the standard VISION models, VISION VX is available in the MASTER/SLAVE configuration. Such configuration is made of two pairs of light curtains, where the two emitters and the two receivers are respectively connected in series. The most common application is shown in Figure 3: the horizontal light curtain (A) has been installed to detect the presence of a person between the vertical light curtain (B) and the dangerous machine at system power-up or restart.
-
Page 9: Safety Distance Calculation
SAFETY DISTANCE CALCULATION The barrier must be installed at a distance that is greater than or equal to the minimum safety distance S, so that a dangerous point can only be reached after all hazardous machine movements have stopped (Figure 5). According to European standard EN999, the minimum safety distance S must be calculated using the following formula: S = K (t... -
Page 10: Vertical Position Of The Barrier
VERTICAL POSITION OF THE BARRIER 20 mm resolution models. These models are suitable for the protection of fingers. 30 mm and 40 mm resolution models. point of safety barrier danger These models are suitable for the protection of hands. -
Page 11: Horizontal Position Of The Barrier
point of Multibeam Models. danger These models are suitable for the protection of safety the entire body and must not be used to protect barrier arms or legs. The minimum safety distance S is calculated according to the following formula: direction S = 1600 (t ) + 850... -
Page 12: Electrical Connections
ELECTRICAL CONNECTIONS WARNINGS Before making the electrical connections, make sure that the supply voltage complies with that specified in the technical data sheet. Emitter and Receiver units must be supplied with 24Vdc±20% power. The external power supply must comply with the standard EN 60204-1. The electrical connections must be made according to the diagrams in this manual. -
Page 13: Emitter Connections
EMITTER CONNECTIONS VX/VXM/VXS - 5 poles M12 connector (power-supply). VXM (Master models) - 5 poles M12 Secondary connector. COLOR NAME TYPE DESCRIPTION FUNCTIONING Brown 24VDC +24 VDC power supply Blue 0VDC 0 VDC power supply Grey INPUT Ground connection RANGE0* White According the normative Barrier configuration... -
Page 14: Warnings Regarding The Connection Cables
VXS (Slave models) - 5 poles M12 connector (power-supply) COLOR NAME TYPE DESCRIPTION FUNCTIONING Brown 24VDC +24 VDC power supply Blue 0VDC 0 VDC power supply Grey Ground connection White OSSD1 OUTPUT Safety static outputs PNP active high Black OSSD2 OUTPUT Table 4 VXM (Master models) - 5 poles M12 Secondary connector. - Page 15 Example of MASTER-SLAVE connection in MANUAL mode without external contactors K1-K2 Table 2 (Ref. Page 11) Figure 11 In order to assure a correct barrier operation, it is necessary connect the pins 2 and 4 of the Emitter according to table 2 (page 11) and to the "TEST FUNCTION"...
- Page 16 Example of MASTER-SLAVE connection in MANUAL mode with external contactors K1-K2 Table 2 (Ref. Page 11) Figure 12 In order to assure a correct barrier operation, it is necessary connect the pins 2 and 4 of the Emitter according to table 2 (page 11) and to the "TEST FUNCTION"...
- Page 17 Example of MASTER-SLAVE connection in AUTOMATIC mode without external contactors K1-K2 Table 2 (Ref. Page 11) Figure 13 In order to assure a correct barrier operation, it is necessary connect the pins 2 and 4 of the Emitter according to table 2 (page 11) and to the "TEST FUNCTION"...
- Page 18 Table 2 (Ref. Page 11) Figure 14 In order to assure a correct barrier operation, it is necessary connect the pins 2 and 4 of the Emitter according to table 2 (page 11) and to the "TEST FUNCTION" paragraph of page 25. 8540571 - 25/08/2016 - Rev.15...
- Page 19 Example of connection in MANUAL mode with external contactors K1-K2 Table 2 (Ref. Page 11) Figure 15 Example of connection in AUTOMATIC mode with external contactors K1-K2 Table 2 (Ref. Page 11) Figure 16 In order to assure a correct barrier operation, it is necessary connect the pins 2 and 4 of the Emitter according to table 2 (page 11) and to the "TEST FUNCTION"...
-
Page 20: Configuration And Operation Modes
CONFIGURATION AND OPERATION MODES The VISION VX operation mode is selected realizing appropriate connections on the M12 8 poles of the Receiver (Table 6 and Table 7). AUTOMATIC MODE The VISION VX light curtain does not dispose of a start/restart interlock circuit in automatic mode. -
Page 21: K1/K2 External Contactors Connection
+24VDC MULTIPLE SYSTEMS When more than one VISION VX system is used, precautions must be taken to avoid optical interference between them: install units so that the beam emitted by the Emitter of one system can only be received by the relative Receiver. -
Page 22: Use Of Deflection Mirrors
USE OF DEFLECTION MIRRORS In order to protect or control areas that can be accessed from more than one side, in addition to the Emitter and Receiver, one or more deflection mirrors can be installed. These mirrors enable the optical beams generated by the Emitter to be deviated on one or more sides. -
Page 23: Distance Between Reflecting Surfaces
DISTANCE BETWEEN REFLECTING SURFACES The presence of reflecting surfaces in proximity of the photoelectric barrier may generate spurious reflections that prevent monitoring. With reference to Figure 19, object A is not detected because surface S reflects the beam and closes the optical path between the Emitter and Receiver. -
Page 24: Mechanical Assembly And Optical Alignment
MECHANICAL ASSEMBLY AND OPTICAL ALIGNMENT The Emitter and the Receiver must be assembled opposite each other (at a distance specified in the technical data sheet). Use the fastening brackets and inserts supplied with the system to place the Emitter and the Receiver so that these are aligned and parallel to each other and with the connectors facing the same way. -
Page 25: Operation And Technical Data
OPERATION AND TECHNICAL DATA SIGNALS The symbols showed on the 7 segments display and the leds of emitter and receiver units are visualized depending on the system operation phase. The tables below shows the different signals (ref. Figure 22). EMITTER RECEIVER Figure 22 EMITTER SIGNALS... - Page 26 RECEIVER SIGNALS VISION VX MASTER or VX (with additional functions) Normal operation (FIXED SYMBOLS) 7 SEGMENTS DISPLAY SYMBOL MEANING RED (2) GREEN (3) YELLOW (1) System power on. Initial TEST Light-on for 10sec: Manual with feedback disabled Light-on for 10sec: Manual...
-
Page 27: Test Function
TEST FUNCTION The VISION VX barrier system features an automatic self-diagnosis function that enables it to detect response time malfunctions (with a periodic auto-test every 500ms). This safety system is permanently active and does not require any interventions from the outside. -
Page 28: Output Status
OUTPUT STATUS The VISION features two static PNP outputs on the Receiver, the status of which depends on the condition of the protected area. The maximum load allowed is 500mA at 24VDC, which corresponds to a resistive load of 48. Maxim load capacity corresponds to 2F. The meaning of the status of outputs is defined in the table below. -
Page 29: Technical Specifications
EN ISO 13849-1:2008 * Devices are not suitable for outdoor use without supplementary measures ** In case of operation of VISION VX in Master-Slave configuration, the correct total SLAVE response time must be calculated according the following formula: t tot_slave = t slave + t master + 1,8 ms... - Page 30 40 mm Resolution Models 1054 1204 1354 1504 1654 1804 Number of beams Response time (VX) Response time (VXM or VXS) 1011 1161 1311 1461 1611 1761 1911 Overall barrier ht. 1,01E-8 1,09E-8 1,17E-8 1,24E-8 1,32E-8 1,39E-8 1,47E-8 1,54E-8 1,62E-8 1,69E-8 1,77E-8 PFHd *...
-
Page 31: Dimensions
DIMENSIONS Figure 24 Emitter and Receiver 1050 1200 1350 1500 1650 1800 Model 1001 1151 1301 1451 1601 1751 1901 1060 1210 1360 1510 1660 1810 (PROTECTED AREA) Mounting 2 LS Brackets with 2 mounting inserts 3 LS Brackets with 3 mounting inserts Model VX 2B VX 3B... - Page 32 Figure 26 LL and LH TYPE fastening brackets (optional) M8 Inserts Model SP100S SP300S SP400S SP600S SP700S SP900S 1060 SP1100S 1230 SP1200S 1400 SP1300S 1450 SP1500S 1600 SP1600S 1750 SP1800S 1900 Figure 27 Fastening brackets for deviation mirrors Figure 28 Deviation mirrors 8540571 - 25/08/2016 - Rev.15...
-
Page 33: Checkouts And Maintenance
If the weak signal "d" letter appears on the Receiver display, check that: – the front surfaces are clean; – the Emitter and Receiver are aligned correctly. If the LED stays on, contact the ReeR service department. 8540571 - 25/08/2016 - Rev.15... -
Page 34: Troubleshooting
1 and 3 (OSSD) on the connector. If Overload of the OSSD necessary, adjust load reducing the static outputs current required to max 500 mA (2F) (SLAVE MODELS) Send the equipment for repair to the ReeR laboratories. 8540571 - 25/08/2016 - Rev.15... - Page 35 Carefully check the connection of terminals OSSD1 - OSSD2 1 and 3 (OSSD) on the connector. short-circuit (SLAVE MODELS) Send the equipment for repair to the ReeR laboratories. (only for MASTER and STANDARD models) Carefully check the connection of terminals 1 Overload of the OSSD static and 3 (OSSD) on the connector.
- Page 36 In any case, when faced with a system stoppage, switch the system off and then on again, to exclude any occasional electromagnetic disturbances. Should the problem persist, contact ReeR’s service department. In case of continued malfunctioning: ...
-
Page 37: Spare Parts
SPARE PARTS MODEL ARTICLE CODE AD SR1 AD SR1 Safety Relay 1330900 AD SR0 AD SR0 Safety Relay 1330902 AD SR0A AD SR0A Safety Relay 1330903 Straight 5-pin M12 female connector, 5 m cable 1330950 CD95 90° 5-pin M12 female connector, 5 m cable 1330951 CD15 Straight 5-pin M12 female connector, 15 m cable... -
Page 38: Guarantee
GUARANTEE All new VISION VX systems are guaranteed by ReeR for a period of 12 (twelve) months under normal working conditions, against defects due to faulty materials and workmanship. During the aforesaid period, ReeR promises to replace faulty parts free of charge. This guarantee covers both material and labour. - Page 39 Dichiarazione CE di conformità EC declaration of conformity Torino, 11/07/2016 REER SpA via Carcano 32 10153 – Torino Italy dichiara che le barriere fotoelettriche VISION sono Dispositivi Elettrosensibili di Sicurezza (ESPE) di : Tipo 2 (secondo la Norma IEC 61496-1(ed.3); IEC 61496-2(ed.3)) ...
- Page 40 REER S.p.A. 32 via Carcano 10153 Torino Italia Tel. +39/0112482215 r.a. Fax +39/011859867 Internet: www.reer.it e-mail: info@reer.it...
Need help?
Do you have a question about the VISION VX and is the answer not in the manual?
Questions and answers