
Related Manuals for Genevac HT-8SII


Summary of Contents for Genevac HT-8SII
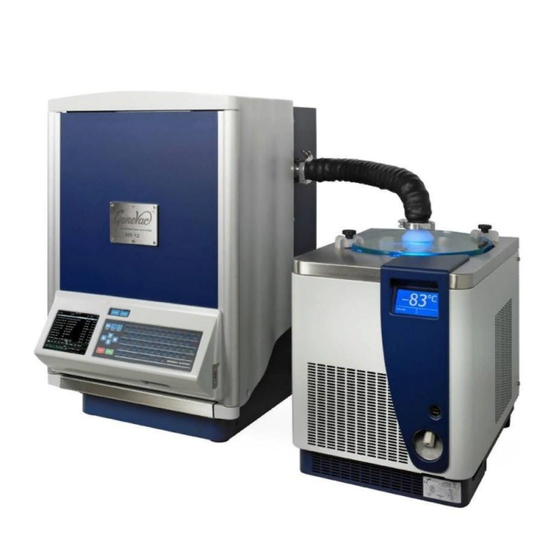
- Page 1 Genevac HT-8&12SII Evaporation System with VC6000 condenser and XDS5 vacuum pump User Manual Original instructions Part number 04-6963 Issue 1-19 August 2014...
-
Page 3: Table Of Contents
Contents Introduction ........... 2 Loading Samples ........ 32 Sample holders ........32 Safety ............. 4 Use of correct accessories ....32 Warnings and cautions ......4 Mass limit ..........33 Risk assessment ........4 Sample holders and swings ....33 Precautions .......... -
Page 4: Introduction
User Manual Introduction Genevac HT evaporation systems are designed to provide very high performance, coupled with ease of use. They are simple to set up, easy to operate and very flexible. HT-8 and HT-12SII systems comprise a vacuum pump, a cryopump-condenser unit and an evaporator which controls the system. - Page 5 User Manual Genevac HT-8 and HT-12 Automatic end of run detection software can be utilised to complete evaporation runs in the shortest possible time, opening the possibility for two or more runs to be completed in a day where previously overnight running may have been required.
-
Page 6: Safety
Make sure exhaust / ventilation hoses are securely fitted and take solvent vapours away from the equipment and from the operator Only use sample holders and / or swings that are approved for use by Genevac Do not leave the system unevenly loaded, someone may start it ... -
Page 7: Combustible Solvents
Emergency shutdown All Genevac evaporators are designed to be safe with respect to samples when they are switched off in an emergency. The system will automatically vent and the rotor will spin down slowly when power is removed. To shutdown in an emergency, switch off all power sockets at the wall and unplug (or simply unplug if there is no switch). -
Page 8: Options
Genevac HT-8 and HT-12 User Manual Options Standard equipment High power lamps Genevac HT-8 and HT-12 evaporators High power Coolheat IR lamps can feature the following equipment as significantly reduce evaporation times when standard: evaporating solvents with high latent heat of evaporation (such as water, methanol or ®... -
Page 9: Sample Holders
For further details of sample holders, contact your local Genevac representative to request a Genevac Accessories Brochure or visit the Genevac web site at www.genevac.com. 04-6963 Issue 1-19 August 2014... -
Page 10: Basic Operation
Genevac HT-8 and HT-12 User Manual Basic Operation Power up / down Before switching on, make sure three power cables are connected to mains power outlets as shown and the power to all three outlets is switched on. Evaporator power switch Pump power switch Switch on the system using the power switch on the evaporator service panel. - Page 11 User Manual Genevac HT-8 and HT-12 To start the system, press the green START button on the evaporator keypad. The vacuum pump starts and the SELECT RUN menu appears on the evaporator LCD screen. The condenser also powers up and begins to cool down to operating temperature. The system will not allow an evaporation run to commence until the condenser reaches 0°C;...
-
Page 12: Opening / Closing The Door
Genevac HT-8 and HT-12 User Manual Opening / closing the door Stand-by mode To open the door, press the OPEN button To enter stand-by mode when the system on the front panel. is idle (powered up but not evaporating), press the STOP button. The LCD screen continues to operate with reduced brightness;... -
Page 13: Controls
User Manual Genevac HT-8 and HT-12 Controls Frequently used function keys are positioned on the left hand side of the keyboard. The right side illuminates to accept input for programming via the Run data screen when required. LCD screen: Shows graphical and numerical data. -
Page 14: Lcd Screen
Genevac HT-8 and HT-12 User Manual LCD screen The illustration shows the LCD screen as it appears during an evaporation run, the graphical and numerical information shown relates to evaporation progress. Other menu screens appear during different operations and are discussed later in this User Manual. -
Page 15: Sampleguard
User Manual Genevac HT-8 and HT-12 SampleGuard™ The SampleGuard transmitter has two input connectors for SampleGuard probes, these must be connected for the SampleGurard system to function correctly. The numbers 1 and 2, embossed on the side of the SampleGuard transmitter, correspond to the SampleGuard channels shown on the LCD screen. -
Page 16: Selecting A Run
The use of Genevac Heat Transfer Plates reduces the effect by providing an even heat transfer across the plate. For details of the range of heat transfer plates that are available, contact your local Genevac representative to request a Genevac Accessories Brochure or visit the Genevac website at www.genevac.com. -
Page 17: Run In Progress
User Manual Genevac HT-8 and HT-12 Run in progress The Run Log screen provides data relating to evaporation progress, information is presented in numerical and graphical form. During evaporation, the effect of evaporative cooling (on the sample being monitored) can be seen in the divergence of the SampleGuard channel 1 and channel 2 traces. -
Page 18: End Of Run
Genevac HT-8 and HT-12 User Manual End of run This screen appears after the run finishes. Select Skip, Drain or Defrost using the numeric keys indicated. Skip: The evaporator returns to the Run Select screen. Drain: The system opens the drain valve and pumps any waste solvent into the waste solvent container. -
Page 19: Advanced Operation
User Manual Genevac HT-8 and HT-12 Advanced Operation The evaporator holds a library of up to 100 individual methods (or runs) which can be accessed using the SELECT RUN screen. Runs 50 to 99 are pre-set at the factory and are generic;... -
Page 20: Run Parameters
Genevac HT-8 and HT-12 User Manual Run parameters The following pages describe the function of each run parameter in turn and show the range of setting options available. Instructions for setting the parameter are also given. Run Data Protection The run profile can be protected against accidental alteration. Set the Run Data Protection field to No before attempting to edit an existing run profile or set to Yes to prevent accidental changes being made to the run profile. - Page 21 User Manual Genevac HT-8 and HT-12 Solvent Commonly used solvents can be selected from the window that opens (more than one solvent may be selected if using a mixture). Once selected, solvents are highlighted in blue. Select Done when the solvent or solvents have been selected. For solvents that are not listed, select Other and enter the solvent name manually (no more than 31 characters).
- Page 22 Genevac HT-8 and HT-12 User Manual Sample Volume Enter a value for the volume of sample in each individual well / tube / vial. Note: Once selections for Sample Holder Type, Sample Volume and Solvent have been made from the drop down lists, an option to Auto Program is offered.
- Page 23 User Manual Genevac HT-8 and HT-12 SampleGuard Control Temperature Enter a temperature value up to +70°C. The system heats the sample holders to this temperature. Caution: Risk to Sample Integrity; consider the possible effects on the dried sample when selecting a safe control temperature.
- Page 24 Note: When waiting to cool, the chamber temperature will not drop below the ambient temperature. If in doubt contact Genevac Applications Support for advice. 04-6963 Issue 1-19 August 2014...
- Page 25 User Manual Genevac HT-8 and HT-12 Rotor Speed Select from the options: High Increased centrifugal force (approximately 500 G) helps to hold the samples in place. Select High If using microtitre plates, very full tubes, solvents or mixtures that are prone to bumping, or if at all unsure of the any of the above.
- Page 26 Genevac HT-8 and HT-12 User Manual Heat-Off Option Select from the options: Elapsed Time Manually enter a time for the Heat-Off Option, the evaporator turns off the IR lamps when the time elapses and continues to run without heat input until the end-of-run time elapses.
- Page 27 User Manual Genevac HT-8 and HT-12 Pressure Control Regime Select from the options: Full Vacuum The evaporator reduces the pressure in the chamber to the lowest attainable level. Controlled Pressure Enter the Controlled Pressure required, the evaporator reduces the pressure in the chamber to this preset level.
-
Page 28: Run Log
Genevac HT-8 and HT-12 User Manual Run log The Run Log screen allows sample drying progress to be monitored during the evaporation process; information is presented numerically with relevant data also presented graphically to reveal change trends in real time. -
Page 29: Controls Menu
User Manual Genevac HT-8 and HT-12 Controls menu Adjust Screen Brightness: adjusts the screen viewing angle (not available on later evaporators with high contrast screens). Keypress Beep On / Off: turns off the key-press beep response. User Intervention Beeps On / Off: turns off the user-intervention beep response. -
Page 30: Data Transfer
SAVE SYSTEM INFO TO DATAKEY: For troubleshooting use by Genevac Service department COPY SETUP.INI FROM DATAKEY: For use by Genevac Service Engineers. The evaporator requires a sub-directory entitled: Series2 to be present on the data Confirmation requests or advice messages key. -
Page 31: Condenser
Shows the condenser status and refrigerant temperature. In the unlikely event of a problem, error messages are show. USB port: For use by Genevac service engineers Waste Solvent drain: Must always be connected to a waste solvent container, solvent may drain automatically during or after an evaporation run. -
Page 32: Automatic Defrost And Drain
Genevac HT-8 and HT-12 User Manual Do not use automatic end of run defrost and drain: Automatic defrost and drain When evaporating TFA or other strong Select the automatic End of Run Defrost acids. Vapour may travel back from the... -
Page 33: Manual Defrost And Drain
User Manual Genevac HT-8 and HT-12 Manual defrost and drain Waste solvent container When automatic defrost and drain cannot Check the condition of the waste solvent be used, the condenser should be defrosted container and waste solvent drain hose and drained manually. The term “manual regularly. -
Page 34: Loading Samples
For use in side-bridge swing only. Note: Some Bohdan Miniblock system sample holders exceed the mass limitations of Genevac systems. If you plan to use Bohdan Miniblocks in a Genevac system, please contact Genevac for a list of the Tube holder and side bridge swing relevant weights. -
Page 35: Mass Limit
User Manual Genevac HT-8 and HT-12 Mass limit The mass limit for Genevac HT-SII evaporators is 1.5 kg per swing. This is the total mass that can be loaded onto each position of a swung rotor, and includes: The swing ... -
Page 36: Loading The Rotor
Rotate the rotor by hand. Check that all tubes, holders, plates, etc are correctly located and swings are able to swing freely. Only use the sample holders that were supplied with the system or are specified for use with the system; never use non Genevac approved sample holders. -
Page 37: Balancing The Rotor
User Manual Genevac HT-8 and HT-12 Alternatively, two empty swings can be placed on the unused rotor positions; or Balancing the rotor better still, loads may be counter-balanced using dummy samples of a similar solvent Always make sure that swings of the same composition. -
Page 38: Method Guide
Note: Runs 99 and 100 are reserved for use by Genevac service engineers. Each of the pre-programmed runs is designed to work for a group of solvents. Please bear in mind it is usually possible to further optimise methods for specific solvents. -
Page 39: Creating New Methods
Run options, may employ single SELECT RUN screen, then optimised for a SampleGuard channel temperature control. specific application. This allows runs to be Genevac are able to provide remote created for development whilst the original assistance by analysing evaporation data is preserved. -
Page 40: Crystallisation
Genevac HT-8 and HT-12 User Manual Crystallisation For evaporators equipped with the optional eXalt crystallisation package, the Crystallise option is accessed from Pressure Control Regime in the Run Data screen. Selecting Crystallise allows the user to enter control parameters for pressure reduction cycles. -
Page 41: Acceptable Solvents
Carry out a risk assessment for each solvent or solvent mixture before use. Solvents included in the following table are not damaging to the evaporator providing appropriate methods are used. Contact your local Genevac representative for advice before using solvents which are not listed. -
Page 42: Solvent Mixtures
Genevac HT-8 and HT-12 User Manual Select Variable Dri-Pure and set a ramp from 750 mbar to 70 mbar in 55 Solvent mixtures minutes. This helps to prevent bumping. When creating methods for solvent Evaporate the DCM at 65 mbar; it will mixtures, linked runs can be used to collect in the condenser. -
Page 43: Method Examples
User Manual Genevac HT-8 and HT-12 Method examples The following examples show suggested settings for some common applications. Example 1. Drying HPLC Fractions Method consists of three runs linked together to form a multi stage run, with settings: Stage 1... - Page 44 Genevac HT-8 and HT-12 User Manual Example 2. Fast Lyophilisation of HPLC Fractions Method consists of three runs linked together to form a multi stage run, with settings as follows: Stage 1 Stage 2 Ramp & Remove Freeze & Primary...
- Page 45 User Manual Genevac HT-8 and HT-12 Example 3. Mixture of High and Low Boiling Point Solvents Method consists of three runs linked together to form a multi stage run, with settings as follows: Stage 1 Stage 2 Sage 3 Remove Organic...
-
Page 46: Maintenance
Any maintenance or repair of this product, other than that specified within this user Periodic maintenance manual, must be carried out by Genevac personnel (or approved representatives of Check the condition of the exhaust hose and Genevac) using only approved spare parts. -
Page 47: General Cleaning
User Manual Genevac HT-8 and HT-12 General cleaning Condenser Cleaning should be performed as and when Remove the condenser pot lid and open the required, depend on the solvents being drain valve by selecting DRAIN from the used this may range from monthly to menu bar in the SELECT RUN screen. -
Page 48: Planned Maintenance And Servicing
Changing parts in the field is complex and cause the sample swings to requires a high level of skill. Genevac offers stick in the out position when a range of preventive maintenance, service the rotor stops, resulting in and breakdown contracts designed to keep unrecoverable sample loss. -
Page 49: Delivery And Installation
User Manual Genevac HT-8 and HT-12 Delivery and Installation Check the contents of the delivery, against Consult Genevac for advice on any other the delivery note as soon as possible. positioning requirements. Notify your local Genevac representative immediately if any parts are missing or Make sure the exhaust hose is free from damaged. -
Page 50: Troubleshooting
Genevac HT-8 and HT-12 User Manual Troubleshooting Audible alerts Notification Button acknowledge Short beep Door lock acknowledge Short beep Illegal button press Short double beep Evaporator stopped Three short beeps when the system comes to rest. Repeats every minute until the door is opened Critical error Three short beeps when the system comes to rest. -
Page 51: Condensation
IR lamp glass cracked A range of specialised sample holders is available to protect the quartz lenses. Contact Genevac Sales for details. 04-6963 Issue 1-19 August 2014... -
Page 52: Bumping
Genevac HT-8 and HT-12 User Manual Bumping Opening the door without power Bumping is unpredictable and can occur In the event of power failure, the vacuum with any solvent mixture; it can cause cross system vents automatically, the rotor may contamination between samples and can take up to two minutes to stop spinning. -
Page 53: Condenser Problems
Genevac Service for assistance. Circuit breakers / fuses If a fuse blows, it may be the result of an electrical failure; fuses should only be replaced by suitably trained personnel. If a fuse blows repeatedly, contact Genevac service for assistance. Vacuum pump... -
Page 54: Other Troubleshooting
Genevac HT-8 and HT-12 User Manual Other troubleshooting If one of the following problems occurs, it can normally be addressed by the user; if a fault occurs that is not listed, contact your local Genevac representative for advice or technical support. Symptom Cause... - Page 55 See IR lamp / fan failure above SampleGuard fault See SampleGuard error above Poor vacuum Check vacuum connectors. Contact Genevac service if leak cannot be found Aqueous samples freezing due Set controlled pressure to 8 to evaporative cooling mbar for aqueous runs...
-
Page 56: Technical Data
Genevac HT-8 and HT-12 User Manual Technical Data Specifications Evaporator Emissions Max rotor speed 1745 rpm Typical noise level is 69 dB (A) at one metre Max load per swing 1.5 kg from the evaporator during normal operation. Max operational imbalance... -
Page 57: Ec Declaration Of Conformity
In non-laboratory environments this product might cause interference, in which case the user is required to take appropriate actions. Signed: Name: G Broadbent Position: Research and Development Manager Date: July 2014 Being the person appointed by Genevac Ltd to sign on their behalf 04-6963 Issue 1-19 August 2014... -
Page 58: Warranty Statement
Exhaust vapours must be ducted away from the system, ideally to a suitable laboratory fume extraction system. The system is only used for purpose it was sold, and in accordance with Genevac published compatible solvent list. Preventative maintenance and cleaning must be carried out as detailed in the Maintenance section of this user manual. -
Page 59: Amendment Control
User Manual Genevac HT-8 and HT-12 Amendment control Issue Reason for change Date Issued 1-1 First issue 23-Sep-11 1-2 SP Scientific Service Email address added. Opening door without power 20-Dec-11 instructions added. Layout revised. 1-3 Cover page revised. Specifications updated. -
Page 60: Useful Information
Genevac Limited. applications@genevac.com If you need to contact Genevac for Web site: assistance, use either the telephone or fax Hotlines shown. Please have the http://www.genevac.com instrument serial number at hand.
Need help?
Do you have a question about the HT-8SII and is the answer not in the manual?
Questions and answers