Table of Contents
Advertisement
Advertisement
Table of Contents

Related Manuals for Dell EMC PowerScale F900


Summary of Contents for Dell EMC PowerScale F900
- Page 1 PowerScale F900 Node Installation Guide May 2021...
- Page 2 Notes, cautions, and warnings NOTE: A NOTE indicates important information that helps you make better use of your product. CAUTION: A CAUTION indicates either potential damage to hardware or loss of data and tells you how to avoid the problem. WARNING: A WARNING indicates a potential for property damage, personal injury, or death.
-
Page 3: Table Of Contents
Contents Figures............................4 Chapter 1: F900 nodes........................5 About F900 nodes................................5 Drive types.................................... 5 Unpack and verify components............................5 Chapter 2: F900 node installation....................6 Before you begin..................................6 Rail kit components for 2U systems..........................6 Install the rails..................................7 Secure the rail assemblies to the cabinet........................8 Install the system in the cabinet............................ -
Page 4: Figures
Figures Sliding rail assembly - 2U systems......................... 6 Installing the rear end of the rail..........................7 Installing the front end of the rail...........................7 Installing screws................................. 8 Extend rails from the cabinet..........................9 Install the system in the rails........................... 9 Slide the system into the cabinet......................... 10 Installing the front bezel on 2U system....................... -
Page 5: Chapter 1: F900 Nodes
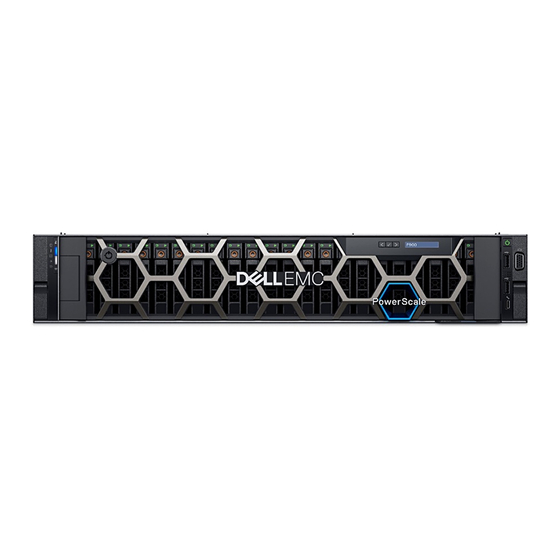
F900 nodes Topics: • About F900 nodes • Drive types • Unpack and verify components About F900 nodes F900 all-flash nodes support inline software data compression (3:1 depending on the workload and the dataset), and data deduplication with OneFS 9.2.0.0. F900 nodes are 2U models that require a minimum cluster size of three nodes. Clusters can be expanded to a maximum of 252 nodes in single node increments. -
Page 6: Chapter 2: F900 Node Installation
F900 node installation This document describes how to install F900 nodes into an equipment cabinet. Topics: • Before you begin • Rail kit components for 2U systems • Install the rails • Secure the rail assemblies to the cabinet • Install the system in the cabinet •... -
Page 7: Install The Rails
Install the rails The rails are labeled left and right, and cannot be interchanged. The front side of each rail is labeled Left Front or Right Front when viewed from the cabinet front. 1. Determine where to mount the system, and use masking tape or a felt-tip pen to mark the location at the front and back of the cabinet. -
Page 8: Secure The Rail Assemblies To The Cabinet
Secure the rail assemblies to the cabinet The supplied screws and washers are used to secure the rail assemblies to the front and rear of the cabinet. NOTE: For square hole cabinets, install the supplied conical washer before installing the screw. For unthreaded round hole cabinets, install only the screw without the conical washer. -
Page 9: Extend Rails From The Cabinet
Figure 5. Extend rails from the cabinet 2. Locate the rear rail standoff on each side of the system. Position the system above the rails and lower the rear rail standoffs into the rear J-slots on the slide assemblies. 3. Rotate the system downward until all the rail standoffs are seated in the J-slots. Figure 6. -
Page 10: Install The Front Bezel
Figure 7. Slide the system into the cabinet Install the front bezel The procedure to install the front bezel with the LCD panel. 1. Align and insert the right end of the bezel onto the system. 2. Press the release button and fit the left end of the bezel onto the system. 3. -
Page 11: Connect And Route Cords And Cables
Figure 8. Installing the front bezel on 2U system Connect and route cords and cables 1. Connect the power cables and I/O cables as described in documentation for your system. 2. If the system uses a cable management arm (CMA), install it as described in the document that is shipped with the CMA. 3. -
Page 12: Node Ports
Node ports The back-end ports are the private network connections to the nodes. Port 1 from all nodes connects to one switch, and port 2 from all the nodes connects to a second switch. Both back-end switches are provided. The front-end ports are for the client network connections. NOTE: In the F900 and F600 nodes, the rNDC does not provide network connectivity. -
Page 13: Chapter 3: F900 Node Configuration
F900 node configuration Topics: • Configure the node • Front panel LCD display • Configure the Integrated Dell Remote Access Controller • Update the install database • Getting help Configure the node Before using the node, you must either create a new cluster or add the node to an existing cluster. Federal installations Configure nodes to comply with United States federal regulations. -
Page 14: Run The Configuration Wizard
3. Start a serial communication utility such as Minicom (UNIX) or PuTTY (Windows). 4. Configure the connection utility to use the following port settings: Setting Value Transfer rate 115,200 bps Data bits Parity None Stop bits Flow control Hardware (RTS/CTS) 5. - Page 15 Setting Description int-a network settings The int-a network settings are for communication between nodes. ● Netmask The int-a network must be configured with IPv4. ● IP range The int-a network must be on a separate subnet from an int-b/failover network. int-b/failover network settings The int-b/failover network settings are optional.
-
Page 16: Updating Node Firmware
Setting Description Cluster join mode The method that the cluster uses to add new nodes. Choose one of the following options: Manual join Cluster join mode enables configured nodes in the cluster, or new nodes to request to join the cluster. -
Page 17: F900 Node Lcd Display
Figure 10. F900 node LCD display Item Button or Display Description Left Moves the cursor back in one-step increments Select Chooses the selected menu item Right Moves the cursor forward in one-step increments during message scrolling: 1. · Press and hold the right button to increase scrolling speed. - Page 18 Option Description iDRAC Select DHCP or Static IP to configure the network mode. If Static IP is selected, the available fields are IP, Subnet (Sub), and Gateway (Gtw). Select Setup DNS to enable DNS and to view domain addresses. Two separate DNS entries are available.
-
Page 19: Configure The Integrated Dell Remote Access Controller
a. If the node joins the cluster successfully, the LCD displays the hostname of the node. b. If the node fails to join the cluster, the LCD displays Failed to join…. Return to Step 4. c. To try another cluster, press Select. Configure the Integrated Dell Remote Access Controller The integrated Dell Remote Access Controller (iDRAC) delivers advanced, agent-free local, and remote administration. -
Page 20: Getting Help
Getting help This topic contains resources for getting answers to questions about PowerScale products. Dell Technologies support ● https://www.dell.com/support/incidents-online/en-us/contactus/product/ isilon-onefs Telephone support ● United States: 1-800-SVC-4EMC (1-800-782-4362) ● Canada: 1-800-543-4782 ● Worldwide: 1-508-497-7901 ● Local phone numbers for a specific country or region are available at https:// www.dell.com/support/incidents-online/en-us/contactus/product/isilon-onefs.
Need help?
Do you have a question about the PowerScale F900 and is the answer not in the manual?
Questions and answers