
Related Manuals for Robur Calorio M 42M


Summary of Contents for Robur Calorio M 42M
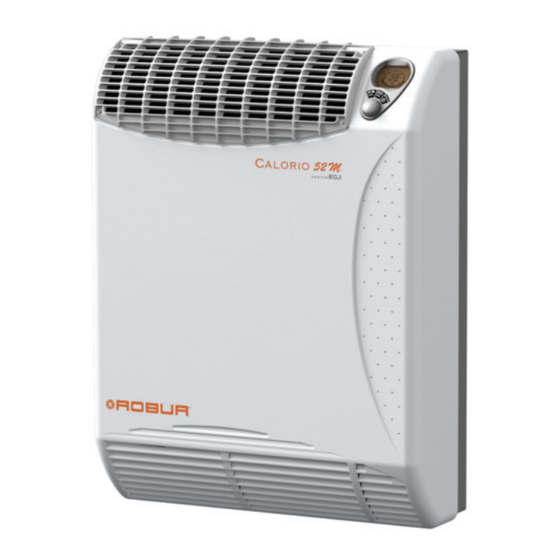
- Page 1 Installation, use and maintenance manual Calorio M Independent direct exchange gas-fired convectors with automatic modulation to heat small and medium-sized rooms Fired by natural gas/LPG...
- Page 2 The rights of those who have legitimately filed the registered trademarks contained within this publication are not affected. With the aim of continuously improving the quality of its products, Robur S.p.A. reserves the right to modify the data and contents of this Installation, use and maintenance manual without prior notice.
-
Page 3: Table Of Contents
INDEX OF CONTENTS Introduction 4 Electrical installer ................p. 4 ............p. 17 Recipients ..............p. 4 Warnings ..............p. 17 Electrical power supply ........p. 17 II Symbols and definitions ......... p. 4 Electrical connection of two appliances ..p. 18 Key to symbols ............p. 4 II.1 5 First start-up Terms and definitions ......... -
Page 4: Iintroduction
Appliance/Unit = equivalent terms, both used to refer to WARNING the independent direct exchange gas-fired convector. TAC = Technical Assistance Centre authorised by Robur. First start-up = appliance commissioning operation NOTE which may only and exclusively be carried out by a TAC. -
Page 5: Iii.2 Conformity
Warnings Aggressive substances in the air If you smell gas: „ Do not use electrical devices such as telephones, The air of the installation site must be free from ag- multimeters or other equipment that may cause gressive substances. sparks next to the appliance. „... -
Page 6: Iii.3 Exclusions Of Liability And Warranty
Warnings III.3 EXCLUSIONS OF LIABILITY AND 2006/42/EC "Machine Directive" as amended and add- ▶ WARRANTY 2015/1186/EU "Energy labelling of local space heaters ▶ regulation" as amended and added. Any contractual or extra-contractual liability of the 2015/1188/EU "Ecodesign requirements for local ▶... -
Page 7: Features And Technical Data
Features and technical data FEATURES AND TECHNICAL DATA FEATURES modulate according to the room temperature measured by the temperature probe. 1.1.1 Operation The sealed combustion chamber is the best guarantee of safety for the environment in which the gas-fired convec- The Calorio M gas-fired convector is an independent tor is installed: there is no possibility of the products of modulating heating appliance with sealed combustion... -
Page 8: Dimensions
Features and technical data DIMENSIONS Figure 1.1 Dimensions ≥100 ≥100... -
Page 9: Electrical Wiring Diagram
Features and technical data ELECTRICAL WIRING DIAGRAM Figure 1.2 Electrical wiring diagram 220-240 V / 50 Hz 3.15AF 250V Electronic board 2 A fuse Pre-limit temperature probe Gas valve Ignition electrodes Room temperature probe Line Detection electrode Stocko connectors Neutral Combustion air blower External request connection Manual reset limit thermostat Room fan... -
Page 10: Technical Data
Transport and positioning TECHNICAL DATA Table 1.1 Technical data Heating mode nominal (1013 mbar - 15 °C) (1) Heat input minimum (1) nominal Heat output minimum Efficiency nominal heat input 90,0 Electrical specifications voltage Power supply type single-phase frequency Electrical power absorption nominal 0,05 0,09... -
Page 11: Minimum Clearance Distances
Heating engineer 2.3.1 Where to install the appliance MINIMUM CLEARANCE DISTANCES The gas-fired convector must be installed on or near ▶ 2.4.1 Distances from combustible or flammable an external perimeter wall, respecting the distances materials indicated in Figure 1.1 p. 8 . Avoid placement on walls or combustible materials Keep the appliance away from combustible or flam- ▶... - Page 12 Heating engineer sealed to ensure tightness using a sealant that Figure 3.1 Gas supply position complies with EN 751-1 and EN 751-2. The connec- tion must be made in such a way that no strain is produced in the pipe or gas-fired convector com- ponents.
-
Page 13: Combustion Products Exhaust
Heating engineer COMBUSTION PRODUCTS EXHAUST wall (maximum pipe length: 1 metre) (see Figure 3.2 p. 13 ). With coaxial pipes with 90° outlet (max pipe length: 1 ▶ Compliance with standards metre) (see Figure 3.3 p. 14 ). In this case, it is neces- sary to use the 90°... - Page 14 Table 3.2 Separate exhaust pressure drop table installation guide for the flue gas exhaust/air intake Description Code ducts D-GPP001, available on the Robur website. residual head Air pipe internal Ø 33 mm OPRL000 Pa/m 3.4.2.1 Installation with separate ducts...
-
Page 15: Installation Procedures
Heating engineer 3.5.1 Install the gas-fired convector on the wall Description Code 90° elbow on flue gas pipe OCRV000 1. Check the packaging for visible signs of damage, oth- Casing complete with internal erwise, notify the carrier immediately. OCFF002 elbow for flue gas exhaust 2. - Page 16 Heating engineer Figure 3.6 Support bracket positioning and holes drilling Bracket fixing holes Support bracket Adhesive gasket Air pipe 7. Position the support bracket and the air intake pipe Ø Figure 3.8 Positioning the flue gas exhaust pipe 49, making sure that the pipe edge perfectly enters the matching hole in the bracket (see Figure 3.6 ...
-
Page 17: Electrical Installer
Electrical installer 3.5.2 Install the windproof terminal that it seats against the support bracket (see Figure 3.10 p. 17 ). 1. When the appliance is installed, place the aluminium 13. Secure the gas-fired convector to the support bracket windproof terminal to the outdoor wall so that it en- by means of the two side screws as shown in Figure gages with the end of the flue gas pipe and mark the 3.10 ... -
Page 18: Electrical Connection Of Two Appliances
Electrical installer If required, the electrical socket on the frame can Figure 4.1 Three-pole plug wiring be rotated 180° to allow the electrical cable to exit to the left instead of the right. Blue cable Yellow/green cable Brown or black cable Cable type 3x0,75 mm²... -
Page 19: First Start-Up
Power supply mains complying with the appliance's ▶ bustion parameters and may exclusively be carried rating plate data. out by a Robur TAC. NEITHER the user NOR the in- Appliance correctly installed, according to the manu- ▶ stallation technician is authorised to perform such facturer's provisions. -
Page 20: Checking Burner Gas Pressure
First start-up by the TAC. 5.1 p. 20 ). 10. Save the new parameter settings by turning the knob After performing the remedial actions (the installer's re- sponsibility), if the TAC deems that safety and conformity to display parameter P002 and then pressing it to conditions are in place, first start-up may be effected. -
Page 21: Gas Changeover
First start-up To adjust the gas-fired convector for operation with LPG, pressure calibration at minimum power". proceed as described below. 9. Press the knob and change the displayed value, start- ing with minimal decrements (-1); press the knob Figure 5.1 p. 20 to confirm and wait for the pressure gauge read- ing. -
Page 22: Access To The Advanced Setting Menu (Inst)
Normal operation 5. Unscrew the calibrated nozzle C from the nozzle hold- tightness of plug B. 11. Check the gas pressure at the burner as described in er A and replace it (Table 5.2 p. 22 ). 6. Screw the nozzle support and nozzle assembly back Paragraph 5.2.1 ... -
Page 23: Warnings
Chapter III.1 p. 4 , providing impor- tant information on regulations and on safety. First startup by TAC First start-up may exclusively be carried out by a Robur TAC (Chapter 7 p. 27 ). Never power the appliance off while it is run- On/off button ning... -
Page 24: Switch On And Off
Normal operation SWITCH ON AND OFF will appear on the display and the red LED E will light lower the required temperature level by turning the 6.3.1 Switching on ▶ knob counter-clockwise until the value 1.0 is achieved 1. Open the gas tap (only for heating mode operation). (corresponding to a room temperature of approx. -
Page 25: Access To The User Menu
Normal operation If the economy temperature is set to off, the flashing hand icon to indicate that manual opera- heating will be switched off (any antifreeze will not tion is only temporary. work either, even if it is enabled). ACCESS TO THE USER MENU 6.5.3 Antifreeze temperature setting To access the user information/settings menu (USER), 1. -
Page 26: Operating Faults
Normal operation in levels). To change the factory default, proceed as keeping the knob pressed, press button C follows: The default setting is off (unlocked keypad). 1. Press button B MENU for 5 seconds and turn the knob until the display shows "°C". 2. -
Page 27: Maintenance
Maintenance MAINTENANCE WARNINGS Temporary overheating If the upper or lower grille is partially obstructed Correct maintenance prevents problems, assures during operation, causing the gas-fired convector efficiency and keeps running costs low. to overheat, the prelimit temperature probe will trip automatically, forcing the gas-fired convec- tor into modulated operation. -
Page 28: Any Malfunctions Of Operation
Maintenance For a correct ignition, the distance between the Figure 7.1 Limit thermostat and prelimit temperature probe two ignition electrodes must be about 3-5 mm. C. The detection electrode is broken or badly positioned: replace it or reposition it. D. One of the ignition electrodes or the relevant cable is in contact with the casing or other metal parts: check by removing the casing and removing the contact. - Page 29 Maintenance Table 7.1 Faults Fault Code ACTION Lock-out due to ignition failure Manual reset Lock-out due to temperature limit function trip Manual reset Lock-out due to generic internal error Manual reset Air pressure switch/blower fault TAC intervention Room probe fault TAC intervention Prelimit probe fault TAC intervention Gas-fired convector body overheating...
-
Page 30: Appendices
Appendices APPENDICES ADVANCED GAS-FIRED CONVECTOR below. ADJUSTMENT AND CONTROL FUNCTIONS Access to the transparent control parameters is re- stricted to professionally qualified personnel. The transparent control parameters are listed in the table Table 8.1 List of transparent control parameters Function Default value Allowed setting User level 0 = natural gas... - Page 31 Appendices external request, such as, for example, an automatic dial- (15), the ambient probe reading will be shifted down- er, centralised request, etc... wards; vice versa the reading will be shifted upwards. Gas- For activation, parameter 008 must be set to 01, and pa- fired convector operation will therefore follow the value rameter 009 must be set to 00.
- Page 32 �me limita�on with black bulb sensor Permanent pilot flame power requirement Pilot flame power requirement (if N.A. pilot applicable) Contact details Robur SPA Via Parigi 4/6 I-24040 Zingonia (BG) (*) NO = nitrogen oxides...
- Page 33 Permanent pilot flame power requirement Pilot flame power requirement (if N.A. pilot applicable) Contact details Robur SPA Via Parigi 4/6 I-24040 Zingonia (BG) (*) NO = nitrogen oxides Installation, use and maintenance manual – Calorio M...
- Page 36 Robur mission Robur is dedicated to dynamic progression in research, development and promotion of safe, environmentally-friendly, energy-efficiency products, through the commitment and caring of its employees and partners. Robur S.p.A. advanced technologies for air conditioning via Parigi 4/6 24040 Verdellino/Zingonia (BG) Italy +39 035 888111 - F +39 035 884165 www.robur.it robur@robur.it...
Need help?
Do you have a question about the Calorio M 42M and is the answer not in the manual?
Questions and answers