Table of Contents
Advertisement
Advertisement
Table of Contents

Related Manuals for Boavision HD22M102M


Summary of Contents for Boavision HD22M102M
- Page 1 User Guide (V2.3) Wireless Pan/Tilt Home Security HD22M102M...
-
Page 2: Table Of Contents
Contents Declaration Introduction Product Detail Insert Micro SD Card Set Up Your Camera Add Camera Format Micro SD Card Wall Mount Intelligent Tracking Motion Detection and Push Alert Message Actions When Detect a Motion Playback and Download Videos From Micro SD Card Device Information How to Use Two-way Talk Function IR LED Night Vision and Floodlight... -
Page 3: Declaration
This guide provides a brief introduction to the Pan/Tilt home security Wi-Fi Camera and the CamHipro app, as well as regulatory information.Please note that The Product Specifications, Appearance Pictures And Related Information Mentioned In This Manual Are For Reference Only and may not reflect your actual Boavision Camera experience. Conventions... -
Page 4: Introduction
Introduction When you are away home, there are always something you care about. This is where the smart camera functions. No matter your child is climbing the kitchen cabinet, or the pet is stealing snacks, the Pan/Tilt Home Security Wi-Fi Camera helps you stay with them anytime, anywhere. -
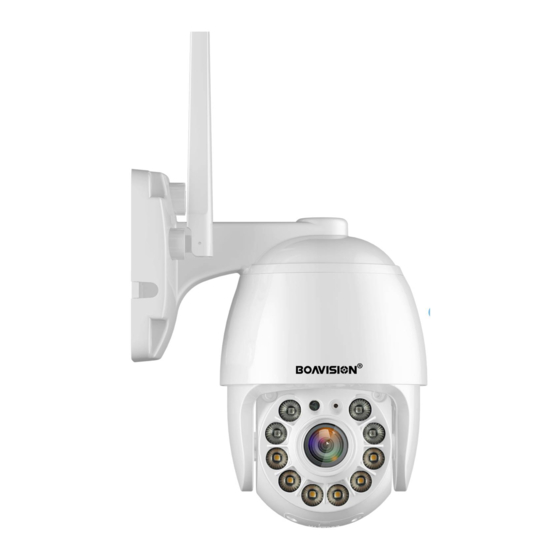
Page 5: Product Detail
Product Detail Wifi Antenna Night Vision Switch Sensor Microphone Night Vision IR Led Lens Lan Port (Optional) Floodlight Reset Note : Long press the reset button for 20 Power port Micro SD Card Slot seconds to factory default... -
Page 6: Insert Micro Sd Card
Insert Micro SD Card Open the bottom micro SD Card slot cover with a small screw driver Insert a micro SD card (Support Class 10, 8Gb~128Gb, micro SD Card Not Included ,Sold Separate) Note : Please power off the camera when you insert the micro SD card. -
Page 7: Set Up Your Camera
Set Up Your Camera Note For Android Phones, Please Select "Agree" To The Tips Pop-Up: : 1. Allow Camhipro To Access Mobile Cellular Data And Wireless Lan, Otherwise It Can not Add Camera. 2. Allow Camhipro To Receive Pushed Messages, Otherwise The Phone Will Not Receive an Alarm Push Message. 3. -
Page 8: Add Camera
Please follow the steps below to find the hotspot AP of the camera and connect to it, set up the camera's WiFi, and let it connect to the WiFi router in your home wirelessly. Step1: Download the mobile app (CamHiPro) Search "Camhipro" in App Store /Google Play Store or Visit www.boavision.com Step2:Connect AP Wifi "IPCAM-XXXXX"... - Page 9 Step3:Add New Device in App Open The Camhipro App, Select --->“+”---> “IP camera”--->“New device”--->You will see a new device UID name as “xxxxx-xxxx-xxxx "--->Click "Yes,I want to add this device”--->"Add to" AP equipment Add device Back Camera New device CamHipro AAEE-257445-BBDDC Device not connected to the network after first use or factory reset...
- Page 10 Step4:Configure the WiFi connection Select your home Internet WiFi and enter your WiFi password,Click"Configure wireless and add device" to finish the setting.(You will hear a tone from camera once it connected to your WiFi network.) Tips: 1.the camera will be sending One Big voice out when connected successfully. 2.if not success, the camera gives you 4 small tones, that will be WIFI Password error.
-
Page 11: Format Micro Sd Card
Format Micro SD Card Open Camhipro app, Tap on the Gear Wheel Icon” “ --> SD card setting --> format SD card. Note : The camera will start loop recording once installed micro sd card, 10min per video,the latest video will cover the oldest video. -
Page 12: Wall Mount
Wall Mount Paste the drilling location mark on the wall, then drill the hole according to the mark and Insert the anchors, pass the screw through the back of the bracket, and fix the top of the bracket on the wall. Wall Drilling Location Mark Anchors... -
Page 13: Intelligent Tracking
Intelligent Tracking 1. Slide the menu to 3 2. Click the icon “ ” 3. Tap on Intelligent tracking... -
Page 14: Motion Detection And Push Alert Message
Motion Detection and Push Alert Message Open Camhipro app, Tap on the Gear Wheel Icon” “ --> Alarm management and notification-->Turn on both “Receive alarm push” and “Motion detection alarm”. Note 1. If you want the camera also detects a sound, please turn on “Audible alarm”. :... -
Page 15: Actions When Detect A Motion
Actions When Detect a Motion Save Motion Videos to micro SD Card Sound Warning If you have inserted a micro SD card to camera, you If you want the camera warning with a sound when detect will be able to turn on the switch “Alarm recording to the motion, please turn on “When the alarm is triggered, SD card”... - Page 16 Email Alert (Gmail setting reference) 1. If you want camera send an Email Alert with picture, you can turn on “Alarm Capture sent to Email”, and configure Email, see below photos for your reference. 2. Tap “Apply” before Test ..Note Please turn on Gmail 2-factor Authentication :...
-
Page 17: Playback And Download Videos From Micro Sd Card
Playback and Download Videos From Micro SD Card Please tap the icon to check videos saved in micro SD card, select and tap a video to play, if you wan t to find older videos, tap the right down Search icon to select the date. Note Select your Time Zone, and enable Daylight Saving Time, then Click Saving Time Zone for Device, :... - Page 18 Upload Pictures and Videos to FTP Server If you want to upload pictures and videos to FTP server, please turn on “Alarm recording to FTP” and “Alarm Capture saved to FTP”, and configure FTP, Tap “Apply” before test. This IP address is the example for setup 192.168.1.xxx ········...
- Page 19 Download Video Select the video --> Tap the video --> Tap Download --->after Download complete, Tap “To View”. If you want to save this video to phone or share with family, you can tap download icon to save to album, then you can find the videos in your phone photo album.
-
Page 20: Device Information
Note : . The camera will continue loop record videos after you inserted the sd card. 2. Saved to sd card 10min per video, no matter if there is a motion, there is a blue label “plan recording” for this kind of videos. -
Page 21: How To Use Two-Way Talk Function
How to Use Two-way Talk Function If you want to talk with camera, need go to live video page Step 1: Activate the Speaker icon, you can hear from camera Step 2: Active the Microphone icon to speak Note : You can not hear from camera when you active microphone, and can not speak when you hear from the camera, so you need switch from the microphone and speaker. -
Page 22: Ir Led Night Vision And Floodlight
IR LED Night Vision and Floodlight This smart camera has 3 types night vision mode: Ordinary: IR LED works at night (light is low) automatically, picture is black/white, Floodlight does not work. Color: IR LED does not work at night, Floodlight works at night, picture is color . Intelligent: IR LED works at night, and when there is a motion detected, the IR LED will be off, the Floodlight will be on for 30 seconds, the it will be off if there is no motion in 30 seconds, if there are continue motions, the floodlight working... -
Page 23: Share The Camera With Your Family
For Mac, it can only work with Safari via local ip address. Please check detail instructions on www.boavision.com/download.html Support page or contact our support team via Email Support@boavision.com If you need help for making it work with other devices or 3rd party ONVIF software/device. ONVIF & RTSP ONVIF: If you want to add the camera to 3rd party onvif software/device, please find the camera ip address from device information... -
Page 24: How To Reset The Camera
How to Reset The Camera Connect camera to power adapter, press and hold camera reset button for 20 seconds, it will reset and restart in 1 min, the reset button is on the cable with a cover. Connect to Blue Iris Input ip address and onvif port: 8080, click Find/Inspect Note :... -
Page 25: Connect To Synology
Connect to Synology Add Camera Wizard Add Camera Wizard Information Setup Select a setup mode: Quick Setup Name: CamhiPro Camera Complete Setup IP address: 192.168.1.223 Port: 8080 [ONVIF] Brand: Camera model: All functions Username: admin ········ Password: Test Connetion Load Capability Next Cancel Previous... -
Page 26: Connect To Qnap
Connect to QNAP... - Page 27 Search Network Camera IP Address Brand Camera Model Port MAC Address Add a camera 192.168.1.8 ONVIF IPC-model 8899 This wizard guides you through the following settings: 192.168.1.16 ONVIF IPC-model 8899 192.168.1.17 ONVIF IPC-model 8899 · Camera Configuration 192.168.1.19 ONVIF 8899 IPC-model ·...
- Page 28 Confirm Settings Schedule Settings Please confirm the following information Enable schedule recording Active: Inactive: Channel: Channel 1 Camera Brand: ONVIF Camera Model: ONVIF Profiles Cameras Camera Name: Camera 1 IP Address/Port: 192.168.1.24/8080 Recording: Enabled Video Compression: H.264 Resolution: 1920x1080 Frame Rate: Quality: Quality 3 Enable manual recording:...
- Page 29 Channel IP Address Status Camera Name Recording Setting Video Compression: H.264 Resolution: 1920x1080 Frame Rate: 15/14 ? Camera 1 192.168.1.24 Connected Bit Rate: 1.3 Mbps Channel 1 Quality: Quality 3 Recording Status: Recording...
-
Page 30: Connect To Ispy
Connect to iSpy Video Source MJPEG URL FFMPEG (H.264) VLC Plugin Local Device Desktop XIMEA Kinect JPEG URL ONVIF Custom Clone Username admin Overide RTSP Port ········ Password Port Network Address http://192.168.1.223.8080/onvif/device_service http://192.168.1.223.8080/onvif/device_service http://192.168.1.218.8080/onvif/device_service http://192.168.1.193/onvif/device_service http://192.168.1.129/onvif/device_service http://ipaddress/onvif/device_service Transport Connect with FFMPEG Next Help... - Page 31 Edit Camera(ID:2, DIR: KWARX) Cloud Storage Scheduling Storage Сamera Montion Detection Alerts Recording Images Сamera Model ONVIF Get Latest ListTo Edit Reload Preset 001 Preset 002 Preset 003 Preset 004 Preset 005 Preset 006 Preset 007 Preset 008 Preset 009 Preset 010 Preset 011 Preset 012...
-
Page 32: Warranty & Support
Warranty & Support Dear Users: Thank You For Purchasing Boavision Products. In Order To Protect Your Rights, Please Read The Following Carefully After Purchasing: 1. The Following Situations Do Not Belong To The Scope Of Free Maintenance Please Note: * Disassemble And Repair The Product Without Permission. -
Page 33: Trouble Shooting
Trouble Shooting Lssues Description Solutions Please make sure the camera is NOT connecting Ethernet cable, press and hold the reset button on the cable for 20 seconds, wait for 30 seconds, check in your phone WLAN settinge, there Can not see the camera’s WiFi Signal should be a WiFi signal named IPCAM-xxxxx, if still can not find in phone WLAN setting the wifi... - Page 34 1) Please try to adjust the camera position or direction, make the camera further from the monitor area. 2) Some objects (Fly, Leaves, Dust) trigger the motion sensor, Alarm captures without a person please reduce the motion sensitivity, and adjust the monitor area to avoid the false alarm area.
Need help?
Do you have a question about the HD22M102M and is the answer not in the manual?
Questions and answers