Table of Contents
Advertisement
Quick Links
Advertisement
Table of Contents

Related Manuals for Atrump AL52


Summary of Contents for Atrump AL52
- Page 1 AL52 / AM52...
-
Page 2: Table Of Contents
CONTENTS Chapter 1 Safety Instructions 1.1 General Remarks ....................1-1 1.2 Safety Description of Lifting and Movement (unpacked) ......... 1-6 1.3 Electrical Safety Description ................1-8 1.4 Machine Safety Description ................1-11 1.5 Potential Danger Areas ................... 1-20 1.6 Warning Signs on the Machine ............... 1-22 Chapter 2 Machine Specification 2.1 Introduction ....................... - Page 3 CONTENTS Chapter 6 Lubrication 6.1 Importance of Lubrication ................6-1 6.2 Lubrication System Diagram ................6-3 6.3 The Oil Guide Table ..................6-7 Chapter 7 Mechanism 7.1 Headstock System ..................7-1 7.2 Feed-Motion Transmission Mechanism ............7-5 7.3 Tool Magazine .................... 7-12 7.4 The Fully-Enclosed Splash-Guarding Enclosure .........
- Page 5 Chapter 1 Machine Safety Regulation...
- Page 6 Machine Safety Regulation General Safety The precautions included in this manual are NOT intended to cover all hazards that may occur in this machine. Prevention of accidents requires the constant attention of all personnel in vicinity of this machine to make a safe situation and to provide a safe work environment.
- Page 7 1.1.1.7 Never attempt to change the settings of all protective devices without consulting When the machine out of order while Atrump Machinery Inc. running, shut it down and turn to servicemen for help as soon as possible.
- Page 8 Atrump authorized agency are responsible for a future connection of the machine with ancillary equipment only if we ourselves have designed such connection.
- Page 9 Machine Safety Regulation requirements specified in the standard applicable for that ancillary equipment (e.g. ISO 10218-1 for robot equipment). 1.1.2.18 Explain the operation of this machine and its safety devices to the operator prior to his/her operating the machine. Use demonstration as a positive means of instruction and be certain that the operator fully understands the machine and is qualified to handle it.
- Page 10 Machine Safety Regulation 1.1.3 Caution: 1.1.3.1 Turn off no fuse breaker of main power circuit when power supply is insufficient or not stable. 1.1.3.2 Only the recommended or same grade hydraulic oil, lubricant oil and grease are allowed to use on this machine. 1.1.3.3 Only the same specification and same grade fuses are allowed to use on this machine.
-
Page 11: Safety Description Of Lifting And Movement (Unpacked)
AL52/AM52, the safety load of the handling equipment must be greater than10 tons for AL52/AM52,. If you are not sure of the safety load of handling equipment, please confirm it with their supplier. Do not lift or move the machine if you are not sure of their load. - Page 12 Machine Safety Regulation 1.2.2 Warning: 1.2.2.1 Check whether the machine is balanced or not before lifting or moving this machine. It is prohibited from lifting or moving the machine unbalance, otherwise it will damage the machine and hurt people around it. 1.2.2.2 Be careful of when lifting or lowering the machine, the speed should not be so fast that may cause any unpredictable vibration or crash.
-
Page 13: Electrical Safety Description
Machine Safety Regulation Electrical Safety Description To assure the safety of NC operation, please note the followings: 1.3.1 Wiring: 1.3.1.1 Ensure that the electrical conductors used is equivalent or superior to the performance rating described in maintenance manual. 1.3.1.2 Only qualified engineer is allowed to connect the power cable. 1.3.1.3 Do not connect power cable which will cause noise on the power panel of this machine such as welding machine and high frequency quench machine. - Page 14 Machine Safety Regulation Grounding resistance : Smaller than 100Ω. Common grounding Grounding as figure 2. Grounding resistance : 100Ω *** NOTE: Never ground equipments as figure 3. ***...
- Page 15 Machine Safety Regulation 1-10 1.3.3 Environment condition Generally the machine should be installed as following conditions.However, these may change over a period of time or in response to seasonal changes. 1.3.3.1 Supply voltage: 0.9 – 1.1 nominal supply voltage. 1.3.3.2 Source frequency: 0.99 - 1.01 of nominal frequency. 1.3.3.3 Surrounding temperature: 5℃~ 40℃...
-
Page 16: Machine Safety Description
Machine Safety Regulation 1-11 Machine Safety Description 1.4.1 Note before Operation: 1.4.1.1 Danger: Before starting to operate this machine, please check and confirm all cables and wire isolation whether they are damaged or not to avoid electric shock. 1.4.1.2 Warning: 1.4.1.2.1 Understand completely every operation procedure and description on the manual. - Page 17 Machine Safety Regulation 1-12 1.4.2 Inspection 1.4.2.1 Warning: 1.4.2.1.1 Ensure to turn off the main power supply and put warning signs on visible spots before inspecting the belt tension. Do not touch or reach over the pulleys and the belts if the power is still on. Otherwise might result in squeeze to wounded and disabled.
- Page 18 Machine Safety Regulation 1-13 1.4.3 Warming up According to experience if machine is not warmed up before machining work piece, which has not been run for a period of time, It will damage sliding parts and cause oil leakage because sudden thermal expansion destroys machine accuracy.
- Page 19 Machine Safety Regulation 1-14 1.4.4 Preparation 1.4.4.1 Warning: 1.4.4.1.1 Cutting tool's specification should be the same as this machine requirement to avoid any accident. 1.4.4.1.2 Broken tool will cause accident. Please replace it when broken. 1.4.4.1.3 Working area lightening must be sufficient for safety inspection. 1.4.4.1.4 Tools and equipments which surrounding the machine must place in position to keep aisle clean and clear.
- Page 20 Machine Safety Regulation 1-15 1.4.5.1.7 Clamp workpiece safely and closely. 1.4.5.1.8 Stop machine before adjust position of coolant nozzle. 1.4.5.1.9 Do not touch rotating machine parts such as work piece, chuck, spindle..etc. by hands. 1.4.5.1.10 Do not take away safety device from the machine. 1.4.5.1.11 Scrape the chips from tool tip by wiper.
- Page 21 Machine Safety Regulation 1-16 1.4.7.1.6 Check coolant and change it if it is dirty. 1.4.7.1.7 Check quantity of coolant, lubricant oil and hydraulic oil, fill it if it is not sufficient. 1.4.7.1.8 Clean filter of coolant, lubricant and hydraulic oil. 1.4.7.1.9 Be sure that operator's power switch is off and main power no fuse breaker is off also before leaving the machine...
- Page 22 Machine Safety Regulation 1-17 1.4.8 Safety Device 1.4.8.1 Fully enclosed guards and coolant splash guards. 1.4.8.2 X .Y. Z-axes over travel limit switches. 1.4.8.3 Pressure switch for chuck clamping force. 1.4.8.4 Machining travel limited by controller's software. 1.4.8.5 Emergency stop push button. 1.4.8.6 Interlock by software to protect spindle, cutting tools and X .Y.
- Page 23 Machine Safety Regulation 1-18 1.4.11 After maintenance 1.4.11.1 Warning 1.4.11.1.1 Maintenance jobs include working area cleaning and ground dry keeping to offer safety working area. 1.4.11.1.2 The operator is safe, that to need moved components and discard oils out of the machine to suitable place. 1.4.11.2 Caution 1.4.11.2.1 Maintenance people must inspect whether machine operation is safe or not.
- Page 24 Machine Safety Regulation 1-19 1.4.12 How to rescue the operator trapped by the machine When there is person trapped by the machine, please press the Emergency Stop Button first (Fig. 01) Procedure by Resuming the power supply, pull out the 1.4.12.1 Emergency Stop shown on Fig.
-
Page 25: Potential Danger Areas
Machine Safety Regulation 1-20 Potential Danger Area Users must be clearly aware of that moving or rotating parts, especially with 1.5.1 high speed, any abnormal operation will cause danger because of machine's mis-movement or mis-rotation. Therefore, this machine's moving and rotating parts have been designed to be protected by guards or covers as possible to avoid user's directly contact with these parts. - Page 26 Machine Safety Regulation 1-21 1.5.1.2 The parts with " " mark as drawings shown below are all high voltage parts. Please be attention that only qualified engineers are allowed to open the box to avoid electrical shock.
-
Page 27: Warning Signs On The Machine
Machine Safety Regulation 1-22 arning Signs on the Machine 1.6.1 Do not enter hazardous area authorized personnel only. (When the machine operations) ZL12020071 1.6.2 Low clearance. Be alert. ZL12020081 1.6.3 Exposed gripping parts or area can cause severe iniury. Your hand is out of gripping area or parts before removing parts or servicing. - Page 28 Machine Safety Regulation 1-23 before removing cover or servicing. 1.6.8 Exposed moving parts can cause Severe injury. LOCK OUT POWER before removing guard or servicing. 1.6.9 Exposed gripping parts or area can cause Severe injury. LOCK OUT POWER Before removing cover or servicing. ZL12020191 1.6.10 Riskof accidents caused by electric voltage.
-
Page 29: Chapter 2 Machine Specification
Chapter 2 Machine Specification... -
Page 30: Introduction
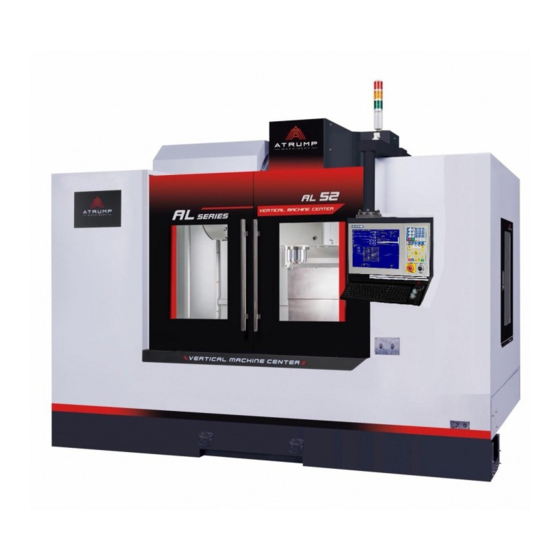
Machine Specification Introduction 2.1.1 AL52/AM52 is one product of the vertical machining center series. This machine is made up of bed base, headstock, main column, saddle, working table, operation panel, hydraulic and pneumatic systems, lubrication system, chip conveyor, chip collecting equipment, safety guards, CNC controllers, etc. -
Page 31: Machine Specification
Machine Specification Machine Specification ITEM AL52 Dimension 1500mmX650mm 1300mm×680mm Working area Table CD125mmX18mmX5 T-slot (CD4.9”X0.7”X5) Max. loading capacity 1200 kg(2640lbs) Max. travel range of X/Y/Z-axis 1300mm / 680mm / 680mm Distance from spindle nose to 150mm-830mm(5.9”-32.7”) table surface Travel Range... - Page 32 Machine Specification Column height ITEM AL52 Dimension 1500mmX650mm 1300mm×680mm Working area Table CD125mmX18mmX5 T-slot (CD4.9”X0.7”X5) Max. loading capacity 1200 kg(2640lbs) Max. travel range of X/Y/Z-axis 1300mm / 680mm / 680mm Distance from spindle nose to 353mm-1033mm table surface Travel Range...
- Page 33 Machine Specification ITEM AM52 Dimension 1500mmX650mm 1300mm×680mm Working area Table CD125mmX18mmX5 T-slot (CD4.9”X0.7”X5) Max. loading capacity 1200 kg(2640lbs) Max. travel range of X/Y/Z-axis 1300mm / 680mm / 680mm Distance from spindle nose to 150mm-830mm(5.9”-32.7”) table surface Travel Range Distance from spindle center to 760(mm) column Spindle taper...
-
Page 34: Electrical Equipment Specification
Machine Specification Electric Equipment Specification 2.4.1 Power Supply Power supply voltage: 200 V Power supply frequency: 60 Hz 2.4.2 Allowable Range of System Parameters 2.4.2.5 Power supply voltage: 85% ∼ 110% of 220 V 2.4.2.6 Power supply frequency: 58 ∼ 62 Hz 2.4.2.7 Ambient temperature:0°~45°C (32°F to 113°F) 2.4.2.8 Ambient relative humidity: less than 90% (with no condensation occurred) 2.4.2.9 Other environment requirements are listed below:... -
Page 35: Machine Accessories
Machine Specification Machine Accessories 2.5.1 Standard Centroid M400 BT/CAT 40 8000 rpm Spindle (3) Cutting coolant system (4) Oil Circulating Cooling System for Spindle (5) Spindle Taper Cleaner (6) Arm Type A.T.C 24 Tools (7) T-Slot Type Table (8) Heat Exchanger for Electrical Cabinet (9) Fully Enclosed Splash Guard (10) Grease Lubrication System... -
Page 36: Dimensions
Machine Specification Machining Accuracy ITEM X'Y'Z-axis MODLE Positioning Repeatability ±0.004 ±0.003 AL52 ±0.005 ±0.004 AM52 Dimensions AL52/ AM52... - Page 37 AL52(Column height) Machine Specification...
-
Page 38: Main Part
Machine Specification Main Parts Item Nomenclature Shield cover Electrical cabinet Operation panel Coolant tank Headstock Main column Bed base Working table Saddle Tool magazine Pneumatic system... -
Page 39: Working Range And Workpiece Weight
2-10 Machine Specification Working Range and Workpiece Weight Maximum weight of workpiece: AL52/AM52:1200 KG MODEL AL52/AM52 height) 1300 1500 AL52(Column... -
Page 40: Dimensions Of The Working Table
Machine Specification 2-11 Dimensions of the Working Table 2.10 AL52/AM52... -
Page 41: Dimensions Of The Machine Tool Holder
2-12 Machine Specification Dimensions of the Tool Holder 2.11 2.11.1 BT-40 JIS Specification... - Page 42 Machine Specification 2-13 2.11.2 V40 ANSI Specification...
- Page 43 2-14 Machine Specification 2.11.3 V40 CT Specification...
- Page 44 Machine Specification 2-15 2.11.4 CAT-40 Specification Unit:inch...
-
Page 45: Specifications Of The Machine Tool
2-16 Machine Specification Specifications of the Tool 2.12... -
Page 46: Stroke Limits For Axes And Atc
Machine Specification 2-17 Stroke Limits for Axes and ATC 2.13 MODEL AL52/AM52 height) 1300 1500 AL52(Column... - Page 47 2-18 Machine Specification 2.14 The Mechanism for Tool Clamping and Unclamping The tool clamping and unclamping are accomplished through the use of disk spring, drawing bar, and a pneumatic system, as shown below. The tool clamping force applied by the disk spring is approximately 1000 kg.
-
Page 49: Chapter 3 Shipping/Handling And Installation
Chapter 3 Shipping/Handling and Installation... -
Page 50: Preparation
Clear the space and transportation route at the factory 12 days in advance for the machine to move in and install. 3.1.1 Space Requirement Recommended site space for the machine with standard equipment: MODEL AL52/AM52 6380 5250 3380 2250 3.1.1.1 Ensure to reserve space for optional equipment. Please contact us if you have any problem in installing this machine. - Page 51 Shipping/Handling and Installation 3.1.2 Foundation Plan This machine should be placed upon a solid foundation to maintain the machine accuracy for a long run. Dig the planning site to about 85-cm underground. Pave the bottom with a layer of pebble of 20 cm thick, then fill the site with concrete. The foundation surface should be level and flat.
- Page 52 Shipping/Handling and Installation 3-3 AL52/AM52...
-
Page 53: Machine Lifting
Shipping/Handling and Installation 3.2 Machine Lifting This AL52/AM52 vertical machining center is composed of headstock, tool magazine, main column, working table, saddle, bed base, operation panel, pneumatic system, lubrication system, electrical cabinet and CNC unit. Those components are connected with electrical cables and/or pneumatic pipelines. - Page 54 Shipping/Handling and Installation 3-5...
- Page 55 Shipping/Handling and Installation 3.2.2.2 Using Crane or Other Lifting Equipment 3.2.2.2.1 The loading capacity of the lifting equipment should be tons AL52/AM52 Wiring cables and chains of the lifting equipment should be able to bear a load of AL52/AM52. 3.2.2.2.2 The...
- Page 56 Shipping/Handling and Installation 3-7 3.2.3 Lifting the Bare Machine 3.2.3.1 Using Forklift 3.2.3.1.1 The loading capacity of the forklift should be at least tons AL52/AM52. 3.2.3.1.2 AL52/AM52 cm in length, cm in width and cm in height. Ensure nobody is in the way and the path is clear before starting to move this machine.
- Page 57 3.2.3.2 Using Crane or Other Lifting Equipment 3.2.3.2.1 The loading capacity of the lifting equipment should be tons AL52/AM52 at least. The loading capacity below 10 tons AL-52/AM52 is prohibited. 3.2.3.2.2 Wire cables and chains of the lifting equipment should be able to bear a...
- Page 58 Shipping/Handling and Installation 3-9 3.2.4 Notice 3.2.4.1 How to Fix Machine Components during Transportation 3.2.4.1.1 Counterbalance weight: To prevent the counterbalance weight from swing, put a steel rod (φ32mm) through its center hole from two holes on the main column wall reserved for fastening the counterbalance weight.
- Page 59 3-10 Shipping/Handling and Installation 3.2.4.2 How to move work piece Using sling to move work piece is necessary for any work piece heavy than 10 Kgs Sling hook Work piece Work piece must Operation procedure description is below: has fix point for sling...
- Page 60 Shipping/Handling and Installation 3-11 Move work piece to table Lock the bolt and positioning block.
- Page 61 3-12 Shipping/Handling and Installation 3.2.5 Fixture (sling frame) Remove Ensure to remove all the fixtures listed below before operating the machine: 3.2.5.1 Remove the fixed block (1) under the headstock. 3.2.5.2 Remove the fixed plate (2) on the working table. 3.2.5.3 Remove the fixed plate (3) under the operation box.
- Page 62 Shipping/Handling and Installation 3-13 Unloading machine from container 3.2.6 頭叉卸貨方式 Back of Container Direction 240 cm 1、需用18噸堆高機. 18 Toons fork lift is necessary 2、牙長須240公分以上 Fork length must longer than 240 cm 側叉卸貨方式 Side of Container Direction 步驟一(Step 1):以鋼纜拉出機台。 Pull the iron base by hawser 步驟二(Step 2):堆高機請依示位置作業。...
- Page 63 3-14 Shipping/Handling and Installation...
-
Page 64: Storage
Shipping/Handling and Installation 3-15 3.3 Storage 3.3.1 Storage with the Machine Packed 3.3.2.1 Ensure to fasten all the loose parts and have an anti-rust treatment of the machine. 3.3.2.2 Ensure to fix the machine firmly inside the crate to prevent the machine move from falling. -
Page 65: Installation
3-16 Shipping/Handling and Installation 3.4 Installation 3.4.1 Power Supply 3.4.1.1 The main power supply of this machine is rated as 60 Hz, 220 Volts, alternating, and 21~30KVA. Ensure all the associated connections and wiring are appropriate, that is, connections and wiring should conform with the local safety rules at least. -
Page 66: Cleaning
Shipping/Handling and Installation 3-17 3.5 Cleaning 3.5.1 Ensure to clean up the anti-rust treatment with the kerosene or the diesel on the contact surfaces of the moving machine parts. Don‘t clean up the anti-rust solvent on other places than where mentioned above. 3.5.2 Do not clean the machine with organic solvent. - Page 67 3-18 Shipping/Handling and Installation 3.6.6.1 Arrange the granite squareness rule and the dial gauge set, as shown in the attached figure. 3.6.6.2 Ensure to place the squareness rule along the centerline of the working table. The dial gauge set should be held directly under the spindle. 3.6.6.3 Move the headstock along the Z direction, then level the machine by adjusting the rear two foundation bolts until the squareness meets the requirements.
- Page 68 Shipping/Handling and Installation 3-19 3.6.8.1 Prepare the dial gauge set and granite squareness rule. 3.6.8.2 Place the granite squareness rule on the working table. 3.6.8.3 Hold the dial gauge set directly under the spindle. 3.6.8.4 In each of the three directions, move either the headstock or working table along some distances, then level the machine until readings at both ends are the same.
-
Page 69: Inspection
3-20 Shipping/Handling and Installation 3.7 Inspection 3.7.1 Before Power Start-Up 3.7.1.1 Ensure the power supply specification is correct. 3.7.1.2 Ensure electric cables and connectors are appropriate based on the local safety regulations. 3.7.1.3 Ensure connections between the machine and grounding terminals are correct. -
Page 70: Polycarbonate Panels
Shipping/Handling and Installation 3-21 3.8 Polycarbonate panes Note: We recommend making a replacement the polycarbonate panes every three years. -
Page 71: Installation Of The Optional Accessories
3-22 Shipping/Handling and Installation 3.9 Installation of the optional accessories 3.9.1 Chip conveyor This machine has chip conveyor to drive away the chips from working area into chip bucket outside the machine. Please put chip conveyor on the top of coolant tank, and then insert them to the tunnel at the rear of bed or right side of machine. -
Page 72: Chapter 6 Lubrication
Chapter 6 Lubrication... -
Page 73: Importance Of Lubrication
Lubrication Importance of Lubrication Running conditions of this machine depend heavily on the lubrication management. Ensure to check the lubrication system frequently to keep this machine in a good service condition. The followings describe how to lubricate various machine parts properly. - Page 74 Lubrication 6.1.3 Warning System for the Slideway Lubrication System A warning system is designed to notify users of checking and filling up the slideway lubrication system: 6.1.3.1 Counter starts to count when the machine is ready. The cycle time is set to be 600 hours, that is, the warning will be set every 600 hours to notify the user to add on the lubrication grease.
-
Page 75: Lubrication System Diagram
Lubrication Lubrication System Diagram 6.2.1 Grease Lubrication System Diagram AL52 Operation's & Maintenance Manual EV-860/1050... - Page 76 Lubrication AM52 EV-860/1050 Operation's & Maintenance Manual...
- Page 77 Lubrication 6.2.2 Oil lubrication/Cooling Diagram Operation's & Maintenance Manual EV-860/1050...
- Page 78 Lubrication 6.2.3 Grease Lubrication Points 6.2.3.1 Fill the R68 lubricate from oil-orifice if the optional centralized lubrication system is used instead. 6.2.3.2 Move the headstock down to the end point. Fill the R68 lubricant to oil- orifice . The lubricant checking frequency is 12 months. 器...
-
Page 79: The Oil Guide Table
Centralized Lub. Circulating Lub. Method As needed 12 months As needed Oil Change Period Tank Capacity AL52/AM52:344L 1)Kluber Lubrication 1)B.P Energol NT 68 1)CPC Cutting Oil 31C lsoflex Nbu 15 2)Mobil Vactra No.2 2)Mobile Esultran 2)Shell Alvania No.2 3)Esso Febis K68... -
Page 80: Chapter 7 Mechanism
Chapter 7 Mechanism... -
Page 81: Headstock System
10000 /min. The tool clamping and unclasping are accomplished through the use of disk spring, draw bar, and a pneumatic system, as shown below. The tool clamping force applied by the disk spring is approximately 1200 kgf AL52/AM52。... - Page 82 M e c h a n i s m 7 - 2 7.1.2 Tool Clamping and Unclasping Mechanism To grip the tool holder, the draw bar will be pulled up by the disk spring set to close the collet chuck. To release the tool holder, the collet chuck is pushed off by the pneumatic piston through the draw bar.
- Page 83 Mechanism 7.1.3 Spindle Positioning Mechanism The sensor tracks the spindle rotation motion and feeds the positioning signal to the spindle drive motor's controller to control the spindle position precisely.
- Page 84 M e c h a n i s m 7 - 4 7.1.4 Gear Trains Mechanism of Spindle Head In low gear spindle rotation, pressured air comes through circuit A and pushes cylinder’s piston and shifter downward to mach low speed gears. In high gear spindle rotation, pressured air comes through circuit B and pulls cylinder’s piston and shifter upward to mach high-speed gears.
-
Page 85: Feed-Motion Transmission Mechanism
Mechanism 7.2 Feed-Motion Transmission Mechanism 7.2.1 X Direction 7.2.1.1 Transmission Mechanism 7.2.1.1.1 The working table is seated on guide rails of the saddle and driven by the AC servomotor via the connection of a coupling and a ballscrew. 7.2.1.1.2 Because the AC servomotor is directly connected to the ballscrew through a coupling, alignment problems can be reduced to minimum. - Page 86 This is only a semi-closed control loop. Otherwise can select the linear scales (option) which are a closed control loop. 7.2.1.2.2 The maximum traveling range in the X direction is AL52/AM52. A safety mechanism is used to prevent the saddle from over-traveling as described below.
- Page 87 Mechanism 7.2.2 Y Direction 7.2.2.1 Transmission Mechanism 7.2.2.1.1 The saddle is seated on guide rails of the bed base and driven by the AC servomotor via the connection of a coupling and a ballscrew. 7.2.2.1.2 Because the AC servomotor is directly connected to the ballscrew through a coupling, alignment problems can be reduced to minimum.
- Page 88 This is only a semi-closed control loop. Otherwise can selections the linear scales (option) which are a closed control loop. 7.2.2.2.2 The maximum traveling range in the Y direction is 680mm (AL52/AM52). A safety mechanism is used to prevent the saddle from over-traveling as described below.
- Page 89 Mechanism 7.2.3 Z Direction 7.2.3.1 Transmission Mechanism 7.2.3.1.1 The headstock is seated on guide rails of the main column and driven by the AC servomotor via the connection of a coupling and a ballscrew. 7.2.3.1.2 Because the AC servomotor is directly connected to the ballscrew only through a coupling, alignment problems can be reduced to minimum.
- Page 90 This is only a semi-closed control loop. Otherwise can selections the linear scales (option) which are a closed control loop. 7.2.3.2.2 The maximum traveling range in the Z direction is 680mm (AL52/AM52). A safety mechanism is used to prevent the headstock from over-traveling as described below.
- Page 91 Mechanism 7-11 7.2.4 X,Y and Z Axis Cable Carrier All the electrical wires and oil hoses connecting between the saddle and base bed start from connectors on the base bed, pass through the base bed to the Y-axis cable carrier, then connect to connectors located on the saddle. And all the electrical wires, air hoses and oil hoses connecting between the headstock and main column start from the electrical cabinet to the Y-axis cable carrier then connect to connectors located on the headstock.
-
Page 92: Tool Magazine
Mechanism 7-12 7.3 Tool Magazine 7.3.1 Transmission / Positioning Mechanism 7.3.1.1 The tool magazine is driven by an electrical motor through the cylindrical cam to drive the roller on the swivel disk and make the swivel disk rotate. The cylindrical cam both has the transmission and positioning functions. 7.3.1.2 The tool selection is accomplished by using the pneumatic system and proximity switch. - Page 93 Mechanism 7-13 7.3.2 Tool Shank Adapter Swivel Mechanism After tool selection locating process, the cylinder activates the draw bar and shifter to make the tool shank adapter rotate 90°, then tool changing is possible. After the tool changing process, the cylinder activates the tool shank adapter to return for the next tool selection process.
- Page 94 Mechanism 7-14 7.3.3 Tool Exchange Sequences 7.3.3.1 Mechanism The tool magazine makes the swivel disk rotate and makes the tool shank adapter rotate 90° ATC executes the tool exchange. 7.3.3.2 Procedures 1. Tool arm at standby position. Z-axis headstock moves to Position of Position of the tool exchange origin.
-
Page 95: The Fully-Enclosed Splash-Guarding Enclosure
Mechanism 7-15 7.4 The Fully-Enclosed Splash-Guarding Enclosure A fully-enclosed sheet metal enclosure is designed to isolate the running machine and the cutting coolant and flying chips it generates from the operator. Chips are conveyed to the chip-collecting bucket through the chip conveying tunnel. The circulating cutting coolant is pumped through the coolant filters to the coolant distributors. -
Page 96: Mechanism Adjustment
Mechanism 7-16 7.5 Mechanism Adjustment 7.5.1 Spindle Transmission Belt Tension Check the main drive belt tension frequently. Follow steps below to adjust the belt tension: 1) Loosen the four fastening screws on the gear box or motor stand (without gear box) and the nut of adjust bolt. - Page 97 Mechanism 7-17...
-
Page 98: Chapter 8 Pneumatic & Coolant Systems
Chapter 8 Pneumatic & Coolant Systems... -
Page 99: Schematic Diagram Of The Pneumatic System
Pneumatic& Coolant Systems 8.1 Schematic Diagram of the Pneumatic System STD. 8.1.1 氣壓迴路圖 Schematic Diagram of the Pneumatic 主軸吹氣 主軸鎖退刀 儲刀倉倒刀 Tool holder cleaning Spindle Tool 配重[(B)MV-1060*1/1220*2] Tool Adapter (Taper hole) Clamp/Unclamp (TAPER孔) Counterweight Rotation 90° 主軸迷宮吹氣 WITHOUT SPINDLE AIR SEAL 退刀... - Page 100 Pneumatic& Coolant Systems for CE 8.1.2 氣壓迴路圖 Schematic Diagram of the Pneumatic 主軸吹氣 主軸鎖退刀 儲刀倉倒刀 Tool holder cleaning 配重[(B)MV-1060*1/1220*2] Spindle Tool Tool Adapter (Taper hole) Clamp/Unclamp (TAPER孔) Rotation 90° Counterweight 主軸迷宮吹氣 WITHOUT SPINDLE AIR SEAL 退刀 Unclamp Clamp 回正 Horizontal 90°...
-
Page 101: Schematic Diagram Of The Pneumatic Piping System
Pneumatic& Coolant Systems Schematic Diagram of the Pneumatic Piping System . -
Page 102: Pneumatic System
Pneumatic& Coolant Systems 8.3 Pneumatic System The compressed air passing through the F.R.L. (air filter, air regulator, and air lubricator) combination is used to clean the tool holder and spindle taper hole. The compressed air pressure is regulated under 5 bar. The air pipe lines and solenoid valves are also lubricated by these mixture of oil and air. -
Page 103: Self Compensation Of Pneumatic Syste
Pneumatic& Coolant Systems 8.4 Self compensation of pneumatic system 8.4.1 Function The self compensation of pneumatic system is used by the compressed-air to control the cylinder of column when the spindle head up and down. It is operated by the air pressure from compressed-air tank. 8.4.2 Pressure value The main pressure meter (for all pneumatic system ) is source of air pressure need 4.905~6.867bar(5~7kg/cm²) above, and the mini regulator pressure... - Page 104 Pneumatic& Coolant Systems AL52/AM52 The cylinder of The cylinder of column column Behind on the machine lower and right side(near the transformer and cooler oil). Release pressure valve...
-
Page 105: Sematic Diagram Of The Coolant System
Pneumatic& Coolant Systems 8.5 Schematic Diagram of the Coolant System... -
Page 106: Chapter 9 Preventive Maintenance
Chapter 9 Preventive Maintenance... -
Page 107: Daily Maintenance
Preventive Maintenance To keep the machine in good service conditions, please follow the procedures below to maintain the machine: 9.1 Daily Maintenance 9.1.1 Check the oil level frequently. Fill up or refill the oil tank if necessary. 9.1.2 Check the spindle taper bore after finishing the machining. Clean up the spindle taper bore with the spindle taper bore cleaner, as illustrated in the following chapter. -
Page 108: Annual Maintenance
Preventive Maintenance 9.4 Annual Maintenance 9.4.1 Ensure the push buttons and switches on the control panels work properly. 9.4.2 Remove all the carbon deposited on the electrical relay points, then clean all the electrical relay points with alcohol liquid. 9.4.3 Check if the balance chains are in good service conditions. 9.4.4 Clean up the cutting oil tank, then fill up the tank with recommended oil. -
Page 109: Notice
Preventive Maintenance 9.6 Notice 9.6.1 Ensure to use the recommended fluids as listed in the oil guide table. 9.6.2 Do not power on the machine if the PCBs of the NC equipment have been taken out for maintenance. 9.6.3 High parts of the machine which must be accessible for maintenance or trouble shooting, please use movable ladders which in accordance with ISO 14122 standard and supports for safety belt Operation's &... - Page 110 PARTS NO:MM0100030A / Mar 2019...
Need help?
Do you have a question about the AL52 and is the answer not in the manual?
Questions and answers