
Related Manuals for Cressi-sub ELLIPSE

Summary of Contents for Cressi-sub ELLIPSE
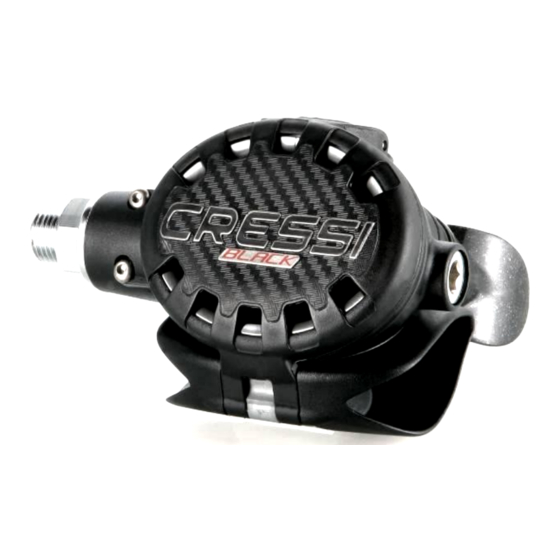
- Page 1 2nd stage ELLIPSE Black Regulators repair and maintenance Rev. ELL. OCTO /A January 2008 Ed. B / 09...
- Page 2 EXCLUSIVELY by an authorized Cressi-Sub center. If the information provided in this document is unclear or not fully intelligible, • please contact Cressi-sub before proceeding with any disassembly or maintenance procedures. Before proceeding, Cressi-sub recommends that you read the following document •...
- Page 3 • To prevent any assembly errors when performing maintenance and/or repairs, we recommend using all the replacement parts provided by Cressi-Sub in every operation. • Pay special attention to the recommendations provided in the margin of the figures that show the various sequences of equipment maintenance and/or repair in order to avoid any problems that could result in an accident.
- Page 4 2nd stage ELLIPSE Black Regulators repair and maintenance ELLIPSE 2 STAGES HZ 810067 ANNUAL REPLACEMENT KIT CHART (Real Size) Rev. ELL. OCTO /A January 2008 Ed. B / 09...
- Page 5 2nd stage ELLIPSE Black Regulators repair and maintenance • Maintenance kit 2nd stage Ellipse Black HZ 810067 (Real Size) Go back to •Use only original Cressi-sub spare parts •Note: we recommend to carry out a complete maintenance of your regulator once a year or more in case of a particularly intensive use.
- Page 6 2nd stage ELLIPSE Black Regulators repair and maintenance • Yearly maintenance • Cressi-Sub recommends complete regulator maintenance at least once a year, or more frequently in the case of particularly intense use. • Maintenance must include replacement of all components provided in the annual equipment maintenance kit.
- Page 7 EXCLUSIVELY by an authorized Cressi-Sub center. • You can find your authorized Cressi-Sub center by asking your dealer, or Cressi Sub S.p.A. itself by sending an e-mail to: info@cressi-sub.it • Use only original Cressi-sub spare parts Rev.
- Page 8 2nd stage ELLIPSE Black Special tools Regulators repair and maintenance Rev. ELL. OCTO /A January 2008 Ed. B / 09...
- Page 9 To replace the O-ring correctly, press its sides to create a bulge inside which to insert the round pointed tool, as shown in the pictures; • Attention: USE ONLY ORIGINAL CRESSI-SUB SPARE PARTS Rev. ELL. OCTO /A January 2008 Ed. B / 09...
- Page 10 2nd stage ELLIPSE Black Regulators repair and maintenance • Disassembling the low-pressure hose • Using a 19 mm (0,75 in.) and a 17 mm (0,67 in.) spanner, remove the low-pressure hose, holding the set nut with the former and unscrewing the shaft with the latter.
- Page 11 2nd stage ELLIPSE Black Regulators repair and maintenance • Cam-lock –disassembling the regulator • Insert a 4 mm (0,15 in.) Allen wrench in the cam-lock, slightly press and turn 90° anticlockwise. The inside spring will push out the key, so that it may be easily taken out.
- Page 12 2nd stage ELLIPSE Black Regulators repair and maintenance • Opening the lid – 1- • After removing the cam-lock key, use two fingers to press outwards: the central lid will open, as shown in the picture. Rev. ELL. OCTO /A January 2008 Ed.
- Page 13 2nd stage ELLIPSE Black Regulators repair and maintenance • Opening the lid – 2- • Holding the regulator in one hand, open the cap with the other. Rev. ELL. OCTO /A January 2008 Ed. B / 09...
- Page 14 2nd stage ELLIPSE Black Regulators repair and maintenance • Removing cap and seal • After opening the cap, remove the semirigid cap and seal HZ 810069 HZ 810064 Rev. ELL. OCTO /A January 2008 Ed. B / 09...
- Page 15 2nd stage ELLIPSE Black Regulators repair and maintenance • NOTE: the following disassembling and assembling phases are the same for all versions of Ellipse regulators. Therefore, although the pictures refer to “Ellipse Titanio” version, they have to be considered valid as well for “Ellipse Black” version, which the present manual refers to.
- Page 16 • Please note how the set nut form reduces the obstructions around the adjustable nozzle seat. HZ 810096 2nd stage Ellipse Black Rev. ELL. OCTO /A January 2008 Ed. B / 09...
- Page 17 2nd stage ELLIPSE Black Regulators repair and maintenance • Removing the conical blocking pins –1- • Use a 0,59” (15 mm) spanner to turn slightly the hexagonal seat of the adjustable nozzle in both directions, in order to get the removal...
- Page 18 2nd stage ELLIPSE Black Regulators repair and maintenance • Removing the conical blocking pins–2- • Remove both conical pins inserting a pointed tool under their sides. HZ 810084 Rev. ELL. OCTO /A January 2008 Ed. B / 09...
- Page 19 2nd stage ELLIPSE Black Regulators repair and maintenance • Removing the 2nd stage mechanism • After removing the conical pins, the 2nd stage mechanism may be taken out of the regulator, without removing any other component, therefore without varying the regulator setting:...
- Page 20 2nd stage ELLIPSE Black Regulators repair and maintenance • Disassembling the flux diverter Use a flat pointed tool to remove the flux diverter seal ring, pushing it outside. Rev. ELL. OCTO /A January 2008 Ed. B / 09...
- Page 21 2nd stage ELLIPSE Black Regulators repair and maintenance Disassembling the flux diverter • Replace and grease the flux diverter’ s 21K = HZ 810079 HZ 810081 HZ 810082 HZ 810080 Rev. ELL. OCTO /A January 2008 Ed. B / 09...
- Page 22 ELLIPSE Black 2nd stage: disassembling phases Regulators repair and maintenance • Disassembling the 2nd stage mechanism HZ 810085 HZ 709011 • After taking out the 2nd stage mechanism, insert the special tool in the valve and push it inside, to let the lever easily get out.
- Page 23 2nd stage ELLIPSE Black Regulators repair and maintenance • Disassembling the 2nd stage mechanism • Remove the setting nut and its metal washer, using a 5.5 mm (0,22 in.) screwdriver. 15K = HZ 746094 Rev. ELL. OCTO /A January 2008...
- Page 24 ELLIPSE Black 2nd stage: disassembling phases Regulators repair and maintenance • Disassembling the 2nd stage mechanism • To remove the 2nd stage mechanism, insert a 15mm (0,59 in.) spanner in the valve outside seat and another 15mm (0,59 in.) spanner in the nozzle hexagon.
- Page 25 ELLIPSE Black 2nd stage: disassembling phases Regulators repair and maintenance • Disassembling the 2nd stage mechanism • After disconnecting valve body and nozzle seat, use a screwdriver to remove the adjustable nozzle out of its seat. Rev. ELL. OCTO /A January 2008 Ed.
- Page 26 ELLIPSE Black 2nd stage: disassembling phases Regulators repair and maintenance • Disassembling the 2nd stage mechanism HZ 709011 Use the plastic spring pusher - designed to prevent the edge from being damaged - to remove the nozzle out of its seat.
- Page 27 2nd stage ELLIPSE Black Regulators repair and maintenance • Disassembling the 2nd stage mechanism • Now, here we have on our bench all elements composing the 2nd stage Ellipse Black mechanism. 2nd stage valve spring Lever, washer and nut HZ 730207 2°...
- Page 28 2nd stage ELLIPSE Black Regulators repair and maintenance • Assembling the 2nd stage mechanism Rev. ELL. OCTO /A January 2008 Ed. B / 09...
- Page 29 2nd stage ELLIPSE Black Regulators repair and maintenance • Assembling the 2nd stage mechanism HZ 742013 • Connect the valve with the regulator and insert the previously removed pad back into the valve shaft bush. • Note: use the old pad in order to prevent the fresh one to be damaged by the nozzle cutting edge, as will be seen later.
- Page 30 2nd stage ELLIPSE Black: assembling phases Regulators repair and maintenance • Assembling the 2nd stage mechanism • Insert the teflon washer in the thermoplastic rubber washer. 11K = HZ 810088 Rev. ELL. OCTO /A January 2008 Ed. B / 09...
- Page 31 2nd stage ELLIPSE Black: assembling phases Regulators repair and maintenance • Assembling the 2nd stage mechanism • Insert the whole sliding washer in the valve’s spring. 11K = HZ 810088 HZ 730207 Rev. ELL. OCTO /A January 2008 Ed. B / 09...
- Page 32 2nd stage ELLIPSE Black: assembling phases Regulators repair and maintenance • Assembling the 2nd stage mechanism • Insert the whole spring and washer in the valve body, getting sure it is correctly placed. Rev. ELL. OCTO /A January 2008 Ed. B / 09...
- Page 33 2nd stage ELLIPSE Black Regulators repair and maintenance • Assembling the 2nd stage mechanism 9k = HZ 810089 • Insert the whole shaft including the old pad into the spring, making sure its square stem gets into the sliding washer.
- Page 34 2nd stage ELLIPSE Black: assembling phases Regulators repair and maintenance • Assembling the 2nd stage mechanism • After greasing the O-rings, insert and push the nozzle into its seat up to the beginning of the thread. • Now turn it into its seat for two whole turns, and keep it so until the regulator is assembled and set.
- Page 35 2nd stage ELLIPSE Black: assembling phases Regulators repair and maintenance • Assembling the 2nd stage mechanism “CLOSE” Tighten both assembled parts: remember the thread between them is LEFT. Rev. ELL. OCTO /A January 2008 Ed. B / 09...
- Page 36 2nd stage ELLIPSE Black: assembling phases Regulators repair and maintenance • Assembling the 2nd stage mechanism •Insert the lever into the valve body slot in the direction shown in the picture (lever 1 opposite injector hole 2). Rev. ELL. OCTO /A January 2008 Ed.
- Page 37 2nd stage ELLIPSE Black: assembling phases Regulators repair and maintenance • Assembling the 2nd stage mechanism • Now insert washer and nut. Rev. ELL. OCTO /A January 2008 Ed. B / 09...
- Page 38 2nd stage ELLIPSE Black: assembling phases Regulators repair and maintenance • Assembling the 2nd stage mechanism HZ 810085 15K = HZ 746094 • Use a 0,22 in. screwdriver to turn the nut for a couple of threads, so as to keep the lever vertically, and keep it so until the regulator is assembled and set.
- Page 39 2nd stage ELLIPSE Black: assembling phases Regulators repair and maintenance • Assembling the 2nd stage mechanism • Fully unscrew the nozzle seat out of the valve body clockwise, since the coupling thread is LEFTHAND Rev. ELL. OCTO /A January 2008...
- Page 40 2nd stage ELLIPSE Black: assembling phases Regulators repair and maintenance • Assembling the 2nd stage mechanism • Remove the pad out of the valve shaft and replace it with the fresh one supplied in the annual service kit. Rev. ELL. OCTO /A January 2008 Ed.
- Page 41 2nd stage ELLIPSE Black: assembling phases Regulators repair and maintenance • Assemblaggio della meccanica del 2°stadio • Remember: the coupling thread is LEFT, turn the nozzle seat in the direction written on the valve body (“close”), at the same time keeping the...
- Page 42 2nd stage ELLIPSE Black: assembling phases Regulators repair and maintenance Use two 0,60 in. spanners respectively in the nozzle seat hexagonal frame and the profiling under the lever and tighten both, taking care to keep the lever pressed so as not to damage the pad with the nozzle cutting edge, as shown in the picture.
- Page 43 2nd stage ELLIPSE Black: assembling phases Regulators repair and maintenance • Disassembling the flux diverter Use a flat point to push back the flux switch’s seal ring into its housing. Rev. ELL. OCTO /A January 2008 Ed. B / 09...
- Page 44 2nd stage ELLIPSE Black Regulators repair and maintenance • Assembling the mechanism in the body HZ 810073 HZ 810063 Black HZ 810065 Yellow HZ 810074 HZ 810068 Rev. ELL. OCTO /A January 2008 Ed. B / 09...
- Page 45 2nd stage ELLIPSE Black Regulators repair and maintenance • Assembling the mechanism in the body • Insert the previously assembled and lubricated 2nd stage mechanism into the regulator’s case: make sure the air outlet hole under the lever’s washer is placed against the injector’s top, inside...
- Page 46 2nd stage ELLIPSE Black Regulators repair and maintenance • Assembling the mechanism in the body • Insert the regulator mechanism: to make the oepration easier, depress the thermoplastic injector top with your thumb. Rev. ELL. OCTO /A January 2008 Ed. B / 09...
- Page 47 2nd stage ELLIPSE Black Regulators repair and maintenance • Assembling the mechanism in the body • Insert the conical pins in their seats. HZ 810084 Rev. ELL. OCTO /A January 2008 Ed. B / 09...
- Page 48 • Assembling the mechanism in the body • Use a 19 mm (0,75 in.) hexagonal spanner to tighten the regulator 2nd stage set nut. HZ 810096 2nd stage ELLIPSE Black Rev. ELL. OCTO /A January 2008 Ed. B / 09...
- Page 49 2nd stage ELLIPSE Black Regulators repair and maintenance • Assembling the mechanism in the body • Place the ring on the seal, making sure its perimeter lies perfectly all over the seal external surface. Rev. ELL. OCTO /A January 2008...
- Page 50 2nd stage ELLIPSE Black Regulators repair and maintenance • Assembling the mechanism in the body • Now, insert the whole, making sure the seal perimeter edges get perfectly in the regulator’ s body. • NOTE: In order to ensure proper coupling, it can be helpful to soak the diaphragm before placing it in the body of the regulator.
- Page 51 2nd stage ELLIPSE Black Regulators repair and maintenance • Closing the regulator‘ s cap • Depress the halfrigid discharge cap with your finger, and turn the weigh-cap towards the discharge valve seat. Rev. ELL. OCTO /A January 2008 Ed. B / 09...
- Page 52 2nd stage ELLIPSE Black Regulators repair and maintenance • Closing the regulator‘ s cap • To close, place the tooth shown in the picture in such way that it TOOTH LIES on the 2nd FULCRUM (HOUSING) stage special housing. The...
- Page 53 2nd stage ELLIPSE Black Regulators repair and maintenance • Closing the regulator‘ s cap • Turn the weigh-cap until the regulator is perfectly closed. Rev. ELL. OCTO /A January 2008 Ed. B / 09...
- Page 54 2nd stage ELLIPSE Black Regulators repair and maintenance • Closing the regulator‘ s cap • Depress the middle part (grey in the picture) until you hear a small click, proving the regulator is perfectly closed. Rev. ELL. OCTO /A January 2008...
- Page 55 2nd stage ELLIPSE Black Regulators repair and maintenance • Closing the regulator‘ s cap - Cam-Lock HZ 810077 Rev. ELL. OCTO /A January 2008 Ed. B / 09...
- Page 56 2nd stage ELLIPSE Black Regulators repair and maintenance • Closing the regulator‘ s cap - Cam-Lock Use a 4 mm (0,15 in.) allen wrench to insert the safety cam-lock in its seat and turn 90° clockwise. Rev. ELL. OCTO /A January 2008 Ed.
- Page 57 2nd stage ELLIPSE Black Regulators repair and maintenance • Closing the regulator‘ s cap - Cam-Lock • If the cam-lock is inserted correctly, it will appear as shown in the picture. Rev. ELL. OCTO /A January 2008 Ed. B / 09...
- Page 58 2nd stage ELLIPSE Black Regulators repair and maintenance Use a 0,24 in. Allen wrench to unscrew the second stage setting cap, as shown in the picture. Rev. ELL. OCTO /A January 2008 Ed. B / 09...
- Page 59 2nd stage ELLIPSE Black Regulators repair and maintenance stage Ellipse Black: valve nozzle setting (page 60) • Screw the 2 stage onto the setting gauge (HZ 710011) connected through a middle pressure hose to a regularly set first stage; •...
- Page 60 2nd stage ELLIPSE Black Regulators repair and maintenance • 2 stage Ellipse Black: valve nozzle setting HZ 710011 Rev. ELL. OCTO /A January 2008 Ed. B / 09...
- Page 61 • The 2 stage Ellipse is correctly set if, with pressurized regulator, its lever idles for about 0,08 in. as to the diaphragm plate; • The final setting can also be carried out, with open tap and pressurized regulator, using the original Cressi-sub optional dima (page 63) Rev.
- Page 62 2nd stage ELLIPSE Black Regulators repair and maintenance • Second stage Ellipse Black setting: lever height setting HZ 710011 HZ 709009 Rev. ELL. OCTO /A January 2008 Ed. B / 09...
- Page 63 2nd stage ELLIPSE Black Regulators repair and maintenance Rev. ELL. OCTO /A January 2008 Ed. B / 09...
- Page 64 2nd stage ELLIPSE Black Regulators repair and maintenance • Ellipse Black second stage setting •After setting the second stage correctly, turn the side screw with a 0,24 in. Allen wrench until its head lines up with the case. HZ 810075 2°stadio Ellipse Black Rev.
- Page 65 2nd stage ELLIPSE Black checking Regulators repair and maintenance •After setting the regulator, keep it pressurized with a properly set 1 stage, and carry out following final checking: •Put the second stage gently under water with its mouthpiece upwards and its Venturi checking lever in the position Dive “+”, without letting water enter the mouthpiece;...
- Page 66 2nd stage ELLIPSE Black Service records Regulators repair and maintenance Download Rev. ELL. OCTO /A January 2008 Ed. B / 09...
- Page 67 2nd stage ELLIPSE Black Service records Regulators repair and maintenance Download Tab Maintenance / Service Record Rev. ELL. OCTO /A January 2008 Ed. B / 09...
Need help?
Do you have a question about the ELLIPSE and is the answer not in the manual?
Questions and answers