Table of Contents
Advertisement
Quick Links
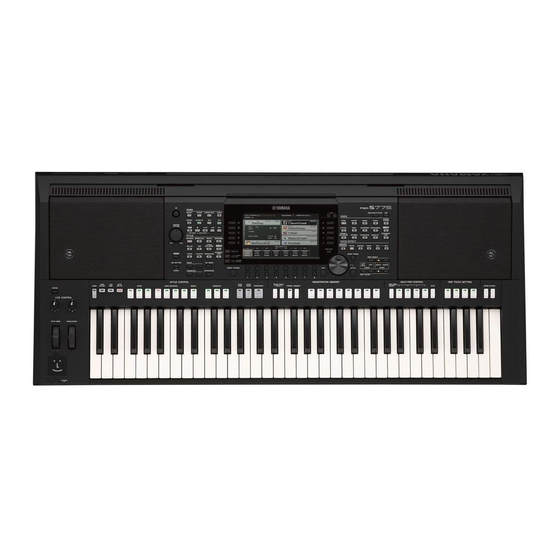
Digital Workstation
Clavier Arrangeur Professionnel
Owner's Manual
Mode d'emploi
Thank you for purchasing this Yamaha Digital Workstation!
This electric keyboard for professional entertainers not only has a wide selection of Voices and
versatile functions but also gives you the potential of expanding content for the instrument.
We recommend that you read this manual carefully so that you can fully take advantage of the
advanced and convenient functions of the instrument. We also recommend that you keep this
manual in a safe and handy place for future reference.
Before using the instrument, be sure to read "PRECAUTIONS" on pages 5 – 6.
Merci d'avoir choisi ce Clavier Arrangeur Professionnel Yamaha !
Ce clavier électrique destiné aux professionnels dispose d'une large sélection de sonorités
et de fonctions polyvalentes et offre un potentiel considérable pour l'élargissement des
contenus de l'instrument.
Nous vous conseillons de lire attentivement ce mode d'emploi afin de tirer pleinement profit
des fonctions avancées et très utiles de votre instrument. Nous vous recommandons
également de garder ce manuel à portée de main pour toute référence ultérieure.
Avant d'utiliser l'instrument, lisez attentivement la section « PRÉCAUTIONS
D'USAGE » aux pages 5 et 6.
English
Français
EN
FR
Advertisement
Table of Contents

Related Manuals for Yamaha PSR-S775


Summary of Contents for Yamaha PSR-S775
- Page 1 Before using the instrument, be sure to read “PRECAUTIONS” on pages 5 – 6. Merci d'avoir choisi ce Clavier Arrangeur Professionnel Yamaha ! Ce clavier électrique destiné aux professionnels dispose d’une large sélection de sonorités et de fonctions polyvalentes et offre un potentiel considérable pour l’élargissement des...
- Page 2 This product should be used only with the components supplied never mix different types of batteries. Batteries MUST be installed or; a cart, rack, or stand that is recommended by Yamaha. If a correctly. Mismatches or incorrect installation may result in over- cart, etc., is used, please observe all safety markings and instruc-...
- Page 3 Yamaha Corporation of America or its subsidiaries. devices. Compliance with FCC regulations does not guarantee * This applies only to products distributed by YAMAHA CORPORATION OF AMERICA. (class B) PSR-S975/S775 Owner’s Manual...
- Page 4 (1) this device may not cause harmful interference, and (2) this device must accept any interference received, including interference that may cause undesired operation. (fcc_sengen) CAN ICES-3 (B)/NMB-3(B) • This applies only to products distributed by Yamaha Canada Music Ltd. • Ceci ne s’applique qu’aux produits distribués par Yamaha Canada Musique Ltée. (can_b_01) Explanation of Graphical Symbols...
- Page 5 For AC adaptor WARNING CAUTION • This AC adaptor is designed for use with only Yamaha electronic instruments. Do • When setting up, make sure that the AC outlet is easily accessible. If some not use for any other purpose.
- Page 6 If you experience any hearing loss or ringing in the ears, consult a physician. Yamaha cannot be held responsible for damage caused by improper use or modifications to the instrument, or data that is lost or destroyed. Always turn the power off when the instrument is not in use.
-
Page 7: Included Accessories
• The illustrations and LCD screens as shown in this manual are for instructional purposes only, and may appear somewhat different from those on your instrument. • Even though the example screens and illustrations pertain to the PSR-S975, the usage is the same for the PSR-S775. • The displays are taken from the PSR-S975, and are in English. -
Page 8: Formats
* The contents described above include a computer program, Accompaniment Style data, MIDI data, WAVE data, voice recording data, a score, score data, etc. * You are allowed to distribute medium in which your performance or music production using these contents is recorded, and the permission of Yamaha Corporation is not required in such cases. -
Page 9: Table Of Contents
Table of Contents Included Accessories............7 USB Audio Player/Recorder – Playing Back and Recording Audio Files – About the Manuals..............7 Formats ................8 Playing Back Audio Files ............ 71 Information................8 Recording Your Performance as Audio......74 Welcome to Digital Workstation Multi Pads – Adding Musical Phrases to Your Performance – 76 Panel Controls and Terminals Playing the Multi Pads ............ -
Page 10: Welcome To Digital Workstation
Featured on our special website (http://www.yamaha.com/awk/) are many Voices and Styles (called Expansion Pack data) that you can get and load to the PSR-S975/S775. By using the “Yamaha Expansion Manager” software, you can manage the variety of Expansion Packs and create your own custom Pack for installing on your instrument. - Page 11 Vocoder feature, recreating that popular effect for a variety of luscious, other-worldly sounds. Both the PSR-S975 and PSR-S775 let you connect an electric guitar, and you can even use powerful DSP effects to process the guitar sound instead, and play that along with the keyboard sounds.
-
Page 12: Panel Controls And Terminals
Turns on/off the OTS Link function. 4 [MIC SETTING/VOCAL HARMONY] button (PSR-S975) / @ STYLE CONTROL buttons......Page 50 [MIC SETTING] button (PSR-S775) .....Page 88 Controls Style playback. Calls up the display from which you can make settings for # [ASSIGN] button, LIVE CONTROL knobs..Page 40 the microphone/guitar and (on the PSR-S975) Vocal Har- Assigns functions and controls sounds in real time. - Page 13 ( [MIXER/EQ] button .........Page 95 G [MUSIC FINDER] button......... Page 80 Calls up various settings for the keyboard, Style and Song Calls up ideal panel setups for your performance. parts. H PART SELECT buttons ........Page 36 A [CHANNEL ON/OFF] button....Pages 56, 65 Selects a keyboard part.
- Page 14 Rear Panel 1 DC IN jack ............Page 16 5 [MIC/GUITAR INPUT] jack......Page 88 For connecting the power adaptor. For connecting a microphone or guitar. 2 FOOT PEDAL [1]/[2] jacks......Page 97 6 [GAIN] knob ............ Page 88 For connecting Footswitches and/or Foot controllers. For adjusting the input level of the [MIC/GUITAR INPUT] jack.
- Page 15 8 MIDI [IN]/[OUT] terminals......Page 103 For connecting external MIDI devices. 9 [USB TO HOST] terminal......Page 102 For connecting to a computer. ) [USB TO DEVICE] terminal ......Page 100 For connecting a USB device such as a USB flash drive. ! [RGB OUT] terminal (PSR-S975) ....Page 99 For connecting to an external monitor.
-
Page 16: Setting Up
Setting Up Power Requirements Connect the AC adaptor in the order shown in the illustration. AC Outlet AC adaptor Power cord DC IN jack (page 14) The shape of the plug and outlet differs depending on your area. WARNING Use the specified AC adaptor (page 111) only. Using the wrong AC adaptor can result in damage to the instrument or overheating. CAUTION When setting up the product, make sure that the AC outlet you are using is easily accessible. - Page 17 CAUTION Even when the power switch is turned off, electricity is still flowing to the product at the minimum level. When you are not using the prod- uct for a long time, make sure to unplug the power cord from the wall AC outlet. NOTICE While recording or editing, or while a message is displayed, the power cannot be turned off even if you press the [ ] (Standby/On)
-
Page 18: Adjusting The Master Volume
Adjusting the Master Volume To adjust the volume of the entire keyboard sound, use the [MASTER VOLUME] dial while playing the keyboard. CAUTION Do not use the instrument at high volume for long periods of time. Doing so may cause hearing loss. Changing the Display Language This determines the language (English, German, French, Spanish and Italian are available) used in the display for messages. -
Page 19: Playing The Demos
Playing the Demos The Demos provide helpful, easy-to-understand introductions to the features and functions as well as dynamic demonstrations of the high-quality sounds. Press the [DEMO] button to call up the Demo display. Press one of the [A] – [E] buttons to show a specific Demo. NOTE Pressing one of the [F] –... -
Page 20: Basic Operations
Basic Operations Display-based Controls The LCD provides comprehensive at-a-glance information on all current settings. The displayed menu can be selected or changed by the controls around the LCD. 2 TAB [E][F] buttons 1 [A] – [J] buttons 1 [A] – [J] buttons 3 [1 ] –... - Page 21 2 TAB [E][F] buttons These buttons are used to change the pages of displays that have “tabs” at the top. 3 [1 ] – [8 ] buttons The [1 ] – [8 ] buttons are used to make selections or adjust settings (up or down correspondingly) for functions shown directly above them.
- Page 22 4 Data dial and [ENTER] button Depending on the selected display, the Data dial can be used in the following two ways. • Selecting files (Voice, Style, Song, and so on) When one of the File Selection displays (page 26) is shown, you can use the Data dial and the [ENTER] button to select a file.
-
Page 23: Calling Up The Desired Display Instantly - Direct Access
Calling Up the Desired Display Instantly — Direct Access With the convenient Direct Access function, you can instantly call up the desired display — with just a single additional button press. Refer to the “Direct Access Chart” on page 106 for a list of the displays that can be called up with the Direct Access function. -
Page 24: Main Display Configuration
Main Display Configuration NOTE The display that appears when the power is turned on is the Main display. This display shows the current basic settings such as the currently selected Voice and You can quickly call up the Main dis- play by pressing the [DIRECT Style, allowing you to see them at a single glance. - Page 25 8 Multi Pad Bank name Displays the names of the selected Multi Pad Bank. Pressing the [I] button calls up the Multi Pad Bank Selection display (page 76). 9 Registration Memory Bank name Displays the currently selected Registration Memory Bank name and Registration Memory number.
-
Page 26: File Selection Display Configuration
File Selection Display Configuration The File Selection display is for selecting Voice, Styles, and other data. The File Selection display appears when you press one of the VOICE or STYLE category selection buttons, the SONG [SELECT] button, etc. 1 Location (drive) of data NOTE •... -
Page 27: File Management
• Prot. 1: Indicates Preset Songs copied to the USER drive. These only can be copied/moved/deleted in the USER drive. • Prot. 2 Orig: Indicates Yamaha-protection-formatted Songs. These cannot be copied. These can be moved/saved only to the USER drive and USB flash drives with ID. - Page 28 Saving a File You can save your original data (such as Songs you've recorded) as a file to the USER or the USB drive in the File Selection display (page 26). In the File Selection display, select the appropriate tab (USER or NOTE USB) to which you want to save the data by using the TAB Files cannot be saved to the PRESET...
- Page 29 Creating a New Folder NOTE You can create folders to make it easier to find your original data. A new folder cannot be made in the PRESET tab or the “Expansion” folder In the File Selection display, select the appropriate tab (USER or (page 46) in the USER tab.
- Page 30 Renaming a File/Folder You can rename files/folders. NOTE In the File Selection display, select the appropriate tab (USER or USB) which contains the file/folder you want to rename by using Files and folders in the PRESET tab or the “Expansion” folder (page 46) in the the TAB [E][F] buttons.
- Page 31 Press the [3 ] (COPY) button to copy or [2 ] (CUT) to move. The window for the Copy/Cut operation appears at the bottom of the display. Press one of the [A] – [J] buttons corresponding to the desired NOTE file/folder.
-
Page 32: Entering Characters
Press one of the [A] – [J] buttons corresponding to the desired NOTE file/folder. To cancel the Delete operation, press the [8 ] (CANCEL) button. Pressing a button selects (highlights) the file/folder. To cancel the selection, press the same [A] – [J] button again. Press the [6 ] (ALL) button to select all files/folders indicated on the current display including the other pages. -
Page 33: Resetting To The Factory-Programmed Settings
Other Character-entry Operations • Deleting characters Move the cursor to the character you wish to delete by using the Data dial, and press the [7 ] (DELETE) button. To delete all characters on the line at once, press and hold the [7 ] (DELETE) button. •... -
Page 34: Data Backup
Data Backup NOTE You can back up all data saved in the USER drive (except Protected Songs and Expansion Voices/Styles) and all settings of the instrument to a USB flash drive as a Before using a USB flash drive, be sure to read “Connecting USB Devices”... -
Page 35: Playing Voices
Voices – Playing the keyboard – The instrument features a wide variety of exceptionally realistic instrumental Voices, including piano, guitar, strings, brass, wind instruments and more. Playing Voices The Voices can be played via three keyboard parts: LEFT, RIGHT 1 and 2. You can combine these parts by using the PART ON/OFF buttons to create luscious instrument textures and convenient performance combinations. - Page 36 Make sure that the PART SELECT button corresponding to the part you want to select the Voice is turned on. Press one of the VOICE category selection buttons to select a Voice category and call up the Voice Selection display. NOTE •...
- Page 37 Holding the LEFT part Voice (Left Hold) By turning on the PART ON/OFF [LEFT HOLD] button when the LEFT part is ON, the LEFT part Voice is held even when the keys are released. Non-decaying Voices such as strings are held continuously, while decay-type Voices such as piano decay more slowly (as if the sustain pedal has been pressed).
-
Page 38: Changing The Pitch Of The Keyboard
Changing the Pitch of the Keyboard Adjusting the Pitch in Semitones (Transpose) NOTE The TRANSPOSE [-]/[+] buttons transpose the overall pitch of the instrument (the keyboard sound, Style playback, Song playback, and so on) between -12 and 12 in The Transpose functions do not affect the Drum Kit or SFX Kit Voices. -
Page 39: Using The Wheels
Using the Wheels Using the Pitch Bend Wheel NOTE Use the [PITCH BEND] wheel to bend notes up (roll the wheel away from you) or down (roll the wheel toward you) while playing the keyboard. The Pitch Bend is • The effects produced by using the [PITCH BEND] wheel may not be applied to all the keyboard parts (RIGHT 1, 2 and LEFT). -
Page 40: Using The Live Control Knobs
Using the LIVE CONTROL Knobs You can add dynamic variations to your performance intuitively in real time by assigning various functions such as effects to the LIVE CONTROL [1] and [2] knobs. Press the [ASSIGN] button to call up the LIVE CONTROL display. - Page 41 Vocal Harmony volume. For details on how to use the Vocal Harmony function, refer to page 91. (PSR-S775) AUX/Volume Controls the input volume from the [AUX IN] jack to adjust the volume balance with the other parts.
-
Page 42: Applying Voice Effects
Applying Voice Effects You can apply various effects to enhance or change the sound of the keyboard parts (LEFT, RIGHT 1 and 2). The effects can be turned on or off by using the following buttons. These effects only apply to the selected part (the PART SELECT button is on). - Page 43 Use the [4 ] – [6 ] buttons to select the desired type. Pressing one of the [7 ] (DETAIL) buttons calls up the detail setting display. For more information, refer to the Reference Manual on the website. Harmony Category •...
- Page 44 Echo Category (Echo, Tremolo, Trill) The Echo, Tremolo or Trill effect is applied to the note played in the right-hand section of the keyboard in time with the currently set tempo, regardless of the [ACMP] and the LEFT part on/off status. Keep in mind that Trill works when you hold down two notes on the keyboard simultaneously (or the last two notes, if more than two notes are held), and it plays those notes alternately.
-
Page 45: Creating Your Original Organ Flutes Voices
Creating Your Original Organ Flutes Voices NOTE You can create original Organ Flutes Voices by editing the preset Organ Flutes Voices. Just as on a traditional organ, the original Voices can be created by The term “footage” is a reference to the sound generation of traditional pipe increasing and decreasing the levels of the flute footages. -
Page 46: Adding New Contents - Expansion Packs
STYLE category selection buttons, allowing you to expand your music performance and creation possibilities. You can get high quality Expansion Pack data created by Yamaha, or create your own original Expansion Pack data by using the “Yamaha Expansion Manager” software on your computer. For instructions on how to install the Expansion Packs, refer to the Reference Manual on the website. - Page 47 Advanced Features Refer to the Reference Manual on the website, Chapter 1. Voice Selection display → [8 ](UP) → [2 ] (P2) Selecting GM/XG or other Voices: Touch Response and effect-related settings [FUNCTION] → TAB [E] MENU 1 → [D] CONTROLLER → •...
-
Page 48: Playing A Style With The Auto Accompaniment
Styles – Playing Rhythm and Accompaniment – The instrument features various accompaniment and rhythmic backing patterns (called “Styles”) in a variety of different musical genres including pop, jazz, and many others. The Style features Auto Accompaniment, letting you produce automatic accom- paniment playback simply by playing “chords”... - Page 49 • Keep in mind that the audio Styles kit. Yamaha Time Stretch Technology allows the audio to follow your tempo may take more time to load than oth- changes without changing pitch, so everything stays in perfect sync.
-
Page 50: Operating Style Playback
Operating Style Playback To Start/Stop Playing • [START/STOP] button Starts playback of the rhythm part of the current Style. To stop playback, press the button again. • [ACMP] button Turns the Auto Accompaniment on/off. When this button is on, both the rhythm part and Auto Accompaniment can be played back when playing chords in the chord section during Style playback. - Page 51 Changing Pattern Variation (Sections) During Style Playback Each Style features four different Main sections, four Fill-in sections and a Break section. By using these sections effectively, you can easily make your performance sound more dynamic and professional. The section can be freely changed while the Style is playing back.
-
Page 52: Changing The Chord Fingering Type
Fading In/Out • [FADE IN/OUT] button This produces smooth fade-ins and fade-outs when starting/stopping the playback of a Style or Song. Press the [FADE IN/OUT] button when playback is stopped and press the [START/STOP] button for Style (or the [PLAY/PAUSE] button for Song) to start playback with a fade in. -
Page 53: Calling Up Appropriate Panel Settings For The Current Style (One Touch Setting)
Using the Chord Tutor Function NOTE With this function shown in the right half of this display, you can see which notes to press for specifying the chord. If you know a chord name but don’t know how to play Depending on the chord, some notes may be omitted. -
Page 54: Finding Suitable Music Pieces For The Current Style (Repertoire)
Automatically changing One Touch Settings with the Main sections (OTS Link) The convenient OTS (One Touch Setting) Link function lets you automatically have One Touch Settings change when you select a different Main section (A – D). The Main sections A, B, C and D correspond to One Touch Settings 1, 2, 3 and 4 respectively. -
Page 55: Calling Up Optimum Styles For Your Performance (Style Recommender)
Calling up Optimum Styles for Your Performance (Style Recommender) This convenient function “recommends” optimum Styles for your performance, based on the rhythm you play for one or two measures. In the Style selection display (page 48), press the [7 ] NOTE (RECOMMEND) button to call up the STYLE RECOMMENDER Make sure that MENU 1 is shown at... -
Page 56: Turning On/Off Each Channel Of The Style
NOTE On the PSR-S975, there are two pages, 1/2 and 2/2 for Style channels. The PSR-S775 has only one page. For information on the CHANNEL ON/ OFF (SONG) display, refer to page 65. Use the [1 ] – [8 ] buttons to turn the channels on or off. -
Page 57: Adjusting The Volume Balance Between The Parts
To change the Voice for each channel Press one of the [1 ] – [8 ] buttons corresponding to the desired channel to call up the Voice Selection display (page 36), then select the desired Voice. NOTE The Audio channel does not have a Voice and, hence, cannot be changed. Press the [EXIT] button to close the CHANNEL ON/OFF display. -
Page 58: Setting The Split Point
Setting the Split Point The key which divides the keyboard into two sections is referred to as “Split Point.” There are two Split Points: Split Point (LEFT) and Split Point (STYLE). Split Point Split Point (STYLE) (LEFT) RIGHT 1, 2 LEFT Voice Chord section Voices section... -
Page 59: Specifying Chords With Your Right Hand While Playing Bass With Your Left Hand
Specifying Chords with Your Right Hand while Playing Bass with Your Left Hand By changing the chord detection area from the left-hand section to the right-hand section, you can play a bass line with your left hand while using your right hand to control Style playback. Call up the Split Point display. -
Page 60: Creating/Editing Styles (Style Creator)
Creating/Editing Styles (Style Creator) The Style Creator function lets you create original Styles by recording rhythm patterns from the keyboard and using already-recorded Style data. Basically, select a preset Style that is closest to the type you want to create, then record the rhythm pattern, bass line, chord backing, or phrase (referred to as “Source Pattern”... - Page 61 Advanced Features Refer to the Reference Manual on the website, Chapter 2. [FUNCTION] → TAB [E] MENU 1 → [G] STYLE SETTING Style playback related settings: Memorizing original One Touch Settings: [MEMORY] + ONE TOUCH SETTING [1] – [4] [FUNCTION] → TAB [F] MENU 2 → [A] STYLE CREATOR Creating/editing Styles (Style Creator): →...
-
Page 62: Playback Of Songs
Songs – Playing, Practicing and Recording Songs – For the PSR-S975/S775, “Song” refers to the MIDI songs which include preset songs, commercially available MIDI format files, etc. Not only can you play back a Song and listen to it, but you can also play the keyboard along with Song playback and record your own performance as a Song. - Page 63 F/ K Press the SONG [ ] (PLAY/PAUSE) button to start playback. NOTE You can transpose the Song playback (page 38). Queuing the next Song for playback While a Song is playing back, you can queue up the next Song for playback. This is convenient for chaining it to the next Song smoothly during live performance.
-
Page 64: Displaying Music Notation (Score)
Pressing the [G] (REW) or [H] (FF) button calls up a pop-up display showing the current measure number (or Phrase Mark number). NOTE While the Song Position pop-up is shown on the display, you can also use the Data Phrase Mark is a pre-programmed dial to adjust the value. -
Page 65: Displaying Lyrics/Text
Displaying Lyrics/Text When the selected Song contains lyrics data, you can view it on the instrument’s display. Even if the Song does not contain lyrics data, you can view the lyrics on the display by loading the text file (.txt file less than 60 KB) created on a computer via USB flash drive. -
Page 66: One-Handed Practice With The Guide Function
Use the [1 ] – [8 ] buttons to turn each channel on or off. NOTE Usually, each part is recorded to the If you want to play back only one particular channel (solo playback), press and following channels. hold down one of the [1 ] – [8 ] buttons to set the desired channel to Channels 1 −... -
Page 67: Repeat Playback
Repeat Playback The Song Repeat functions can be used to repeatedly play back a Song or a specific range of measures in a Song. This is useful for repeated practicing of difficult-to-play phrases. NOTE To repeat a Song, turn the [REPEAT] button on and play back the desired Song. Turning the [REPEAT] button off cancels Repeat playback. -
Page 68: Recording Your Performance
Recording Your Performance NOTE You can record your performance and save it as a MIDI file (SMF format 0) to the USER drive or USB flash drive. Since the recorded data is MIDI, you can easily edit For instructions on the recording of audio songs (files), see page 74. - Page 69 Press the SONG [ F/ K ] (PLAY/PAUSE) button to play back the recorded performance. Save the recorded performance as a Song. NOTICE The recorded Song will be lost if Press the SONG [SELECT] button to call up the Song Selection display. you change to another Song or you turn the power off without Save the recorded data as a file by following the instructions on page 28.
- Page 70 Start recording. You can start recording by playing the keyboard, starting a Style, playing a Multi Pad or pressing the SONG [F/ K] (PLAY/PAUSE) button. After you finish your performance, press the SONG [ ] (STOP) button to stop recording. A message may appear prompting you to save the recorded data.
-
Page 71: Usb Audio Player/Recorder
USB Audio Player/Recorder – Playing Back and Recording Audio Files – The convenient USB Audio Player/Recorder function allows you to play back audio files (WAV or MP3) saved to a USB flash drive — directly from the instrument. Moreover, since you can record your performances and recordings as audio files (WAV) to a USB flash drive, it is possible to play back the files on computer, share them with your friends, and record your own... - Page 72 NOTE Press one of the [A] – [J] buttons to select the desired file. Audio files take a slightly longer time to load than other files. Viewing Audio file information Pressing the [6 ] (INFO) button calls up the Information window which you can view the file name, path, sample rate etc.
- Page 73 Playback-related Operations Elapsed playback time Total playback time [2 ] STOP Stops playback. [3 ] PLAY/PAUSE Starts or pauses playback at the current position. [4 ] PREV Pressing this selects the previous file; holding it moves continuously back through the cur- rent file (in seconds).
-
Page 74: Recording Your Performance As Audio
Repeat Playback mode via the [D] (REPEAT MODE) button • Off ....Plays through the selected file, then stops. • Single....Plays through the selected file repeatedly. • All.....Continues playback through all the files in the current folder repeatedly. • Random ...Randomly and repeatedly plays back all files in the current folder. Adjusting the Volume Balance Between Song and Audio Playback Pressing the [BAL.] button once or twice calls up the BALANCE (2/2) display. - Page 75 Press the [USB AUDIO PLAYER] button to call up the USB NOTE AUDIO PLAYER display. The USB flash drive of “USB1” is selected as the recording destination when multiple USB flash drives are connected. Use the [1 ] (REC) buttons to enter recording standby. NOTE You can use the metronome (page 37) The [PLAY/PAUSE] button in the display flashes.
-
Page 76: Playing The Multi Pads
Multi Pads – Adding Musical Phrases to Your Performance – The Multi Pads can be used to play a number of short pre- recorded rhythmic and melodic sequences adding impact and variety to your keyboard performances. Multi Pads are grouped in Banks of four each. The instrument features a variety of Multi Pad Banks in a variety of different musical genres. -
Page 77: Using Chord Match
NOTE Press the [STOP] button to stop playback of the Multi Pad(s). • While the Style or Song is playing If you want to stop specific pads, simultaneously hold down the [STOP] button back, pressing the Multi Pad button and press the pad(s) you wish to stop. starts playback at the top of the next measure. -
Page 78: Creating A Multi Pad With Audio Files (Audio Link Multi Pad)
Creating a Multi Pad with Audio files (Audio Link Multi Pad) NOTE You can create a new Multi Pad by making links with audio files (WAV format: 44.1 kHz sample rate, 16 bit resolution) in the USB flash drive to each of the Multi Pad. Audio Link Multi Pads can neither be created nor played back during play- The audio files (WAV) can be data you’ve recorded on this instrument (page 71) as... - Page 79 If you want to link other audio files to other pads, repeat steps 4 to 6. If desired, adjust the volume of each audio file by using the [1 ] – [4 ] buttons. By pressing the desired MULTI PAD CONTROL [1] – [4] button, you can adjust the volume while playing the Multi Pad phrase.
-
Page 80: Music Finder
Music Finder – Calling Up Ideal Panel Setups for Your Performance – This feature helps you call up the panel settings ideal for the music you want to play simply by selecting a Music Finder “Record,” which includes Voice and Style settings. If you want to play a certain piece of music but don't know which Style and Voice settings would be appropriate, you can search for relevant Records by the title of the piece. -
Page 81: Searching For Records (Panel Settings)
Start playback of the Style by specifying the chords in the chord section. To avoid changing the tempo during Style playback when selecting another Record Press the [I] (STYLE TEMPO) button to set the “STYLE TEMPO” to “HOLD” or “LOCK.” When set to “LOCK,”... -
Page 82: Downloading Records (Panel Settings) From The Website
As a factory default, some sample Records are provided in the Music Finder. To use the Music Finder function more conveniently and effectively, we recommend that you download the Records from the Yamaha website, and load them to this instrument. -
Page 83: Registering A Song, Audio Or Style File To A Record
When confirmation messages appear, follow the on-display instructions. You can confirm the Records that have been appended by checking the number NOTE of Records in the right lower corner of the display. Even after appending or replacing the Music Finder Records, you can reset them to their original factory settings by selecting the “MusicFinderPreset”... - Page 84 Calling up the Song, Audio or Style registered to Music Finder NOTE You can call up the registered Song, Audio or Style in the same way as done in the sections “Selecting the Desired Record” (page 80) and “Searching for Records” If you want to play back a Song, audio or Style file in the USB flash drive that (page 81).
-
Page 85: Registration Memory
Registration Memory – Saving and Recalling Custom Panel Setups – The Registration Memory function allows you to save (or “register”) virtually all panel settings to a Registration Memory button, and then instantly recall your custom panel settings by simply pressing a single button. The registered settings for eight Registration Memory buttons are saved as a single Bank (file). -
Page 86: Saving The Registration Memory As A Bank File
Press one of the REGISTRATION MEMORY [1] – [8] buttons to NOTICE which you wish to memorize the panel setup. If you select the button whose lamp is lit in red or green here, the panel setup previously mem- orized to the button will be erased and replaced by the new settings. -
Page 87: Recalling A Registered Panel Setup
Recalling a Registered Panel Setup NOTE The saved Registration Memory Bank files can be recalled by using the REGIST BANK [-]/[+] buttons or the following procedure. • When recalling the setups including file selection of Song, Style, text, etc. from a USB flash drive, make Press the REGIST BANK [+] and [-] buttons simultaneously to sure that the appropriate USB flash call up the REGISTRATION BANK Selection display. -
Page 88: Guitar With The Instrument
Microphone/Guitar Input – Using a Microphone or Guitar with the Instrument – By connecting a microphone to the [MIC/GUITAR INPUT] jack, you can enjoy singing along with your keyboard performance or with Song playback. The instrument outputs your vocals through the built-in speakers. -
Page 89: Setting Up For Using A Microphone/Guitar
2. Disconnect the microphone/guitar from the [MIC/GUITAR INPUT] jack. Setting Up for Using a Microphone/Guitar Connect the microphone/guitar to the instrument (page 88). Press the [MIC SETTING/ VOCAL HARMONY] (PSR-S975) or [MIC SETTING] (PSR-S775) button to call up the MIC/GUITAR SETTING display. NOTE Settings on the MIC/GUITAR SETTING... -
Page 90: Using The Talk Function
Press the [EXIT] button to return to the MIC/GUITAR SETTING display. (PSR-S775) Use the [5 ]/[6 ] buttons to select the effect category then use the [7 ]/[8 ] buttons to select the effect type. Press the [EXIT] button to return to the MIC/GUITAR SETTING display. -
Page 91: Using Vocal Harmony (Psr-S975)
Using Vocal Harmony (PSR-S975) This section covers the Vocal Harmony Effects that can be applied to your voice via the microphone. Connect the microphone to the instrument (page 88). Press the [MIC SETTING/VOCAL HARMONY] button to call up the MIC/GUITAR SETTING display. Make sure that the [A] (MIC/GUITAR) button is set to ON. - Page 92 Make sure that the [4 ] (HARMONY) buttons in the MIC/ NOTE GUITAR SETTING display is set to ON. To return to the MIC/GUITAR SETTING display, press the [EXIT] button. If necessary, use the [5 ] (VOCAL EFFECT) buttons to turn on the Vocal Harmony effect which can be set on the display called up via the [8 ] NOTE (EDIT) buttons.
-
Page 93: Using Synth Vocoder (Psr-S975)
Using Synth Vocoder (PSR-S975) These are special effects that graft the characteristics of your voice input from the microphone onto synthesizer and other sounds, for unusual machine‐like or robotic effects, as well as unique choir sounds, which you can control with your own singing and playing. - Page 94 Advanced Features Refer to the Reference Manual on the website, Chapter 8. Making the microphone/guitar settings: (PSR-S975) [MIC SETTING/VOCAL HARMONY], (PSR- S775) [MIC SETTING] → [B] (EQ/CMP) Saving the microphone/guitar settings: (PSR-S975) [MIC SETTING/VOCAL HARMONY], (PSR- S775) [MIC SETTING] → [B] (EQ/CMP) → [H] (USER MEM- ORY) →...
-
Page 95: Basic Procedure
Mixing Console – Editing the Volume and Tonal Balance – The Mixing Console gives you intuitive control over aspects of the keyboard parts and Style/Song channels, including volume balance and the timbre of the sounds. It lets you adjust the levels and stereo position (pan) of each Voice to set the optimum balance and stereo image, and lets you set how the effects are applied. - Page 96 Use the TAB [E][F] buttons to call up the desired page. For details about each page, refer to the Reference Manual on the website. • VOL/VOICE..Changes the Voice for each part and adjusts panning and vol- ume for each part. •...
-
Page 97: Connecting A Footswitch/Foot Controller (Foot Pedal Jacks)
Connections – Using Your Instrument with Other Devices – This chapter covers the connectors of this instrument. To see where the connectors are located on the instrument, refer to pages 14 – 15. CAUTION Before connecting the instrument to other electronic components, turn off the power of all the components. Also, before turning any components on or off, make sure to set all volume levels to minimum (0). -
Page 98: Connecting Audio Devices (Output [L/L+R]/[R] Jacks, [Aux In] Jack)
Connecting Audio Devices (OUTPUT [L/L+R]/[R] jacks, [AUX IN] jack) NOTE Using an External Stereo System for Playback Use audio cables and adaptor plugs having no (zero) resistance. You can connect a stereo system to amplify the instrument’s sound by using the NOTE OUTPUT [L/L+R]/[R] jacks. -
Page 99: Connecting An External Monitor ([Rgb Out] Terminal) (Psr-S975)
Connecting an External Monitor ([RGB OUT] terminal) (PSR-S975) By connecting an external monitor to the [RGB OUT] terminal of the instrument, CAUTION you can have the lyrics, text and display of the instrument’s LCD shown on the Avoid looking at the television or monitor. -
Page 100: Connecting Usb Devices ([Usb To Device] Terminal)
The instrument does not necessarily support all commer- can save data you’ve created to the connected device, as cially available USB devices. Yamaha cannot guarantee well as read data from the connected device. operation of USB devices that you purchase. Before pur-... - Page 101 Formatting a USB Flash Drive When a USB flash drive is connected, a message may appear prompting you to NOTICE format the USB flash drive. If so, carry out the format operation. The format operation deletes any previously existing data. Make sure that the USB flash drive you Connect a USB flash drive for formatting into the [USB TO are formatting does not contain...
-
Page 102: Connecting To An Iphone/Ipad ([Usb To Device], [Usb To Host] And Midi Terminals)
Reference Manual on the website. For information about the compatible smart devices and application tools, access the following page: http://www.yamaha.com/kbdapps/ Connecting to a Computer ([USB TO HOST] terminal) By connecting a computer to the [USB TO HOST] terminal, you can transfer data NOTICE between the instrument and the computer via MIDI. -
Page 103: Connecting External Midi Devices (Midi [In]/[Out] Terminals)
Connecting External MIDI Devices (MIDI [IN]/[OUT] terminals) Use the MIDI [IN]/[OUT] terminals and standard MIDI cables to connect external MIDI devices (keyboard, sequencer, etc.). • MIDI IN ....Receives MIDI messages from another MIDI device. • MIDI OUT ....Transmits MIDI messages generated by the instrument to another MIDI device. -
Page 104: Using Advanced Features
Other Functions – Making Global Settings and Using Advanced Features – The Function menu provides a variety of convenient settings and tools for the instrument. These include general settings that affect the entire instrument, as well as detailed settings for specific functions. -
Page 105: Function List
For installing Expansion Packs for adding extra contents downloaded from PACK INSTALLATION Chapter 1 the website or created on your own by using the Yamaha Expansion Manager. OWNER For setting the Owner name, Message language, etc. page 18... -
Page 106: Direct Access Chart
MUSIC FINDER MUSIC FINDER SEARCH 1 ONE TOUCH SETTING [1], [2], [3], [4] OTS INFORMATION (PSR-S975) [MIC SETTING/VOCAL HARMONY] MIC/GUITAR SETTING EQ/CMP SETTING MIC/GUITAR (PSR-S775) [MIC SETTING] REGIST BANK [+], [-] REGISTRATION SEQUENCE [FREEZE] FUNCTION REGIST SEQUENCE/FREEZE FREEZE REGISTRATION MEMORY... -
Page 107: Troubleshooting
Troubleshooting Overall A click or pop is heard when the power is turned on or off. This is normal. Electrical current is being applied to the instrument. The power is automatically turned off. This is normal and due to the Auto Power Off function. If necessary, set the parameter of the Auto Power Off function (page 17). - Page 108 Some characters of the file/folder name are garbled. The language settings have been changed. Set the appropriate language for the file/folder name (page 18). An existing file is not shown. The file extension (.MID, etc.) may have been changed or deleted. Manually rename the file, adding the appropriate extension, on a computer.
- Page 109 USB Audio Player/Recorder A message indicating the USB flash drive is unavailable appears, Make sure to use a compatible USB flash drive (page 100). and the recording is aborted. The USB flash drive may not have enough memory. Check the recordable time on the display (page 75).
-
Page 110: Specifications
Specifications PSR-S975 PSR-S775 Product name Digital Keyboard Digital Keyboard 1,002 mm x 437 mm x 148 mm 1,002 mm x 437 mm x 148 mm Dimensions (W x D x H) (39-7/16” x 17-3/16” x 5-13/16”) (39-7/16” x 17-3/16” x 5-13/16”) - Page 111 * The contents of this manual apply to the latest specifications as of the publishing date. To obtain the latest manual, access the Yamaha website then download the manual file. Since specifications, equipment or separately sold accessories may not be the same in every locale, please check with your Yamaha dealer.
- Page 112 Index Drum Kit .......... 37 Drum Setup ........60 A-B Repeat........67 Intro (Style) ........50 DSP ..........42 AC adaptor......16 iPhone/iPad........102 Accompaniment ......48 iPhone/iPad Connection Manual ..7 Arpeggio ........44 Audio Link Multi Pad .......78 Echo..........42 Audio Player ........71 Effect.........
- Page 113 Music notation .........64 Rewind ........63 Music rest........14 RGB OUT ........99 UPPER ..........59 RIGHT part ........35 Upper Octave ......... 38 USB (File Selection display) ... 26 USB Audio Player/Recorder ... 71 Name..........30 USB flash drive ..... 100 S.Art! (Super Articulation Voice) ..
- Page 114 Information for users on collection and disposal of old equipment: This symbol on the products, packaging, and/or accompanying documents means that used electrical and electronic products should not be mixed with general household waste. For proper treatment, recovery and recycling of old products, please take them to applicable collection points, in accordance with your national legislation.
- Page 116 Yamaha at the address, telephone number or website shown below. Yamaha may request that you send the defective product to a local authorized Yamaha Servicer or authorize return of the defective product to Yamaha for repair. If you are uncertain as to whether a dealer has been authorized by Yamaha, please contact Yamaha’s Service Department at the number shown below, or...
- Page 117 P.O Box 10245, Petach-Tikva, 49002 Clarissenhof 5b, 4133 AB Vianen, The Netherlands Tel: (972) 3-925-6900 Tel: +31-347-358040 Head Office/Manufacturer: Yamaha Corporation 10-1, Nakazawa-cho, Naka-ku, Hamamatsu, 430-8650, Japan DMI22 (For European Countries) Importer: Yamaha Music Europe GmbH Siemensstrasse 22-34, 25462 Rellingen, Germany...
- Page 118 Yamaha Global Site https://www.yamaha.com/ Yamaha Downloads http://download.yamaha.com/ Manual Development Group © 2018 Yamaha Corporation Published 01/2018 POMA*.*-**B0 ZY93900...
Need help?
Do you have a question about the PSR-S775 and is the answer not in the manual?
Questions and answers