Table of Contents
Advertisement
Advertisement
Table of Contents

Related Manuals for Canon RP10


Summary of Contents for Canon RP10
- Page 1 RP10 User Manual Please read this manual before operating this printer.
- Page 2 Canon U.S.A. Inc. when you buy a new similar product or to an authorized One Canon Park, Melville, NY 11747, U.S.A. collection site for recycling waste electrical and electronic equipment Tel. No. (800)652-2666 (EEE).
- Page 3 This is not an exhaustive list. CANON ELECTRONICS INC. MAKES NO WARRANTY OF ANY KIND Canon is not responsible for how this printer is used by an individual. WITH REGARD TO THIS MATERIAL, EITHER EXPRESS OR IMPLIED, Please note that certain intellectual property is protected by...
-
Page 4: Introduction
Setup Guide (Supplied with the printer) Indicates operational requirements and restrictions. Be sure to read It contains the procedure for getting started with the RP10. For details these items carefully to operate the machine correctly, and avoid about the RP10, see User Manual (Electronic Manual) below. -
Page 5: Table Of Contents
Table of Contents Cautions When Printing ............23 Maintenance ...............24 INTRODUCTION ..............4 Daily Cleaning ................24 Manuals for the RP10 ............4 Main Unit ................24 Symbols Used in This Manual..........4 Thermal Head............... 25 Important Safety Instructions..........6 Moving blade initialize sensor ..........25 Handling ................. -
Page 6: Important Safety Instructions
OFF the power immediately and disconnect the power cord Never damage or modify the power cord, and never place heavy from the power outlet. Contact your local authorized Canon dealer objects on the power cord. or service representative to have the printer serviced. -
Page 7: Installation Location
For operation, maintenance, and ventilation, make sure that there is Document Feeder of the CR-150/CR-120 and the RP10 face in the enough space around the printer, as shown in the illustration below. -
Page 8: Power Supply
Moving the Printer • Connect only to a power outlet of the rated voltage and power When you move the RP10, hold it firmly with both hands and carry it supply frequency (either 120V, 60Hz or 220-240V 50/60Hz, carefully. The printer weighs approximately 1530 g (3.4 lb). -
Page 9: Introduction To The Rp10
Introduction to the RP10 Recommended Paper Packaging: What Is in the Box? Purchasing information for the accessories can be obtained from your local authorized dealer. Make sure that you have everything shown below. Check every item you have removed from the box. If any items are missing, contact... -
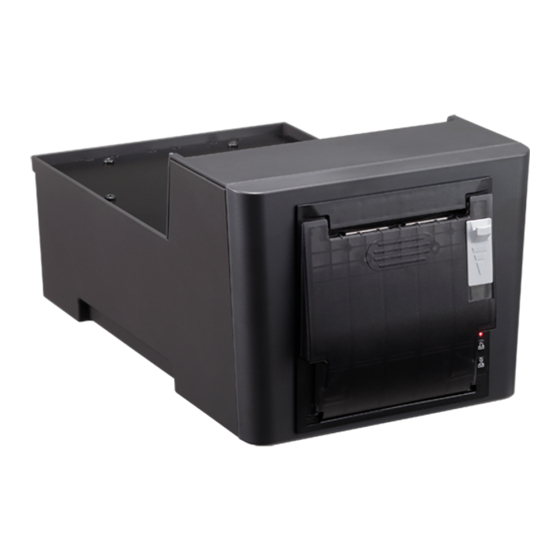
Page 10: Part Names
Part Names Front View Thermal Head Paper Output Section This applies prints paper. Status LED Displays status of the Paper Sensor printer. This sensor detects the status of paper. Feed Button To feed paper. Paper Cutter Button To cut paper. Operation Buttons Paper Cover Platen Roller... -
Page 11: Exterior Dimensions
Exterior Dimensions Status LED Units: millimeters (units in parenthesis are inches) The Status LED on the front of the printer shows the status of the printer. 370 mm (14.6") (with the Paper Cover open) The colors and patterns of the light indicate the following. Ready state: Lit green No paper: Blinking red RAM error: Blinking red and green alternately... -
Page 12: Preparing The Printer
Preparing the Printer • Use paper that is not deformed or loosened, as shown below. Loading the Paper Cautions Regarding Paper • Use roll paper having a φ15 inner diameter or greater (with no core) and a φ83 outer diameter or smaller. •... -
Page 13: Loading Paper
Loading Paper Load paper in the right direction in the printer. Connect the supplied power cord and press the Power Button to turn ON the power. Slightly pull the edge of paper, and then close the Paper NOTE Cover while pulling the paper forward so that the paper When you turn ON the power, the Status LED is lit green. -
Page 14: Installing The Software
Paper pressed against output section Paper loaded askew RP10 Configuration is the software necessary to use the RP10, and is available on the Canon website. For the latest software support information, go to the Products page on the Canon website. -
Page 15: How To Install
When the following screen appears, keep the screen opened, then IMPORTANT connect and turn ON the RP10 as described in the following sections. Do not connect or turn ON the RP10 before the software installation is completed. Turn ON your computer, and Log On to Windows. -
Page 16: Connecting The Printer To A Computer
Connecting to a Wired LAN (CR-150N/ Connecting the Printer to a Computer CR-120N only) Connecting the CR-150N/CR-120N to the printer makes it possible for USB Connections computers connected to the LAN to use it for printing. Connect the printer and the computer with the USB cable provided or Use a LAN cable to connect the CR-150N/CR-120N to the wired LAN a Hi-Speed USB 2.0 cable. -
Page 17: Connecting The Power Cord
If the power cannot be turned ON, or the Status LED blinks or is lit red even when the paper is properly loaded, there is a problem with the printer. Turn OFF the power, and contact your local authorized Canon dealer or service representative to have the printer serviced. -
Page 18: Setting Rp10 Configuration
To use the printer, you must specify the COM port, driver, and paper Press and hold the Power Button to turn off the power. that you want to use with RP10 Configuration. Immediately after the software installation, RP10 Configuration starts automatically. Make sure that the screen below is displayed. - Page 19 • When making connection with the USB cable, check the COM port number in the [Device Manager] screen. • If the message "RP10 not found. Connect RP10 to this computer" appears under [USB], confirm the cable connections (see p. 16) and the STATUS LED (see p.
-
Page 20: Printer Driver Settings
Click [Advanced] to configure the printer settings in detail. When you click [Advanced], The Canon RP10 Printing Preferences dialog box appears. The Canon RP10 Printing Preferences dialog box has three tabs: [Layout], [Extended Settings1], and [Extended Settings2] [Paper/Output] Specify the page orientation. - Page 21 [Extended Settings1] tab [Mark Detection settings] Specify the print settings and whether to detect the marks on the [Mark Detection] printed page. Specify how to detect the mark when using paper with a mark. When you select [Each page], mark detection is performed for each page, and then paper is fed to the mark position.
- Page 22 [End of page] [Test Print] Specify the paper feed volume at the end of a print page in the Click this option if you want to print a test page. range of 0 to 255. Once configuration is complete, click [Close]. Unit: dot per line (1 mm = 8 dots per line) [End of document] Specify the paper feed volume at the end of a document in the...
-
Page 23: Cautions When Printing
Cautions When Printing • Do not touch or pull paper during printing. Printing may not be performed properly, or paper jams may occur inside the printer. • Do not cover the paper output section during printing. Doing so may result in paper jams. •... -
Page 24: Maintenance
Maintenance This chapter describes to clean and maintain the printer. Daily Cleaning To ensure high-quality printing, regularly clean your RP10 as described below. About Cleaning Frequency It is recommended that you clean the printer at regular intervals However, if paper chips, foreign substances, paper dusts, etc. -
Page 25: Thermal Head
Thermal Head Moving blade initialize sensor When using the printer with paper chips, foreign substances, or hand If paper dusts, etc. generated while cutting paper adhere to the fats adhering to the thermal printhead, the function of the thermal Moving Blade Initialize Sensor, sensor misrecognition may occur. If printhead or Platen Roller may be deteriorated. -
Page 26: Platen Roller
Platen Roller Blow off adhering substances using a blower, etc., or If foreign substances such as paper chips adhere to the Platen Roller, remove them by lightly wiping with a cotton swab, etc. paper feed or print quality problems may occur. If they adhere to the Platen Roller, follow the steps below to clean it. -
Page 27: About Paper Jams
About Paper Jams Cautions When Storing and Not Using the Printer For an Extended Period of If a paper jam occurs, follow the steps below to remove paper. Time Printing while paper is jammed inside the printer may result in malfunctions. -
Page 28: Troubleshooting
– When the Platen Roller is dirty, clean it. personal computers are guaranteed. Contact your local Cause The printer prints slow. authorized Canon dealer for more detailed information. Remedy – If a document contains many black areas, the printer Cause USB cable is not compatible with the printer. -
Page 29: Software Installation Trouble
Cause Scuff marks are made on paper 1. Click the Start button, and then click [Control Panel]. 2. Click [System and Security] - [Administrative Tools] in Remedy The mechanism of the printer is designed to load the the Control Panel. paper holder with roll paper. -
Page 30: Uninstalling The Software
• RP10 driver • CEI USBCOM driver If the RP10 driver or CEI USBCOM driver is not operating normally, follow the procedure below to uninstall them. To uninstall RP10 software completely, uninstall those programs separately. Then, re- install the software. -
Page 31: Appendix
Appendix Cautions About Preprinted Paper About Preprinted Paper Thermal paper has different characteristics than general printing paper or carbonless copy paper. When printing on thermal paper, When preprinting paper with the mark for position detection or a logo, note the following precautions. note the following precautions. -
Page 32: Test Print
Others Test Print • When using a UV lamp frequently, take extra care about paper shrinking due to heat (in the feeding/sub-feeding (paper width) Press and hold the Power Button to turn OFF the power. directions), or about color fogging. •... -
Page 33: Specifications
Specifications Printer Specifications Print Method Thermal Line-dot Printing Printing Direction Unidirectional with friction feed Dot Density 8 dot/mm Paper Feeding Pitch 0.125 mm Cutter Method Full cut / Partial cut Max Print Width About 72 mm Print Speed Up to 150 mm/sec. Interface USB 2.0 Full speed (12 Mbps) 0 to 40°C (32 to 104°F) - Page 34 Safety-related markings on the machine Marquages de sécurité sur la machine Marcature di sicurezza sulla macchina Sicherheitshinweise auf der Maschine Marcas de la máquina relacionadas con la seguridad Veiligheidsmarkeringen op de machine Makine üzerindeki güvenlik i aretleri Power on [English] Switch (On) [Français] Commutateur (Marche)
- Page 35 [English] Switch (Push-On/Push-Off) Power on/off (no standby current) [Français] Commutateur (Appuyer pour Sous/hors tension (pas de courant de veille) mettre en marche/Appuyer pour arrêter) [Italiano] Interruttore a pulsante Alimentazione on/off (nessuna corrente di standby) bistabile (On/Off) [Deutsch] Schalter (Ein- und Ausschalten Ein- und Ausschalten (ohne Ruhestromaufnahme) durch Drücken) [Español]...
- Page 36 [English] DC symbol Indicates direct current [Français] Symbole CC Indique qu’il s’agit de courant continu [Italiano] Simbolo corrente continua (C.C.) Indica la corrente continua [Deutsch] Gleichstrom-Symbol Kennzeichnet Gleichstrom [Español] Símbolo CC Indica corriente continua Geeft gelijkstroom aan [Nederlands] DC-pictogram [Türkçe] DC sembolü...
- Page 37 CANON ELECTRONICS INC. 3-5-10 SHIBAKOEN, MINATO-KU, TOKYO 105-0011, JAPAN CANON U.S.A. INC. ONE CANON PARK, MELVILLE, NY 11747, U.S.A. CANON CANADA INC. 8000 MISSISSAUGA ROAD, BRAMPTON, ONTARIO L6Y 5Z7, CANADA CANON EUROPA N.V. BOVENKERKERWEG 59, 1185 XB AMSTELVEEN, THE NETHERLANDS CANON AUSTRALIA PTY.