Advertisement
Advertisement
Table of Contents

Related Manuals for BEMIS Bio Bidet LW-1000


Summary of Contents for BEMIS Bio Bidet LW-1000
- Page 1 LW-1000 OWNER’S MANUAL...
-
Page 2: Table Of Contents
TABLE OF CONTENTS PRODUCT INFORMATION Important Safeguards & Cautions......4 Cautions Before Installation........6 Main Unit & Parts............8 Remote Control............10 Dimensions..............11 PRODUCT INSTALLATION Installation..............12 PRODUCT OPERATION Operation...............16 Maintenance & Cleaning........24 Settings................26 Specifications..............29 WARRANTY Warranty................30... -
Page 3: Important Safeguards & Cautions
IMPORTANT SAFEGUARDS & CAUTIONS This unit was manufactured for household use only. Read all DANGER - To reduce the risk of electrocution: operating instructions before installation. • Do not use while bathing. NOTES: • Do not place or store product where it can fall or be pulled into a tub or sink. -
Page 4: Cautions Before Installation
CAUTIONS BEFORE INSTALLATION GROUNDING INSTRUCTIONS Figure 1 DANGER- Improper use of the grounding plug can result in a risk of electric shock. • This product has a three-prong grounding plug, which must be plugged into an outlet that is properly installed and grounded. In the event of an electrical short circuit, grounding reduces the risk of electric shock by providing an escape wire for the electric current. -
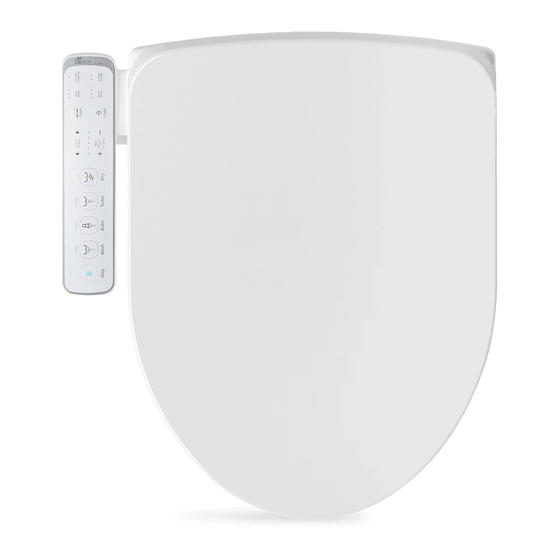
Page 5: Main Unit & Parts
MAIN UNIT & PARTS Power Plug Top Mount Top Mount Metal Bolt (x2) Rubber Nut (x2) Dryer Occupied Sensor Washer (x2) Catch Plate Bracket Holder Wash & Turbo Side Control Panel Bidet Heated Seat Night Light T-Valve 7/8” Bidet Water Supply Hose... -
Page 6: Remote Control
REMOTE CONTROL DIMENSIONS Elongated Type Round Type PULSE To run the pulse function during wash/bidet /turbo operation 18.5(470) SEAT TEMP TURBO 15.9(406) BIDET 15.9(406) To control seat To run the turbo temperature. To run the bidet 8.1(206) 8.1(207) function. (1 minute) To control the (off/low/mid/high) function. -
Page 7: Installation
INSTALLATION 1. Remove the seat from the 2. Install the T-valve. 3. Fix the catch plate onto 4. Push the main body existing toilet body. the toilet. towards the catch plate completely. Cone washer Align • Release the nuts, and then remove •... - Page 8 INSTALLATION (CONT.) 5. After installing the T-valve, 6. Turn on the water and 7. Plug in and be sure that Using inline carbon filter connect the supplied check for leaks the nozzle comes out and bidet hose from the center retracts when powered on.
-
Page 9: Operation
OPERATION 1. Sit on the toilet seat 2. Wash, Bidet, Turbo 3. Dry Temperature Control 4. Pulse essu Puls Bide urbo • Be sure to sit on the seat sensor. • Activate a cleansing • Dryer operates for 3 minutes. •... - Page 10 OPERATION (CONT.) 5. Child Function 6. Nozzle Position Control 7. Water Pressure Control 8. Stop Wate Pressure Dry Temp Chil d Nozzle Position • When selecting Child Function • Nozzle position is adjustable. • Water pressure is adjustable • All operations will stop. settings adjust to low pressure.
- Page 11 OPERATION (CONT.) 9. Seat/Water 10. Energy Saving Function 11. Nozzle Cleaning 12. Night Light Temperature Control Eco 1 3 Seconds • This mode is activated by pressing the Energy Saving button until the yellow LED lamp lights up. (Seat and water temperature will be kept at 32°C) Eco 2 •...
- Page 12 OPERATION (CONT.) 13. Automatic Tank Draining 14. Sitz Bath 15. Seat Sensor Bypass 16. Reset 3 Seconds 3 Seconds 3 Seconds Stop Stop • To protect from water • Wash or Bidet is switched to • The seat sensor can be activated •...
-
Page 13: Maintenance & Cleaning
MAINTENANCE & CLEANING 1. Screen Filter Cleaning 2. Seat Cleaning 3. Extended Non-Use 4. Draining of Tank Screen filter Waters upply hose • Close the water valve. • Exterior surface of unit is • When the bidet seat is not •... -
Page 14: Settings
SETTINGS TROUBLESHOOTING GUIDE User settings with the remote control Please check the following points before requesting repair service Seat sensor “off” Seat sensor “on” Regardless of on/off No. Function Seat Switch Description Initial Problem Check List Status Operation Status • Check if the power plug is not connected. Completely out of order. -
Page 15: Specifications
SPECIFICATIONS TROUBLESHOOTING GUIDE (CONT.) Please check the following table and inform the exact status Item LW-1000 when requesting repair service. Rated Voltage AC 120V, 60Hz Self Diagnosis Indication Max. Power Consumption 870W Water temp sensor is LEDs of water low + middle Power cord length 1.2m disconnected or not inserted... -
Page 16: Warranty
WARRANTY • We hereby guarantee the product as follows in accordance with the regulation of consumer damage compensation. • In case of product failure, please contact Bio Bidet • Product warranty will be effective for one year from the date of purchase. Regarding Product Warranty Regulation •... - Page 17 Thank You Technical Support/Customer Service 7900 S Route 31 Crystal Lake, IL 60014 T: 847.458.2334 U.S. TOLL FREE: 877.339.5214 support@biobidet.com www.biobidet.com...
Need help?
Do you have a question about the Bio Bidet LW-1000 and is the answer not in the manual?
Questions and answers