
Related Manuals for Case 1150M


Summary of Contents for Case 1150M
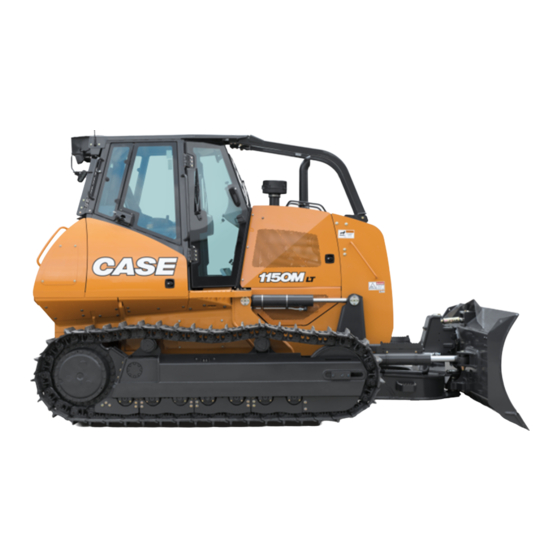
- Page 1 1150M Tier 4B (final) Crawler Dozer PIN NGC105100 and above SERVICE MANUAL Part number 48080033 edition English January 2017...
- Page 2 SERVICE MANUAL 1150M Long Track (LT) - Tier 4B (final) and Stage IIIB [NGC105100 - ] 1150M Wide Track (WT) / Low Ground Pressure (LGP) - Tier 4B (final) and Stage IIIB [NGC105100 - ] 48080033 31/01/2017 Find manuals at https://best-manuals.com...
- Page 3 Link Product / Engine Product Market Product Engine 1150M Long Track (LT) - Tier 4B North America F4HFE613F*A002 (final) and Stage IIIB [NGC105100 1150M Wide Track (WT) / Low North America F4HFE613F*A002 Ground Pressure (LGP) - Tier 4B (final) and Stage IIIB [NGC105100 48080033 31/01/2017 Find manuals at https://best-manuals.com...
- Page 4 Contents INTRODUCTION Engine..................10 [10.001] Engine and crankcase ............. 10.1 [10.202] Air cleaners and lines .
- Page 5 [48.134] Track tension units ..............48.3 [48.138] Track rollers .
- Page 6 [90.150] Cab ................. 90.1 [90.160] Cab interior trim and panels.
- Page 7 48080033 31/01/2017 Find manuals at https://best-manuals.com...
- Page 8 INTRODUCTION 48080033 31/01/2017 Find manuals at https://best-manuals.com...
-
Page 9: Table Of Contents
Contents INTRODUCTION Foreword - Important notice regarding equipment servicing (*) ....... . 3 Safety rules (*) . -
Page 10: Foreword - Important Notice Regarding Equipment Servicing
In any case, no warranty is given or attributed on the product manufactured or marketed by the manufacturer in case of damages caused by parts and/or components not approved by the manufacturer. -
Page 11: Safety Rules
INTRODUCTION Safety rules 1150M Personal safety This is the safety alert symbol. It is used to alert you to potential personal injury hazards. Obey all safety messages that follow this symbol to avoid possible death or injury. Throughout this manual you will find the signal words DANGER, WARNING, and CAUTION followed by special in- structions. -
Page 12: Safety Rules - Personal Safety
INTRODUCTION Safety rules - Personal safety 1150M General maintenance safety Keep area used for servicing the machine clean and dry. Clean up spilled fluids. Service machine on a firm level surface. Install guards and shields after servicing the machine. Close all access doors and install all panels after servicing the machine. - Page 13 INTRODUCTION Battery acid causes burns. Batteries contain sulfuric acid. Avoid contact with skin, eyes, or clothing. Antidote (ex- ternal): Flush with water. Antidote (eyes): flush with water for 15 minutes and seek medical attention immediately. Antidote (internal): Drink large quantities of water or milk. Do not induce vomiting. Seek medical attention immedi- ately.
-
Page 14: Safety Rules - Ecology And The Environment
Improper disposal of batteries can contaminate the soil, groundwater, and waterways. CASE CONSTRUCTION strongly recommends that you return all used batteries to a CASE CONSTRUCTION dealer, who will dispose of the used batteries or recycle the used batteries properly. -
Page 15: Safety Rules - Do Not Operate Tag
INTRODUCTION Safety rules - Do not operate tag 1150M WARNING Maintenance hazard! Before you start servicing the machine, attach a DO NOT OPERATE warning tag to the machine in a visible area. Failure to comply could result in death or serious injury. -
Page 16: Torque - Minimum Tightening Torques For Normal Assembly
INTRODUCTION Torque - Minimum tightening torques for normal assembly 1150M METRIC NON-FLANGED HARDWARE NOM. LOCKNUT LOCKNUT SIZE CL.8 CL.10 CLASS 8.8 BOLT and CLASS 10.9 BOLT and W/CL8.8 W/CL10.9 CLASS 8 NUT CLASS 10 NUT BOLT BOLT PLATED PLATED UNPLATED... - Page 17 INTRODUCTION METRIC FLANGED HARDWARE NOM. CLASS 8.8 BOLT and CLASS 10.9 BOLT and LOCKNUT LOCKNUT SIZE CLASS 8 NUT CLASS 10 NUT CL.8 CL.10 W/CL8.8 W/CL10.9 BOLT BOLT PLATED PLATED UNPLATED UNPLATED W/ZnCr W/ZnCr 2.4 N·m (21 lb 3.2 N·m (28 lb 3.5 N·m (31 lb 4.6 N·m (41 lb 2.2 N·m (19 lb...
- Page 18 INTRODUCTION 1. Manufacturer's Identification 2. Property Class 3. Clock Marking of Property Class and Manufacturer's Identification (Optional), i.e. marks 60° apart indicate Class 10 properties, and marks 120° apart indicate Class 8. INCH NON-FLANGED HARDWARE LOCKNUT LOCKNUT NOMINAL SAE GRADE 5 BOLT SAE GRADE 8 BOLT GrB W/ Gr5 GrC W/ Gr8...
- Page 19 INTRODUCTION INCH FLANGED HARDWARE NOM- LOCKNUT LOCKNUT SAE GRADE 5 BOLT and SAE GRADE 8 BOLT and INAL GrF W/ Gr5 GrG W/ Gr8 SIZE BOLT BOLT UNPLATED PLATED UNPLATED PLATED or PLATED W/ZnCr or PLATED W/ZnCr SILVER GOLD SILVER GOLD 12 N·m (106 lb 13 N·m (115 lb...
- Page 20 INTRODUCTION Inch Lock Nuts, All Metal (Three optional methods) 20090268 Grade Identification Grade Corner Marking Method (1) Flats Marking Method (2) Clock Marking Method (3) Grade A No Notches No Mark No Marks Grade B One Circumferential Notch Letter B Three Marks Grade C Two Circumferential Notches...
-
Page 21: Torque - Standard Torque Data For Hydraulics
INTRODUCTION Torque - Standard torque data for hydraulics 1150M NOTICE: Hydraulic connections require a minimum assembly torque in order to provide zero leakage at rated pres- sure with adequate fatigue resistance. Too much torque on a hydraulic connection can lead to leakage or failure. - Page 22 INTRODUCTION Torques for British Standard Pipe Parallel (BSPP) straight-pipe-thread port connections Ferrous Non-Ferrous BSPP Metric Tube OD Thread S-Series L-Series S-Series L-Series S-Series L-Series (Heavy Duty) (Light Duty) (Heavy Duty) (Light Duty) (Heavy Duty) (Light Duty) 21 N·m 12.5 N·m G 1/8 A —...
- Page 23 INTRODUCTION Torques for Metric O-Ring Face Seal (ORFS) ports and stud end connections Ferrous Non-Ferrous Metric Tube OD Thread S-Series L-Series S-Series L-Series S-Series L-Series (Heavy Duty) (Light Duty) (Heavy Duty) (Light Duty) (Heavy Duty) (Light Duty) 21 N·m 12.5 N·m M10x1 —...
- Page 24 INTRODUCTION Torques for Inch O-Ring Boss (ORB) non-adjustable port and stud end connections UN/UNF Inch Tube OD S-Series (Heavy Duty) L-Series (Light Duty) Dash size Thread size Ferrous Non-Ferrous Ferrous Non-Ferrous 3.18 mm 8.5 N·m (6.3 lb 5 N·m (3.7 lb 5/16–24 —...
- Page 25 INTRODUCTION Torques for Inch O-Ring Boss (ORB) adjustable stud end and port connections UN/UNF Inch Tube OD S-Series (Heavy Duty) L-Series (Light Duty) Dash size Thread size Ferrous Non-Ferrous Ferrous Non-Ferrous 3.18 mm 8.5 N·m (6.3 lb 5 N·m (3.7 lb 5/16–24 —...
- Page 26 INTRODUCTION Torques for Inch O-Ring Boss (ORB) port plug Ferrous Non-Ferrous UN/UNF Dash size Thread size Internal Hex External Hex 5/16–24 7.5 N·m (5.5 lb ft) 12.5 N·m (9.2 lb ft) 7.5 N·m (5.5 lb ft) 14.5 N·m (10.7 lb ft) 21 N·m (15.5 lb ft) 12.5 N·m (9.2 lb ft) 3/8–24...
- Page 27 INTRODUCTION Torques for O-Ring Face Seal (ORFS) hose connectors UN/UNF Tube OD High/Medium pressure Low pressure applications (less Dash size Thread size applications (greater than than 50 bar (725 psi) 50 bar (725 psi) Swivel nut torque 6.35 mm 27 N·m (19.9 lb ft) 27 N·m (19.9 lb ft) 9/16–18 (0.25 in) 1/4...
- Page 28 INTRODUCTION Torques for four-bolt flange connections (Metric class 10.9) Bolt Bolt Torque Bolt Torque Length (SAE Code 61) (SAE Code 61) (SAE Code 62) (SAE Code 62) M8x1.25 M8x1.25 13 mm (0.5 in) 34 N·m (25.1 lb ft) 34 N·m (25.1 lb ft) 19 mm (0.75 in) M10x1.5 74 N·m (54.6 lb ft)
- Page 29 INTRODUCTION Torques for four-bolt flange connections (Inch grade 8) Bolt Bolt Torque Bolt Torque Length (SAE Code 61) (SAE Code 61) (SAE Code 62) (SAE Code 62) 13 mm (0.5 in) 5/16–18 34 N·m (25.1 lb ft) 5/16–18 34 N·m (25.1 lb ft) 19 mm (0.75 in) 3/8-16 63 N·m (46.5 lb ft)
- Page 30 INTRODUCTION Tapered thread connection tightening NPTF BSPT Turns From Finger Tight (TFFT) Thread size Thread size 1/8–28 1/8–27 2 to 3 full turns 1/4–19 1/4–18 2 to 3 full turns 3/8–19 3/8–18 2 to 3 full turns 1/2–14 1/2–14 2 to 3 full turns 3/4–14 3/4–14 2 to 3 full turns...
- Page 31 INTRODUCTION Installation of adjustable O-Ring Bosses (ORB) connectors Adjustable port connectors are commonly found on shaped connectors, which allow for orientation of the connection. Adjustable port connectors utilize a locknut and back-up washer. NOTICE: Teflon coated O-rings do not require lubrication. For connections which are made into aluminum manifolds or with stainless steel connectors, it may be required to apply a lubricant to prevent galling.
- Page 32 INTRODUCTION Installation of non-adjustable O-Ring Bosses (ORB) connectors Non-adjustable port connectors are commonly found on straight connectors, which do not require the installer to adjust the orientation of the connection. NOTICE: Teflon coated O-rings do not require lubrication. For connections which are made into aluminum manifolds or with stainless steel connectors, it may be required to apply a lubricant to prevent galling.
- Page 33 INTRODUCTION Installation of tapered thread connectors 1. Remove protective connector caps only immediately prior to assembly. NOTICE: Pre-applied sealants, such as L ® OCTITE 503™ V ® and/or powdered PTFE are the IBRA preferred sealants for tapered thread connectors. Non-preferred sealant types include PTFE tape, paste sealants, and anaerobic liquids.
- Page 34 INTRODUCTION Installation of flange connectors Flange connections typically have four bolts, although some flange connections may have more or fewer. The flange connector consists of four main components: • A body (flange head) • An O-ring • One “captive” or two “split” flange clamps •...
- Page 35 INTRODUCTION Installation of O-Ring Face Seal (ORFS) connections 1. Remove protective connector caps only immediately prior to assembly. 2. Inspect the components to ensure that the male and female threads and sealing surfaces are free of burrs, nicks, and scratches, or any foreign material. Do not use if impurities are found.
- Page 36 INTRODUCTION Installation of Flare-less Bite type and Flared connections 1. Remove protective connector caps only immediately prior to assembly. 2. Inspect the components to ensure that the male and female threads and sealing surfaces are free of burrs, nicks, and scratches, or any foreign material. Do not use if impurities are found.
-
Page 37: Torque - Standard Torque Data For Hydraulic Connections
Over-torquing of a hydraulic connection can also lead to leakage or failure. For some connections, CASE CONSTRUCTION requires a different torque value than is listed in the ISO and SAE standards. • The torque values in this document should be used whenever possible or applicable. - Page 38 INTRODUCTION Torque values for metric O-Ring Boss (ORB) port connections S-Series * L-Series ** Metric Ferrous Non-Ferrous Ferrous Non-Ferrous thread N·m (lb ft) ± 10% N·m (lb ft) ± 10% N·m (lb ft) ± 10% N·m (lb ft) ± 10% M8 x 1 10.5 (7.7) 6.3 (4.6)
- Page 39 INTRODUCTION Torque values for port connections (British Standard Pipe Parallel (BSPP) thread ports and stud ends) Metric tube Outside Diameter (OD) Ferrous Non-Ferrous mm (in) BSPP S-Series L-Series S-Series L-Series thread S-Series * L-Series ** N·m (lb ft) N·m (lb ft) N·m (lb ft) N·m (lb ft) G- Gas;...
- Page 40 INTRODUCTION Torque values for Inch O-Ring Boss (ORB) port non-adjustable connections S-Series * L-Series ** Ferrous Non- Ferrous Non- Inch tube UN/UNF N·m (lb ft) Ferrous N·m (lb ft) Ferrous dash size thread size ± 10% N·m (lb ft) ± 10% N·m (lb ft) mm (in) ±...
- Page 41 INTRODUCTION Torque values for inch O-Ring Boss (ORB) port plugs Ferrous Non-Ferrous Internal hex External hex UN/UNF N·m (lb ft) N·m (lb ft) N·m (lb ft) dash size thread size ± 10% ± 10% ± 10% 5/16-24 7.5 (5.5) 12.5 (9.2) 7.5 (5.5) 3/8-24 14.5 (10.7)
- Page 42 INTRODUCTION Torque values for four-bolt flange connections (Inch Screws, Grade 8) Code 61 Code 62 Metric size Imperial size Screw code Screw code N·m (lb ft) N·m (lb ft) ± 10% ± 10% 5/16-18 34 (25.1) 5/16-18 34 (25.1) 3/8-16 63 (46.5) 3/8-16 63 (46.5)
- Page 43 INTRODUCTION Torque values for O-Ring Face Seals (ORFS) connections Hex size Metric Swivel nut Swivel nut Inch tube (mm) UN/UNF tube dash torque torque OD (mm) (Reference thread size OD (mm) size N·m (lb ft) N·m (lb ft) only) ± 10% ±...
-
Page 44: Torque - Special Torques
INTRODUCTION Torque - Special torques 1150M Ripper Component Torque Ripper mounting bolts 700 – 1260 Nm (515 – 925 lb ft) Ripper pin retaining and tube cover bolts 145 – 260 Nm (110 – 190 lb ft) Hydraulic Pump Component... - Page 45 INTRODUCTION Track Torque Component Master link bolts (Use L ® 242® on master link 340.0 – 380.0 N·m (250.8 – 280.3 lb ft) OCTITE bolts.) Standard link shoe bolts 381.0 – 435.0 N·m (281.0 – 320.8 lb ft) Final Drives Component Torque Drive Hub Rolling Torque...
- Page 46 INTRODUCTION Starter Torque Component Mounting bolts 68 – 77 Nm (50 – 57 lb ft) Battery terminal nut 17.7 – 24.5 Nm (13 – 18 lb ft) Solenoid + screw 2.6 – 4.5 Nm (23 – 40 lb in) Multifunction valve Component Torque Brake valve...
-
Page 47: Basic Instructions - Shop And Assembly
Only use CNH Original Parts or CASE CONSTRUCTION Original Parts. Only genuine spare parts guarantee the same quality, duration, and safety as original parts, as they are the same parts that are assembled during standard production. Only CNH Original Parts or CASE CONSTRUCTION Original Parts can offer this guarantee. - Page 48 W0111A Special tools The special tools that CASE CONSTRUCTION suggests and illustrate in this manual have been specifically re- searched and designed for use with CASE CONSTRUCTION machines. The special tools are essential for reliable repair operations. The special tools are accurately built and rigorously tested to offer efficient and long-lasting oper- ation.
-
Page 49: Engine Cooling System - Basic Instructions
OOLANT FREEZE tion such as CASE AKCELA ACTIFULL™ OT EXTENDED LIFE COOLANT. You can easily identify CASE AKCELA ACTIFULL™ OT EXTENDED LIFE COOLANT by its yellow color. You should never mix the coolant types. The coolant solution used must meet the following CNH Industrial material specifications for either coolant type: •... - Page 50 INTRODUCTION You may notice the older version of the OAT decal (CNH Industrial part number 47488993) on some applications. Definitions Conventional coolant: A coolant that relies on inorganic inhibitors such as sil- icates, nitrites, and phosphates for corrosion and cavi- tation protection.
-
Page 51: Maintenance Chart
INTRODUCTION Maintenance chart Replace Change fluid Drain fluid Cleaning Grease Lubricate Check Maintenance action Page no. Daily inspection General General (10) Every 10 hours Engine oil Engine oil (10.304) Engine coolant Engine coolant (10.400) Hydraulic oil Hydraulic oil (35) Grease points Grease points (90) Initial 20 hours Track shoe bolt torque... - Page 52 INTRODUCTION Replace Change fluid Drain fluid Cleaning Grease Lubricate Check Maintenance action Page no. Roll Over Protective Structure (ROPS) Roll Over Protective Structure (ROPS) (90.114) Cab air filter - Recirculation filter Cab air filter - Recirculation filter (10.254) Selective Catalytic Reduction (SCR) system - Replace supply Selective Catalytic Reduction module filter (SCR) system - Replace supply...
-
Page 53: Basic Instructions - Moving A Disabled Machine
INTRODUCTION Basic instructions - Moving a disabled machine 1150M WARNING Transport hazard! Make sure that the weight of a trailed vehicle that is not equipped with brakes NEVER EXCEEDS the weight of the machine that is towing the vehicle. Stopping distance increases with increasing speed as the weight of the towed load increases, especially on hills and slopes. - Page 54 INTRODUCTION 3. Change the Tow Mode from “Disabled” to “Enabled” by highlighting and pressing the enter switch. RAIL12DOZ0592AA RAIL12DOZ0823AA 4. Continue to follow the screen prompts. RAIL12DOZ0824AA 48080033 31/01/2017...
- Page 55 INTRODUCTION 5. Read the procedure for releasing brakes later in this instruction. RAIL12DOZ0825AA 6. Press the enter switch to continue to the next screen. NOTICE: Do not tow the machine over 1.2 km/h (0.7 mph). RAIL12DOZ0826AA 7. Press the enter switch to continue to the next screen. NOTICE: Tow the machine the shortest possible distance.
- Page 56 INTRODUCTION 8. The tow mode will be enabled. Wait for the next screen prompt before you tow the machine. RAIL12DOZ0829AA Bypass hydrostatic pumps You must open the pressure relief valves in order to bypass the hydrostatic pumps. There are two valves located on each hydrostatic pump.
- Page 57 INTRODUCTION 11. Remove the relief valve plastic caps ( (5) to access the engagement screws (6). The plastic caps will be unusable after removal and should be replaced. RAIL12DOZ0644AA 12. Use an Allen wrench, and turn the engagement screw (6) counterclockwise two turns on each relief valve. RCIL10CWL116AAL Releasing the brakes NOTE: This machine is equipped with a spring applied hydraulically released parking brakes.
- Page 58 INTRODUCTION 14. Disconnect the fittings (1) at the brake lines and cap the fittings. There are two brake lines. A Tee fitting will be required for the two lines in order to connect to the hand pump. If a T-fitting is not available, two pumps must be used.
- Page 59 INTRODUCTION Returning the unit to service 1. Disconnect the hand pump from the brake lines. 2. Remove the plugs, and reconnect the lines (1) to the brake solenoid. RAPH12DOZ0094AA 3. Remove the vacuum pump and install the hydraulic reservoir breather. RAIL12DOZ0372AA 4.
- Page 60 INTRODUCTION 5. Install new plastic caps on each relief valve. 6. Reinstall the floor access panel. RAIL12DOZ0644AA 7. On the multi-function display screen, select “Service” and press the enter switch. RAIL15DOZ0018AA 8. Scroll down, and highlight the “Tow Mode” selection and press the enter switch.
- Page 61 This as a preview PDF file from best-manuals.com Download full PDF manual at best-manuals.com...
Need help?
Do you have a question about the 1150M and is the answer not in the manual?
Questions and answers