Table of Contents
Advertisement
Quick Links
Advertisement
Table of Contents

Related Manuals for NVision 30100VA

Summary of Contents for NVision 30100VA
- Page 2 WELCOME Thank you for purchasing our nVISION Tire Pressure Monitoring System … the most sophisticated and ® robust TPMS technology available! This product is designed to give you years of reliable performance. If you have any questions about this product, how to set it up or how to use, do not return it to the dealer where you bought it.
-
Page 3: Table Of Contents
TABLE OF CONTENTS INITIAL INSTALLATION Get Your TPMS Ready .............................5-10 Boosting Your Signal ..............................11 Display Screen - Alerts ............................19-20 Getting The Most From Your TPMS ......................... 21 YOUR NeW TPMS SYSTeM Tire Safety Alerts ................................ 12 TPMS Components ..............................13 Monitor Power Buttons ............................. - Page 4 Screw the sensor on. When the pressure registers correctly, press You have established a unique electronic signature for that tire. Follow the prompts for all other tires. Your nVISION TPMS has a unique memory feature that allows you to store other configurations (trailers, vehicles, ®...
-
Page 5: Get Your Tpms Ready
GET YOUR TPMS READY ACTIVATe • Before you power up your TPMS system for the first time, you will need to attach the pivoting antenna. You will find an antenna port in the back of the monitor. Screw the pivoting antenna into the port. Be careful not to over- tighten the antenna. - Page 6 DeFINe MODe When you turn your monitor on for the first time, your screen should look like this. The “Define” Mode allows you to choose a wheel configuration that exactly matches your vehicles and trailers. TIP: We recommend that you program your most common driving configurations into Memory Position 1 and 2.
- Page 7 The front left tire will begin flashing. This is where the first sensor needs to be attached Screw the sensor on the valve stem The “YES” icon on the screen will be flashing. Wait for the correct pressure to appear Press after the correct pressure appears on the monitor The monitor will advance to the next sensor location to install.
- Page 8 VehICLe POSITION MODe After saving your last memory position the system advances to Vehicle Position Mode. This mode allows you to choose among the vehicles or trailers you have stored. TIP: In Vehicle Position Mode all defined vehicles or trailers will display on the RIGHT side of the screen.
- Page 9 NORMAL OPERATION Once you have completed programming your Memory Positions, your system will enter normal operating mode. Your TPMS system will begin checking your tires. You will see a series of check marks illuminate in the middle on the right side of the display screen. These checks indicate that your TPMS system is reestablishing the RF connections with each sensor and verifying tire conditions.
- Page 10 ChANGING YOUR VehICLe POSITION When in Normal Mode, Press the Vehicle Position Button on the monitor. CAUTION: Pressing the Vehicle Position Button will clear all memory positions that have been saved in the “FRONT” or “BACK” Position “FRONT” icon is flashing, Press Select the memory position you wish to monitor in the “FRONT”...
-
Page 11: Boosting Your Signal
BOOSTING YOUR SIGNAL RF (Radio Frequency) signals are commonly used in wireless devices. The RF frequencies in your nVISION TPMS system conform to all FCC Rules. The RF system in your TPMS device has been designed to use normal objects in the environment to reverberate signals from the wheels to the monitor. -
Page 12: Your New Tpms System Tire Safety Alerts
Your New nVISION TPMS Offers 5 Total Tire Safety STOP STOP Features STOP STOP... -
Page 13: Tpms Components
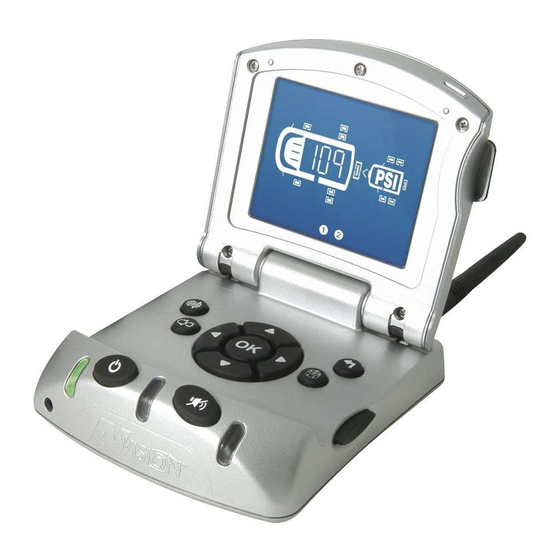
TPMS COMPONENTS ® Your nVISION TPMS has 6 Basic Components ® A specially designed monitor that has a unique flip top to improve viewing angles. A pivoting antenna that will attach to the monitor base. A special non-skid pad designed for vinyl dash boards to help prevent the monitor from sliding while driving. -
Page 14: Monitor Power Buttons
MONITOR POWER BUTTONS There are two buttons on the face of the monitor (See Illustration B). On/Off Button: When the monitor is plugged into a 12-volt DC power source, pushing this button will power on or power off the monitor. For best results, we recommend that you always leave your monitor on. -
Page 15: Navigation And Control Buttons
NAVIGATION AND CONTROL BUTTONS Press the Quick-Release Button on the right side of the monitor and the display screen will open to reveal your navigation and control buttons. Selection “OK” Has up/down/left/right arrows with a OK push button in the center. This allows you to move the cursor to different options and confirm your selections. -
Page 16: Tpms Warnings
TPMS WARNINGS On the face of the monitor (Illustration C) you will find 3 different colored lights. These lights are designed to provide a quick reference to the status of your tires. Illustration C: Warning Lights STOP STOP GReeN YeLLOW ALeRTS ReD ALeRTS This means you are saving money (Yellow Light Will Flash) -
Page 17: Display Screen - Alerts
It gives you the power to view your tire conditions from the comfort of your driver’s seat … whether you’re moving or stationary … and regardless of whether conditions. TIP: Your nVISION TPMS will not prevent tires from losing pressure or failing. Your new system is ®... -
Page 18: Edit Settings
EDITING SETTINGS ADDING/DeLeTING SeNSORS Once you have completed your vehicle/towed vehicle selections, you will be able to add or delete specific tire or sensor locations. For example, you may need to change out a sensor due to a low battery. Follow the steps below to complete: To add a sensor, Press the “Sensor Edit”... - Page 19 STOP Your nVISION TPMS has a unique 5-Level Alert System SAFe TIRe CONDITIONS: Properly inflated tires are safer, run cooler and last longer. Also, helps increase fuel economy and tire tread life by 50% or more. This alert means all tire all good. The GREEN light on the front of the monitor will be illuminated.
- Page 20 DANGeROUSLY LOW PReSSURe: At 25% below the baseline pressure level, you will receive this alert. The RED STOP light on the monitor will begin to flash and will flash continuously until the low pressure condition has been resolved. STOP To ensure that you are aware of the alert, a continuous signal tone will sound with the RED light for 5 seconds. If you want to silence the warning signal, simply press the volume control button to “MUTE”...
-
Page 21: Getting The Most From Your Tpms
So much is riding on your tires, that it makes sense to give them regular check ups. Below find a list of what you can do to get the most performance and safety out of your tires! 1. Use your nVISION TPMS to check tire pressure regularly, including the spare. •... -
Page 22: Frequently Asked Questions
ON if you have a TPMS system and it will be in your vehicle manual or contact your dealer. nVISION Sensors are made with brass threads. NOTE: brass will bond to aluminum due to the galvanic action that takes place between the different metals. - Page 23 Your sensors have been designed to withstand extreme conditions for temperature, vibration and moisture infiltration. To ensure that the pressure sensors have the highest reliability, the sensor housing is permanently sealed. Batteries cannot be replaced. When your sensors expire, simply purchase a new nVISION TPMS sensor replacement.
- Page 24 Can I store my vehicle with the monitor on? Yes. And we recommend that you do. The monitor draws a modest 25mA of power. That’s minimal for normal driving situations. If storing for more than 1 month, it’s advisable to unplug the monitor and remove all sensors. Can monitor be used independently on front/back tow-vehicle? Yes.
- Page 25 Refer to “Edit Settings” on page 18 of the manual. What should I do if a sensor is lost or damaged? Contact your local dealer or nVISION Technical Services (800) 835-0129 to order a new sensor. During installation, no signal was received from the sensor.
- Page 26 Why does my monitor screen go blank after a few minutes? Your nVISION TPMS monitor has been designed with an energy saving feature. After 10 minutes of inactivity, the monitor will go into sleep mode. To awaken the monitor, press any button.
- Page 27 Why am I receiving excessive low pressure alerts? It is critical that when you establish your baseline pressures, that your tires be at the manufacturer’s recommended pressure level, that the tires be cold and vehicle or trailer not have been moved. It is best to install your sensors early in the morning.
-
Page 28: Fcc Compliance
FCC COMPLIANCE This device complies with Part 15 of the FCC Rules. Operation is subject to the following two conditions: This device may not cause harmful interference, and This device must accept any interference received, including interference that may cause undesired operation. WARNING: Changes or modifications to this unit not expressly approved by the party responsible for compliance could void the user’s authority to operate the equipment. -
Page 29: Warranty Information
TPMS is improperly installed or improperly wired contrary to nVISION TPMS product instructions; or damage or defect attributable to fire or other casualty, including, without limitation, acts of God or exposure to abrasive or corrosive materials or pollutants, or attributable to collision or other accidents involving vehicles upon which the nVISION TPMS is installed. - Page 30 To the extent permitted by state law, this one-year limited warranty is a complete and exclusive statement of the warranties, which apply to the nVISION TPMS; there are no express or implied warranties beyond those expressly stated above. No employee, agent, dealer or other person is authorized to give any warranties on behalf of Hopkins Manufacturing Corporation, except as authorized in writing.
-
Page 31: System Specifications
1 to 24 wheel positions Sensor Alarm Trigger Settings Pressure 12.5% and 25% below the original tire inflation level 24% increase in pressure from baseline Above 176˚ F or 80˚ C nVISION TPMS - #30100VA ® Hopkins Towing Solutions TPMS - #38100VA ® nVISION TPMS systems comply with Part 15, Class B of the FCC Rules. - Page 32 Driver Awareness Solutions CORPORATe OFFICeS Hopkins Manufacturing Corporation 428 Peyton PO Box 1157 Emporia, KS 66801 WARRANTY AUThORIZATION For Return Authorization On All Warranty Issues (800) 835-0129 PRODUCT/INSTALLATION QUeSTIONS Technical Support (800) 835-0129 TPMS Made in China © 2011 Hopkins Manufacturing Corporation 800-1847-002 Rev.
Need help?
Do you have a question about the 30100VA and is the answer not in the manual?
Questions and answers