Table of Contents
Advertisement
Quick Links
MODEL
HT-SBW125
SOUND BAR HOME THEATER SYSTEM
Thank you for purchasing this SHARP product. To obtain the best performance from this product,
please read this manual carefully. It will guide you in operating your SHARP product.
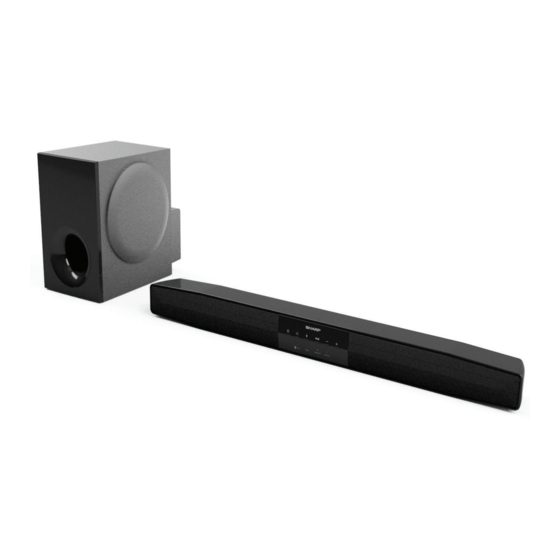
HT-SBW125 consisting of Sound Bar Home Theater System (Sound Bar) and CP-SW125 (Active
Subwoofer System).
oft
barcodesoft.com
ode: TINSEA569AWZZ
:
*TINSEA569AWZZ#D*|
Note:
This product is recommended for flat panel TV (LED, LCD and Plasma).
0 :
*TINSEA569AWZZ#D*|
TINSEA569AWZZ
OPERATION MANUAL
ENGLISH
1
21H R AS
Advertisement
Table of Contents

Related Manuals for Sharp HT-SBW125


Summary of Contents for Sharp HT-SBW125
- Page 1 SOUND BAR HOME THEATER SYSTEM OPERATION MANUAL Thank you for purchasing this SHARP product. To obtain the best performance from this product, please read this manual carefully. It will guide you in operating your SHARP product. HT-SBW125 consisting of Sound Bar Home Theater System (Sound Bar) and CP-SW125 (Active Subwoofer System).
-
Page 2: Special Notes
(UM/SUM4, R3, HP-16 or similar) x 2 Special notes Warnings: Dolby, Dolby Audio, and the double-D symbol ● When the HT-SBW125 button is set at STANDBY ● are trademarks of Dolby Laboratories Licensing position, mains voltage is still present inside the Corporation. - Page 3 10 cm (4”) ● This apparatus is designed for use in moderate ● climates. ● SHARP is not responsible for damage due to ● improper use. Refer all servicing to a SHARP 10 cm (4”) 10 cm (4”) authorised service centre.
-
Page 4: Controls And Indicators
Controls and indicators HDMI (ARC) AUDIO OPTICAL ■ Front panel LED Indicators button Switch the sound bar between ON and In Standby mode STANDBY mode. MAGENTA In USB mode button In Bluetooth mode or Dolby Select the input function. BLUE Digital signal button WHITE... - Page 5 Controls and indicators (continued) ■ Rear panel HDMI (ARC) AUDIO OPTICAL HDMI ARC terminal Audio In terminal Connect to a TV via HDMI cable. Connect to an external audio device. USB terminal Optical In terminal Plug in USB device to playback audio files from Optical input jack.
- Page 6 Controls and indicators (continued) ■ Remote control button – Switch the sound bar between ON and STANDBY mode. button – Increase the volume level. button – Skip to previous sound track. button – Select the input function. button – Press to activate the pairing function in Bluetooth mode or disconnect the existing paired Bluetooth device.
-
Page 7: Placing The System
Placing the system Installation image: DVD player Subwoofer Place the system as shown. Notes: Remove the protective film covering the sound bar and subwoofer before turning on the system. ● The front panel of the sound bar is not removable. ●... -
Page 8: Falling Prevention
Falling prevention Safety wires (not supplied) are useful to prevent the sound bar from falling. ● ■ When mounting on the wall Screw eye (not supplied) Safety wires (not supplied) Sound bar Wall ■ When placing on the shelf/table Sound bar Screw eye Safety wires (not supplied) -
Page 9: System Preparation
Wall sur face 4 Fasten the screws to the wall as shown be- SHARP designed the sound bar so you may hang it low. (Total screw is 2 pieces) on the wall. Use proper screws (not supplied). See below for size and type. -
Page 10: System Connections
System connections Caution: Turn off all other equipment before making any connections. Notes: To connect to TV/player, use HDMI ARC, AUDIO IN or OPTICAL IN terminals located at the rear of the ● sound bar. Refer the operation manual of the equipment to be connected. ●... - Page 11 System connections (continued) ■ Optical input ■ Audio In L-shaped adaptor or cable head is recom- mended for wall mount installation. < 21 mm AUDIO HDMI (ARC) AUDIO OPTICAL Remove the protective cap of the OPTICAL ter- minal, then connect an OPTICAL cable (not in- cluded) to the TV’s OPTICAL OUT terminal and the OPTICAL terminal on the sound bar.
- Page 12 System connections (continued) Make sure to unplug the AC power lead before making any connections. ■ Connect to power Sound Bar Notes: Before connecting the AC power cord, ensure ● you have completed all other connections. Risk of product damage! Ensure that the ●...
-
Page 13: Remote Control
Remote control General control ■ Battery installation ■ To turn the power on 1 Open the battery cover. When you first connect the sound bar and the sub- 2 Insert the batteries according to the terminal woofer to the main socket, it will be in STANDBY indicated in the battery compartment. - Page 14 General control (continued) ■ Subwoofer level control (subwoofer) ■ Pairing with the Subwoofer To increase or decrease the Subwoofer level, The sound bar and subwoofer will link automat- select LEVEL + /-. ically (wirelessly) when turned on as it is already pre-linked at the factory.
- Page 15 General control (continued) ■ Audio format ■ Bass and Treble Control (remote control) Bass Control During the HDMI ARC and OPTICAL IN function the LED indicator will light up to indicate the audio 1. Press the BASS button. format. 2. Within 5 seconds, press the + / - button to adjust the bass.
-
Page 16: Bluetooth Operation
Remote be searchable. The blue indicator will blink Function Operation rapidly. control 3. Select “HT-SBW125 SHARP” in the pairing Play/ To play or pause. list. The system is successfully connected Pause when the blue indicator lights up. Skip Up/ Skip to next song. -
Page 17: Usb Operation
USB operation Notes: ■ Various USB functions (remote control) This product is not compatible with MTP and ● AAC file systems from USB mass storage de- Remote Function Operation vice. control USB L-shaped adaptor (commercially available) ● Play/ To play or pause. is recommended for wall mount installation as Pause shown below. -
Page 18: Troubleshooting Chart
Troubleshooting chart Many potential problems can be resolved by the „ Remote control owner without calling a service technician. If something is wrong with this product, check the following before calling your authorised dealer or Symptom Possible cause service centre. z The remote control z The battery polarity is incorrect. -
Page 19: Maintenance
Troubleshooting chart (continued) Maintenance „ Condensation „ Cleaning the cabinet Sudden temperature changes, storage operation in an extremely humid environment may Periodically wipe the cabinet with a soft cloth. cause condensation inside the cabinet or on the Caution: transmitter on the remote control. Condensation z Do not use chemicals for cleaning (petrol, paint can cause the sound bar to malfunction. -
Page 20: Specifications
Specifications As part of our policy of continuous improvement, „ USB (MP3) SHARP reserves the right to make design and specification changes for product improvement z Complies with USB 1.1 (Full USB host without prior notice. The performance specification interface Speed)/2.0 Mass Storage Class.