Table of Contents
Advertisement
Available languages
Available languages
Quick Links
DE FR EN IT
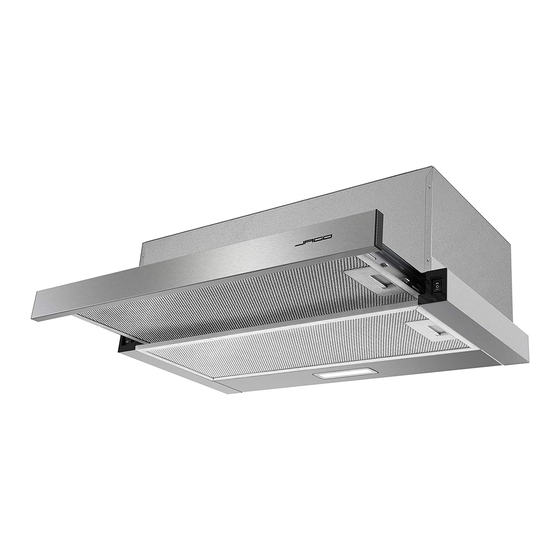
DUNSTABZUGSHAUBE / HOTTE ASPIRANTE / EXTRACTOR HOOD /
CAPPA ASPIRANTE
DUNSH02
ORIGINAL-BEDIENUNGSANLEITUNG / MODE D'EMPLOI /
ORIGINAL INSTRUCTION MANUAL / MANUALE DI ISTRUZIONI ORIGINALE
LIEBER KUNDE, LIEBE KUNDIN,
danke, dass Sie sich für unser Produkt entschieden haben. Bitte lesen Sie die Bedienungsanleitung aufmerksam durch,
bevor Sie das Produkt montieren oder benutzen, um Schäden durch nicht sachgemäßen Gebrauch zu vermeiden. Sollten
Sie dieses Produkt an Dritte weitergeben, muss diese Aufbauanleitung mit ausgehändigt werden.
CHÈRES CLIENTES, CHERS CLIENTS,
Nous vous remercions d'avoir choisi notre produit. Nous vous prions de bien vouloir lire le mode d'emploi attentivement
avant de monter ou d'utiliser le produit, afin d'éviter des dommages causés par une utilisation non conforme. Si vous
souhaitez donner ce produit à une tierce personne, veuillez y joindre cette notice d'utilisation.
DEAR CUSTOMER,
Thank you for choosing our product. Please read this manual carefully before assembling or using the
product, to avoid damage caused by improper use. If the product is passed on to third parties, this manual
has to be passed on along with the product.
GENTILE CLIENTE,
Grazie per aver scelto il nostro prodotto. La preghiamo di leggere attentamente questo manuale prima di procedere
con il montaggio o utilizzo del prodotto per evitare danni causati da un uso improprio. Se il prodotto venga regalato a
qualcuno questo manuale deve essere trasmesso insieme al prodotto.
1
Advertisement
Table of Contents

Summary of Contents for JAGO FF Europe DUNSH02
- Page 1 DE FR EN IT DUNSTABZUGSHAUBE / HOTTE ASPIRANTE / EXTRACTOR HOOD / CAPPA ASPIRANTE DUNSH02 ORIGINAL-BEDIENUNGSANLEITUNG / MODE D’EMPLOI / ORIGINAL INSTRUCTION MANUAL / MANUALE DI ISTRUZIONI ORIGINALE LIEBER KUNDE, LIEBE KUNDIN, danke, dass Sie sich für unser Produkt entschieden haben. Bitte lesen Sie die Bedienungsanleitung aufmerksam durch, bevor Sie das Produkt montieren oder benutzen, um Schäden durch nicht sachgemäßen Gebrauch zu vermeiden.
- Page 2 SICHERHEITSHINWEISE SICHERHEITSHINWEISE Diese Anleitung sorgfältig lesen. Nur dann können Sie Ihr Gerät sicher und richtig bedienen. Die Gebrauchs- und Montageanleitung für einen späteren Gebrauch oder für Nachbesitzer aufbewahren. Nur bei fachgerechtem Einbau entsprechend der Montageanleitung ist die Sicherheit beim Gebrauch gewährleistet. Der Installateur ist für das einwandfreie Funktionieren am Aufstel- lungsort verantwortlich.
- Page 3 DER SCHALTPLAN...
-
Page 4: Montage
MONTAGE Bevor Sie die Dunstabzugshaube reinigen oder reparieren stellen Sie sicher, dass dieDunstabzugshaube ausgeschalteten und ausgesteckt ist. Die Abzugshaube sollte einen Abstand von 65-75 cm von der Kochfläche haben (min. 65 cm für Elektroherd, min. 75 cm für Gaskocher). MONTAGE DES GERÄTS AN DER WAND Bohren Sie 2 Löcher (ø... -
Page 5: Betrieb
Entfernen Sie die Schutzfolie vor der Montage. Nehmen Sie vor der Verwendung die rechteckige Abdeckung von hinten heraus. Installieren Sie zur Belüftung im Freien die Abdampfleitung und schalten Sie die Dunstabzugshaube ein. Für den Umluftbetrieb (Aktivkohlefilter enthalten): Nehmen Sie zuerst den Fettfilter ab. Drücken Sie das Schloss und ziehen Sie es nach unten: Stecken Sie den Kohlefilter auf beiden Seiten in das Gerät und drehen Sie ihn im Uhrzeigersinn:... -
Page 6: Wartung
WARTUNG Hinweis: Stellen Sie vor der Reinigung sicher, dass die Dunstabzugshaube ausgeschaltet und vom Stromnetz getrennt ist. Verwenden Sie zur Reinigung ein weiches Tuch mit handwarmem, leicht seifigem Wasser oder Haushaltsreinigungsmittel. Bitte benutzen Sie keine scheuernden Reinigungsmittel, da diese das Geräte beschädigen. -
Page 7: Problemlösung
PROBLEMLÖSUNG PROBLEMLÖSUNG Problem Ursache Lösung Schalten Sie das Gerät aus. Der Ventilator ist blockiert. Das Licht funktioniert, aber der Die Dunstabzugshaube soll von Motor funktioniert nicht. qualifiziertem Personal repariert Der Motor ist beschädigt. werden. Licht funktioniert nicht. Leuchte ist beschädigt. Leuchte auswechseln. - Page 8 UMWELTSCHUTZ Bitte entsorgen Sie das Gerät, sein Zubehör und die Verpackung umwelt- freundlich. Elektro- und Elektronikaltgeräte gehören insbesondere nicht in den Hausmüll. Dieses Symbol weist innerhalb der EU darauf hin, dass dieses Produkt nicht mit dem Hausmüll entsorgt werden darf. Dieser Artikel enthält wertvolle wiederverwertbare Materialien und soll- te an ein Recycling-System abgegeben werden, um die Umwelt und die menschliche Gesundheit zu schützen, die durch unkontrollierte Abfallent-...
- Page 9 Produktdatenblatt laut Kommission Delegierte Verordnung (EU) 65/2014 PRODUCT FICHE Dunstabzugshauben Marke JAGO Modellkennung DUNSH02 Jährlicher Energieverbrauch 33.6 kW/Jahr Energieeffizienzklasse Fluiddynamische Effizienz Klasse für fluiddynamische Effzienz Beleuchtungseffizienz lux/Watt Beleuchtungseffizienzklasse Fettabscheidegrad 67.18 Klasse für den Fettabscheidegrad Lufstrom bei minimaler Geschwindigkeit im Normalbetrieb 95.9...
- Page 10 AVERTISSEMENT AVERTISSEMENT Lisez attentivement ces instructions. Seulement ainsi, vous serez capable de faire fonction- ner votre appareil correctement et en toute sécurité. Conservez le mode d'emploi et les instructions de montage pour une utilisation ultérieure. L'appareil ne peut être utilisé en toute sécurité que s'il est correctement installé conformé- ment aux instructions de sécurité.
-
Page 11: Circuit Electrique
CIRCUIT ELECTRIQUE... - Page 12 MONTAGE Avant l'installation, assurez-vous que l'appareil est éteint et débranché. La hotte aspirante doit être placée à 65 ~ 75 cm au- dessus du panneau de cuisson pour un meilleur effet (min. 65 cm pour la cuisinière électrique, min. 75 cm pour la cuisinière à...
- Page 13 Enlevez le film de protection avant l'installation. Retirez le couvercle rectangulaire à l'arrière avant l'utilisation. Pour l'extraction à l'extérieur, installez le tuyau de sortie et mettez la hotte aspirante en marche. Pour le mode de recirculation (filtres à charbon actif inclus) : Détachez d'abord le filtre à...
-
Page 14: Entretien
ENTRETIEN Remarque : avant de nettoyer, assurez-vous que la hotte aspirante est éteinte et débranchée. Pour le nettoyage, utilisez un chiffon doux avec de l'eau tiède légèrement savonneuse ou un détergent de nettoyage domestique. N'utilisez pas de tampons métalliques, de produits chimiques, de nettoyants abrasifs ou de brosses rigides. -
Page 15: Aide Au Dépannage
AIDE AU DÉPANNAGE AIDE AU DÉPANNAGE Problème Cause Solution La pale du ventilateur est coincée Mettez l'appareil hors tension et Les lumières sont allumées mais le faites entretenir la hotte aspirante ventilateur ne fonctionne pas Le moteur est endommagé par un personnel qualifié Les lumières ne fonctionnent pas Les ampoules sont brûlées Remplacez la lumière LED... -
Page 16: Protection De L'environnement
PROTECTION DE L’ENVIRONNEMENT Jetez cet article ainsi que les éventuels accessoires et emballage en re- spectant l’environnement, ne le jetez pas avec les ordures ménagères. Au sein de la communauté européenne, ce symbole indique que ce produit ne peut pas être jeté avec les déchets ménagers. Cet article contient des matières précieuses recyclables lesquelles doi- vent être triées afin qu’elles soient recyclées, dans le but de ne pas nuire à... -
Page 17: Safety Warning
SAFETY WARNING SAFETY WARNING Read these instructions carefully. Only then will you be able to operate your appliance safely and correctly. Retain the instruction manual and installation instructions for future use. The appliance can only be used safely if it is correctly installed according to the safety in- structions. -
Page 18: Wiring Diagram
WIRING DIAGRAM... -
Page 19: Installation
INSTALLATION Before installation, make sure the unit is turned off and unplugged. The extractor hood should be placed at 65 ~ 75 cm above the cooking panel for best effect (min. 65 cm for electric cooker, min. 75 cm for gas cooker) INSTALLING THE UNIT ON THE WALL Drill 2 holes ø... - Page 20 Take off the protective film before installation. Take out the rectangle cover from the back before using For outdoor extracting install the outlet pipe and turn on the extractor hood. For recirculation mode (active carbon filters included): First detach the grease filter. Press the lock and pull it downwards: Plug the active carbon filters into the unit on both sides and turn them clockwise:...
-
Page 21: Maintenance
MAINTENANCE Note: Before cleaning, make sure the hood is turned off and unplugged. For cleaning use a soft cloth with hand-warm mildly soapy water or household cleaning detergent. Do not use metal pads, chemicals, abrasive cleaners or stiff brush. Clean the filter every month to prevent any risk of fire. Clean it with household cleaning detergent. -
Page 22: Troubleshooting
TROUBLESHOOTING TROUBLESHOOTING Issue Cause Solution The fan blade is jammed. Lights are on but the fan is not Switch off the unit and have the hood working serviced by qualified personnel. The motor is damaged. Lights not working Light bulb burned Replace the LED light Unplug and plug again into the power Fan not working... -
Page 23: Environmental Protection
ENVIRONMENTAL PROTECTION Please dispose the unit, its accessories and packaging environmentally friendly an do not dispose them with household garbage. Within the EU, this symbol indicates that this product may not be disposed as household waste. This item contains valuable recyclable materials and should be fed to a recycling system to protect the environment and human health that could be damaged from uncontrolled waste disposal. -
Page 25: Avvertenza Di Sicurezza
SAFETY WARNING AVVERTENZA DI SICUREZZA Leggere attentamente queste istruzioni. Solo così sarete in grado di far funzionare il vostro apparecchio in modo sicuro e corretto. Conservare il manuale di istruzioni e le istruzioni di installazione per uso futuro. L'apparecchio può essere utilizzato in sicurezza solo se installato correttamente secondo le istruzioni di sicurezza. -
Page 26: Schema Elettrico
SCHEMA ELETTRICO... -
Page 27: Montaggio A Parete
MONTAGGIO Prima del montaggio, assicurarsi che la cappa sia spenta e scollegata. La cappa aspirante deve essere posizionata a 65 ~ 75 cm sopra il piano cottura per un effetto migliore (min. 65 cm per cucina elettrica, min. 75 cm per cucina a gas) MONTAGGIO A PARETE Praticare 2 fori con diametro di ø... -
Page 28: Funzionamento
Rimuovere la pellicola protettiva prima del montaggio. Estrarre il coperchio rettangolare dal retro prima dell'uso. Per la ventilazione esterna installare il tubo di uscita e accendere la cappa aspirante. Per la modalità di ricircolo (filtri a carbone attivo inclusi): Rimuovere innanzitutto il filtro antigrasso. Premere il blocco e tirarlo verso il basso: Inserire i filtri a carbone attivo nell'unità... -
Page 29: Manutenzione
MANUTENZIONE Nota: Prima di effettuare la pulizia, assicurarsi che la cappa sia spenta e scollegata. Per la pulizia utilizzare un panno morbido con acqua leggermente insaponata tiepida o detergente. Non utilizzare cuscinetti metallici, prodotti chimici, detergenti abrasivi o spazzole rigide. Pulire il filtro ogni mese per prevenire qualsiasi rischio di incendio. -
Page 30: Risoluzione Dei Problemi
RISOLUZIONE DEI PROBLEMI RISOLUZIONE DEI PROBLEMI Problema Causa Soluzione La ventola è bloccata. Le luci sono accese ma la ventola Spegnere la cappa e farla riparare da non funziona. personale qualificato. Il motore è danneggiato. Le luci non funzionano. Lampadina è bruciata. Sostituire la lampadina. -
Page 31: Protezione Ambientale
PROTEZIONE AMBIENTALE Smaltire l‘unità, i suoi accessori e l‘imballaggio rispettosi dell‘ambiente e non smaltirli con i rifiuti domestici. All‘interno dell‘UE, questo simbolo indica che questo prodotto non può essere smaltito con i rifiuti domestici. Questo articolo contiene preziosi materiali riciclabili e dovrebbe essere alimentato a un sistema di riciclaggio per proteggere l‘ambiente e la sa- lute umana che potrebbero essere danneggiata da smaltimento incontrol- lato di rifiuti.
Need help?
Do you have a question about the FF Europe DUNSH02 and is the answer not in the manual?
Questions and answers