
Related Manuals for Linsar 24LED325DVD


Summary of Contents for Linsar 24LED325DVD
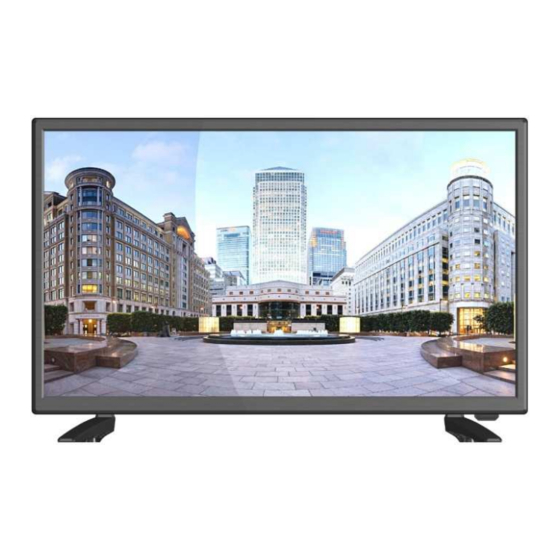
- Page 1 24”HD LED TV/DVD COMBI MODEL NO.: 24LED325DVD USER MANUAL Please read this manual carefully before using, and keep it for future reference.
-
Page 2: Important Instructions
IMPORTANT INSTRUCTIONS Safety information CAUTION: DVD/VIDEO CD/CD PLAYER IS A CLASS 1 LASER PRODUCT. HOWEVER THIS DVD/VIDEO CD/CD PLAYER USES A VISIBLE LASER BEAM WHICH COULD CAUSE HAZARDOUS RADIATION EXPOSURE IF DIRECTED. BE SURE TO OPERATE THE DVD/VIDEO CD/CD PLAYER CORRECTLY AS INSTRUCTED. WHEN THIS DVD/VIDEO CD/CD PLAYER IS PLUGGED TO THE WALL OUTLET, DO NOT PLACE YOUR EYES CLOSE TO THE OPENING OF THE DISC TRAY AND OTHER OPENINGS TO LOOK INTO THE INSIDE OF THIS PLAYER. - Page 3 Safety precautions Read these safety instructions before using your device and store them for possible future reference. ● If the cord is damaged, have it repaired by the manufacturer, its service or a similarly qualified person in order to avoid any hazard. ●...
- Page 4 Battery Handling and Usage ● Keep batteries away from children and pets. Only adults should handle batteries. ● Never throw batteries into a fire or expose them to fire or other heat sources. ● Follow the battery safety and usage instructions. DISC Handling and Maintenance Handling precautions Hold the disc by the edges so the surface will not be soiled with fingerprints.
-
Page 5: Table Of Contents
ACCESSORIES User Manual x 1 Remote Control x 1 Power Cord x 1 Adaptor Cable for Mini AV x 1 Adaptor Cable for Mini YPbPr x 1 All the pictures in this manual are just for your reference, appearance and display should subject to the final product. -
Page 6: Features
FEATURES 24" LED Display This unit has a built-in LED display window to provide clear vision and low radiation. With Hotel Lock Support Auto TV Scanning Support Digital Broadcasting Reception Support TV Guide Function Support TELETEXT (Europe) Function Support USB Multimedia Playback Support Multi-languages On Screen Display Support Full Function Remote Control Support HDMI, SCART, YPBPR, AV, VGA, PC AUDIO and CI Input... -
Page 7: General Parts
GENERAL PARTS MAIN UNIT Front View Side View 1. LED display screen 2. Remote control sensor / Power indicator - In standby mode the indicator light is red; when switching on the unit the indicator light is blue color. 3. Stand holder 4. - Page 8 GENERAL PARTS Back View Power input (AC cord) 2. OPTICAL output terminal 3. LAN input terminal (Note: LAN port is for network signal return only). 4. HDMI input terminal 5. VGA input terminal 6. PC AUDIO input terminal 7. SCART input terminal 8.
-
Page 9: Remote Control
REMOTE CONTROL POWER: Set the unit in standby mode; press it again to switch it on. GOTO: Jump to a different chapter of DVD.* ANGLE: View DVD playback from different angles, if the DVD has this feature.* REPEAT: Repeat different chapter/title or entire DVD.* FAV: Press to display your favourite program in DTV mode. - Page 10 REMOTE CONTROL 24 CH +/-: Press to play the next or previous channel; press repeatedly to scan through the channels. 25 MUTE: Mute the sound. Press again or press VOL+ to restore the sound. 26 GUIDE / D. MENU: Display electronic program guide; Display the main disc menu.* 27 OK: Confirm selection.
-
Page 11: Remote Control Preparation
REMOTE CONTROL PREPARATION BATTERY INSTALLATION Install the batteries as the following pictures. Be sure + and – terminals are positioned as indicated in the battery compartment (Fig1). SERVICE LIFE OF BATTERIES - The batteries normally last for one year although this depends on how often the remote control is used. -
Page 12: Basic Connection
BASIC CONNECTION ● Ensure all the cables are disconnected from the main unit before connecting to power source. ● Read through the instructions before connecting other equipments. CONNECTING TO AC POWER SOURCE Main unit Use an external power adaptor (not supplied) or similar to connect this product and power outlet. - Page 13 HDMI CONNECTION Use HDMI cable to connect the unit with HDMI cable other devices to receive high-definition (Not included) multimedia signal. Back of DVD/VCR PC/VGA CONNECTION Audio cable VGA cable (Not included) (Not included) Use VGA cable and Audio cable to connect the unit with TV or PC, and use this product as a monitor.
- Page 14 SCART CONNECTION SCART cable (Not included) Back of DVD/VCR OPTICAL CONNECTION Use Optical cable to connect the unit with amplifier or other audio decoding devices for audio signal output. (Optical cable is not included.) LAN CONNECTION Use a LAN cable (not included) to connect this TV with available network.
- Page 15 AV (COMPOSITE VIDEO) CONNECTION Adaptor Cable for Mini AV (included) AV cable (Not included) For basic connection, use the composite Audio L/R (white/red) and CVBS (yellow) cable to connect the unit with other devices. Back of DVD/VCR YPBPR CONNECTION Audio L/R of AV cable (Not included) YPbPr cable (Not included)
- Page 16 USB CONNECTION USB Memory Device (Not included) INSERT A CI CARD Insert your CI card (Conditional (Not included) Access Module) to watch special digital channels in your area. EARPHONE CONNECTION EARPHONE cable (Not included)
-
Page 17: Basic Operations
MAKE SURE ALL THE EQUIPMENTS AND POWER PLUG ARE CONNECTED PROPERLY AND THE UNIT IS SET IN CORRECT MODE BEFORE KINDS OF OPERATIONS. BASIC OPERATIONS - Press POWER button on the unit or remote control to power ON the unit (indicator will glow blue);... - Page 18 4. Fast forward/Fast backward During playback, press button or button to fast forward/backward. Press button to resume normal play. 5. Pause/play During playback, press button to pause playing, press it again to resume normal playback. 6. Music playback a) Insert the disc which contains music files and after a few seconds, the screen will show all the folders on the disc.
- Page 19 d) During normal playing, press button, the player will play the next or previous file. e) Press REPEAT button to change play mode. - SINGLE: play one file only. - REPEAT ONE: repeat one file. - REPEAT FOLDER: all the files in the folder will be played repeatedly. - FOLDER: all the files in the folder will be played.
- Page 20 Picture Shrink/Zoom Press ZOOM button repeatedly to enlarge or shrink picture to 50%, 75%, 100%, 125%, 150% and 200%. NOTE: If the picture is enlarged, you may press navigation buttons to pan across other portions of the picture. 9. Enjoying Video CD with playback control a) When playing VCD 2.0 with PBC, the player will show the VCD version.
- Page 21 A-B repeat play Repeating sections between two specific points (A-B repeat) a) Press A-B button during playing at the point where repeat play is to be started (A). b) Press A-B button at the point where repeat play is to be ended (B). Repeat play of the selection between points A and B starts.
- Page 22 17. Initial settings Once the initial programming is entered it will be retained in memory until changed, the player can always be operated under the same conditions. Common procedure for initial settings Press D.SETUP button on remote control. ● Use the navigation buttons to select preferred item, and press OK button, each screen ●...
- Page 23 2. AUDIO Downmix - It is used to select desired audio output mode. Options: a) LT/RT-Left/Right mix mode b) STEREO 3. PREFERENCE 3.1 TV TYPE - Select desired TV system. 3.2 AUDIO - Select desired audio language, if your disc contains multiple audio languages.
- Page 24 - Press SOURCE button on the unit or remote control to switch the unit to DTV or ATV mode. SELECT DESIRED PROGRAM 1. Press CH+ button to play next channel. 2. Press CH- button to play previous channel. 3. Press number buttons on remote control directly to select desired program. NOTE: Press -/-- button repeatedly to switch the digit.
- Page 25 VIDEO SIZE SETTING - Press ASPECT button on remote control repeatedly to select VIDEO SIZE directly. Available options: Auto, 4:3, 16:9, Zoom1, Zoom2. NOTE: If there’s no signal, pressing ASPECT button will not work. And the available video size may be different for different input source. MULTIAUDIO SETTING - Press AUDIO button on remote control repeatedly to select desired audio language.
- Page 26 QUICK SELECT When watching an available channel, press OK button on remote control to enter Channel List menu page. - Press UP or DOWN navigation button to select preferred channel. - Press OK button to confirm selection. FAVORITE LIST When watching an available channel, press FAV button on remote control to enter Favorite List menu page.
- Page 27 - Press LEFT or RIGHT navigation button to select desired option. Press OK button to confirm selection. - If the tool bar disappeared, press EXIT button on remote control to display it again. - Press button to stop recording. TIMESHIFT (FOR DTV MODE ONLY) - Insert your USB memory device into USB slot first.
- Page 28 1. MOVIE - Press LEFT/RIGHT navigation button to select Movie in the main menu and press OK button to enter it. - Use navigation buttons to select desired folder or file and press OK to start playback. - Press DISPLAY button to dismiss/recall the tool bar. Use navigation buttons to select desired option and press OK to confirm it.
- Page 29 4. File - Press LEFT/RIGHT navigation button to select File in the main menu and press OK button to enter it. - Use navigation buttons to select a Movie/Music/Photo file and press OK to start playback. - Press EXIT button to return. Remote operations when playing multimedia files: - Press button on remote control to play or pause playing.
-
Page 30: Main Menu
MAIN MENU ● The unit contains different setting menus. Once the initial programming is entered, it will be remained in the memory until changed, and the unit can always be operated under the same conditions. ● This settings will be remained in the memory until the settings are changed even after setting the player to standby mode. - Page 31 DTV MODE - Press SOURCE button on the unit or remote control to select DTV input source. 1. PICTURE 1.1 Picture Mode - Press LEFT/RIGHT navigation button to select an option. Available options: Standard, Movie, Personal, Dynamic. Contrast / Brightness / Saturation / Sharpness: adjustable value: 0-100. NOTE: When the value of Contrast / Brightness / Colour / Sharpness is changed, Picture Mode will turn to “Personal”...
- Page 32 2. SOUND 2.1 Sound Mode - Press LEFT/RIGHT navigation button to select an option. Available options: Standard, Movie, Music, News, Personal. Treble / Bass: adjustable value: 0-100. NOTE: When the value of Treble or Bass is changed, Sound Mode will turn to “Personal” automatically.
- Page 33 When “Audio Description” is turned on: AD Volume: Select desire volume level. Audio Language: Select audio language if available for current program. 2.7 Audio Delay Adjust this item if TV picture display and sound doesn’t work simultaneously. 2.8 SPDIF Delay Adjust this item if TV picture display and sound doesn’t work simultaneously.
- Page 34 3.3 Digital Manual Tuning - Press OK or RIGHT navigation button to enter it. - Use LEFT/RIGHT navigation button to select the channel. Then press OK button to start searching. 3.4 Channel Edit - Press OK or RIGHT navigation button to enter it. - Press UP/DOWN navigation button to highlight desired channel.
- Page 35 4. LOCK - Press OK or RIGHT navigation button to enter it. - Input the factory default password “0000” using number buttons on remote control. - Press UP/DOWN navigation button to select preferred item. NOTE: If you forget the password, please use the universal password “4711”. 4.1 System/Hotel Lock This item is used to turn on/off Lock System.
- Page 36 4.5 Hotel Mode - When highlighted, press OK to enter it: - Press UP/DOWN navigation button to move the cursor. - Press LEFT/RIGHT navigation button to adjust the value. - Press OK or RIGHT navigation button to enter submenu. - Press MENU button to return to previous page. Warm Tip: We strongly advise that you use Hotel Mode in hotels and you should just ignore it if take this TV for home use only.
- Page 37 5.1 Clock It displays current system time. 5.2 Off Time - Press OK or RIGHT navigation button to enter it. - Use navigation buttons to select an option or adjust the value. Off Time: available options: Off / Once / Every Day / Mon~Fri / Mon~Sat / Sat~Sun / Sun. Time: press OK button to enter adjusting mode and press 0~9 numeric button to input the hour and minute.
- Page 38 6. NETWORK 6.1 IP Config Notice: Connect your local network using a LAN cable first. - Press OK or RIGHT navigation button to enter it. - Press UP/DOWN navigation button to highlight desired channel. Mode: select Auto to gain IP address automatically; select Manual to configure IP manually.
- Page 39 7. SETUP 7.1 Language This item is used to select desired on-screen display language. 7.2 Audio Languages This item is used to select desired audio languages. 7.3 Audio Languages2 This item is used to select desired audio languages. 7.4 Subtitle Language This item is used to select available subtitle languages.
- Page 40 7.8 PVR File System - Press OK or RIGHT navigation button to enter it. - Press UP/DOWN navigation button to select desired option and press LEFT/RIGHT navigation button to adjust it. - Press OK button to enter submenu or confirm setting. In this part, you can select desired disk, check speed, format your USB memory device or set desired Timeshift size.
-
Page 41: Dtv Mode
ATV AND OTHER MODES - Press SOURCE button on the unit or remote control to select desired input source. - For these modes, please refer to the menu operations of DTV mode. PC/VGA MODE - Connect a personal computer to this unit. - Power on your computer and this unit. -
Page 42: Maintenance
MAINTENANCE ● Be sure to press POWER button to set the player to the standby mode and disconnect the power plug before maintaining the player. ● Wipe the player with a dry, soft cloth. ● If the surface is extremely dirty, wipe clean with a cloth which has been dipped in a weak soap-water solution and wrung out thoroughly, and then wipe again with a dry cloth. -
Page 43: Stand Installation
STAND INSTALLATION Your TV is packaged with the Stand and the Cabinet separated. Before enjoying this TV, please carry out the Stand Installation according to the instructions below. Step 1 Place the TV faced down on a soft cloth or cushion to prevent the panel from being damaged. -
Page 44: Specifications
SPECIFICATIONS Display Device 24 inch LED TV Resolution 1366×768 Display Colors 16.7M Contrast Ratio 1000:1 Aspect Ratio 16:9 30,000 Hrs Life Time Movie: AVI, MPG, MKV USB Multimedia Music: MP3 Playback Format Photo: JPG/JPEG Power Source AC 100-240V, 50/60Hz; DC 12 V Power Consumption <48W Operation Temperature... -
Page 45: Troubleshooting
GENERAL TROUBLESHOOTING Check the following points before assuming malfunctions of this unit: Symptom[COMMON] Remedy No power. Insert the power plug securely into the power outlet. No picture. Ensure that the equipment is connected properly. ● Ensure that the equipment is connected properly. ●... - Page 46 GENERAL TROUBLESHOOTING Symptom [DVD] Remedy Play does not start even Confirm the region code setting is right. when title is selected. Audio soundtrack and/or If the audio soundtrack and/or subtitle language does not exist on subtitle language is not the disc, the language selected at the initial settings will not be the initial settings.
- Page 47 THE DISPOSAL OF ELECTRICAL AND ELECTRONIC EQUIPMENT WASTE PRODUCTS ON THE PART OF FINAL USERS IN THE EUROPEAN UNION This symbol on the product or on the container indicates that this product cannot be eliminated with the general waste. The user is responsible for eliminating this kind of waste by throwing them away at a “recycling point”...
- Page 48 Product Fiche Commercial Brand: LINSAR Product No. 24” HD LED TV/DVD COMBI Model No. 24LED325DVD Energy efficiency class Visible screen size 60cm 24inch (diagonal, approx.) (inch/cm) On mode average power consump�on (Wa�) Annual energy consump�on (kWh/annum) Standby power consump�on <0.5 (Wa�)
Need help?
Do you have a question about the 24LED325DVD and is the answer not in the manual?
Questions and answers