Table of Contents
Advertisement
Quick Links
Advertisement
Table of Contents

Related Manuals for Entrust CD800


Summary of Contents for Entrust CD800
- Page 1 User Reference Guide CD800™ Card Printer October 2020 527980-001, Rev C...
-
Page 2: Table Of Contents
Check the Printer Power Connections ..........20 Check the Printer Data Connections ........... 21 CD800 Card Printer Notes ..............22 The CD800 Card Printer with Optional CLM Laminator ....... 23 Common Laminator LCD Messages ............ 24 Replace Laminator Supplies ............... 26 Empty the Laminator Reject Tray ............ -
Page 3: The Cd800 Card Printer
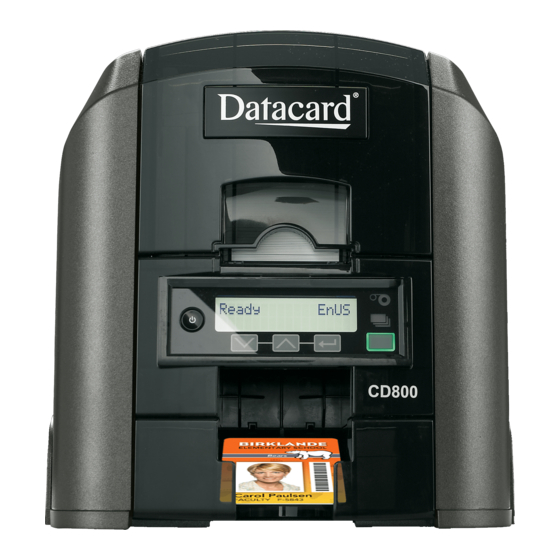
User Reference Guide The CD800 Card Printer A = Card Input Hopper G = Multi-Hopper Printer Supplies B = Swingarm Access Door C = Printhead H = Multi-Hopper Cover D = Manual Advance Knob I = Card Output Hopper E = Latch Button... -
Page 4: Common Printer Lcd Messages
The printer front panel displays printer messages or conditions as they are issued. This section describes some of the common messages that may display. Refer to “The CD800 Card Printer” on page 3 for the location of the system components. - Page 5 User Reference Guide Common Printer LCD Messages (cont.) 105: Magstripe data error Cause: The printer could not verify the magnetic stripe data written to the card. Use magnetic stripe cards that match the printer settings. Make sure that the cards are positioned in the printer correctly. Press the User button on the printer and send the card to print again.
- Page 6 CD800 Card Printer Common Printer LCD Messages (cont.) 114: Cover opened during job Cause: The printer cover was opened while printing. Check all printer doors to make sure that they are closed completely. Press down on the cover ridges to make sure that the cover latches completely on both sides.
- Page 7 User Reference Guide Common Printer LCD Messages (cont.) 172: Insert cleaning card Cause: The printer is ready to be cleaned. • If the cleaning card is in the input hopper, press the User button. • If the cleaning card is not in the input hopper, insert the card into the printer and then press the User button.
-
Page 8: Load Cards
CD800 Card Printer Load Cards • Fan the cards to separate the edges. • Insert ISO magnetic stripe cards with the stripe facing down and to the right. • Insert smart cards with the chip facing up and toward the back of the hopper. -
Page 9: Use The Exception Slot
User Reference Guide Use the Exception Slot Use the exception slot to insert a single card, such as a different card type than those loaded in the input hopper. The input hopper does not have to be opened to insert a card through the exception slot. Slide the card into the exception slot. -
Page 10: Load The Print Ribbon
CD800 Card Printer Load the Print Ribbon Unlock the printer, if necessary, and open the printer supplies access door (multi-hopper) Press the latch button to open the printer swingarm. Remove the print ribbon cartridge. Load a full roll of print ribbon (blue spool) onto the spindle closest to the cartridge handle until it clicks into place. -
Page 11: Replace The Cleaning Sleeve
User Reference Guide Replace the Cleaning Sleeve Unlock the printer and open the printer supplies access door (multi- hopper). Press the latch button to open the printer swingarm. Remove the print ribbon cartridge. Remove the cleaning roller spindle from the ribbon cartridge. Slide the spindle into the cleaning sleeve (a). -
Page 12: Clean The Printer
CD800 Card Printer Clean the Printer Prepare the Printer for Cleaning Power on and unlock the printer, if necessary. Open the printer swingarm and remove the print ribbon cartridge. For a multi-hopper printer, remove the cleaning sleeve and replace the ribbon cartridge. (The ribbon must remain installed on the ribbon cartridge. -
Page 13: Clean The Printer
User Reference Guide Clean the Printer Use the LCD menu system to start the cleaning cycle. Enter the menu system. Follow the steps on the LCD panel (refer to the following illustration). Press the User button to start the cleaning cycle when “Insert cleaning card”... -
Page 14: Clean The Multi-Hopper Rollers
CD800 Card Printer Clean the Multi-Hopper Rollers Unlock and open the input hopper cover. Load cleaning cards into each hopper. Close the input hopper and lock the printer. Follow the steps on the LCD panel (refer to the following illustration). -
Page 15: Clean The Printhead
User Reference Guide Clean the Printhead Power off the printer. Unlock the printer, if necessary, and open the printer supplies access door on the optional multi-hopper. Open the printer cover and remove the print ribbon cartridge. Open and remove a cleaning swab from its package. Use gentle pressure, move the cleaning swab back and forth along the full length of the printhead edge until it is completely clean. -
Page 16: Empty The Printer Reject Tray
CD800 Card Printer Empty the Printer Reject Tray Empty the reject tray regularly. Follow your site’s guidelines to dispose of the cards removed from the reject tray. Make sure that the reject tray is installed properly before locking the printer, if necessary. -
Page 17: Clear A Printer Card Jam
User Reference Guide Clear a Printer Card Jam Unlock the printer, if necessary, and open the printer cover. Remove the print ribbon cartridge. Turn the manual advance knob to move the jammed card until it is accessible from the rollers or exits into the output hopper. Remove the card. -
Page 18: Repair A Broken Ribbon
CD800 Card Printer Repair a Broken Ribbon Open the printer and remove the print ribbon cartridge. Trim the ends of the broken ribbon evenly. Align the ends of the broken ribbon and apply adhesive tape to secure them. Turn the take-up spool counterclockwise until the mended portion is wound around the spool two or three turns. -
Page 19: Close The Printer Doors
User Reference Guide Close the Printer Doors The printer cannot process cards while any access doors are open. Make sure that all printer doors are closed and locked. Note: Press down on the cover ridges to make sure that the swingarm latches completely on both sides. -
Page 20: Check The Printer Power Connections
CD800 Card Printer Check the Printer Power Connections Make sure that all power cables are securely connected. Single-Hopper Power Connections Multi-Hopper Power Connections 527980-001C... -
Page 21: Check The Printer Data Connections
User Reference Guide Check the Printer Data Connections Make sure that all data cables are securely connected. USB Connection To Computer Network Network Connection 527980-001C... -
Page 22: Cd800 Card Printer Notes
CD800 Card Printer CD800 Card Printer Notes 527980-001C... -
Page 23: The Cd800 Card Printer With Optional Clm Laminator
User Reference Guide The CD800 Card Printer with Optional CLM Laminator A = Optional Impresser (if installed) F = L2 Laminator B = Card Output Hopper G = L1 Laminator C = Manual Advance Knobs H = Reject Tray D = Reject Tray Release Button... -
Page 24: Common Laminator Lcd Messages
CD800 Card Printer Common Laminator LCD Messages The following laminator messages display on the printer LCD panel. Refer to “The CD800 Card Printer with Optional CLM Laminator” on page 23 for the location of the laminator components. 177: Laminator not available Cause: The printer and laminator cannot communicate. - Page 25 User Reference Guide Common Laminator LCD Messages (cont.) 202: L1 supply out or missing 207: L2 supply out or missing Cause: The laminator does not have usable supplies. Open the laminator. Replace the supply. Close the laminator. Refer to “Replace Laminator Supplies” on page 203: L1 supply type problem 204: L1 supply not supported 205: L1 supply not identified...
-
Page 26: Replace Laminator Supplies
CD800 Card Printer Replace Laminator Supplies The L1 (green) and L2 (orange) cartridges fit only in their assigned locations inside the laminator. They are not interchangeable. Unlock and open the laminator access door. Remove the L1 (green) cartridge from the laminator. - Page 27 User Reference Guide Replace Laminator Supplies (cont.) Replace the cartridge in the laminator. Remove the L2 (orange) cartridge, if installed, from the laminator. Repeat steps 3 and 4 to load the overlay onto the L2 cartridge. Close and lock the laminator access door when finished. 527980-001C...
-
Page 28: Empty The Laminator Reject Tray
Press the reject tray release button to open the laminator reject tray. Refer to “The CD800 Card Printer with Optional CLM Laminator” on page for the location of the reject tray release button. Remove the rejected cards from the reject tray. -
Page 29: Clear A Laminator Card Jam
User Reference Guide Clear a Laminator Card Jam Open the laminator access door. Remove the L1 and L2 (if installed) laminator cartridges Turn the manual advance knobs inside of the laminator until the card is accessible. Remove the card. Replace the laminator cartridges. Close the laminator access door. -
Page 30: Clean The Laminator
CD800 Card Printer Clean the Laminator This procedure uses a double-sided, adhesive cleaning card that removes holographic overlay particles from the laminator. When you clean the printer using an isopropanol cleaning card, the card also moves into the laminator and cleans the laminator rollers, the card entry area, and the impresser exit rollers. - Page 31 User Reference Guide Clean the Laminator (cont.) Follow the steps on the printer LCD panel (refer to the following illustration). Press the User button to start the cleaning cycle when “Insert cleaning card” displays on the LCD. 527980-001C...
-
Page 32: Check The Laminator Power Connection
CD800 Card Printer Check the Laminator Power Connection Make sure that the laminator power cord is connected to the power supply and the power outlet. Also refer to “Check the Printer Power Connections” on page 527980-001C... -
Page 33: Check The Laminator Data Connection
User Reference Guide Check the Laminator Data Connection Make sure that the laminator-to-printer interconnect cable is securely connected. 527980-001C... - Page 34 CD800 Card Printer Notes: 527980-001C...
- Page 35 User Reference Guide Notes: 527980-001C...
- Page 36 Entrust, Sigma and the hexagon design are trademarks, registered trademarks and/or service marks, and Datacard is a registered trademark and service mark, of the Entrust Corporation in the United States and other countries. All other trademarks are the prop- erty of their respective owners.
Need help?
Do you have a question about the CD800 and is the answer not in the manual?
Questions and answers