
Subscribe to Our Youtube Channel
Related Manuals for Logik LFTC60W16


Summary of Contents for Logik LFTC60W16
- Page 1 Instruction Manual Free-Standing Twin Cavity Electric Cooker LFTC60W16 / LFTC60B16 LFTC60W16/B16_IB.indd 1 23/05/2016 16:54...
- Page 2 LFTC60W16/B16_IB.indd 2 23/05/2016 16:54...
-
Page 3: Table Of Contents
Energy Saving Tips and Energy Label ..................18 - Main Oven ..............................18 - Hob .................................. 18 Installation ..........................19 Adjusting the Feet ........................20 Moving the Cooker ........................20 Stability Bracket ......................... 20 Electrical Connection ......................... 21 LFTC60W16/B16_IB.indd 3 23/05/2016 16:54... -
Page 4: Safety Warnings
• Use of your appliance creates moisture in the room in which it is placed, make sure that your kitchen is well ventilated. Maintain the natural ventilation ducts properly. • Cleaning and user maintenance shall not be made by children without supervision. LFTC60W16/B16_IB.indd 4 23/05/2016 16:54... - Page 5 ‘nugget’ size pieces if it breaks. These pieces will still have sharp edges, please handle broken glass with care. • The appliance is not intended to be operated by means of an external timer or separate remote-control system. LFTC60W16/B16_IB.indd 5 23/05/2016 16:54...
-
Page 6: Unpacking
Thank you for purchasing your new Logik Free Standing Twin Cavity Electric Cooker. You must read this manual in order to fully understand how to operate it correctly. This cooker must be installed by a competent engineer. Please allow the installer to view the installation section of this manual. -
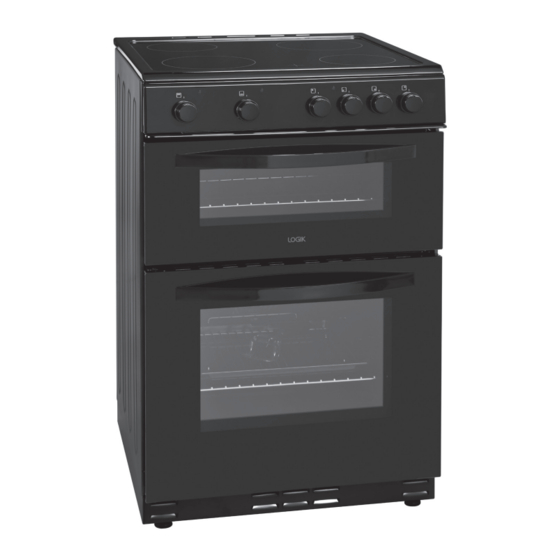
Page 7: Product Overview
Main Oven Door Top Oven Door Adjustable Feet Top View Large Ceramic Heater 1700W Hot Hob Warming Light Small Ceramic Heater 1200W * All images are for indication only; please refer to your individual unit for actual item. LFTC60W16/B16_IB.indd 7 23/05/2016 16:54... -
Page 8: Control Panel
Make sure that the base of your pan is smooth, sits flat against the glass, and is the same size as the cooking zone. Always centre your pan on the cooking zone. * All images are for indication only; please refer to your individual unit for actual item. LFTC60W16/B16_IB.indd 8 23/05/2016 16:54... -
Page 9: Using Your Hob
The cooking zones will remain hot for some time and the hot hob warning light will illuminate. Do not touch the hobs until they have completely cooled down. * All images are for indication only; please refer to your individual unit for actual item. LFTC60W16/B16_IB.indd 9 23/05/2016 16:54... -
Page 10: First Time Use Of The Oven
• To remove, completely angle the shelf upward so the shelf stop is cleared from the guide stop. Accessible parts may become hot during use. Young children should be kept away. * All images are for indication only; please refer to your individual unit for actual item. LFTC60W16/B16_IB.indd 10 23/05/2016 16:54... -
Page 11: Using The Oven Control
• Select the correct shelf location for the food being cooked. • Do not open the oven door more than necessary. * All images are for indication only; please refer to your individual unit for actual item. LFTC60W16/B16_IB.indd 11 23/05/2016 16:54... -
Page 12: Using The Grill
Bread may catch fire if the toasting time is too long. Close supervision is necessary during toasting. * All images are for indication only; please refer to your individual unit for actual item. LFTC60W16/B16_IB.indd 12 23/05/2016 16:54... -
Page 13: General Advice
• Do not use steel cleaning material as it may damage the ceramic hob glass. • Dust on the surface must be cleaned with a damp cloth allow to completely dry before use. • The glass may discolour if the incorrect cleaning materials are used. LFTC60W16/B16_IB.indd 13 23/05/2016 16:54... -
Page 14: Cleaning The Cooker Door Glass
The swivel retainers of the right hand and left hand hinges are hooked onto the metal bar above them. Lift the retainers as shown. * All images are for indication only; please refer to your individual unit for actual item. LFTC60W16/B16_IB.indd 14 23/05/2016 16:54... -
Page 15: Replacing The Oven Lamp
• Unscrew and replace the bulb with a new one suitable for high temperatures (300°C). • Refit the protective cover. Bulb specifications 230V~ 50 Hz, 25W, E14 * All images are for indication only; please refer to your individual unit for actual item. LFTC60W16/B16_IB.indd 15 23/05/2016 16:54... -
Page 16: Hints And Tips
The interior lighting lamp does The oven must be on for the lamp not light. to light. If the lamp is defective you can change it. (See "Replacing the Oven Lamp" section.) LFTC60W16/B16_IB.indd 16 23/05/2016 16:54... -
Page 17: Product Fiche And Specifications
Product Fiche and Specifications Brand Logik Model LFTC60W16 / LFTC60B16 Product Type Electric Cooker Mass of the appliance 45 Kg Grill ( upper cavity) Heat Source Electric Volume 36 litres Main Oven ( lower cavity) Energy Efficiency Index - Fan Forced 104.3... -
Page 18: Energy Saving Tips And Energy Label
• Use the correct sized cookware for the cooking zone being used. • Use a lid on your cookware. • Minimize the amount of liquid or fat used. • When liquids start boiling reduce the heat. LFTC60W16/B16_IB.indd 18 23/05/2016 16:54... -
Page 19: Installation
For all dimensions marked “X”, please refer to the information below: X : 100mm for combustible materials 20mm for non-combustible materials. * All images are for indication only; please refer to your individual unit for actual item. LFTC60W16/B16_IB.indd 19 23/05/2016 16:54... -
Page 20: Adjusting The Feet
The supplied stability bracket or a recognized cooker stability device MUST be fitted. Screw Plastic Foot Washer Stability Bracket You can connect a stability chain (not supplied) to the screws shown here. * All images are for indication only; please refer to your individual unit for actual item. LFTC60W16/B16_IB.indd 20 23/05/2016 16:54... -
Page 21: Electrical Connection
Heat resistant sleeving or high temperature cables. Junction * All images are for indication only; please refer to your individual unit for actual item. LFTC60W16/B16_IB.indd 21 23/05/2016 16:54... - Page 22 LFTC60W16/B16_IB.indd 22 23/05/2016 16:54...
- Page 23 LFTC60W16/B16_IB.indd 23 23/05/2016 16:54...
- Page 24 For more information about where you can drop off your waste for recycling, please contact your local authority, or where you purchased your product. DSG Retail Ltd. (co. no. 504877) 1 Portal Way, London, W3 6RS, UK IB-LFTC60W16/B16-160523V1 LFTC60W16/B16_IB.indd 24 23/05/2016 16:54...
Need help?
Do you have a question about the LFTC60W16 and is the answer not in the manual?
Questions and answers