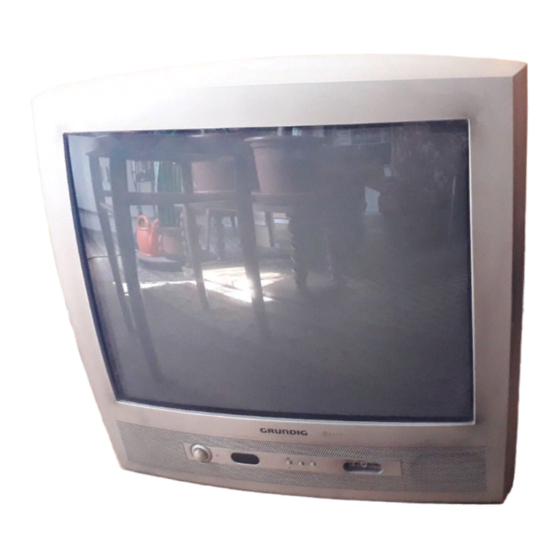
Summary of Contents for Grundig DAVIO 37
- Page 1 COLOR TELEVISION DAVIO 37 P 37- 4201 TOP DAVIO 51 T 51- 4201 TOP DEUTSCH DAVIO 55 ENGLISH T 55- 4201 TOP FRANÇAIS ITALIANO NEDERLANDS...
-
Page 2: Table Of Contents
CONTENTS ________________________________________________________________________ Set-up and safety Connection and preparation Connecting the antenna and the mains cable Inserting batteries in the remote control Overview The front of the television set The remote control Settings Assigning TV stations – Automatically (using the ATS channel search) Picture settings TV mode Teletext mode... -
Page 3: Set-Up And Safety
SET-UP AND SAFETY ______________________________________________ Please note the following information when setting up your television set: 20 cm This television set is designed to receive and display video and audio signals. Any other use is expressly prohibited. The ideal viewing distance is 5 times the screen diagonal. External light falling on the screen impairs picture quality. -
Page 4: Connection And Preparation
CONNECTION AND PREPARATION _______ Connecting the antenna and the mains cable Insert the telescopic antenna (P 37 only) in the recess on the rear panel. Plug the roof antenna cable or the telescopic antenna into the antenna socket É » «... -
Page 5: The Remote Control
Switches between large- and wide-screen playback. Displays programme information. VCR/SAT For operating the basic functions of a GRUNDIG video recorder or press and hold down satellite receiver button »VCR« or »SAT«. Then select the button you require. The functions available to you depend on the model of the... -
Page 6: Settings
SETTINGS ____________________________________________________________________________ Assigning channel positions automatically with the ATS Channel Search The television set is equipped with an automatic channel search system. You start the search and can then sort the television channels into order of preference. 99 preset positions are provided, to which you can assign television stations Sprachauswahl from the antenna or from the cable connection. -
Page 7: Picture Settings
SETTINGS ____________________________________________________________________________________ Deleting television channels Sort In the » Sort« menu, select the channel to be sorted using »P+« or »P-«. SAT1 Press »?« to delete the station. PRO7 BR 3 Note: P 10 To delete other television channels, repeat steps and 2. - Page 8 TELEVISION MODE ___________________________________________________ Switching on/off Switch on the television with » « on the television. – The television switches to stand-by mode. Switch on the television with » P+«. – The television switches on to the most recently selected station; Switch on the television out of stand-by with »...
-
Page 9: Teletext Mode
TELETEXT MODE __________________________________________________________ TOP/FLOF text mode and normal text mode In the teletext function of your television there is an integrated seven-page TOP/FLOF operating function. As a result, you do not have to switch back and forth between TOP/FLOF text mode and normal text mode. Press »TXT«... - Page 10 TELETEXT MODE _________________________________________________________________________ Page stop for multiple pages A multiple page may contain several sub-pages, which are automatically scrolled by the transmitting station. STOP Call up the ”symbol line” by pressing »?«. Press » « or » « to select »STOP«...
-
Page 11: Convenience Functions
CONVENIENCE FUNCTIONS __________________________ Entering the switch-off time for the sleep timer Dialog Center The sleep timer function allows you to enter a time for the television to switch off. Language selection After the set time has elapsed, the television switches to stand-by mode. Child lock –... -
Page 12: Using External Devices
USING EXTERNAL DEVICES ____________________________ Satellite receiver, video recorder or DVD player You can connect the television to either a satellite receiver (or SET-TOP box), a video recorder or a DVD player. If you want to receive encoded programs from a privately operated station, you need a decoder. A decoder can only be operated when you have installed a satellite receiver and connected the decoder with the satellite receiver. -
Page 13: Special Settings
SPECIAL SETTINGS ____________________________________________________ Assigning channel positions manually You’ll only need this setting if a new channel is added and you want to retain Manual tuning your specific channel position sequence. Program Channel C 06 Tune Finetun. Call up the »Dialog Center« with » «. -
Page 14: Information
INFORMATION _____________________________________________________________ Technical data Mains voltage: 220 – 240 V, 50/60 Hz, (power pack control range 190 ... 265 V) Power consumption: P 37-4201 TOP: during operation 40 W, in stand-by 4 W T 51-4201 TOP: during operation 50 W, in stand-by 4 W T 55-4201 TOP: during operation 50 W, in stand-by 4 W Sound output: 5 Watts music (2.5 Watts sine) - Page 15 In no circumstance must any of the wires be connected to the terminal marked with the letter “E”, earth symbol “ ”, coloured green, or green & yellow. Replacement mains lead sets can be obtained from your local dealer, or by contacting Grundig Consumer Relations (01788 570088) Moulded 3-pin lead set, suitable for UK use:...
- Page 16 INFORMATION __________________________________________________________________________ Rectifying minor problems If the remedies given below do not work, please consult an authorised GRUNDIG dealer. Please bear in mind that malfunctions can also be caused by external devices such as video recorders or satellite receivers. Fault...
- Page 18 Grundig AG Beuthener Str. 41 D-90471 Nürnberg http://www.grundig.com 72011 600 0201 • • •...


Need help?
Do you have a question about the DAVIO 37 and is the answer not in the manual?
Questions and answers