Advertisement
Advertisement

Related Manuals for StarHub TV+


Summary of Contents for StarHub TV+
- Page 1 ENGLISH VERSION STARHUB TV+ BOX GUIDE...
-
Page 2: Table Of Contents
CONTENTS What’s included..................Pg2 Using your remote control..............Pg2 Setting up your StarHub TV+ box............Pg3 Using your StarHub TV+ box..............Pg11 How to create a Hub iD................Pg16... -
Page 3: What's Included
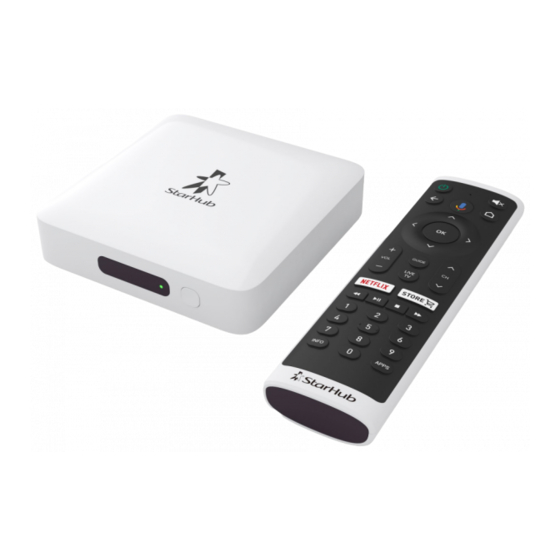
WHAT’S INCLUDED StarHub TV+ box Remote with LED indicator Control Green : Powered On Red : Standby Mode Ethernet Cable Power Adapter 2 x AAA Batteries HDMI Cable USING YOUR REMOTE CONTROL Low Battery Indicator Power On / Standby Mute / Unmute Back Home Google Voice Search... -
Page 4: Setting Up Your Starhub Tv+ Box
SETTING UP YOUR STARHUB TV+ BOX STEP 1 Connect.the.HDMI.cable.to.your. StarHub.TV+.box.and.the.HDMI.port. on.your.TV. HDMI.port Back.of.the.TV STEP 2 HDMI.cable Connect.the.Ethernet.cable.to.your. StarHub. StarHub.TV+.box.and.the.LAN.or. TV+.Box Ethernet.port.on.your.router.. For StarHub Smart WiFi To.enjoy.Free-to-air.channels.on.your. StarHub.TV+.box,.you.will.need.. via.wireless.or.wired.connection StarHub.Broadband.with.a.StarHub. StarHub. LAN.port Smart.WiFi. Smart.WiFi.or.a.wired.connection.to. router Linksys.EA8100/7500.router..Head.to. Page.11.for.more.information. Using.the.Ethernet.cable.provides. Ethernet.cable a.more.stable.internet.connection.. However,.if.you.prefer.to.use.WiFi. - Page 5 STEP 4 HDMI 1 Select.the.corresponding.HDMI. HDMI 2 source.on.your.TV.using.your.. TV.remote.control. Note: Newer Smart TV models may show the TV+ box name NVSH800H1 on the corresponding HDMI source. STEP 5 Insert.the.2.AAA.batteries.into. the.remote.control. AAA.Batteries STEP 6 Press.and.hold.the.Rewind.and.Fast Forward.buttons.on.your.remote.control. at.the.same.time.for.5-10.seconds.to.pair.your.remote.control. Rewind Fast.Forward When.the.remote.control.pairing.is. If.the.remote.control.pairing.is.unsuccessful,. successful,.you.will.see.this.screen.
- Page 6 STEP 7 Select.your.preferred. language.for.the.set-up. process. If.your.StarHub.TV+.box.is. connected.to.your.router. via.the.Ethernet.cable,.you. will.see.this.screen..Select. Continue.to.proceed. If.your.StarHub.TV+.box.is. not.connected.to.your.router. via.the.Ethernet.cable,.you. will.see.this.screen..Select. your.WiFi.network.and.input. the.WiFi.network.password. to.proceed. If.you.have.a.Google.account,. select.Sign In..We.recommend. that.you.sign.in.to.your. account,.so.you.can.enjoy. Android.TV.services.such.as. the.Google.Play.Store. If.you.do.not.have.a.Google. account,.select.Skip..Continue. with.Step.9.(Page.6).
- Page 7 STEP 8 To.sign.in.using.your. remote.control,.select. Use your remote. Using.the.D-Pad.Navigation. on.your.remote,.enter.your. Google.account.log-in.. and.password. D-Pad Navigation (Up / Down / Left / Right) STEP 9 Select.Accept.to.accept.the. Terms.of.Service. Select.Yes.to.turn.on.location. services,.or.select.No.to.turn. off.location.services.
- Page 8 Select.Yes.to.send. diagnostics.to.Google,.or. select.No.to.opt.out. STEP 10 Select.Continue.on.the.next. 2.screens.to.set.up.your. Google.Assistant. Note: If you have skipped the Google account sign-in proceed to Step 11 (Page 8). Select.Turn on.to.get. personalized.results.on.your. Google.Assistant,.or.select.. No thanks.to.opt.out.
- Page 9 STEP 11 You.will.be.introduced.to.the. Google.features.available. on.the.StarHub.TV+.box.. OK (Select / Confirm) Press.the. .button.on.your. remote.to.continue. Your.Google.set-up.is.. now.complete. Now,.wait.for.the.Data. Synchronization.to.finish.. Once.it’s.done,.you.will.be. prompted.to.log.in.to.your. Hub.iD..
- Page 10 STEP 12 A.Hub.iD.is.required.to.enjoy. StarHub.TV+.content. If.you.have.a.Hub.iD,.select. Login with Hub iD. If you have a Hub iD: Enter.your.Hub.iD.and. password.to.sign.in. If you have forgotten your Hub iD or Password: Select.Forgot Hub iD / Password? Use.your.smartphone.to.scan. the.corresponding.QR.code. shown.on.screen..Retrieve. your.Hub.iD.or.Password.by. following.the.instructions.sent. to.your.smartphone. Once.you.have.retrieved.your. Hub.iD.or.Password,.select. Back to Login.on.your.TV.
- Page 11 If you do not have a Hub iD: Select.Sign up a new account.. Use.your.smartphone.to.scan. the.QR.code.shown.on.screen. Follow.the.instructions..to. complete.your.Hub.iD. registration..When.you’re.done,. select.Back to Login. For steps to create a Hub iD, please refer to page 16-17. Enter.your.new.Hub.iD.and. password.to.sign.in. Once.you.see.this.Home. Screen,.it.means.your.set-up. is.now.complete.and.you’re. ready.to.start.watching!
-
Page 12: Using Your Starhub Tv+ Box
USING YOUR STARHUB TV+ BOX Watching LIVE TV channels To.watch.LIVE.TV.channels,.press.the. .button. on.your.remote..Key.in.the.channel.number. using.the.number.pad.e.g..825.for.Hub.E.City. To.enjoy.Free-to-air.channels.on.your.StarHub.TV+.box,.you.will.need.StarHub. Broadband.with.a.StarHub.Smart.WiFi.router.or.a.wired.connection.to.Linksys. EA8100/EA7500.router. via.wireless/wired connection Free-to-air channels StarHub Smart WiFi StarHub TV+ box Channel 5, Channel 8, Channel U, via.wired connection StarHub Channel News Asia, Broadband Suria, Vasantham Linksys EA7500 Linksys EA8100 StarHub TV+ box... - Page 13 Watching On Demand shows To.watch.On.Demand.shows,. press.the. .button.on.your. remote.to.go.to.the.Home.Screen.. Use.the.D-Pad.Navigation.to. browse.and.select.shows. Using.the.D-Pad.Navigation,. scroll.to.the.show.that.you. would.like.to.watch. Press.OK.to.select.. the.show. D-Pad Navigation (Up / Down / Left / Right) Using.the.D-Pad.Navigation,. navigate.to.the.Play.button.and. press.OK.on.your.remote.
- Page 14 How to change your Show Info language: Select. .to.access. My.Account. Select. Preferences. Select. Show info language.
- Page 15 Press.the.OK.button.and.the.D-Pad.Navigation.on.your.remote.to.toggle. between.English.or.Chinese. D-Pad Navigation (Up / Down / Left / Right) Please.note.that.this.changes.the.language.of.the.Show.Info.only,.where. available..English.is.the.default.language.for.the.StarHub.TV+.interface.. You.will.also.be.able.to.set.your.preferred.audio.and.subtitles.
- Page 16 If.you.have.set.your.Show.Info.language.to.Chinese,.the.show.info.will. appear.in.Chinese.where.available.
-
Page 17: How To Create A Hub Id
HOW TO CREATE A HUB iD To.create.a.Hub.iD,.scan.this. QR.code Or.visit.starhub.com/hubid-signup Enter.your.email.address,. password.and.mobile.number. Check.the.box.beside.. I’m not a robot. Then.select.Next. Enter.the.verification.code. that.was.sent.to.your.mobile. number.via.SMS. Then.select.Next. Please.enter.the.verification.code.sent.to +65.91234567 The.code.is.valid.for.2:56.minutes. - Page 18 When.you.see.this.screen,. you.have.completed.the.. Hub.iD.creation. Welcome.to.StarHub.family! Your.Hub.iD.test@email.com.has.been. created.successfully..Click.here.to.view.your. Hub.iD.profile. Have.active.StarHub.Postpaid.service?.Link your.account.now.to.view.and.manage.your. services! Do.not.have.StarHub.service?.Start.browsing our.online.offers.now! To change your Hub iD password Log.in.to.your.Hub.iD. test@email.com XXXXX000A Click.on. Change password test@email.com under.Hub.iD.profile. +65-91234567 test@email.com Enter.your.current. XXXXX000A and.new.password. test@email.com and.click.Save. +65-91234567...
- Page 19 For further information, please visit starhub.com/tvplus-box-help or scan the QR code. ©.2020.StarHub.Cable.Vision.Ltd..All.rights.reserved.
Need help?
Do you have a question about the TV+ and is the answer not in the manual?
Questions and answers
When trying to connect my computer to the starhub tv+ router, it request for PIN which could not be found on the wi fi router.Please advise.