Table of Contents
Advertisement
Quick Links
Advertisement
Table of Contents

Related Manuals for Zanussi ZCG669GW


Summary of Contents for Zanussi ZCG669GW
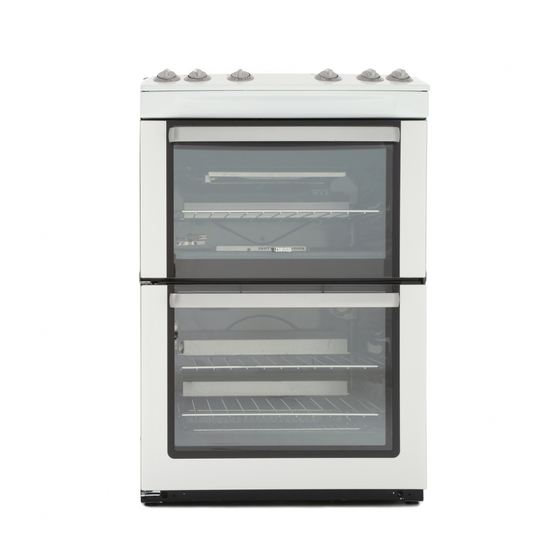
- Page 1 User Manual Cooker ZCG669GW...
-
Page 2: Table Of Contents
Cleaning and user maintenance shall not be made by children • without supervision. General Safety Only a qualified person must install this appliance and replace • the cable. Do not operate the appliance by means of an external timer or • separate remote-control system. www.zanussi.com... -
Page 3: Safety Instructions
• Make sure to install a stabilizing means in • Do not pull the appliance by the handle. order to prevent tipping of the appliance. • The kitchen cabinet and the recess must Refer to Installation chapter. have suitable dimensions. www.zanussi.com... - Page 4 • This appliance is not connected to a device, – do not put water directly into the hot which evacuates the products of appliance. combustion. Make sure to connect the www.zanussi.com...
- Page 5 Contact the closed. Leave the oven door slightly open. Service. There is a risk of fire or carbon monoxide • Be careful when you remove the door from emissions. the appliance. The door is heavy! www.zanussi.com...
-
Page 6: Product Description
Steam outlet - number and position depend on the model Semi-rapid burner Auxiliary burner Rapid burner Semi-rapid burner Accessories For cookware, cake tins, roasts. • Grill- / Roasting pan • Wire shelf To bake and roast or as pan to collect fat. www.zanussi.com... -
Page 7: Before First Use
Preheat the empty appliance to burn off the remaining grease. Hob - Daily use Burner overview WARNING! Refer to Safety chapters. A) Burner cap B) Burner crown C) Ignition candle D) Thermocouple E) Hob F) Slots G) Burner body H) Location peg Hole www.zanussi.com... -
Page 8: Hob - Hints And Tips
1 minute. Hob - Hints and tips Cookware WARNING! Refer to Safety chapters. WARNING! Do not put the same pan on two burners. www.zanussi.com... -
Page 9: Hob - Care And Cleaning
2. The enamel coating occasionally can have rough edges, so be careful when you wash www.zanussi.com... -
Page 10: Oven - Daily Use
3. Keep the knob pushed for equal or less than 15 seconds to let the thermocouple warm up. If not, the gas flow is interrupted. 4. After ignition release the knob, close the oven door and turn the knob to set the necessary heat setting. www.zanussi.com... - Page 11 Trivet and Grill- / Roasting pan WARNING! Be careful when you remove the accessories from a hot appliance. There is a risk of burns. 2. Put the deep pan into the oven on the necessary shelf position. www.zanussi.com...
-
Page 12: Oven - Hints And Tips
The baking time is too long. The next time you bake, set a shorter baking time. The cake browns unevenly. The oven temperature is too high Set a lower oven temperature and the baking time is too short. and a longer baking time. www.zanussi.com... - Page 13 1 - 2 Soufflés 20 - 30 1 - 2 Fish 20 - 30 1 - 2 Fish Pie 20 - 25 1 - 2 Beef Casserole 150 - 180 1 - 2 Lamb Casserole 150 - 180 1 - 2 www.zanussi.com...
- Page 14 90 - 120 Scones 8 - 12 1 + 4 Choux Pastry 30 - 35 Éclairs / Profiteroles 20 - 30 Flaky Pastry 25 - 40 Mince Pies 15 - 20 1 + 4 Pasta Lasagne etc. 40 - 45 www.zanussi.com...
- Page 15 20 - 35 minutes per 500g (1lb) and 20 - 35 minutes over Mutton / Lamb 25 - 35 minutes per 500g (1lb) and 25 - 35 minutes over Pork / Veal / Ham 30 - 40 minutes per 500g (1lb) www.zanussi.com...
- Page 16 2 - 3 Whole Trout / Mackerel 15 - 25 2 - 3 Plaice / Cod Fillets 10 - 15 2 - 3 Kebabs 20 - 30 2 - 3 Kidneys – Lamb / Pig 8 - 12 2 - 3 www.zanussi.com...
-
Page 17: Oven - Care And Cleaning
Clean the oven control panel with the same precautions. 3. Pull the door trim to the front to remove it. 4. Remove the glass panels. To install the panels, do the same steps in reverse. www.zanussi.com... -
Page 18: Troubleshooting
You cannot activate the appli- The appliance is too hot. Wait for the appliance to cool ance. down. The burners do not work. There is no gas supply. Check the gas connection. www.zanussi.com... - Page 19 Do not remove yourself, contact your dealer or an Authorised the rating plate from the appliance cavity. Service Centre. We recommend that you write the data here: Model (MOD.) ......... Product number (PNC) ......... Serial number (S.N.) ......... www.zanussi.com...
-
Page 20: Installation
WARNING! These instructions are only valid in the countries whose symbols appear on this booklet's cover. Gas cate- gory: Gas supply G20 (2H) 20 mbar Gas burners BURNER NORMAL POWER Natural Gas INJECTOR MARK 1/100 mm Btu/h Auxiliary 3412 www.zanussi.com... - Page 21 P.T.F.E. sealant tape. When the installation is complete, carry out a gas tightness test and make sure that the seal of each pipe fitting does not leak. Use flexible tubing, which comply with the BS.669 current edition. www.zanussi.com...
- Page 22 Help protect the environment and human health and to recycle waste of electrical and electronic appliances. Do not dispose appliances marked with the symbol with the household waste. Return the product to your local recycling facility or contact your municipal office. www.zanussi.com...
- Page 23 www.zanussi.com...
- Page 24 www.zanussi.com/shop...