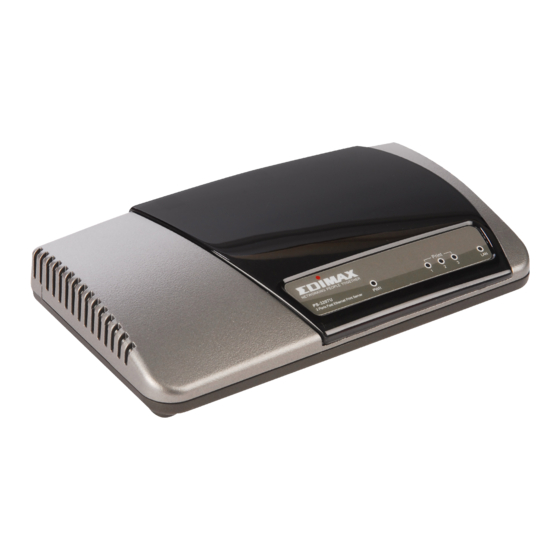
Edimax PS-3207U User Manual
3 ports print server series
Hide thumbs
Also See for PS-3207U:
- Compatibility listing (11 pages) ,
- Specifications (2 pages) ,
- User manual (159 pages)
Table of Contents
Advertisement
Quick Links
Advertisement
Table of Contents

Related Manuals for Edimax PS-3207U


Summary of Contents for Edimax PS-3207U
- Page 1 3 Ports Print Server Series User’s Manual Version: 1.0 (December, 2005)
- Page 2 COPYRIGHT Copyright 2005/2006 by this company. All rights reserved. No part of this publication may be reproduced, transmitted, transcribed, stored in a retrieval system, or translated into any language or computer language, in any form or by any means, electronic, mechanical, magnetic, optical, chemical, manual or otherwise, without the prior written permission of this company.
-
Page 3: Federal Communication Commission Interference Statement
Federal Communication Commission Interference Statement This equipment has been tested and found to comply with the limits for a Class B digital device, pursuant to Part 15 of FCC Rules. These limits are designed to provide reasonable protection against harmful interference in a residential installation. - Page 4 Federal Communication Commission (FCC) Radiation Exposure Statement This equipment complies with FCC radiation exposure set forth for an uncontrolled environment. In order to avoid the possibility of exceeding the FCC radio frequency exposure limits, human proximity to the antenna shall not be less than 20cm (8 inches) during normal operation.
- Page 5 DISCLAIMER This company makes no representations or warranties, either expressed or implied, with respect to the contents hereof and specifically disclaims any warranties, merchantability or fitness for any particular purpose. Any software described in this manual is sold or licensed "as is". Should the programs prove defective following their purchase, the buyer (and not this company, its distributor, or its dealer) assumes the entire cost of all necessary servicing, repair, and any incidental or consequential damages resulting from any defect...
-
Page 6: Table Of Contents
INTRODUCTION ...1 Product Introduction ...2 Product Package ...3 Network Printing Architecture...4 1.3.1 Print Server Network Functions ... 5 1.3.2 Network Printing Functions for Clients... 5 1.3.3 Network Printing Functions for Network Server ... 8 Network Printing Environment...9 Contents of the User’s Manual...11 Firmware &... - Page 7 Verify Print Server’s IP Address...59 Configure Remote LPD Printing on the Host ...60 CONFIGURATION UTILITY ...63 Introduction...64 Search for All Available Print Server ...66 Status of Print Server ...67 Setup the Print Server ...69 General Configuration ...71 TCP/IP Configuration ...72 Netware Print Server Configuration ...74...
- Page 8 9.5.1 ipconfig ... 136 9.5.2 reboot ... 136 9.5.3 exit ... 136 9.5.4 help ... 136 10. IPP PRINTING...138 10.1 Introduction...139 10.2 System Setup ...140 10.2.1 Print Server Side... 140 10.2.2 Client Side... 140 11. WINDOWS XP SP2 SETUP ...145...
-
Page 9: Introduction
Introduction... -
Page 10: Product Introduction
Product Introduction Thank you for p urchasing and using our print server. This pr int server allows your printer to become a shared de vice on the networ k. It offers printing f lexibility and mana geability on your Local Area Network at an extremely low cost and with an absolute minimum setup and maintenance requ ired. -
Page 11: Product Package
Product Package This pa ckage contains the following components: n One Print Server n One Antenna n One Po wer Adapter n One Quic k Insta llation Guide n One CD-ROM (Includin g all the software utilities, drivers and Us er’s Manua l) -
Page 12: Network Printing Architecture
Network Printing Architecture This section illustrates ho w print server functions and operates on the net work. Before you install and use print server, it is strongly recommended that you read this section c omp letely, and select only the chap ters you need accord ing to your network operatin g sys tem by “Contents... -
Page 13: Print Server Network Functions
Windows NT Windows 2000 Windows 98 Workstation Because print server supports IPX/SP X, NetBEUI, TCP/IP and AppleTa lk network protocols , any networked computer can directly prin t to the p rint server from any of its insta lled protoc ol. - Page 14 Common operating systems for clients are c lassif ied as following: Windows 95/98SE/Me/NT /2000/XP /2003 Our print server sys tem pro vides PTPP (Peer-to-Peer Printing) driver 95/98SE/Me/NT/2000/XP/2003 users. PTPP (Peer-to-Peer Printing) supports T CP/IP protocol. In the client insta llation procedure, after PTPP (Peer-...
- Page 15 UNIX / Linux UNIX (include HP/UX, SCO Unix, SunOS, Solaris, Unix ware DECUnix, I BM AIX and others) and Linux use the system-standard LP R to print through print server. MAC OS MAC OS can use the system-standard AppleTalk network to print through print ser ver.
-
Page 16: Network Printing Functions For Network Server
Workstation Common network ser vers are class if ied as following: Windows NT/2000/2003 Our print server sys tem pro vides PTPP (Peer-to-Peer Printing) driver and utilities for Windo ws NT/2000/2003. After PTPP is installed, the server can directly print throu gh print server. Adding this printing function into... -
Page 17: Network Printing Environment
Network Printing Environment Common network following: Windows Peer -to -Peer Net work The client’s PTPP driver will use TCP/IP protocol to print throu gh pr int server. Windows NT/2000/2003 Network Networ k pr inting function will become ava ilable after PTPP driver is installe d into Windo ws NT/2000/2 003. - Page 18 NetWare Networ k (see below)
-
Page 19: Contents Of The User's Manual
You may sele ct the appropriate chapters and sections to read depen ding on your networ k printing’s requ ire ment. Chapter 7 and chapter 8 introduce print server ’s mana gement and conf iguration utilities o n Windo ws and Web Browser’s environ ment respectively. - Page 20 Chapter 11 In Windows XP SP2, you may n ot find any print ser ver listed on the “ Available Ports” in “ Network Ports Quick Setup” . P lease follow the instruction in this chapter and resolve the problem.
-
Page 21: Firmware & Printing Function
Firmware & Printing Function The print server provides a complete networ k pr inting solution. The feature set is listed below: n PTPP (Peer-to-Peer-Printing) n TCP/IP (LP R) n IPP Printing n NetWare Bindery Pr inting n AppleTalk n SMB Pr inting... -
Page 22: Hardware Installation
Hardw are Installation 1. Unpack the print server package and verify that all the items listed in the section 1.2 are provided. 2. Connec t the pr int server to the printer you want to share on the net work. -
Page 23: Windows Peer-To-Peer Network
Windows Peer-to-Peer Netw ork... -
Page 24: System Architecture
System Architecture Print server supports Windows Pe er-to-Peer network printing mode, which is suitable for most medium a nd s mall network e nvironments . installation procedure, users can immediately enjo y the convenience of net work prin tin g. - Page 25 Client Installation an d Configuration (refer to section 3 for more detaile d infor mation). Client users must install Windows PTPP driver (Peer- to-Peer Prin ting) for network printing. In addition, after PTPP is installe d, the system will automatically search for all print s ervers on the networ k, and add the printin g port of the print servers into Windows’...
-
Page 26: Administrator Installation And Setup
Administrator Installation and Setup The Administrator Insta lla tion can be performed on Windo ws 95/98SE/Me/NT/2000/XP /2003 with the same user interface. Before the installation, please verify that your networ k protoco l is installed on your P C (TCP/IP, IP X and/or NetBEUI). - Page 27 3. The “Utilities Setup” window will be displayed. Click “Next”. 4. Click “Next” to install the utilities in the default folder or click “Browse” to specify the destination folder where you would like to install the utilities .
- Page 28 5. Select the compo nents you want to install. It is highly rec ommended to install all provided components. Click “Next” to c ontinue. 6. Spec ify the program folder where the program icons will be added to , click “Next”.
- Page 29 7. The system will start install utilities automatically.
- Page 30 Print Server you would like to configure and click “Ne xt”. NOTE 1: If this is the first time you configure the Print Server, the “Print Server Name” is the last 6-digit of MAC ID with prefix “PS”. Please check the MAC ID on the print server.
- Page 31 9. Spec ify a rec ognizable name for the Prin t Server and clic k “Next”. Spec ify the IP Address for the Print Ser ver manua lly or click “Next” to keep default IP Address, i.e. 192.168.2.2.
- Page 32 The configuration summar y is displayed in the window. No w, you have completed the “Print Server Setup”. Click “Finish” and your s ystem will add network port of the Print Server to your PC auto matically. The Administrator Installation pr ocedure is...
- Page 33 Conf igure the print ser ver (including the print server name and network protocol) n Add the ne twork port of the print server to the administrator ’s P C. If you want to pr int from this administrator’s PC to the print server, all you need to do is to perform Windo ws’...
-
Page 34: Administrator Utilities
Administrator Utilities After Administrator Installation is completed, there will be four utilities in pr int server ’s Program folder. n Network Ports Quick Setu p – Ad d the ne twork ports of print servers within the network to your P C. n Print Ser ver configure the pr int server’s IP Address, network... -
Page 35: Client Installation And Setup
Client Installation and Setup The Clie nt Installation c an be performed on Windows 95/98SE/Me/NT/2000/XP/2003 with the same user interface. Before the installa tio n procedure, please confirm that your PC has connected to the networ k and installe d at least one network pro tocol. - Page 36 3. The “Utilities Setup” window will be displayed. Click “Next”. 4. Click “Next” to install the utilities in the default folder or click “Browse” to specify the destination folder where you would like to install the utilities .
- Page 37 5. Spec ify the program folder where the program icons will be added to , click “Next”. 6. The system automatically. will start install utilities...
- Page 38 7. Now, the installation procedure is completed, you are ready to set up the client’s computer. All network ports of the Pr int Ser vers detected on the network will be added to your PC automatically, click “Continue ”. 8. The Client Insta llation procedure is completed. Click “Finish”.
- Page 39 After installation, following tas ks: n Install all utilities and drivers to the client’s PC. n Add all the pr int server’s networ k ports of the network to the c lient’s PC. You can then perform the Windows’ s tandard “ Add Printer”...
-
Page 40: Client Utilities
The other two tools are descr ibed as follows . 3.5.1 Network P orts Quick Setup Network Ports Quic k Setup Utility offers a very simple method to add or remove print server’s printer port from the client’s computer. - Page 41 Perform the s tandard Add Printer procedure, then you can pr int directly to the pr inter through the newly installed print server. port into client’s computer...
-
Page 42: Remote Ports (Utility)
Please be aware that Ne twork Ports Qu ick Setup Utility can only detect a nd configure all pr int servers on the same network, it ca nnot search and configure print servers on other subnets across network segments. You must use Remote Ports Utility descr ibe d in the next section to mana ge remote (across network segments) print ser vers. - Page 43 Enter print server ’s name, IP address, select Step2. used ports , and enter LP R queue name of each port. Click “Ok”. Step3. The ne w remote print port is displayed as follo ws . In order to use the re mote printing function, you will...
-
Page 45: Windows Add Printer Procedure
Windows Add Printer Procedure After adding a “Net work Port” of the pr int server to your P C by Adminis trator or Client Insta llation Program, you can follow the procedure described belo w to add printer to the Windo ws. Note tha t f ollo wing “ Add Printer” steps are running in Windo ws XP, the steps in other Operating Systems are s imilar. - Page 46 “Automatica lly detect and insta ll my P lug and P lay printer” is not selec ted. Click “Next”. Choose the suitable “Print Server Network Step5. Port” which was created by the Administrator Installation or Client Installation process and...
- Page 47 Step6. Select a suitable printer manufacturer and the printer model and click “Next”. If your printer is not in the list, c lick “ Ha ve Disk…” to insta ll the dr iver of the printer. After installation, the printer model will be added to the list. Step7.
- Page 48 Step8. Choose to pr int the test pa ge or not. It is recommen ded to print a test page. Click “Next”. Step9. You have added the printer to the PC successfully. T he information of the printer is displa yed in the windo ws. Click “Finis h”.
-
Page 49: Windows Nt/2000/2003 Network
Window s NT/2000/2003 Netw ork... -
Page 50: System Architecture
System Architecture In Windows networ k enviro nment, other than the Peer- to-Peer networ k printing architecture descr ibed in the previous chapter, we also offer the Server-Based Pr inting architecture for Windows NT /2000/2003 server . Only one Windo ws NT/2000/2003 is required to have Windows PTPP (Peer-to-Peer Printing) dr iver installed and share the printing ser vice on the net work. -
Page 51: Windows Nt/2000/2003 Server Installation And Setup
Please fo llow the procedures d escribed below for installation and c onstruct a peer -to-peer connection (PTPP) between Windows NT/2000/2003 Server and Pr int Server. Step1. If this is your first time installing print server, please install administrator NT/2000/2 003 server f irst. - Page 52 Step3. Share the above server’s printer to the network by performing the standard Windo ws printer shar ing process.
-
Page 53: User Installation And Setup
User Installation and Setup After ser ver side’s installation is comp leted, client s ide will be able to find the server ’s shared pr inter in Network Neighborhood. only need perfor m Windo w’s standard Add New Printer procedure, select “Network Printer”... -
Page 54: Netware Network
NetWare Netw ork... -
Page 55: System Architecture
We have developed the print server to support NetWare print server. Embedded print ser ver, which emulates the “queue mana gement functionality”... - Page 56 Improve productivity by locating the pr inter near the workgro up. Each print server should lo g into a NetWare ser ver before servicing the print jobs . Each print ser ver will occupy a user account with whic h it can lo g into the...
-
Page 57: Netware 3.X/4.X/5.X Installation & Setup
5.2.1 Installation Using PCONSOLE 5.2.1.1 Configuring as Print Server Mode Run the NetWare P CONSOLE program. Change the current f ile ser ver, if necessary, us ing the Chan ge Current File Ser ver menu selection. 3. Choose the Print Queue Information menu selection. - Page 58 P Sxxxxxx name printed o n the la bel of the pr int server. Press Enter to select the newly created print ser ver. Select Print Server Configuration. Select Printer Configuration . Select Printer 0 (or Printer 1, P rinter 2), and press Enter, then select LPT1 (or LPT2, LPT 3) in the Typ e field.
- Page 59 Press Escape, and answer Yes to the Save Changes ques tion. Select Queues Ser viced by P rinter, then select Printer 0 (or Pr inter 1, Printer 2) and press Enter. Press Insert and add your n ewly created print queue to the list of q ueues serviced by the pr inter.
- Page 60 . Your print server shou ld no w be ready to use . should be able to redirect printing to your pr int server us ing a CAPT URE command such as the one shown in the...
-
Page 61: Unix System Network
UNIX Syst em Netw ork... -
Page 62: Introduction
BSD based Unix systems. P lease refer to the related system documentation for the correct syntax of your systems . To configure the print server for LP D printing, perfor m the procedures below: 1. Enable Pr int Ser ver’s TCP/IP Support. -
Page 63: Enable Print Server's Tcp/Ip Support
Enable Print Server’s TCP/IP Support The default configuration of the pr int server is with TCP/IP support enabled. Anyway, you can configure the print server e nable T CP/IP support using configuration program. -
Page 64: Setup Print Server's Ip Address
BOOTP If you have the BOOTP daemon, bootpd, running on your UNIX sys tem that is accessible by the print server, you can use the BOOTP protoc ol to set up the IP address of the pr int server. We recommend that the BOOTP ser ver should be loca ted on the same subnet as the pr int server. - Page 65 Ethernet, the ha= tag specifies the Ethernet add ress of a print server, which is the Node ID located on the print server. The ha tag must be preceded by the ht tag. The ip= tag should correspond to the IP address you wa nt to assign to the print server.
- Page 66 For exa mple, a configuration : Node ID: 0000B4010 101 (this implies Ethernet address is 00 00B4010101) , IP address: 2 03.66.191.12 The entr y for this pr int server in the /etc/bootptab file should be: PS010101:\ print ser ver with the following :ht=1:\ :ha=0000B4010101:\...
-
Page 67: Verify Print Server's Ip Address
Verify Print Server’s IP Address To verif y that your pr int server is respondin g to the ne wly assigned IP address using a PING c ommand : ping ip-address... -
Page 68: Configure Remote Lpd Printing On The Host
Optionally, ass ign a na me corresponding to the print server ’s IP address. You can add this address to the /etc/hosts file, by adding a line such as: 2. Create a spool director y for the printer in the same... - Page 69 mkdir /var/spool/lpd/pserverd chown daemon /var/spool/lpd/pserverd chgrp daemon /var/spool/lpd/pserverd chmod 775 /var/spool/lpd/pserverd 3. Add an entry to the host’s /etc/printcap file , s imilar to the followin g: printer-name:\ :lp=:\ :rm=203.66.191.186:\ :rp=lpt1:\ :lf=/var/spool/lpd/pserverd.log:\ :sd=/var/spool/lpd/pserverd:\ :mx#0: Lin es should be indented with tabs. More than one printer na me can be used, with varia nts separated by vertical bars (name1|name2).
- Page 70 The print server sh ould now be a vailable for pr inting from your Unix host.
-
Page 71: Configuration Utility
Configuration Utility... -
Page 72: Introduction
Utility insta llation procedure - refer to section 3.2 and 3.3. This utility provides the most complete mana gement and conf iguration functions on the print server side. This utility only provides configuratio n functions for print server itself; it does not include configuration functions for client s ide or other file server or NetWare server in the network environment. - Page 73 n Rende zvous: Ren dezvous function. n SNMP Config uration: Conf iguration. n SMB : Co nfigure the SMB Group Name. n System Configuration: Ability Setting and Fir mware Upgrade. n Wireless Conf iguration. n Setup Wizard: Settings. n Report: List the Sta tus of All Available Print Servers on the Net work.
-
Page 74: Search For All Available Print Server
You must select the pr int ser ver you would like to configure fro m the list. The system will, at the same time, display the selected print server’s status on the r ight s ide of the window. on the tool bar . The... -
Page 75: Status Of Print Server
NetWare printer queue names, IP address, subnet mask, default gate wa y, AppleTalk printer type, AppleTalk zone and print server printing ability…etc . You ca n refresh the print server’s status by press ing the “Refresh” button on the tool bar, the s tatus of the... - Page 76 You can restart the prin t ser ver by pressing the “Re boot” button...
-
Page 77: Setup The Print Server
Setup the Print Server Click “Setu p” icon of the current selected print server will be sho wed on the right s ide of the window. Double click one of the icons to set up the selec ted print server. A screen will pop up to verify “User Name”... -
Page 79: General Configuration
Group Name”, “ User Name” and “Pa ssword” here. Server Name, the name of the print server. Yo u can use this name to identif y the print server when you are searching for the pr int ser ver by the administration and client utilities. -
Page 80: Tcp/Ip Configuration
Double Click configuration windo w will pop-up. You can configure the print server to automatically get IP from DHCP server or manually specif y static IP. The print ser ver a lso has a built-in DHCP ser ver. You can enable this DHCP server and let it manages IP for yo u. - Page 81 Click the “IP” button to enter the IP setting pa ge. If you need the print server to automatically get an IP from DHCP server , select “ Auto IP”. You als o can se lect “ Static IP” to manually assign “IP Address”, “Subnet Mask” and “Ga teway”...
-
Page 82: Netware Print Server Configuration
This print server supports NetWare Bindery Printing method. T he print server per iodically polls the NetWare server pr inter queues for pr inting jobs. Yo u have to ass ign the NetWare server na me, pr int server polling inter val and the name of queue on the NetWare server for each pr inter port. - Page 83 NetW are Server is the name of the NetWare file server that provides printer queues.
-
Page 84: Appletalk Configuration
AppleTalk Configuration Double Clic k “AppleTa lk” icon and the AppleTalk configuration windo w will pop-up. AppleTalk is a data communication protocol often used by Macintoshes. The pr int server can use these parameters to join the AppleTalk net work and share the prin ter to other AppleTalk wor kstations. -
Page 85: Rendezvous Configuration
Rendezvous Configuration Rendezvous enables automatically discover y computers, devices and ser vices on IP networ k. The service na me will be seen by users on IP networ k, you have to designate the unique a nd friendly name to describe the de vice . -
Page 86: Snmp Configuration
SNMP manage men t tool. Location: You can enter the installed location of the print server here. T his infor mation will be displayed in the SNMP manage me nt tool. “SNMP” icon here. -
Page 87: Smb Configuration
7.11 SMB Configuration SMB Gro up Name, the name of SMB group that this print server belongs to. All P C should join the same group before they can use this print server by SMB protocol. -
Page 88: 7.12 System Configuration
/disable each printing or mana gement protocol, assign name for each pr inter port of this print server, up grade the ne w f ir mware for this print server, and enable /disable wireless function. Port Name is the name of the printer port. Each pr inter port has to be assigned a name. - Page 89 You also can select “Auto” to let the print server automatically decide to enable or disable the wireless function. The print server on ly can wor k in ether Ethernet or wireless LAN mode. It cannot wo rk in both Ethernet and wireless LAN mo de at the same time.
- Page 90 Country setting is for you to set the available channe ls accord ing to your location.
-
Page 91: Wireless Configuration(Wireless Version Only)
Ethernet cable aga in, restart the pr int server and c onfigure the pr int server through Ethernet until the wireless LAN settings are correct. The default settings of the print server wireless function are as follo ws. Mode: Ad-Hoc Ÿ... - Page 92 If you use access point to build up wireless networ k, you have to se lect “Infrastructure Mode”. If you do not ha ve any access point and want to use peer-to-peer connection to build up wireless network, you have to select “...
- Page 93 The list is the scanned ava ilable access points. Select an access point in the list and click “Next” . If you cannot find the access point that you want to use, click “Scan” to let the pr int server scan again. Ad Hoc Mode:...
- Page 94 “Next” . If you ca nnot find the wireless station that you want the pr int server to communicate with, click “Scan” to let the print server scan again. Both “Infrastructure” and “Ad-Hoc ” mode have to go...
- Page 95 This pr int server supports WEP and WP A-P SK security mode. If you want to use WEP enc ryption to protect your wireless ne twork, you have to select “WEP(ASCII)” or “ WEP(HEX)”. If you want to use WP A-P SK, yo u have to select “...
- Page 96 Ÿ process by automatically generating the WEP encryption keys for the print server. This setting is only valid when the security mode is in “WEP(HEX)”. Key 1 to Key 4 – If the key length is 64-bit, enter 10-digit Hex Ÿ...
- Page 97 WP A-shared key Security Mode: Wh en “WP A-shared key”, also named “WP A-P SK” requires users to select the adva nced e ncryption methods, i.e . TKIP or AES and enter a set of shared key. TKIP – TKIP (Temporal Key Integrity Protocol) changes the Ÿ...
- Page 98 You can select to let the pr int server automatically obtain IP settings with DHCP client or manually assign the IP settings . If you manua lly ass ign the IP settings, you have to enter IP address, subnet mas k and default gate way address . Wh en you finish conf igur ing the IP settings , click “Ne xt”...
- Page 99 Click “Save” to sa ve the wireless configuration.
-
Page 100: Wizard
7.14 Wizard Click “Wizard” icon wizard ite m of the current selecte d print server will be showed o n the r ight s ide of the window. Double clic k the “Print Server Setup Wizard” the setup wizard will guide you through all the setup process. - Page 101 Step 1: Set up the na me of th is print ser ver, SMB Group Name and the port name for the print ser ver. Step 2: Se lect to enable requ ired printing protocol. Please refer to section 7.12 for detail information.
- Page 102 Step 3: Setup the IP of this pr int server and the DHCP server. P lease refer to section 7.6 for deta il information . Step 4: Setup the Net Ware pr inting. P lease refer to section 7.7 for detail information.
- Page 103 Step 5: Se lect the Wireless Adapter mode and complete wireless LAN settings. T he other procedures are the sa me with “ Wireless” Setting in “Setup” screen. P lease refer to section 7.13 for de tail information. Step 6: Click “Save” to f inish setting.
-
Page 104: Report
7.15 Report Click “Report” ic on window will pop up. The report lists bas ic information of all ava ilable print servers on the networ k. The information includes Device Name, M AC ID, Mode l Type, Fir mware Version and Status of pr int server. -
Page 105: Web Management
Web Man agement... -
Page 106: Introduction
Introduction Print server can be conf igured an d managed on the Web. Through Local Area Network, or even Internet, administrator can easily c onfigure and server’s various ma in functions in browsers. Simply enter print server ’s IP address into your browser’s address field to manage a print server by print server’s built-in Web... -
Page 107: Login
Login You may use any Web Browser to review the sta tus or configure the settings of the pr int server. After entering the IP address of the pr int server , a login page displa y. You ha ve to enter correct “User Name” and “Password” before go ing to the Web Manage ment pages. -
Page 108: Device Status
Device Status 8.3.1 Syst em System Information includes “Device Name”, “Print Server Name”, “ Firmware Version”, “MAC Address”, and the protocols enable d status, etc. “Model “System T ype”, T ime”,... -
Page 109: Printer
8.3.2 Printer This pa ge lists information of printers connected to all printer ports. -
Page 110: Tcp/Ip
8.3.3 T CP/IP This page lists all T CP/IP settin gs of the pr int ser ver including “IP Address”, “Subne t Mask” and “Gateway”. It also lists DHCP server setting. -
Page 111: Smb
8.3.4 This page lists the SMB group setting of the print server. -
Page 112: Snmp
8.3.5 SNMP This pa ge lists the SNMP settings of the print server. It includes the settings of “SNMP System Co ntact” and “ SNMP System Location”. -
Page 113: Netware
8.3.6 NetWare This page lists NetWare settings , including “Polling Time”, “Use Bindery Mode” , “Name of the File Ser ver” and “Port Attached Queue” . -
Page 114: Appletalk
8.3.7 AppleT alk This page lists AppleTalk settings, inclu ding “ App leTalk Zone Name” a nd “Printer T ype” of printers connected to all pr int ports . -
Page 115: Rendezvous
8.3.8 Rendezvous This page lists Rendezvous settings, including “Port Service Name” of eac h port. -
Page 116: Setup Wizard
Print Server Name, the name of the pr int ser ver. You can use this name to identif y the print server when you are searching for the pr int ser ver by the administration and client utilities. -
Page 117: Admin Password
”admin”. Pass wo rd, enter the password you want to change to the print server . The pass word can be up to 8-digit alphan umeric format. The default password is “1234”. Re-t ype Pass word, enter the passwor d you want to change to the pr int server aga in. -
Page 118: Advanced Settings
8.4.1.2 Advanced Settings You can enable /disable the printin g protoco ls from the screen. To enable the function, please select “Enable”; to disab le the function, please select “Disable”. -
Page 119: Wireless
8.4.2 Wireless If you want to use the prin t server through wireless LAN, please set up the pr int ser ver through Ethernet f irst and make sure your wireless LAN setting is correct. After setting the wireless LAN, unplu g the Ethernet cable and restart the print ser ver, then you can start to use the print server through wireless LAN. - Page 120 Mode is the operation mode of wireless station. You can c hoose ether “Ad Hoc” or “Infrastructure” mo de. If you do not have any access po int and want to use peer-to-peer connection, you have to choose “Ad Hoc” mode . If you ha ve an access point as the wireless LAN infrastructure, you have to choose “Infrastructure”...
-
Page 121: Site Survey
SSID, BSSID, Channe l, T ype, Encryption and Signal Strength. You can select one wire less device in the list for th is print server to associate with or you have to go back to “Wireless” pa ge to manually setup the wireless... -
Page 122: Encryption
8.4.2.2 Encrypt ion This pr int server supports WEP and WP A-P SK security mode. If you want to use WEP enc ryption to protect your wireless net wor k, you have to select “WEP”. If you want to use WP A-P SK, you ha ve to se lect “WP A-shared key”. The wireless secur ity settin g should be the same with other wireless devices in the same network. - Page 123 PassPhrase – A passphrase simplifies the WEP encryption Ÿ process by automatically generating the WEP encryption keys for the print server. Default Key – Select one of the four keys to encrypt your data. Ÿ Only the key you select it in the “Default key” will take effect.
- Page 124 WP A-shared key Security Mode: Wh en “WP A-shared key”, also named “WP A-P SK” requires users to selec t one of the advanced encryption methods, i.e. T KIP or AES an d enter a set of shared key. TKIP – TKIP (Temporal Key Integrity Protocol) changes the Ÿ...
-
Page 125: Tcp/Ip
“Save & Ne xt” to conf ir m the conf iguration. 8.4.3 T CP/IP You can configure the print server to automatically get IP from DHCP server or manually specif y static IP. The print ser ver a lso has a built-in DHCP ser ver. You can... -
Page 126: Smb
IP for each client. Note that when “Auto” is selected, the DHCP Ser ver of the print server will be enabled only when there is no other DHCP Ser ver within the network. -
Page 127: Snmp
You can enable/disable the SMB protocol from here. If SMB is ena bled, enter the “SMB Group Name” to specify the SMB group tha t this print server belongs to. All P C should join the same group before they can use this print server by SMB pro tocol. -
Page 128: Netware
SNMP System Location: You can enter the installed location of the print server here. T his information will be displayed in the SNMP manage men t tool. 8.4.6 NetWare This print server supports NetWare Bindery Printing method. T he print server per iodically polls the NetWare server pr inter queues for pr inting jobs. -
Page 129: Appletalk
Name of the File Server is the name of the NetWare file server that provides pr inter queues. Attached Queue is the name of the printer queue on the NetWare server. The printer queue keeps all pr inting jobs wa iting on the NetWare server. You have to assign a printer queue for each printer port of this print ser ver. -
Page 130: Rendezvous
AppleTalk Enable: Enable or disable “AppleTalk” . AppleTalk Zone Name: Pr int server has to jo in zones of AppleTalk before it can be shared to other workstations. Only wor kstations in the same zone can share the printer. If you want to share the printer to all workstations in all Zon es, you should enter on ly “*”... -
Page 131: Save Settings
The ser vice name will be seen by users on IP networ k, you have to des ignate the unique and friendly name to describe the device. 8.4.9 Save Settings You can clic k th e “Save Settings” to save the settings and restart the s ystem. -
Page 132: System Tools
System Tools 8.5.1 Load Default You ca n use this page to restore the factory default settings. All of your previous setup will be c leared. -
Page 133: Upgrade Firmware From Browser
8.5.2 Upgrade Firmware from Browser You can upgrade new f ir mware for this print ser ver in this page. Click “ Bro wse” to se lect the ne w f irmware in your stora ge and then c lick “OK”, the f ir mware will be update d in severa l minutes. -
Page 134: Backup Setting
8.5.3 Backup Setting To backup the print server setting to a “config.bin” file, select “Backup settings from P rint Server”. To a pply the setting from the bac kup file , s elect “Restore settings from f ile” and specify a f ile to restore. -
Page 135: Telnet Management
Telnet Manag ement... -
Page 136: Introduction
Introduction Print ser ver can be configured and managed by Te lnet. Through Loca l Area Network, even Internet, administrator can easily c onfigure and manage print server’s var ious main functions by a telne t client. -
Page 137: Login
Then you will be prompted to enter the username and password. After you successfully enter the correct username and password, the following prompt will be displa yed and you can start to ma nage this print server by co mmand. admin#... -
Page 138: Get Setting Values - "Get" Command
Get Setting Values – “get” Command “ge t” command is used to get the setting va lues of this print server. The format of “ get” command is as following: get argument Then the argument value will be dis playe d after the command. - Page 139 128 bit WEP key 2 key1282 128 bit WEP key 3 key1283 128 bit WEP key 4 key1284 IP of the print server Default gateway of the gateway print server Subnet mask of the print submask server Polling interval (in...
- Page 140 The administrator contact SNMPC information of this print server for SNMP The installed location of SNMPL this print server for SNMP The port name of this port1 print server The DHCP server is DHCPS enabled or disabled...
-
Page 141: Modify Setting Values - "Set" Command
Modify Setting Values – “set” Command “set” comma nd is used to modify the setting values of this print server. The for mat of “set” command is as following: set argument_name value Then the value will be written into the s ystem configuration . - Page 142 The value should be 26 digit Hex value 128 bit WEP key 4. key1284 The value should be 26 digit Hex value IP of the print server Default gateway of the gateway print server Subnet mask of the print submask...
- Page 143 The administrator contact SNMPC information of this print server for SNMP The installed location of SNMPL this print server for SNMP The port name of this port1 print server Enable or disable the DHCPS DHCP server.
-
Page 144: Other Commands
“reboot” command is used to restart the print server: admin# reboot 9.5.3 exit “ex it” command is used to leave the print server telnet mana gement: admin# ex it 9.5.4 help “he lp” comman d is used to list all telne t mana gement... - Page 145 set argument va lue get argument ipconfig reboot exit...
-
Page 146: Ipp Printing
IPP Printing... -
Page 147: Introduction
Any P C that can support IPP printing, for example Windows 2 000/XP, can directly uses the print server by IP. By using the IPP pr inting, you can share the printer to all the P C’s that can access the print server by IP. -
Page 148: System Setup
Make sure the print server has correct IP settings. If you want to share the pr inters to Internet users, you have to set a real IP to the print server. You also ha ve to make sure that any gateway; router or firewall does not block IPP protocol if you have these gateway devices installed in your network. - Page 149 The “ Ad d Printer Wizard” is d isplayed . Click Step3. “Next”. Select “A network pr inter, or a printer Step4. attached to another computer”. Click “Next”.
- Page 150 Step5. Select “Connect to a pr inter on the Internet or on a home or office network” and enter the URL of print ser ver. The URL for mat is “http ://IP:631/Port Na me”. The IP should be the pr int ser ver’s IP. The number 631 is IPP standard port nu mber.
- Page 151 Step6. Select a suitable printer manufacturer and the printer model and click “Next”. If your printer is not in the list, c lick “ Ha ve Disk…” to insta ll the dr iver of the printer. After installation, the printer model will be added to the list. Step7.
- Page 152 Step8. You have added the network printer to the P C successfully. T he information of the printer is displa yed in the windo ws. Click “Finis h”.
-
Page 153: Windows Xp Sp2 Setup
Windows XP SP2 Setup In Windows XP SP2, XP SP2’s firewall would block the unknown communications . This print ser ver has allowed the communications data passed through the XP SP2’s firewall. In case that you do not find any pr int ser ver listed on the “... - Page 154 Select “Advanced” tab and click “Settings…”. Step3. Step4. Se lect “ Exceptions” tab and click “ Ad d Program…”.
- Page 155 Click “Browse” to add a new progra m. Step5.
- Page 156 Open the “NP Util” file fro m “C:\Program Step6. Files\PrintServer Utilities” (where C:\ is the system drive).
- Page 157 A new program “Net work Ports Quick Setup” Step7. is displayed in the list, click “Ok”. Click “Ok”. You ha ve completed the setting. Step8. The Windo ws XP SP 2 will allow the incoming network connec tions activated b y the progra m.
Need help?
Do you have a question about the PS-3207U and is the answer not in the manual?
Questions and answers