
Related Manuals for Samsung GT-S3370


Summary of Contents for Samsung GT-S3370
- Page 1 Some of the contents in this manual may differ from your phone depending on the software of the phone or your service provider. Printed in Korea Code No.:GH68-29323A www.samsungmobile.com English (HK). 06/2010. Rev. 1.1...
- Page 2 GT-S3370 user manual...
- Page 3 Instructional icons Before you start, familiarise yourself with the icons you will see in this manual: Thank you for purchasing this Samsung mobile phone. Warning—situations that could cause injury to This phone will provide you with high quality mobile yourself or others communication and entertainment based on Samsung’s...
- Page 4 Copyright information → Followed by—the order of options or menus you must select to perform a step; for example: In Rights to all technologies and products that comprise this Menu mode, select Messages Create message → phone are the property of their respective owners: (represents Messages, followed by Create message) •...
-
Page 5: Table Of Contents
Contents Assembling ..........Access menus ............ 21 Use widgets ............22 Unpack ..............8 Customise your phone ........24 Install the SIM or USIM card and battery ..8 Enter text ............28 Charge the battery ........... 10 Access help information ......... 31 Insert a memory card (optional) .... - Page 6 Camera ..............46 Internet ............... 66 Music player ............52 RSS reader ............69 Find music ............54 Samsung Apps ..........69 FM radio .............. 55 Google ..............70 Games and more ..........57 ActiveSync ............71 Communities ............. 72 Personal information ......
- Page 7 PC connections ..........78 World clock ............85 Tools ............Settings ..........Alarms ..............80 Access the Settings menu ....... 87 Calculator ............80 Phone profiles ........... 87 Convertor ............81 Display and light ..........88 Dictionary ............81 Time and date ............ 89 Image editor ............
- Page 8 Memory settings ..........91 Reset settings ............ 92 Overview of menu functions ..... Troubleshooting ........Safety and usage information ..Contents...
-
Page 9: Assembling
Install the SIM or USIM card and • User manual battery Use only Samsung-approved software. Pirated or illegal software may cause damage or malfunctions When you subscribe to a cellular service, you will receive that are not covered by your manufacturer's a Subscriber Identity Module (SIM) card, with subscription warranty. - Page 10 To install the SIM or USIM card and battery, Insert the SIM or USIM card. If the phone is on, press and hold the Power/End key to turn it off. Remove the back cover. • Place the SIM or USIM card into the phone with the gold-coloured contacts facing down.
-
Page 11: Charge The Battery
You can charge the phone with the provided travel adapter or by connecting the phone to a PC with a PC data cable. Use only Samsung-approved chargers and cables. Unauthorised chargers or cables can cause batteries to explode or damage your phone. - Page 12 • While charging, the phone may heat up. This is normal and should not affect your phone’s lifespan or performance. • If your phone is not working properly, bring your phone and the charger to a Samsung Service Centre. Assembling...
- Page 13 › Charge with the PC data cable When the battery is fully charged (the battery icon is no longer moving), unplug the travel adapter from the Before charging, ensure that your PC is turned on. phone and then from the power outlet. •...
-
Page 14: Insert A Memory Card (Optional)
16 GB (depending on memory card manufacturer and type). Samsung uses approved industry standards for memory cards, but some brands may not be fully compatible with your phone. Using an incompatible memory card may damage your phone or the memory card and can corrupt data stored on the card. - Page 15 › › Remove the memory card Format the memory card Formatting your memory card on a PC may cause Ensure that the phone is not currently using the incompatibilities with your phone. Format the memory memory card. card only on the phone. Remove the back cover.
-
Page 16: Attach A Hand Strap (Optional)
Attach a hand strap (optional) Remove the back cover. Slide a hand strap through the hand strap hole and hook it over the small projection. Replace the back cover. Assembling... -
Page 17: Getting Started
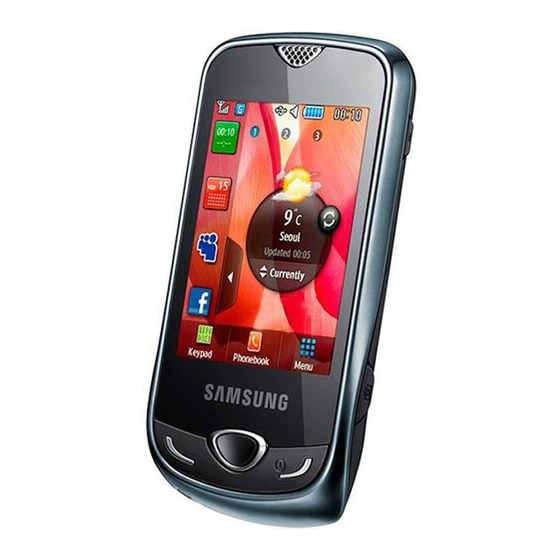
Getting started Get to know your phone › Phone layout Turn your phone on and off Earpiece To turn on your phone, Press and hold the Power/End key. Confirm (if necessary). Enter your PIN and select Volume key Touch screen To turn off your phone, repeat step 1 above. - Page 18 › Keys Function Make or answer a call; In Idle mode, Dial retrieve recently dialled, missed, or received numbers. Rear camera lens In Menu mode, return to the Back previous level. Lock key Turn the phone on or off (press and Power/ hold);...
- Page 19 › Indicator icons Function Icons shown on the display may vary depending on Lock the touch screen and keys; your region or service provider. Lock Unlock the touch screen and keys (press and hold). Icon Definition In Idle mode, turn on the camera; Signal strength Camera In Camera mode, take a photo or...
- Page 20 Icon Definition Icon Definition New voice mail message Roaming (outside of normal service area) Normal profile activated Call diverting activated Connected with PC Silent profile activated Bluetooth hands-free car kit or headset Battery power level connected Current time Bluetooth activated Alarm activated Memory card inserted New text message (SMS)
-
Page 21: Use The Touch Screen
Use the touch screen Control your touch screen with the following actions: • Tap: Tap once with your finger to select or launch a Your phone’s touch screen lets you easily select items or menu, option, or application. perform functions. Learn basic actions to use the touch •... -
Page 22: Lock Or Unlock The Touch Screen And Keys
Lock or unlock the touch screen Access menus and keys To access your phone’s menus, You can lock the touch screen and keys to prevent any In Idle mode, select Menu to access Menu mode. unwanted phone operations. Scroll left or right to a main menu screen. To lock, press the Lock key. -
Page 23: Use Widgets
› Open the widget toolbar Drag an application icon to the location you want. You can move an application icon to another main To open the widget toolbar and access widgets, menu screen. In Idle mode, select the arrow at the bottom left of the Select Done or Save. - Page 24 › › View or change widgets Download new widgets You can view widget names or select widgets to include on Open the widget toolbar and select the widget toolbar. Select an option to search for widgets. Open the widget toolbar and select You can also enter a keyword in the input field and The marked widgets are available from the widget select...
-
Page 25: Customise Your Phone
Customise your phone Set the time and date format, and enter the current time and date. Get more from your phone by customising it to match your Save. Select preferences. › › Adjust the volume of the key tones Change the language of the display In Idle mode, press the Volume key up or down. - Page 26 › › Switch to the silent profile Select a wallpaper for the idle screen In Idle mode, select Keypad, and then tap and hold You can select separate wallpapers for each panel of the mute or unmute your phone. idle screen. ›...
- Page 27 › › Adjust the brightness of the display Unlock the touch screen with gestures The brightness level of the display will affect how With the smart unlock feature, you can unlock the touch quickly the phone consumes battery power. screen by drawing a specified character on the locked touch screen.
- Page 28 Samsung Service Centre to unlock it. To unlock the touch screen, press any key and draw the • Samsung is not responsible for any loss of gesture that corresponds to the unlock feature you want. passwords or private information or other damages caused by illegal software.
-
Page 29: Enter Text
• If you enter an incorrect PIN too many times, your Select the recipient field to open the recipient list. SIM or USIM card will be blocked. You must enter Select Tap to add recipient. a PIN unlock key (PUK) to unblock the SIM or USIM card. - Page 30 Change the text input method Number Function When you tap the text input field, the input panel with the Start a new line. virtual keypad appears by default. Enter symbols. Hide the keypad. Change the text input method (keypad or handwriting).
- Page 31 When entering text with the keypad, you can use the Mode Function following modes: TSTR. Select Mode Function 1 through 5 to enter strokes. Select Select 6 when you are unsure which Select stroke to enter. This will insert a Select appropriate virtual keys to TSTR placeholder.
-
Page 32: Access Help Information
Enter text using the handwriting mode Mode Function Handwriting mode. Change the text input method to T9 (T9 turns In ENG mode, select blue). Change the text input mode. Select the appropriate virtual keys to Write a character in the handwriting box at the bottom enter an entire word. -
Page 33: Communication
Communication To end the call, press the Power/End key. • Use the phonebook to save numbers you dial frequently. p. 59 ► • To quickly access the call log to redial the numbers Calling you dialled recently, press the Dial key. Learn to use calling functions, such as making and Answer a call answering calls using options available during a call, or... - Page 34 › Use options during a voice call Call an international number You can use the following options while a voice call is in Keypad and tap and hold 0 to In Idle mode, select progress: insert the + character. • To adjust the voice volume, press the Volume key up or Enter the complete number you want to dial (country down.
- Page 35 • Set auto rejection To answer a second call, press the Dial key when a call waiting tone sounds. The first call is automatically placed Use auto rejection to reject calls from certain numbers on hold. You must subscribe to the call waiting service to automatically.
- Page 36 Make a fake call Speak into the microphone. You can simulate incoming calls when you want to get out When you are finished, select of meetings or unwanted conversations. The recorded voice plays. To make a fake call, press and hold the Volume key down Use Fixed Dialling Number (FDN) mode in Idle mode.
- Page 37 Set call diverting Set call barring Call diverting is a network feature to send incoming calls to Call barring is a network feature to restrict certain types of another number that you specify. You can set this feature calling or to prevent others from making calls with your separately for several conditions when you are not able to phone.
-
Page 38: Logs
In Menu mode, select Settings Application Select a log to view its details. → settings Call Voice call Call waiting. → → → From the detail view, you can dial the number, send a message to the number or add the number to the Activate. -
Page 39: Messages
Messages Option Function View cost records for your calls, such Learn to create and send text (SMS), multimedia (MMS), or as the cost of the last call and the email messages, and view or manage messages you have total cost of all calls. You can also set sent or received. - Page 40 Enter your message text. Option Function Select Send to send the message. Auth type Select an authentication type. › Set up an MMS profile User ID Enter your user name. To send and receive multimedia messages, you must Password Enter your password. activate a connection profile for connecting to the MMS Protocol Select a network protocol.
- Page 41 › › Send a multimedia message Set up an email account and profile In addition to the email account predefined by your service Messages Create message In Menu mode, select → provider, you can add your personal email accounts. Also, Message.
- Page 42 Option Function Option Function Enter the port number of the IMAP4 Select whether or not to retrieve SMTP port SMTP server. incoming email only new emails or all emails. Secure Select a security protocol for the Select whether or not to retrieve Retrieving connection SMTP server.
- Page 43 Customise the network settings. Option Function “Set up an MMS profile” (p. 39) ► Select to use authentication for SMTP auth. secure connection to the SMTP Save. When you are finished, select server. › Send an email message Select to use the login information from the POP3 In Menu mode, select Messages...
- Page 44 View a text or multimedia message Select Add files and attach a file. You can select a file from the file list or capture a photo, Messages and select a message In Menu mode, select video, or sound clip. folder (inbox or sentbox). Select Send to send the message.
- Page 45 › Use message templates Select Download. Learn to create and use text and multimedia templates to Select an email or a header. quickly and easily create new messages. If you selected a header, select Retrieve to view the body of the email. Create a text template ›...
- Page 46 Create a multimedia template In Menu mode, select Messages My folders. → Select Create folder. Messages Templates In Menu mode, select → → Multimedia templates. Enter a new folder name and select Done. Create to open a new template window. Select You can now move your important messages from Create a multimedia message, with a subject and...
-
Page 47: Entertainment
Entertainment • The camera interface appears only in the landscape orientation. • Tap the screen to hide or display icons in the viewfinder. Camera • The camera automatically turns off when you do Learn how to capture and view photos and videos. You not use it for a specified period. - Page 48 Press the Volume key to zoom in or out. Number Function Press [ ] to take a photo. Check the camera status and settings. The photo is saved automatically. • : Resolution • : Exposure metre type After capturing photos, select to view the captured •...
- Page 49 › • Capture a series of photos To view photos as a slide show, select More Slide → show. You can easily capture a series of photos of moving • To print the photo via a USB connection or via Bluetooth, subjects.
- Page 50 In Idle mode, press [ ] to turn on the camera. Select Mosaic. → Rotate the phone anti-clockwise to landscape view. Select an image layout and press [ Select Panorama. Make any necessary adjustments. → Make any necessary adjustments. Press [ ] to take photos for each segment.
- Page 51 › › Customise camera settings Capture a video Before taking a photo, select to access the → In Idle mode, press [ ] to turn on the camera. following options. Rotate the phone anti-clockwise to landscape view. Option Function Select to switch to the camcorder.
- Page 52 Number Function Number Function Check the camcorder status and View the photo or video you capture settings. last. • : Resolution Press the Volume key to zoom in or out. • : Default storage location • : Length of video that can Press [ ] to start recording.
-
Page 53: Music Player
You can also send the video to a Microsoft Exchange • Download from the wireless web. p. 66 ► server. • Download from a PC with the optional Samsung Kies. • To delete the video, select Delete Yes. → p. 78 ►... - Page 54 Control playback with the following icons: Number Function Change the repeat mode (off, repeating one file, or repeating all files). Skip forward; Scan forward in a file (tap and hold). 1. These icons are shown when you tap the player screen. ›...
-
Page 55: Find Music
Select Save. Option Function Select the new playlist. Sound effects Select a sound effect. Select Tracks. → Select music categories to display Music menu You can add all music files from another playlist by on the music library screen. selecting Playlists and then a playlist. Save. -
Page 56: Fm Radio
Select a connection profile to use. Select Yes to start automatic tuning. The FM radio scans and saves available stations When your phone is successfully registered, select automatically. record a part of a song. • The first time you turn on the FM radio, you will be Follow the on-screen instructions to send the prompted to start automatic tuning. - Page 57 › Save radio stations automatically Number Function Plug the supplied headset into the phone. Access the favourites list. FM radio. Turn off the FM radio; Select to turn In Menu mode, select on the FM radio. More Self-tuning. Select → Change the frequency by 0.1 MHz;...
-
Page 58: Games And More
› Games and more Play games or launch applications Games and more. In Menu mode, select Learn to use games and applications powered by award- winning Java technology. Select a game or application from the list and follow the on-screen instructions. The download of Java games or applications may not be supported depending on the software of Select More to access a list of various options and... -
Page 59: Personal Information
Personal information Enter contact information. If you are saving the contact on a SIM or USIM card, you can save only the contact’s name and a phone number. Phonebook Select Save to add the contact to memory. Learn to create and manage a list of your personal or business contacts stored on the phone’s memory or a SIM You can also create a contact from the dialling screen. - Page 60 › Find a contact • Once you set a favourite number, you can dial the number by tapping and holding the Phonebook. In Idle mode, select corresponding location number on the dialling screen. Select the search field, enter the first letters of the •...
- Page 61 › › Create a group of contacts Create an FDN list By creating groups of contacts, you can manage multiple You can set up a list of contacts to be used in Fixed Dialling contacts and send messages or email to an entire group. Number (FDN) mode that restricts outgoing calls if the Start by creating a group.
-
Page 62: Calendar
› › Copy or more contacts Create an event Phonebook More Copy Calendar. In Idle mode, select In Menu mode, select → → contacts or Move contacts. Create Select an event type. → Select a copy or move option (from the phone to the Enter the details of the event as required. -
Page 63: Task
› Stop an event alarm To view events of a specific date, If you set an alarm for a calendar event, the alarm will Calendar. In Menu mode, select sound at the specified time. To stop the alarm, select Stop. Select a date on the calendar. -
Page 64: Memo
› Memo View tasks Task. In Menu mode, select Learn to record important information to save and view at a later date. Priority drop-down menu and select a Select the category (priority, status, or due date) to sort the tasks. ›... -
Page 65: Voice Recorder
› Voice recorder Play a voice memo Voice recorder. In Menu mode, select Learn to operate your phone’s voice recorder. You can set voice memos as call or alarm ringtones. My voice clips to access the voice memo list. Select ›... - Page 66 › Set a voice memo as your ringtone Number Function You can set voice memos as the caller ringtone or alarm Move to a point of the file by dragging ringtone. the bar. Pause playback; Select to resume Voice recorder. In Menu mode, select playback.
-
Page 67: Web
In Menu mode, select Internet Settings Internet → → profiles. Create. Select Internet Customise the network settings. “Set up an MMS profile” (p. 39) Learn to access and bookmark your favourite web pages. ► • You may incur additional charges for accessing the Select Save. - Page 68 Navigate web pages with the following icons: Number Function Open a list of open web pages. Change the view mode. Access a list of web browser options. › Bookmark your favourite web pages You can bookmark web pages you frequently visit for Add to quick access.
- Page 69 › Customise browser settings Option Function Internet Settings. Change display and sound settings In Menu mode, select → Preferences for the web browser. Adjust the following settings to customise your web Set the web browser to browser: automatically update subscribed RSS feeds at regular intervals.
-
Page 70: Rss Reader
Enter the address of an RSS feed and select Done. Learn to download a variety of media files, such as › wallpapers, ringtones, games, music, and video clips from Update and read RSS feeds the Samsung apps website. Internet RSS feeds. In Menu mode, select → Samsung Apps. -
Page 71: Google
› Use the Google Search service As a result of the Digital Rights Management (DRM) system, some of the media items you download Google Search. In Menu mode, select → from the internet or receive by multimedia messages may require a licence key to access them. Select the search field. -
Page 72: Activesync
ActiveSync Specify an email connection profile. When you are finished, select Save. Learn to synchronise personal data, such as emails, contacts, calendar events, and tasks, between your phone Select a synchronisation profile. and your Microsoft Exchange server. Synchronisation will begin with the Microsoft •... -
Page 73: Communities
To synchronise only your emails, Select Yes to set your favourite website or blog list (if necessary). ActiveSync. In Menu mode, select Accept to confirm that you agree to the general Select Email Inbox Sync Email Select, or Select → →... -
Page 74: Last.fm
Enter your user ID and password and log in. Option Function To upload files, select Tap to add and select a media Set your phone to automatically Upload file. upload files to a website or blog at reservation the scheduled time. Upload. -
Page 75: Community Websites
Community websites In Menu mode, select Last.fm. Select OK to confirm that you read legal information Use Facebook and MySpace services. (if necessary). In Menu mode, select Facebook or MySpace. Enter the user ID and password to log in to the Last. Enter your username and password and sign in. -
Page 76: Connectivity
Connectivity • Samsung is not responsible for the loss, interception, or misuse of data sent or received via the Bluetooth wireless feature. • Always ensure that you share and receive data Bluetooth with devices that are trusted and properly secured. - Page 77 › Find and pair with other Bluetooth- • To browse the file directory of the device and exchange files, select Browse files. enabled devices • To view the service list of the paired device, select Bluetooth Search. In Menu mode, select →...
- Page 78 › Receive data using the Bluetooth Select More Print via Bluetooth, or select More → → Print via Bluetooth. → wireless feature Search for and pair with a Bluetooth-enabled printer. Enter the PIN for the Bluetooth wireless feature and select OK (if necessary). When connected to the printer, customise print options and print the data.
-
Page 79: Pc Connections
› Connect with Samsung Kies Settings Phone settings In Menu mode, select → → Ensure that Samsung Kies is installed on your PC. You can PC connections Mass storage Save. → → download the program from the Samsung website (www. - Page 80 Open the folder to view files. Using an optional PC data cable, connect the multifunction jack on your phone to a PC with Copy files from the PC to the memory card. Windows Media Player installed. To disconnect the phone to the PC, click the USB When connected, a pop-up window will appear on device icon on the Windows task bar and click the the PC.
-
Page 81: Tools
Tools › Stop an alarm When the alarm sounds, • Stop to stop the alarm. Select Alarms • Select Snooze to silence the alarm for the snooze period. Learn to set and control alarms for important events. › Deactivate an alarm ›... -
Page 82: Convertor
Convertor Enter a Chinese or English word and select Done. Select the word. Learn to convert currencies and units of measurement To add the word to your dictionary, select Save in My from one form to another. vocabulary. Convertor In Menu mode, select a conversion type. - Page 83 Select an image and select Add to open the image. Adjust the image as desired and select Rotate the phone anti-clockwise to landscape. Save the edited image with a new file name. › Select Effects an effect option (filter, style, warp, or →...
-
Page 84: My Files
My files Move or resize the rectangle over the area you want to crop and select OK twice. Learn to quickly and easily access all of your images, Save the edited image with a new file name. videos, music, sound clips, and other types of files stored on the phone or a memory card. -
Page 85: Sim Applications
• • Some file formats are not supported depending To set an image as a background image for the idle screen, select More Set as Wallpaper. on the software of the phone. → → • • If the file size exceeds the available memory, an To set a sound clip as a caller ringtone for a contact or error can occur when you open files. -
Page 86: Timer
World clock Select Lap to record lap times. When you are finished, select Stop. Learn to view the time in another region and set world clocks to appear on your display. Select Reset to clear recorded times. › Create a world clock Timer World clock. - Page 87 › Add a world clock to your display With the dual clock widget, you can view clocks with two different time zones on your display. After you have created world clocks, World clock. In Menu mode, select Set as second clock. Select Select the world clock to add to the dual clock widget.
-
Page 88: Settings
Settings Incoming call • Call alert type : Select how the phone will alert you to incoming calls. Access the Settings menu • Voice call ringtone : Select a ringtone to use if you set the phone to alert you to incoming voice calls by playing a melody. -
Page 89: Display And Light
• New messages Power-off type : Select how the phone will alert you when the phone turns off. • Message alert type : Select how the phone will alert you • Phone sound volume : Adjust the volume level for other to incoming messages. -
Page 90: Time And Date
Time and date • Language : Select a language to use on the phone’s display and text input. Access and alter the following settings to control how time • Vibration feedback : Adjust the intensity of the vibration and date are displayed on your phone: that results from tapping the screen. -
Page 91: Touch Panel
Touch panel Security Set the phone to automatically lock the touch screen and Access and alter the following settings to secure your the keys when you do not use the phone for a specified phone and data: period. • Phone lock : Activate or deactivate the phone lock feature to require a phone password before using the phone. -
Page 92: Network Settings
Memory settings • Change PIN2 : Change the PIN2, which is used to protect the primary PIN. Access and alter the following settings to control your • Mobile tracker : Activate or deactivate the mobile phone’s memory use: tracker feature which helps you locate your phone when •... -
Page 93: Reset Settings
Reset settings Reset various settings to the factory default values. Select which settings to reset. You must enter your phone password to reset the settings. Settings... -
Page 94: Overview Of Menu Functions
Messages ► 38 Settings ► 87 Google ► 70 Dictionary ► Music player ► 52 Facebook FM radio ► 55 Bluetooth ► 75 ► Internet ► 66 Samsung Apps Memo ► 63 MySpace ► ► ► 46 ► 62 Camera Last.fm ► 73 ActiveSync Task ► ► 83 ► 81 ► 80 My files Communities ► 72... - Page 95 World clock ► 85 Timer ► 85 Stopwatch ► 84 SIM Applications ► 84 1. Additional folders will be available if you insert a memory card. 2. Available or labelled differently depending on your SIM or USIM card. Overview of menu functions...
-
Page 96: Troubleshooting
Troubleshooting Code Try this to solve the problem: Your SIM card is blocked, usually as a result of entering your PIN incorrectly several When you turn on your phone or while you are times. You must enter the PUK supplied by using the phone, it prompts you to enter one of your service provider. - Page 97 Ensure that you have not set call barring for the • Ensure that your phone software is upgraded to the incoming phone number. latest version. • If the touch screen is scratched or damaged, take it to your local Samsung Service Centre. Troubleshooting...
- Page 98 Others cannot hear you speaking on a call When dialling from contacts, the call is not connected • Ensure that you are not covering the built-in microphone. • Ensure that the correct number is stored in the contact • list. Ensure that the microphone is close to your mouth.
- Page 99 • The battery terminals may be dirty. Wipe both gold- Your Samsung mobile phone must have sufficient coloured contacts with a clean, soft cloth and try available memory and battery power to operate the charging the battery again.
- Page 100 The FM radio application on your Samsung mobile phone Some music files may not play on your Samsung mobile uses the headset cable as an antenna. Without a headset phone for a variety of reasons. If you receive error...
- Page 101 Ensure that your phone and the other Bluetooth device are within the maximum Bluetooth range (10 metres). If the tips above do not solve the problem, contact a Samsung Service Centre. A connection is not established when you connect the phone to a PC •...
-
Page 102: Safety And Usage Information
Safety and usage Protect your hearing Excessive exposure to sound at high volumes can information cause hearing damage. Always turn the volume down before plugging the earphones into an audio source and use only the minimum volume setting This safety and usage information should be followed to necessary to hear your conversation or music. - Page 103 • Use only Samsung-approved batteries and chargers or medical device for guidance. specifically designed for your phone. Incompatible batteries and chargers can cause serious injuries or damage to your Turn off the phone in potentially explosive phone.
- Page 104 Broken glass or acrylic could cause injury to your hand and face. Bring the phone to a Samsung service centre to replace Turn off the phone near medical equipment the screen. Damage caused by careless handling will void your manufacturer’s warranty.
- Page 105 • Protect the phone and batteries from damage Avoid using or storing your phone in dusty, dirty areas to prevent damage to moving parts. • Avoid exposing your phone and batteries to very cold or very • Your phone is a complex electronic device—protect it from hot temperatures (below 0°...
- Page 106 Handle SIM cards or memory cards with care Important usage information • Do not remove a card while the phone is transferring or accessing information, as this could result in loss of data and/ Use your phone in the normal position or damage to the card or phone.
- Page 107 Specific Absorption Rate (SAR) certification “THIRD PARTY CONTENT AND SERVICES ARE PROVIDED “AS IS. ” SAMSUNG DOES NOT WARRANT CONTENT OR SERVICES information SO PROVIDED, EITHER EXPRESSLY OR IMPLIEDLY, FOR ANY Your phone conforms to European Union (EU) standards that PURPOSE.
- Page 108 Content and services are transmitted by third parties by means of networks and transmission facilities over which Samsung has no control. Without limiting the generality of this disclaimer, Samsung expressly disclaims any responsibility or liability for any interruption or suspension of any content or service made available through this device.