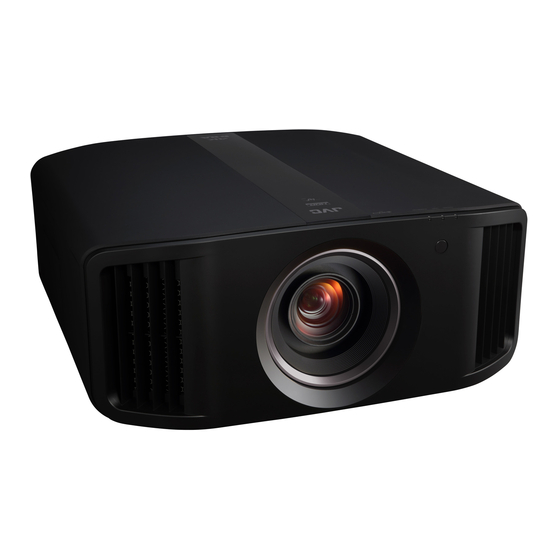
JVC DLA-NX7 Series Instructions Manual
Hide thumbs
Also See for DLA-NX7 Series:
- Instructions manual (99 pages) ,
- Instructions manual (92 pages)
Table of Contents
Advertisement
Quick Links
About the marks being used in this manual
refers to as explanations/instructions for DLA-NX9/NX7 series.
NX9/NX7
refers to as explanations/instructions for DLA-NX5 series.
NX5
Items without markings are for all models.
About "JVC Projector Calibration Software"
"JVC Projector Calibration Software" is a tool that enables you to use the projector in an optimal condition at all times
with the use of a commercially available optical sensor.
Calibration Feature
By performing a precise calibration with easy procedures in optimizing the projected images, which changes
depending on the installation conditions, such as installation position of the main unit, lens shift/zooming position,
you can enjoy high-quality images that are suitable for the installation conditions. You can also maintain the projector
in an optional state by correcting distortions, such as those in the color balance, which are caused by the prolonged
use of the projector.
Environment Settings
Adjusts the video settings according to the installation environment to minimize any influence on the image quality
by objects, such as white walls or indirect illumination.
Import/Export Image Quality Adjustment Data
Enables you to save the image setting data to a PC from the projector, or imported from a PC to the projector via the
LAN terminal.
Gamma Data Adjustment Feature
Allows you to adjust the gamma curve of the projector according to your preference.
* "JVC Projector Calibration Software" is designed to adjust gamma and color display by changing the settings of the
projector.
* Please note that setting of the projector is changed by using this software.
Required Equipment
● Projectors that support calibration
Models supported:
DLA-NX9/NX7 series: DLA-NX9, DLA-NX7, DLA-N11, DLA-N8, DLA-N7, DLA-RS3000, DLA-RS2000
DLA-NX5 series: DLA-NX5, DLA-N6, DLA-N5, DLA-RS1000
● PC (computer)
● LAN cable
● Optical sensor
Models supported: SpyderX Elite/Pro by Datacolor
* SpyderX Elite/Pro sensor is required when using the Environment Settings feature.
D-ILA Projector
"JVC Projector Calibration Software 12"
INSTRUCTIONS
i1 Pro2 by X-Rite
1
B5A-3404-11
Advertisement
Table of Contents

Related Manuals for JVC DLA-NX7 Series


Summary of Contents for JVC DLA-NX7 Series
- Page 1 Items without markings are for all models. About “JVC Projector Calibration Software” “JVC Projector Calibration Software” is a tool that enables you to use the projector in an optimal condition at all times with the use of a commercially available optical sensor.
-
Page 2: System Requirement
System Requirement To make use of this software, your hardware and software must meet the following specifications. PC (Computer) Windows 8 (32-bit, 64-bit) OS supported Windows 10 (32-bit, 64-bit) Memory 1 GB or more 256 MB or more Required functions .NET Framework 3.5 SP1 USB port LAN port... -
Page 3: Installing Software
● “JVC_PJ_Calibration**_v***.msi” Double-click “JVC_PJ_Calibration**_v***.msi” to start installation. “Welcome to the JVC Projector Calibration Software Setup Wizard” window appears. Click the [Next] button. “Select installation Folder” window appears. You can proceed to the next step with the destination unchanged, or designate a folder if necessary. - Page 4 Projector and PC Setup Connecting the Projector to a PC directly Projector To [LAN] Terminal Connection Cable Laptop, etc. (Sold Separately) Connect the projector to a PC via LAN cable. Set the TCP/IP for the PC and “Network” of the projector. ●...
-
Page 5: Connecting The Projector To A Network
Connecting the Projector to a Network Projector Network To [LAN] Terminal Connection Cable Server (Sold Separately) Laptop, etc. Connect the projector to a network connection device (hub, etc.) via LAN cable. Open the “Network” item under the “Function” tab in the menu. If you want to use the DHCP server, set “DHCP Client”... - Page 6 Calibration Precautions Prior to Use of Calibration • Calibrated result might be different from the factory default data, depending on the operating environment. • During calibration, set the PC to the administrator mode, and disable the screen mode and energy-saving mode of the PC.
-
Page 7: Starting Up The Software
Starting up the Software Double-click the “JVC Projector Calibration software” icon on the Desktop. Double-Click Setting Use this feature to specify the various settings. Click the “Setting” button. Specify the various settings. Network IP Address Enter the IP address for the projector on the network. -
Page 8: Calibration Procedure
Calibration Procedure Corrects the image quality which changes depending on the installation condition (such as installation position of the main unit, lens shift/zooming position), and distortions (such as those in the color balance), which are caused by the prolonged use of the projector. - Page 9 Calibration in progress. While calibration is in progress, make sure that the surrounding light does not fluctuate. Otherwise, it may affect the calibration results. * Noise may appear on the screen when data writing is in progress. The results for each Calibration Type are displayed. Gamma Calibration results are shown in a white line.
-
Page 10: Creating A Color Profile
Creating a Color Profile Use this feature to create a color profile that contains the color space, color temperature, and gamma information. Click the “Create” button. Click Create a color profile. Select a Color Space and a Color Temp setting from the pull- down menu. - Page 11 Gamma Data Adjustment Procedure Use this feature to adjust the gamma data. Click the “Gamma Data Adjustment” button. Click Select the custom gamma table to be adjusted. Custom Gamma Table Select the gamma setting value to be set as the base value. Gamma Setting Select the color to be adjusted.
- Page 12 Import/Export Procedure Use this feature to save/import picture quality setting data, or to import color profiles or gamma data. Click the “Import/Export” button. Click Import/Export Picture Data Click ● Export Procedure A Click the pull-down menu, and select “Picture Data (*.jpd)”. B Double-click the Picture Mode name, and select the Picture Mode (User*) to be exported from the pull-down menu.
- Page 13 B Double-click the Picture Mode name, and select the Picture Mode (User*) to be imported from the pull-down menu. Click the Double-Click “IMPORT” button. * Click the “<<” button to go back to the previous screen if Picture Mode does not appear. Proceed to this screen again. Click * The Picture Mode displayed varies depending on the Content Type setting of the projector.
- Page 14 D Select the file (***.prof) from the location where it is stored. E Click the “START” button. To exit, click (to return to the top menu). Click Import Gamma Data A Click the pull-down menu, and select “Gamma Data (*.jgd)”. Click B Double-click Gamma (Custom 1 to 3), and select the Gamma (Custom 1 to 3) to be imported from the pull-down menu.
- Page 15 E Click the “START” button. To exit, click (to return to the top menu). Click...
-
Page 16: Environment Settings
Environment Settings Adjusts the video settings according to the installation environment to minimize any influence on the image quality by objects, such as white walls or indirect illumination. SpyderX Elite/Pro sensor is required when using the Environment Settings feature. Click the “Environment Setting” button. Click Connect the optical sensor to the PC. - Page 17 After installation is complete, click the “>>” button. Click Enter a Screen Size (width across corner, inch) and Viewing Distance, and click the “START” button. Viewing Distance Screen Size Click The recommended settings are displayed. Picture Tone -W Recommended Dark Level Settings Bright Level Color...
-
Page 18: Exiting The Software
Exiting the Software Return to the top menu, and click the “EXIT” button. Click When the following messages are displayed If you encounter with the following messages, follow the instructions being explained in the following: Message Solution (Details) Error in detecting the model. Go back to the previous screen and check the input signal. - Page 19 Setting Up the Network (for Windows10) Click the “Start” button at the bottom left of the desktop screen, and click “Settings” (gear icon). Once the “Windows Settings” window opens, click “Network & Internet”. On the “Status” page and under “Advanced network settings”, click “Network and Sharing Center”.
- Page 20 Write down the value in “IP Address” (192 168 0 2 in the example) after returning to the screen in 10). Start the “JVC Projector Calibration Software” on your PC, and select “Setting” on the right side of the screen.
- Page 21 Mask” and “Default Gateway” fields. After choosing “Set”, select “Yes” in “Apply network setting?” Start the “JVC Projector Calibration Software” on your PC, and select “Setting” on the right side of the screen. Enter the value in the “IP address” field on the screen on the right.
- Page 22 Trademarks ● Spyder and SpyderPro are either registered trademarks or trademarks of Datacolor in the United States and other countries. ● i1 is either registered trademark or trademark of X-Rite in the United States and other countries. ● Microsoft and Windows are either registered trademarks or trademarks of Microsoft Corporation in the United States and other countries.