
Related Manuals for Naxa NID-9009


Summary of Contents for Naxa NID-9009
- Page 1 9" Core™ Tablet with Android™ OS 7.1 & GMS Certi cation NID-9009 Instruction Manual Please read carefully before use and keep for future reference.
- Page 2 You may also find the latest FAQ, documentation, and other product material at our website. Come visit • NID-9009 tablet us on the web at www.naxa.com and see all that we • USB power adapter have to offer! •...
-
Page 3: Before You Start
7) Do not use the tablet in places that are extremely hot, cold, dusty, or humid. 8) Please charge your tablet when the Low Battery icon is displayed, system turns off automatically, or keys are not responsive. www.naxa.com Page 3... - Page 4 At a Glance Front camera LCD touchscreen Power button Reset FCC ID: 2AC JAPLT9650G TF CARD Page 4 Naxa Electronics...
- Page 5 Headphone jack Micro USB port Backspace (ESC) Microphone Rear Camera Memory card slot (microSD/microSDHC) www.naxa.com Page 5...
-
Page 6: Basic Operation
To power off the device, press and hold the power extending the battery life of your tablet. button for 2-3 seconds until the screen displays “Power Off”, then select “OK” to power off the unit completely. Page 6 Naxa Electronics... -
Page 7: Touch Panel
“reboot system now” press the power button to confirm. Your device will reboot and start up normally. Tap and hold – Tap and hold for 2 seconds, a pop up menu with options will display. TF CARD www.naxa.com Page 7... - Page 8 Shut – Use two fingers at same time on touch panel, Drag – drag an icon to relocate the position. to enlarge or to shrink the display scale. Page 8 Naxa Electronics...
-
Page 9: Home Screen
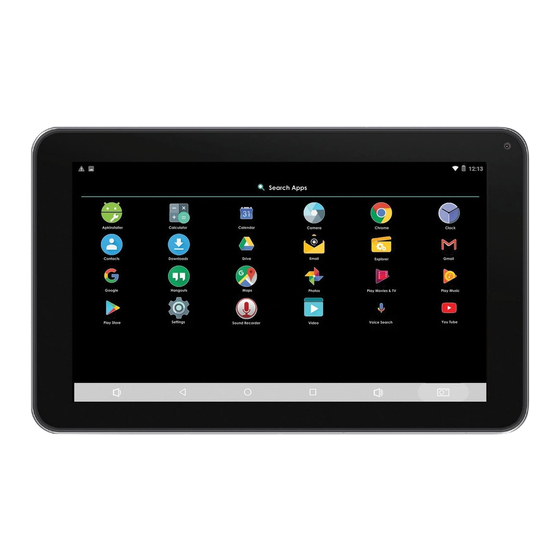
⑥ Display of icons and device status, tap to according to voice input ( Make sure WI-FI is on) turn on notification screen ③ List of current running applications ⑦ Screenshot ④ Back to Home screen ⑧ Enter applications page www.naxa.com Page 9... -
Page 10: Changing The Wallpaper
(If the current home screen is emp widget will not be added. ty, the tablet will not create a new home Some widgets will prompt you to make screen). additional choices before it is added to the Home screen. Page 10 Naxa Electronics... -
Page 11: Notification Screen
When browsing a webpage, tap the upper right “ ”, 2) Tap “Accessibility” and locate “Auto-Rotate Screen.” then you can adjust the settings, add bookmark, view history, etc. 3) Tap “AUTO ROTATE” icon to open/close auto rotation function. www.naxa.com Page 11... -
Page 12: E-Mail Account Setup
3. Select Next Step (Personal Email Account) or 2. Tap to start recording. Manual Setting (Company Email Account) 3. Tap to stop and save the recroding. 4. Follow and input your credentials. 4. Recording can be found in the following location: Android/data/com.android.soundrecorder/files/ Download Page 12 Naxa Electronics... -
Page 13: Video Player
Google Play Music Click “Play Music” in application page. With your Music Library displayed, select a track to begin playback. Take a Photo 1. Tap the Camera icon: 2. To capture a photo, tap: www.naxa.com Page 13... -
Page 14: Shoot A Video
3. Tap APK file to uninstall 3. Tap on the file or folder and hold for 2 seconds so so that the options will appear. 4. Select “Multi,” select file or folder, then select Editor, perform function in option list. Page 14 Naxa Electronics... -
Page 15: Connecting A Usb Device
Connecting a USB device • USB Keyboards and mice are supported by this device. • View media files on USB storage with pre-loaded photo, music, and video applications. www.naxa.com Page 15... -
Page 16: Inserting A Microsd Card
Wi-Fi is a wireless networking technology that can pro scans for available Wi-Fi networks and displays the vide Internet access at distances of up to 100 meters, depending on the Wi-Fi router and your surroundings. indicated with a Lock icon. Page 16 Naxa Electronics... -
Page 17: Language And Input
5. To forget a network or to modify its settings, tap & hold the network name. • You may want the tablet to forget a network if you don’t want to connect automatically or if you no longer use the network. www.naxa.com Page 17... -
Page 18: Date And Time
Connect the power cable to charge the device, check back in a few minutes and try again. If it still can not power on, contact Naxa Tech Support. 2. Noise coming from unit. Check to see if audio file is not corrupt. -
Page 19: Warnings And Precautions
• When discarding batteries, follow all local rules and laws governing facturer’s instructions and should use a mount- the disposal of batteries. Consider the environmental impact of your ing accessory recommended by the manufacturer. actions! www.naxa.com Page 19... - Page 20 19. Replacement Parts: When replacement parts are required, be sure protective device. If replacement of the plug is required, be sure the by the manufacturer or have the same characteristics as the original Page 20 Naxa Electronics...
- Page 21 • Reorient or relocate the receiving antenna. • Increase the separation between the equipment and receiver. • Connect the equipment into an outlet on a circuit different from that www.naxa.com Page 21...
- Page 22 Wireless Connectivity Wi-Fi 802.11 b/g/n Bluetooth ® A/V connectivity Headphone out (3.5 mm) Built-in microphone Built-in stereo speakers (1 W) Camera Rear: 0.3 MP (2.0 MP with interpolation) Front: 0.3 MP Audio MP3, WMA, FLAC, APE, OGG Page 22 Naxa Electronics...
- Page 23 If you have problems with your device, please consult the instructions in this manual. Please also visit us on the web at www.naxa.com to get up to the minute news, alerts, and documentation for your device. For additional assistance, please contact Naxa Technical Support.
Need help?
Do you have a question about the NID-9009 and is the answer not in the manual?
Questions and answers