Table of Contents
Advertisement
Quick Links
Advertisement
Table of Contents

Related Manuals for MSSC Smart-Jet DL200


Summary of Contents for MSSC Smart-Jet DL200
- Page 1 THERMAL INKJET CODER USER MANUAL...
-
Page 2: Table Of Contents
Contents SAFETY INFORMATION ..............................3 EMERGENCY CASE ................................4 ENVIRONMENT PROTECTION ............................4 PRODUCT WARRANTY ..............................5 ABOUT MACHINE ................................6 TECHNICAL SPECIFICATIONS ..............................7 Machine details ................................7 MACHINE OVERVIEW ................................8 INSTALLATION PROCEDURES ............................9 MOUNTING BRACKETS ..............................10 GETTING STARTED ................................. -
Page 3: Safety Information
SAFETY INFORMATION STOP PRINTING BEFORE INSERTING OR REMOVING THE CARTRIDGE. TURN OFF PRINTER BEFORE PLUGGED / UN-PLUGGED ANY CABLE (PRINT HEAD CABLE / ENCODER CABLE / SENSOR CABLE / IO CABLE). BE CAREFUL OF USING OTHER EXTERNAL DEVICES SUCH AS: ENCODER / SENSOR / POWER SUPPLY. -
Page 4: Emergency Case
EMERGENCY CASE IN SOME SPECIAL CASE LIKE: APPEAR SMOKE ON PRINTER, PRINT OUT CONTINUOUSLY WITHOUT CONTROL, FIRE, EXPLOSIVE SOUND, ETC. PLEASE REMOVE THE POWER SUPPLY IMMEDIATELY! ENVIRONMENT PROTECTION DON’T THROW PRINTER / INK CARTRIDGE TO RECYCLE BIN USER MANUAL V2.0 | Updated 01-Aug-2017... -
Page 5: Product Warranty
PRODUCT WARRANTY LIMITED WARRANTY. THE HOUSING AND CIRCUIT BOARD FOR EACH PRINTER IS WARRANTED TO BE FREE FROM DEFECTS IN MATERIALS AND WORKMANSHIP FOR A PERIOD OF TWELVE (12) MONTHS FROM THE BILL OF LADING DATE. THIS LIMITED WARRANTY DOES NOT APPLY TO SPARE PARTS, AUTHORIZED INKS, OR CARTRIDGES, OR TO HOUSINGS AND CIRCUIT BOARDS THAT EXPERIENCE PROBLEMS RESULTING FROM MISUSE, TAMPERING OR IMPROPER STORAGE. -
Page 6: About Machine
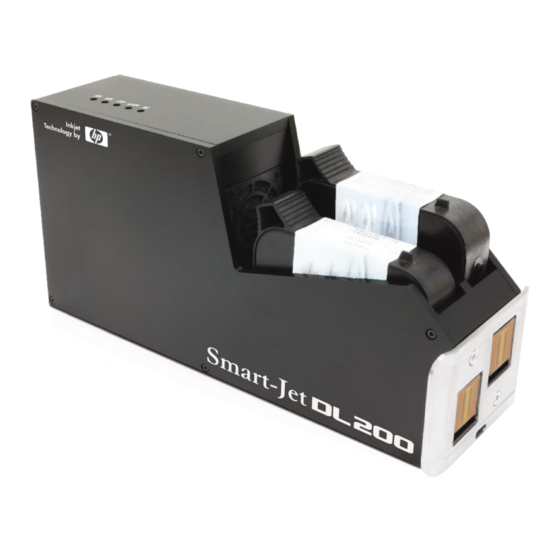
ABOUT MACHINE Thank you for purchasing the Smart-Jet DL200 Thermal Inkjet Coder, a product of MSSC LLC. This printer is designed for packaging printing, POD printing applications powered by HP Thermal Inkjet Technology. Machine boasts to be able to run Standalone, print variable data and variable 2D barcodes, Wi-Fi connection via mobile devices for control and real time update print status. -
Page 7: Technical Specifications
TECHNICAL SPECIFICATIONS Machine details Description Specifications Model Smart-Jet DL200 PC’s Monitoring, Mobile Display Dimensions (LxWxH) 214 x 76 x 101.5 mm / 8.42 x 2.99 x 3.99 in Weight 930g AC 100V – 240V, 50/60Hz. Output 24VDC 2.5A Power supply... -
Page 8: Machine Overview
MACHINE OVERVIEW [1] Led Sen status. [2] Led Alarm status. [3] Led Stop status. [4] Led Run status. [5] Led Ink status [6] USB connector. Use for USB Wi-Fi module. [7] RJ45 LAN connector. Use for Print Online Data or Remote control. ... -
Page 9: Installation Procedures
INSTALLATION PROCEDURES Item Quantity Machine Clamps Base clamp Round bar short Round bar long Screws M8x20 USER MANUAL V2.0 | Updated 01-Aug-2017... -
Page 10: Mounting Brackets
MOUNTING BRACKETS Please setup machine with minimum distance that you could. Closer distance for better printing quality. We are recommend from 1-3 mm. Step 1 Select direction to mount machine on the conveyor or production line. Step 2 Installing the base clamp to the side of the conveyor or production line. Step 3 Installing the clamps to the round bar. - Page 11 Step 4 Select the suitable bar length for each case. Horizontal setup This setup will be used to print on carton box, bottle, tray, pipe, etc… Vertical setup This setup will be used to print on paper, film, and other flat substrates. NOTES: With default machine, we don’t support this setup.
- Page 12 Step a: Add more clamp to bracket. Step b: Add one more vertical round bar. NOTES: Make sure the brackets are mounted firmly to avoid vibration and sway of the print head. This will affect the print quality. USER MANUAL V2.0 | Updated 01-Aug-2017...
-
Page 13: Getting Started
GETTING STARTED Install the machine on your conveyor according to the installation instructions. See the Quick Start Guide for more information. Set print direction and appropriate throw distance to obtain best print quality (1-3 mm). Insert ink cartridge. ... -
Page 14: Encoder
ENCODER An encoder is recommended to ensure the best print quality regardless the inconsistent speed of conveyor. To calculate wheel diameter (D) depend on resolution (R) is: D = R/( x 600) (inches). Example: Encoder has R = 3600 (PPR), ... -
Page 15: Combine External Sensor And Encoder
COMBINE EXTERNAL SENSOR AND ENCODER In some case you need to use external sensor and encoder to get perfect printing quality. But the machine have one extended port only. Please do as following instruction to take external sensor and encoder work together with machine. See picture for this situation. -
Page 16: Alarm
ALARM Allow users to monitor operation of Machine from distance via the light signals from the Alarm. INPUT AND OUTPUT Input: To trigger some functions (reset counter …). Accept NPN or dry contact. Output: NPN signal. Active when some even occur (each print …). USER MANUAL V2.0 | Updated 01-Aug-2017... -
Page 17: Quick Startup
QUICK STARTUP REQUIRED COMPONENTS Basic Components With Smartphone With PC Web browser Optional Machine Power supply Mounting brackets USB Wi-Fi Module Ink cartridge Smartphone Android or iOS PC desktop/laptop ... - Page 18 By PC Web Browser using Wi-Fi hotspot (Chrome, Firefox, Opera, Safari). By Smartphone using the Android Application or iOS Application. USER MANUAL V2.0 | Updated 01-Aug-2017...
- Page 19 Login machine by PC Web browser using RJ45 LAN connector. PC static IP address setup. Insert the Power supply. Connect PC RJ45 gate to RJ45 LAN connector by cable. Power on the machine. The boot time to complete about 40 seconds. ...
-
Page 20: Design Print Template By Pc Web Browser
Design print template by PC Web browser Login by Web browser Main interface USER MANUAL V2.0 | Updated 01-Aug-2017... - Page 21 Update: Update firmware, update software User: Manager user Language: Support English, Chines, Russian, German, Italia, Portuguese, Vietnamese Log: Save event log of user Info: Introduce information of Smart-Jet DL200 Change password: Change password of user Add new template ...
- Page 22 Create template Examples: Name: Name for new template. Width: 100mm. Max 1500mm. Print head: All print head, print head 1, print head 2. Unit: Millimeters, centimeter, pixels, inches. Resolution: 300x300dpi (300x150dpi, 300x600dpi, 600x150dpi, 600x300dpi, 600x600dpi). ...
- Page 23 Click Save for Apply design template After Save. Can change the parameters by click Edit template button. Example Width template 112,7mm Edit template Design Template USER MANUAL V2.0 | Updated 01-Aug-2017...
- Page 24 Draw Barcode Properties: Data type: Number or alphanumeric Step: Set 1 (A-00001-B increase A-000002-B), set 2 (A-00001-B increase A-000003-B). Repeat: Barcode repeat time. Set 1 (A-000001-B, A-000001-B increase A-000002-B, A- 000002-B). Value: Start value. Min length: Number length. Set 6 (000001). ...
- Page 25 Common: Font family: Windows true fonts. Font style: Use for text or numbers (Bold, italicized, underlined). Font size: Number’s size. Text align: Center, left, right. Width: Adjust the barcode width with default barcode size. Height: Adjust the barcode height with default barcode size.
- Page 26 Properties: Divides one day into multiple work shifts and prints a different code for each work shift Shift Code: Check to select print Shift code. Shift value: Add value Shift code to print Hour (24h): The start / End time of shift value print (hour/minute units). Up to 5 shift code value Draw Images Properties: ...
- Page 27 Draw Counter Properties: Data type: Number or Alphanumeric Step: Set 1 (A-000001-B increase A-000002-B), set 2 (A-000001-B increase A-000003-B). Repeat: Counter repeat time. 1: (A-000001-B, A-000001-B A-000002-B, A-000002-B,…). Value: Start value. Min length: Number length. Set 6 (000001). ...
- Page 28 Properties: Start point: Starting page number print End point: Ending page number print (0: Unlimited) Date format: Format date time Value: Add value of date time or text Step value: Step of page print (Only user for print database) ...
- Page 29 Calculate ink cost Density / Resolution: Select your target parameter. Cartridge (ml): Set the ink volume (with cartridge or bulk ink. Maximum you can input is 800ml). Page: Set number of printed page that you need. Cost: Add cost in your currency (depend on language such as: USD, VND, SGD, EUR, CND…) for each cartridge.
-
Page 30: Printer Control By Web Browser
Printer control by Web browser Printer Control Main Screen [1] Open template [6] Purge [2] Edit template [7] Start print [3] Zoom in [8] Stop print [4] Zoom out [9] Print setting ... -
Page 31: Appendix
APPENDIX INK CARTRIDGES MAINTERNANCE Print head cleaning As Machine is working, if the print quality is degraded, please check on the ink level in the cartridge: If the cartridge is out of ink, change the new cartridge. If the cartridge isn’t out of ink, the degraded print quality may be caused by the ink-spray, dust, or paper fiber being collected and built up on the surface of the nozzles plate. -
Page 32: Important Notes
Important notes To avoid scratching the orifice plate, do not apply excessive force or use a dry or abrasive cloth. To avoid clogging the nozzles, make certain that the lint free cloth and de-ionized water used do not have a high percentage of suspended particles. ... -
Page 33: Ink Cartridge Storage Procedure
INK CARTRIDGE STORAGE PROCEDURE For short term storing (less than one day) Leave the cartridge in the machine, capped. Capping cartridge is always recommended to prevent the nozzles from drying out or becoming clogged due to ink’s solvent evaporation or dusting. ... -
Page 34: Update Firmware And Software
UPDATE FIRMWARE AND SOFTWARE NOTES: Be sure there is no power failure while firmware is being updated. All data and settings will be lost while updating new firmware. Cartridge should be removed from the machine to avoid failure. Update firmware ... -
Page 35: Update Software
Step 4: Press “Update” Button after file load completed. Step 5: Press “OK” after the update completed. Step 6: Press “Reboot” button to complete update Update Software Step 1: Select “Update Software” from Combo box. USER MANUAL V2.0 | Updated 01-Aug-2017... -
Page 36: Machine Default
Step 2: Do the same “Step 3”, “Step 4”. Step 3: Press “OK” after the update completed. Step 4: Press “Reboot” Button for complete Update Software. Machine default Set your machine to factory defaults: “Stop Status”. The Printer at ... -
Page 37: Troubleshooting
TROUBLESHOOTING Reason Solution Error ID Hardware Remove the cartridge, clear the boards The connection between the boards on cartridge and insert into the machine Display “Cartridge on cartridge and machine is not fully again. If still display “cartridge connect connect fail” fitted or the boards on cartridge is fail”, restart the machine and check dirty.
Need help?
Do you have a question about the Smart-Jet DL200 and is the answer not in the manual?
Questions and answers