Reolink RLN8-410 User Manual
Poe nvr
Hide thumbs
Also See for RLN8-410:
- User manual ,
- Operational instruction (24 pages) ,
- Quick start manual (22 pages)
Table of Contents
Advertisement
Advertisement
Table of Contents
Troubleshooting

Related Manuals for Reolink RLN8-410


Summary of Contents for Reolink RLN8-410
- Page 1 Sept 2021 QSG1_A User Manual Reolink PoE NVR...
- Page 2 FAQs .............................. 44 Troubleshooting ........................45 Note: 1.This user manual is for the Reolink PoE NVR and NVR security system that work with the monitor. 2.This user manual takes an NVR model that supports most features as an example. Your own NVR model may not support certain features mentioned here.
- Page 3 Device Overview RLN8-410/RLN16-410 Reolink has 16-channe PoE NVR RLN16-410 and 8-channel PoE NVR RLN8-410. Add cameras to the PoE NVR, you are able to customize your own security systems. Reolink PoE IP security camera systems feature plug and play, 12MP,4K Ultra HD, or 5MP/4MP, which are easy to set up and simple to use, for DIY enthusiasts and beginners.
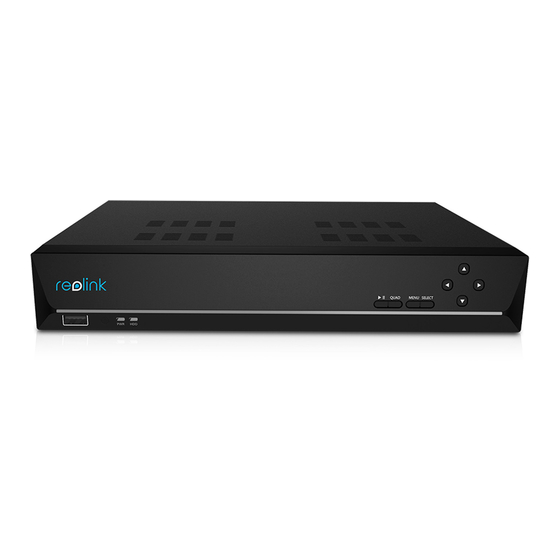
- Page 4 Reolink PoE NVR RLN8-410-E (8MP) HDMI Port Power Switch eSATA RJ45 Audio Out VGA Port Network USB Port Power lnput RLN16-410 eSATA Power Switch Network RJ45 Audio Out HDMI Port Power lnput VGA Port USB Port User Manual...
- Page 5 And the NVR kit is plug and play, making it super easy to set up. The NVR kit model, for example, RLK8-800B4 means it comes with one RLN8-410 and four B800 cameras. For the details, please refer to the package contents while purchasing the product.
- Page 6 Reolink PoE NVR NVR Supportability and Hardware Versions Supported Max Single Hardwar Person/Vehic Interfa NVR Model Camera e Version le Detection Resolution Capacity 4mp/5mp/8mp/ H3MB18 New UI 12mp RLN16-410 H3MB02 4mp/5mp H3MB06 4mp/5mp 4mp/5mp/8mp/ N3MB01 New UI 12mp 4mp/5mp/8mp/ Y (with latest...
- Page 7 Reolink PoE NVR 2. Connect the NVR to a monitor with HDMI or VGA cable. 3. Connect the PoE camera to PoE port of the NVR. Or if you want to use a WiFi camera, please connect the camera to the WiFi of the same router as NVR.
- Page 8 Reolink PoE NVR Set up the NVR on the Monitor Please power on the NVR and connect it to a monitor by VGA or HDMI cable. After the NVR is powered on, wait a few seconds it’ll show a setup wizard on the monitor.
- Page 9 Reolink PoE NVR 3. Login: Set up the NVR account password. If you check “Require Password Login When Unlocking Screen”, the NVR will automatically lock the screen and ask for the password when you want to operate the system. 4. Password Security: Set a password security question and answer. In the case the NVR password is forgotten, you can retrieve the password via this password security question.
- Page 10 Reolink PoE NVR 5. Device Info: Set a name for the NVR, and click Format to format the HDD. 6. Network: Suggest to keep Network access as DHCP and DNS as Auto. It’ll obtain the network connection from a router automatically, when the NVR is connected to the router with an Ethernet cable.
- Page 11 Reolink PoE NVR 7. Email Settings: Configure the email settings for sending alarm emails. You can skip this step and set it up later when you need to use this feature. Install the NVR and Camera NVR is suggested to directly placed on a table, while for the camera you are able to find installation guides and tips on the camera’s user manual.
- Page 12 Reolink PoE NVR Icon Meaning Playback: Replay the recording of the camera Record: Click to manually start/stop recording Clip: Crop to partially enlarge parts of the live image PTZ: Control the camera’s pan, tilt and zoom Audio: Turn on the audio for live viewing Image Settings: Click to change the camera’s image settings...
- Page 13 Icon Meaning Last: Click to show the previous screen of camera’s live image Next: Click to show the next screen of camera’s live image Scrollview: Click to start scrolling the live image screen automatically Display Mode: Choose to view one camera or multiple cameras Playback: Click to enter the playback page Back up: Click to enter the backup page Settings: Click to enter the NVR settings menu...
- Page 14 Reolink PoE NVR Preset Point At Preset Point, please pan and tilt the camera to wanted position then click to add a preset position. Set a name for the preset, then click Confirm to save. User Manual...
- Page 15 Reolink PoE NVR To delete a preset position, please click to edit all current saved preset positions. Click to change name of the preset position, and click to delete the selected position. Monitor Point Set the monitor point (or guard position). You can set the camera to always return back to this position if the camera is rotated away from it.
- Page 16 Reolink PoE NVR Set the Interval for Auto Return from 10-300 seconds, and then click OK. Click to return the camera to it’s monitor point immediately. User Manual...
- Page 17 Reolink PoE NVR Patrol to start or stop cruise horizontally. At Patrol, you can also customize the Click patrol routine with at least two preset points. At Patrol, click Click + to add at least two preset points to create a patrol. Click to set the preset point duration and speed, click Confirm to Save it.
- Page 18 Reolink PoE NVR Change the Live View Resolution to enter the settings menu of the camera. Click Stream, here you can Click change the Resolution for the Main Stream. Then the live view resolution will be changed accordingly. Set up Lock Screen Right click on live image screen to display the icons on the bottom.
- Page 19 Time Stamp: Set the position of the Time Stamp, you can choose from Top Left, Top Right, Bottom Left, and Bottom Right. Watermark: Turn on or off the Reolink Logo on the live view. Flip Display: Turn the camera’s image upside down when enable this option.
- Page 20 Reolink PoE NVR Screen Mirroring: Mirror the camera’s image when enable this option. Image Settings: Click Image Settings, here you can adjust the Brightness, Contrast, Saturation and Sharpness of the camera’s image. Click Advanced, you can set up image settings below.
- Page 21 Reolink PoE NVR Privacy Mask Settings You can set the privacy zone to block parts of the live image to protect your privacy. After setup, the privacy zone will be blocked in both live view and recordings. Click Privacy Mask Settings, use your mouse to drag up to 4 zones. Then click Apply to save the change.
- Page 22 Reolink PoE NVR Volume: For cameras that support adjusting volume, you can also drag the volume bard to adjust the volume of the camera’s speaker. Spotlight: For cameras with built-in spotlight, you can drag on Brightness bard to adjust the brightness of the spotlight. Click to enable Night Mode, you can choose Auto mode or On as scheduled.
- Page 23 Reolink PoE NVR More Info Go to Camera and click More Info. Here you can check the Hw No (Hardware number) of the camera and FW Version (firmware version). User Manual...
- Page 24 Reolink PoE NVR 4.Surveillance Set up Motion Detection Go to Camera > Detection, here you can set up the motion detection (MD) sensitivity and detection area. Click Add Time Period to set a time period with a sensitivity, you can set a maximum of 4 different sensitivity time periods.
- Page 25 Reolink PoE NVR For cameras with human/vehicle detection, you can also set up the sensitivity for smart detection and object size. Click Settings under Sensitivity for Smart Detection. Here you can set the sensitivity level for Person and Vehicle detection independently.
- Page 26 Reolink PoE NVR Click Object Size, here click to set a minimum object size, and click to set a maximum object size. Click Apply to save the settings. This way, only objects between the set minimum and maximum size will trigger the alarm.
- Page 27 Reolink PoE NVR Set up Motion Recording Please set up the motion detection first, then go to Surveillance > Record to enable the motion recording. Click Settings under Record option. Enable Overwrite, it’ll automatically overwrite the previous recordings when the HDD is full.
- Page 28 Reolink PoE NVR Click Daily Schedule, choose the camera you want to set up. Click Alarm, here you can set up a schedule when you’d like the camera to record on motion. If you need to set different schedules for each camera, please choose the cameras to set them up one by one.
- Page 29 Reolink PoE NVR Set up Continuous Recording Please set up the recording settings first, then go to Surveillance > Record > Daily Schedule, choose the camera you want to set up. Click Timer, here you can set up a schedule for when you’d like the continuous recording to work.
- Page 30 Reolink PoE NVR Click Settings under Email Alerts, here you can set up the email parameters as below. Server Type: Choose from Gmail, Yahoo, Outlook, or choose Other and manually the SMTP server. Port: The SMTP port of your email.
- Page 31 Reolink PoE NVR After finishing the settings, please click Apply to save the settings. Then click Test If Setup Succeeded to see if the email test is successful. Set up Email Schedule Click Daily Schedule under Email Alerts. Select a camera, and then set a schedule when you want the email alerts to work.
- Page 32 Reolink PoE NVR Set up Exception Alert Emails Click Exception under Email Alerts, you can set to send an alert email when the HDD is full or there’s an HDD error. Buzzer You can set up the NVR to make an alert beep sound when a motion is detected.
- Page 33 Reolink PoE NVR Click Daily Schedule under Buzzer. Select a camera, and then set a schedule when you want the buzzer to work. For cameras with person/vehicle detection you can also choose the Alarm type from Any Motion, Person or Vehicle.
- Page 34 Reolink PoE NVR Push Notification Push notification is a text message that pops up from the Reolink App on your mobile phone when the camera detects a motion. Go to Surveillance > Push, here you can set up the Push Notification Schedule.
- Page 35 Reolink PoE NVR Then click Exception under On-Screen Warning. Choose which exception to trigger the on-screen warnings from options Full HDD, HDD Error, Disconnected Network or IP Conflict. Set up FTP With FTP settings, you can set up the NVR to upload images or videos to the FTP server as scheduled or when motion is detected.
- Page 36 Reolink PoE NVR Server Address: Enter the domain name or IP address of your FTP server. Port: Enter the port of your FTP server. The default port is 21. Username: Enter the username of the FTP server, please make sure to use a user account with read &...
- Page 37 Reolink PoE NVR 5. Replay and Download Recordings Replay Recordings Click icon on the live image screen to enter the playback page. to select max 4 cameras, then click Apply. Click Note: If you choose a camera that is 8MP or above, it can only support one channel playback.
- Page 38 Reolink PoE NVR At Select Date, click on the date it’ll search the recordings automatically to play. Check option Alarm Only, it’ll only show the alarm recordings for playback. For cameras with person/vehicle detection you can also choose the Alarm type from Any Motion, Person or Vehicle.
- Page 39 Reolink PoE NVR Buttons on the Playback Window Icon Meaning Speed Down: Play the recording at a slow speed to view more details. Frame-by-Frame: Play the recording frame by frame, not to miss any details. Smart Playback: Replay the recording at a normal speed when there’s motion and replay at 4x speed when there’s no motion.
- Page 40 Reolink PoE NVR Download Recordings Cut and Download Connect a USB drive to the USB port of the NVR for downloading the recordings. Click icon on the live image screen to enter the playback page. Select the camera and date to search the recordings to play back.
- Page 41 Reolink PoE NVR Back up Recordings Right click on the live image screen, then click to enter the backup page. Choose the cameras you want to search recordings for. Choose Video Type from Manual, Alarm or Timer. Then select the start and end time, click Search.
- Page 42 Reolink PoE NVR Select the recordings from the searched recording list, then click Backup. Choose the storage disk to save the cut recording clip. Check the option Back Up MP4 File, it’ll convert the recording into mp4 for saving. And then Click Start.
- Page 43 Reolink PoE NVR 6. Storage Go to Storage page, here you can see the status of the HDD. Click Format, it’ll delete all the recordings on the HDD to for formatting. 7. Network and Connection View NVR Network Status Click Network > Network Status, here you can view the IP address, Default Gateway and DNS of the NVR.
- Page 44 Reolink PoE NVR Set Static IP for the NVR Click Network > General, here change Network Access from DHCP to Static. Then enter the IP address, Subnet Mask, Default Gateway, DNS Server manually, and click Apply to save the settings.
- Page 45 Reolink PoE NVR Register an No-IP or DynDNS DDNS first, then enable DDNS to enter the parameters. Click Apply to save the settings. Set up NTP Settings Click Network > Advanced, then click NTP Settings. User Manual...
- Page 46 Reolink PoE NVR Choose a Server Type to change the NTP settings. Click Synchronize to sync the NVR data and time to the NTP server immediately. Click Apply to save the settings. To customize the NTP server, under Server Type please choose Other. Then you can manually enter the parameters of your own server.
- Page 47 Reolink PoE NVR Set up IP Filter Settings Click Network > Advanced, then click IP Filter Settings. Choose Enable White List or Enable Black List, then click on Add IP. Manually enter the IP address you want to allow or block access, then click OK to save the change.
- Page 48 Reolink PoE NVR Change the Port Settings of NVR Click Network > Advanced, then click Port Settings. Here you can view the current ports of the NVR and change the port numbers. User Manual...
- Page 49 Reolink PoE NVR Enable UPNP Go to Network > Advanced, click to enable UPNP option. Enable ONVIF Go to Network > Advanced, click to enable ONVIF Protocol. User Manual...
- Page 50 Reolink PoE NVR 8. System Management General At System > General page, you can set up the settings below. Device Name: Set a name for the NVR. Screen Resolution: Set a display resolution on the NVR monitor. Scrollview Time: Set a time for the scrollview. For example, set it as 5 sec, then it’ll automatically switch to the next screen of the camera’s live image after every 5...
- Page 51 Reolink PoE NVR Time and Language Go to System > Time and Language page, enable DST you can set the daylight saving time according to your need. And click Language to choose the display language for the NVR. User Manual...
- Page 52 Reolink PoE NVR Account Center Go to System > Account Center page, here you can change the password of the NVR and add other user accounts. Click to change the password of the current account. Firstly, enter the old password, then enter the new password and confirm the new password, click OK to save the change.
- Page 53 Reolink PoE NVR Click Password Protection Settings, you can set a security question with answer to protect your password. In the case you lost the login password, you can retrieve the password via the security question. Click Add Account, enter the Username and Password. Choose account Type from General Account or Admin, then click OK to add the account.
- Page 54 Reolink PoE NVR Click to delete an account, and click to change the password of the selected account. Maintenance Go to System > Maintenance page, here you can set up auto reboot, upgrade the device or restore the system to default.
- Page 55 Reolink PoE NVR Upgrade the Firmware Before upgrade, please download the firmware file from Download Center. Unzip it and copy the file to a USB drive, then plug the USB drive to the USB port of the NVR. To upgrade the firmware for NVR, please click Upgrade. Choose the firmware file to upgrade.
- Page 56 8. Can I use the camera without directly connecting to the NVR? A: Yes, Reolink cameras can be connected to a router or PoE switch that is as the same local network as the NVR, and you can still add the cameras to NVR to use.
- Page 57 Reolink PoE NVR A: Yes, the NVR can be used locally with the monitor. Only that the functions that require internet network access won’t work anymore. Troubleshooting 1. Camera shows video loss/connection failed on the NVR monitor. The camera is connected to the NVR, but on the monitor screen the camera doesn’t display the live video but shows as video loss or connection failed.
- Page 58 (1) Please ensure the NVR’s UID is enabled. You can check it on the NVR monitor, go to System > Info page, here enable the option "Allow other Reolink software to access current device via UID". (2) Please add the NVR to Reolink App or Reolink Client software by its UID.
- Page 59 Solution: Ensure the cables and TV/monitor you used are working properly. Try to log in to the NVR via Reolink App or Reolink Client on the same network to see if it will work. Cause 5. NVR cannot be powered on.
- Page 60 For Reolink App, go to NVR Settings > Advanced page, click Restore. For Reolink Client, go to NVR Settings > System > Maintenance, click Restore. If currently no device has access to the NVR, you can reset it via the monitor with Super Password (for old UI) or security question (for new UI).
- Page 61 Reolink PoE NVR latest firmware from Download Center to upgrade it. Cause 3. The connection of the HDD is lost. Solution: Unplug the HDD then re-plug it. Cause 4. The format of the HDD is wrong. Solution: Please format/init the HDD on the NVR monitor to try again.
- Page 62 Reolink PoE NVR If the NVR doesn't reboot, the issue may be caused by both the NVR and the cameras being grounded. Then please unground either the NVR or the cameras to fix the issue. Note: The NVR carries out the lightning protection and grounding treatment on its own and if users also ground the cameras, it will cause a certain potential difference.
- Page 63 Be aware that the ratings of the power adapter of 16-channel Reolink PoE NVRs should be DC 48V 2.5A and 8-channel Reolink PoE NVRs should be DC 48V 2A. 8. NVR cannot be accessed by Reolink software locally.
- Page 64 Reolink PoE NVR Cause 1. The power adapter issues. Solution: Check the status LED on the power adapter of the NVR. If the LED isn't on, please plug the power adapter into another socket as well as change another working power adapter (48V) for a try.
- Page 65 Reolink PoE NVR Cause 3. Incorrect power supply for the NVR. Solution: (1) It might be the problem of the NVR’s power adapter. Please try again with a different power outlet and power adapter. Note: For the 8 channel PoE NVR the power adapter is 48V 1.87A. And for the 16 channel PoE NVR, it’s 48V 2.5A.
Need help?
Do you have a question about the RLN8-410 and is the answer not in the manual?
Questions and answers
как разблокировать экран нажал нечаянно блокировку,а пароль не помню.
If the password for the Reolink RLN8-410 NVR is forgotten, follow these steps to reset it:
1. Go to Menu -> System -> Maintenance and restore all settings.
2. If this does not work, contact the Reolink Support Team for further assistance.
Ensure to write down and store the new password in a secure place after resetting it.
This answer is automatically generated