Advertisement
Table of Contents
If you smell gas:
1. Shut off gas to the appliance.
2. Extinguish any open flame.
3. If odor continues, keep away from the
appliance and immediately call your
gas supplier or fire department.
WARNING:
Do not store or use gasoline or o
ther flammable vapors and liquids
in the
vicinity of this or any other
appliance.
An LP -cylinder not connected for use
shall not be stored in the vicinity of this
or any other appliance.
WARNING:
Improper installation,
alteration, service or maintenance can
cause property damage, injury or death.
Read the
installation, operating and
maintenance instructions thoroughly
before
installing
equipment.
WARNING:
For outdoor use only.
855-242-6887
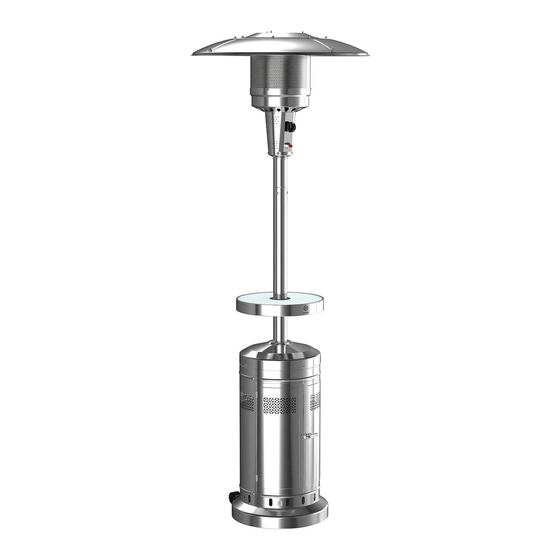
GAS PATIO HEATER WITH LED TABLE
DANGER:
adjustment,
or
servicing
this
Call center for missing parts
MODEL NO.: PG188H
1-
Advertisement
Table of Contents

Related Manuals for Member's Mark PG188H

Summary of Contents for Member's Mark PG188H
- Page 1 GAS PATIO HEATER WITH LED TABLE MODEL NO.: PG188H DANGER: If you smell gas: 1. Shut off gas to the appliance. 2. Extinguish any open flame. 3. If odor continues, keep away from the appliance and immediately call your gas supplier or fire department.
-
Page 2: Table Of Contents
IMPORTANT DO NOT RETURN Question, problems, missing parts? Don ’t return the grill to stores, please call our customer service department at 1-855-CHANT-US (1-855-242-6887) from 8:00am to 5:00pm Eastern time, Monday through Friday for assistance. TABLE OF CONTENTS Product Specifications....................... Safety Information.......................3 Package Contents.......................6 Hardware Contents...................... -
Page 3: Safety Information
Safety Features Thermocouple & Tilt Switch Gas Supply Pressure Max 150 PSI, Min 5 PSI Manufacturer: Guangdong Chant Group Inc. No.42 Xiaolan Industrial Road South Zhongshan, Guangdong 528415, China Call center for missing parts 1-855-242-6887. SAFETY INFORMATION Please read and understand this entire manual before attempting to assemble, operate or install the product. - Page 4 12. Installation and repair should be done by qualified service person, the heater should be inspected before use and at least annual by a qualified service person. 13. More frequent cleaning may be required as necessary. It is imperative that the control compartment, burners and circulating air passageways of the heater to kept clean.
- Page 5 SAFETY INFORMATION Keep the ventilation opening(s) of the cylinder enclosure free and clear from debris. Use this appliance in a well-ventilated space only. Do not use it in a building, garage, or any other enclosed area. Use this appliance in outdoor areas described below: (a) With walls on all sides, but at least one permanent opening at ground level and no overhead cover.
- Page 6 SAFETY INFORMATION 28. CALIFORNIA PROPOSITION 65 WARNING: (a) Combustion by-products produced when using this product contain chemicals known to the State of California to cause cancer and birth defects or other reproductive harm. (b) Handling the brass material on this product exposes you to lead, a chemical known to the State of California to cause cancer and birth defects or other reproductive harm.
-
Page 7: Package Contents
PACKAGE CONTENTS PARTS LIST PART DESCRIPTION QUANTITY PART DESCRIPTION QUANTITY Top Dome Support Assembly KD Dome Beauty Ring Burner Assembly Cylinder Housing Assembly & Base Pole... - Page 8 LED Table Wheel Assembly...
-
Page 9: Hardware Contents
HARDWARE CONTENTS M8X15mm Bolt Wing Nut M8 Nut Battery ST 3.9X12mm screw M5 X 8 Pan Head Bolt M5 X 8 mm Bolt M5 Nut mm Washer M6X10 Hexagon Head Bolt M5 X 8 mm Pan Head Bolt M5 X 8 Bolt M5 X 8 Pan Head Bolt Reflector Spacer 9V Battery... -
Page 10: Assembly Preparation
ASSEMBLY PREPARATION Before beginning assembly of product, make sure all parts are present. Compare parts with package contents list and diagram above. If any part is missing or damaged, do not attempt to assemble the product. Contact customer service for replacement parts. Estimated Assembly Time: 30 minutes Tools required: Wrench, Magnetic Head Phillips Screwdriver (Not included) ASSEMBLY INSTRUCTIONS... - Page 11 1. With the Cylinder Housing Assembly & Base (H) upside down, attach the Wheel Assembly (I) using M8 x 15 mm Bolts (AA) and M8 Nuts (CC).
- Page 12 AA M8X15mm Bolt CC M8 Nut 2. Attach the Pole (D) to Cylinder Housing Assembly & Base (H) using M6 x10 Hexagon Head Bolts (II), then put the Beauty Ring (G) through the Pole on top of Cylinder Housing Assembly & Base I I M6X10 Hexagon Head Bolt 3.
- Page 13 4. Put the assembled Table (E) + (F) to Pole (D). Note: When the Table (E) is well attached, please follow the steps below to adjust the height: a. Adjust the grip until it is vertical to the Pole. b. Adjust the height of the table as you like.
- Page 14 ASSEMBLY INSTRUCTIONS 6. Feed the valve and gas hose and connect the Burner Assembly (C) to the Pole (D). 6.1 Feed the valve and gas hose into and go through the Pole (D) 6.2 Align the screw holes and secure Burner Assembly (C) onto Pole (D) with M5 ×...
- Page 15 7. Attach KD Domes (B) using M5 x 8 mm bolts (FF), M5 nuts (GG) and 5 mm washers (HH). Then, complete dome assembly by attaching top dome (A) to KD domes (B) with M5 x 8 mm bolts (FF), M5 nuts (GG) and 5 mm washers (HH).
- Page 16 9. Connect Hose & Regulator Assembly 20lb.LP-gas cylinder (sold separately). Line up threads on fitting with those on regulator and rotate clockwise until tighten. HAND TIGHTEN ONLY. DO NOT USE ANY HAND TOOLS TO MAKE THIS CONNECTION. careful not to cross threads when screwing in fitting.
-
Page 17: Safety Check
SAFETY CHECK Checking for Leaks Your pati o heater has been checked at all factory connections for leakage. To check the connection at the gas hose/regulator/cylinder: a. Make leakage solution by mixing 1 part liquid dish soap and 3 part water. b. -
Page 19: Operation Instructions
OPERATION INSTRUCTIONS In any case of fail ure of normal ignition, please use the Lighter gun (Sold Separately) to reach the burner for ignition through the hole on the bottom of burner diffuser. WARNING FOR YOUR SATETY: If at any time you are unable to light burner and smell gas, wait 5 minutes t o allow gas to dissipate before attempting to light heater. - Page 20 CARE AND MAINTENANCE Cleaning Wipe surfaces clean with mild dish detergent or baking soda. ⚫ For stubborn surfaces use a citrus-based degreaser and a nylon scrubbing brush. ⚫ Rinse clean with water. ⚫ Note: While cleaning the unit, be sure to keep the area around the burner and pilot assembly dry at all times.
-
Page 21: Troubleshooting
TROUBLESHOOTING Problem Possible Cause Corrective Action Burner won’t light Gas pressure is low. Turn tank valve “OFF” and replace the tank The orifice is blocked. Clear blockage. Control knob is not in “High” Turn control knob to “ON” position. Turn tank valve “OFF” and replace Burner flame is Gas pressure is low. -
Page 22: Replacement Parts List
REPLACEMENT PARTS LIST For replacement parts, call our customer service department at 1-855-CHANT-US (1-855- 242-6887), 8 a.m. - 8 p.m., EST, Monday - Friday. - Page 23 PART DESCRIPTION PART # Top Dome 5007755 KD Dome 5007756 Burner Assembly 188H005 Burner Chamber 5206424 Assembly Thermocouple 2409043 Ignition Pin 2409604 Tilt Switch 2310662 Control Knob 2409034 Igniter 2408276 Control Panel 5209284 Pole 5209287 LED Table 188H006 Glass Assembly 188H002 LED Assembly 188H003...
Need help?
Do you have a question about the PG188H and is the answer not in the manual?
Questions and answers