Table of Contents
Advertisement
Advertisement
Table of Contents

Related Manuals for Garmin ETREX 10


Summary of Contents for Garmin ETREX 10
- Page 1 ETREX 10/20/20X/30/30X ® Owner’s Manual...
- Page 2 © 2020 Garmin Ltd. or its subsidiaries All rights reserved. Under the copyright laws, this manual may not be copied, in whole or in part, without the written consent of Garmin. Garmin reserves the right to change or improve its products and to make changes in the content of this manual without obligation to notify any person or organization of such changes or improvements. Go to www.garmin.com...
-
Page 3: Table Of Contents
Table of Contents Navigating to a Destination....7 Navigating with Sight 'N Go....8 Heading Settings......... 8 Introduction........1 Map............8 Device Overview........1 Navigating with the Map..... 8 Battery Information......... 2 Changing the Map Orientation... 8 Installing AA Batteries......2 Measuring Distance on the Map.. - Page 4 Marine Settings........19 Setting Up Marine Alarms....19 Resetting Data........19 Device Information......19 Product Updates........19 Setting Up Garmin Express....20 Registering Your Device....20 Viewing E-label Regulatory and Compliance Information...... 20 Device Care........... 20 Cleaning the Device......20 Data Management........
-
Page 5: Introduction
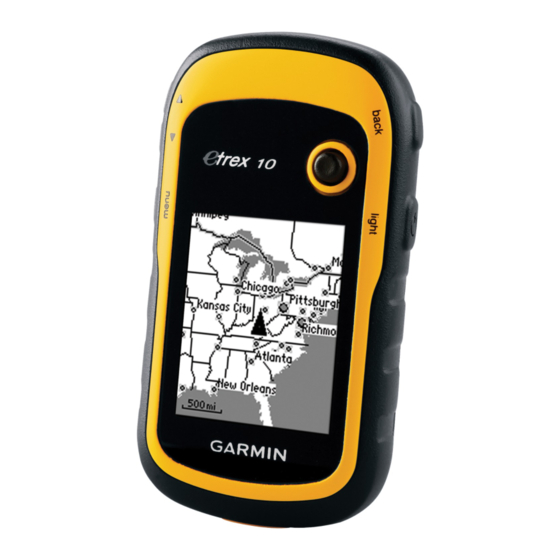
Introduction WARNING See the Important Safety and Product Information guide in the product box for product warnings and other important information. Device Overview Zoom keys. Press to zoom in and out. Back key. Press to return to the previous menu. Thumb Stick controller. -
Page 6: Battery Information
Battery Information WARNING The temperature rating for the device may exceed the usable range of some batteries. Alkaline batteries can rupture at high temperatures. NOTICE Alkaline batteries lose a significant amount of their capacity as the temperature decreases. Use lithium batteries when operating the device in below freezing conditions. -
Page 7: Acquiring Satellite Signals
Acquiring Satellite Signals It may take 30 to 60 seconds to acquire satellite signals. 1 Go outdoors to an open area. 2 If necessary, turn on the device. 3 Wait while the device searches for satellites. flashes while the device determines your location. shows the satellite signal strength. -
Page 8: Projecting A Waypoint
Projecting a Waypoint You can create a new location by projecting the distance and bearing from a marked location to a new location. 1 Select Waypoint Manager. 2 Select a waypoint. 3 Select menu > Project Waypoint. 4 Enter the bearing, and select Done. 5 Select a unit of measure. -
Page 9: Creating A Route
Creating a Route 1 Select Route Planner > Create Route > Select First Point. 2 Select a category. 3 Select the first point in the route. 4 Select Use. 5 Select Select Next Point to add additional points to the route. 6 Select back to save the route. -
Page 10: Reversing A Route
Reversing a Route You can switch the start and end points of your route to navigate the route in reverse. 1 Select Route Planner. 2 Select a route. 3 Select Reverse Route. Tracks A track is a recording of your path. The track log contains information about points along the recorded path, including time, location, and elevation for each point. -
Page 11: Deleting A Track
Color: Changes the color of the track line on the map. Purchasing Additional Maps NOTE: This feature is not available for all device models. 1 Go to your device product page at garmin.com. 2 Click the Maps tab. 3 Follow the on-screen instructions. -
Page 12: Navigating With Sight 'N Go
Navigating with Sight 'N Go You can point the device at an object in the distance, lock in the direction, and navigate to the object. NOTE: Sight 'N Go is available only with eTrex 30/30x devices. 1 Select Sight 'N Go. 2 Point the device at an object. -
Page 13: Measuring Distance On The Map
Measuring Distance on the Map You can measure the distance between two locations. 1 From the map, select a location. 2 Select menu > Measure Distance. 3 Move the pin to another location on the map. Map Settings Select Setup > Map. Orientation: Adjusts how the map is shown on the page. -
Page 14: Course Pointer
Course Pointer The course pointer is most useful when you are navigating on water or where there are no major obstacles in your path. It can also help you avoid hazards near the course, such as shoals or submerged rocks. To enable the course pointer, from the compass, select menu >... -
Page 15: Trip Computer Settings
Trip Computer Settings From the trip computer, select menu. Reset: Resets all the trip computer values to zero. For accurate information, reset the trip information before beginning a trip. Big Numbers: Changes the size of the numbers shown on the trip computer page. Change Data Fields: Customizes the trip computer data fields. -
Page 16: Chirp
™ NOTE: This feature is not available for all device models. A chirp is a small Garmin accessory that is programmed and left in a geocache. You can use your device to ® find a chirp in a geocache. For more information about the chirp, see the chirp Owner's Manual at www.garmin.com. -
Page 17: Gps And Other Satellite Systems
Single Color: Allows you to select whether the satellite page is displayed in multicolor or single color. Set Location On Map: Allows you to mark your current location on the map. You can use this location to create routes or search for saved locations. AutoLocate Position: Calculates your GPS position using the Garmin AutoLocate ® feature. -
Page 18: Customizing The Device
Customizing the Device Adjusting the Backlight Brightness Extensive use of screen backlighting can significantly reduce battery life. You can adjust the backlight brightness to maximize the battery life. NOTE: The backlight brightness may be limited when the battery is low. 1 Select 2 Use the slider to adjust the backlight level. -
Page 19: Data Fields
Data Fields Some data fields require you to be navigating or require ANT+ accessories to display data. 24hr Max Temperature: The maximum temperature recorded in the last 24 hours. Your device must be connected to a wireless temperature sensor for this data to appear. 24hr Min Temperature: The minimum temperature recorded in the last 24 hours. - Page 20 Heart Rate: Your heart rate in beats per minute (bpm). Your device must be connected to a compatible heart rate monitor. Lap Distance: The distance traveled for the current lap. Laps: The number of laps completed for the current activity. Last Lap Time: The stopwatch time for the last completed lap.
-
Page 21: Profiles
NOTE: Changing the text language does not change the language of user-entered data or map data, such as street names. Battery Type: Allows you to change the type of AA battery you are using. USB Mode: Sets the device to use mass storage mode or Garmin mode when connected to a computer. Customizing the Device... -
Page 22: Display Settings
Display Settings NOTE: Some settings are not available for all device models. Select Setup > Display. Backlight Timeout: Adjusts the length of time before the backlight turns off. Colors: Changes the appearance of the display background and selection highlight. Screen Capture: Allows you to save the image on the device screen. Setting the Device Tones You can customize tones for messages, keys, turn warnings, and alarms. -
Page 23: Altimeter Settings
On your computer, install Garmin Express (www.garmin.com/express). On your smartphone, install the Garmin ™ Connect app. ™ This provides easy access to these services for Garmin devices: • Software updates • Map updates • Data uploads to Garmin Connect • Product registration Device Information... -
Page 24: Setting Up Garmin Express
Help us better support you by completing our online registration today. Keep the original sales receipt, or a photocopy, in a safe place. 1 Go to garmin.com/express. 2 Sign in to your Garmin account. Viewing E-label Regulatory and Compliance Information The label for this device is provided electronically. The e-label may provide regulatory information, such as identification numbers provided by the FCC or regional compliance markings, as well as applicable product and licensing information. -
Page 25: Installing A Memory Card
Installing a Memory Card NOTE: This feature is not available for all device models. WARNING Do not use a sharp object to remove user-replaceable batteries. You can install a microSD ® memory card in the handheld device for additional storage or pre-loaded maps. 1 Turn the D-ring counter-clockwise, and pull up to remove the cover. -
Page 26: Transferring Files To Your Device
NOTE: Some computers with multiple network drives may not display device drives properly. See your operating system documentation to learn how to map the drive. 3 Open the Garmin or memory card drive or volume. 4 Select an option: • Select an item from a connected device and drag it to My Collection or to a list. -
Page 27: Specifications
Tips for Pairing ANT+ Accessories with Your Garmin Device • Verify that the ANT+ accessory is compatible with your Garmin device. • Before you pair the ANT+ accessory with your Garmin device, move 10 m (33 ft.) away from other ANT+ accessories. -
Page 28: Index
17–19, 23 device 18 files, transferring 11, 22 sharing data 12 Sight N' Go 8 smartphone 12 Garmin Express 20 software, updating 19 updating software 19 specifications 23 geocaches 11 stopwatch 12 downloading 11 storing data 21 GLONASS 13 sunrise and sunset times 12 GPS 13 satellite page 13... - Page 30 December 2020 GUID-60DDCE99-9830-47EE-8F3C-108F195011E0 v5...
Need help?
Do you have a question about the ETREX 10 and is the answer not in the manual?
Questions and answers