DETAIL K2 MMT5X7G Assembly Manual
Hide thumbs
Also See for MMT5X7G:
- Assembly manual (40 pages) ,
- Assembly manual (40 pages) ,
- Assembly manual (40 pages)

Related Manuals for DETAIL K2 MMT5X7G


Summary of Contents for DETAIL K2 MMT5X7G
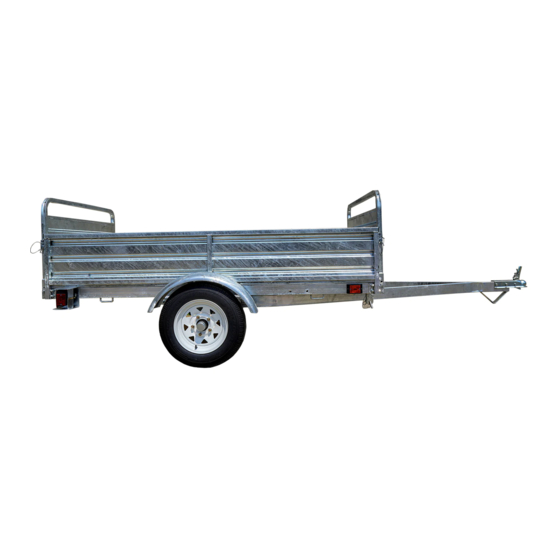
- Page 1 Trailer Assembly Guide Model MMT5X7G 2050 GVWR All Steel Trailer DETAIL K2 INC. 1080 Clay Ave., Unit #2 7.5 ft. (229 cm) Burlington Ont. L7L 0A1 Utility Trailer 1-888-277-6960 GALVANIZED MMT5X7G man v.17...
- Page 2 STEP 1 and use it as your work surface. En.a2 MMT5X7G man...
- Page 3 STEP 2 M12 lock nuts En.a3 v.171214...
- Page 4 Install the coupler and safety chain using the M12 x 75 mm bolts and M12 lock nuts provided. Find the middle link on the chain, and feed it through the side of the tongue where the wiring harness is not present. Feed your bolt through. En.a4 MMT5X7G man...
- Page 5 STEP 4 NOTE: Insert the raised point on the spring into the concave on the axle. En.a5 v.171214...
- Page 6 STEP 5 wheel can be better held. NOTE: Tapered ends of wheel nuts face inward toward wheel. En.a6 MMT5X7G man...
- Page 7 STEP 6 Pre-Wiring NOTE: Make sure all connections are accessible for light mounting when En.a7 v.171214...
- Page 8 STEP 7 CAUTION! Rolling the trailer over will require assistance. The trailer at this point weighs an estimated 400 lb. (181.4 kg). turn. En.a8 MMT5X7G man...
- Page 9 STEP 8 and M8” lock nuts provided. En.a9 v.171214...
- Page 10 STEP 9 Install lights. NOTE: Use Dielectric grease on each connector for corrosion prevention En.a10 MMT5X7G man...
- Page 11 STEP 9 (CONTINUED) En.a11 v.171214...
- Page 12 STEP 10 Install gates En.a12 MMT5X7G man...
-
Page 13: Final Steps
FINAL STEPS MUST TORQUE WHEEL NUTS TO 80 lb. CAUTION: It is the trailer owner’s responsibility to periodically check all hardware is secure and fastened properly En.a13 v.171214... - Page 14 MMT5X7G Owner’s Manual DETAIL K2 INC. 1080 Clay Ave., Unit #2 7.5 ft. Burlington Ont. L7L 0A1 Utility 1-888-277-6960 Trailer Read the owner’s manual over carefully before you begin using your trailer. MMT5X7G man v.171214...
- Page 15 DANGER KEEP CHILDREN AWAY. NEVER SIT OR RIDE ON THE TRAILER. EXERCISE EXTREME CAUTION WHEN TILTING THE TRAILER. DO NOT DO NOT loaded trailer. 41237 41238 41239 ONLY USE ORIGINAL EQUIPMENT PARTS AND ACCESSORIES. Detail K2 Inc. En.m2 MMT5X7G man...
- Page 16 LIGHTING & WIRING MAINTENANCE WIRING LEGEND Symbol Color Ground Trailer Ground NOTE: Lower To test vehicle wiring; To test the Trailer wiring; LOADING YOUR TRAILER A/B. CAUTION TRAILER CAPACITY: Never side only. Tongue Weight En.m3 v.171214...
-
Page 17: Trailer Coupler
RELIABLY, YOU SHOULD INSPECT THE BEARINGS, RACES, AND SEALS AND REPACK THE BEARINGS EVERY 12 MONTHS OR 2000 mi. ( 3200 km ) . THIS IS EASILY FOUND ON THE INTERNET BY SEARCHING “TRAILER WHEEL BEARINGS MAINTENANCE” Item # Qty. Item # Qty. En.m4 MMT5X7G man... - Page 18 TRAILER LICENSING US Residents En.m5 v.171214...
-
Page 19: Parts List
PARTS LIST Part No. Axle M12 Locknut M10 Locknut Trailer Pin M8 Locknut M6 Locknut En.m6 MMT5X7G man... -
Page 20: Schematic Drawing
SCHEMATIC DRAWING 25 26 En.m7 v.171214... - Page 21 Guide d’assemblage de la remorque Modèle MMT5X7G Remorque 2050 GVWR tout acier DETAIL K2 INC. 1080 Clay Ave., Unit #2 Burlington Ont. L7L 0A1 Remorque 1-888-277-6960 Utilitaire GALVANISÉ...
- Page 22 ÉTAPE 1 MMT5X7G man...
- Page 23 ÉTAPE 2 M12 x 90 mm v.171214...
- Page 24 Installez le coupleur et la chaîne de sécurité à l'aide des boulons M12 x 75 mm des contre-écrous M12 fournis. Trouvez le maillon du milieu sur la chaîne et faites-le passer par le côté du timon où le harnais de câbles n'est pas. Faites passer votre boulon à travers. Fr.a4 MMT5X7G man...
- Page 25 ÉTAPE 4 REMARQUE: Insérez la plaque soulevée sur le ressort dans la partie concave sur l’essieu. v.171214...
- Page 26 ÉTAPE 5 roues. REMARQUE: vers la jante. MMT5X7G man...
- Page 27 ÉTAPE 6 Pré-câblage de la remorque. REMARQUE: Assurez-vous que toutes les connexions sont accessibles pour le montage des lumières lorsque remorque sera retourné. v.171214...
- Page 28 ÉTAPE 7 Retournez la remorque et installer les ailes ATTENTION : Retourné la remorque vous demandera de l’aide. La remorque pèse maintenant approximativement 400 lb (181.4 kg) MMT5X7G man...
- Page 29 ÉTAPE 8 M8 fournis. v.171214...
- Page 30 ÉTAPE 9 Installer les lumières REMARQUE : Utiliser de la graisse diélectrique sur chaque connecteur pour prévenir la corrosion. MMT5X7G man...
- Page 31 ÉTAPE 9 (SUITE) v.171214...
- Page 32 STEP 10 MMT5X7G man...
- Page 33 DERNIÈRES ÉTAPES assurer qu‘ils sont tous bien serrés. assurer qu‘ils sont tous bien serrés. ATTENTION : Il est de la responsabilité du propriétaire de la remorque correctement. v.171214...
- Page 34 DETAIL K2 INC. 1080 Clay Ave., Unit #2 Burlington Ont. L7L 0A1 remorque 1-888-277-6960 utilitaire Lisez ce manuel attentivement avant de commencer l’utilisation de la remorque. MMT5X7G man v.171214...
- Page 35 LISTE DE CONTRÔLE DE SÉCURITÉ IMPORTANTE de 2 pouces. manuel. DANGER ÉLOIGNEZ LES ENFANTS. travail de la remorque. JAMAIS S’ASSEOIR OU MONTER SUR LA REMORQUE. PRUDENCE EXTREME LORS DE LA BASCULE DE LA REMORQUE. NE CONDUISEZ PAS NE CHARGEZ PAS MMT5X7G man...
- Page 36 41237 41238 41239 UTILISEZ UNIQUEMENT DES PIÈCES D’ÉQUIPEMENT ET ACCESSOIRES D'ORIGINE. Detail K2 Inc. LUMIÈRE & CÂBLAGE ET ENTRETIENT LÉGENDE DE CÂBLAGE Symboles Couleurs NOTE CHARGER VOTRE REMORQUE A/B. ATTENTION v.171214...
- Page 37 CAPACITÉ de la REMORQUE: ATTACHE DE REMORQUE A = Barré B = Non-barré Pour régler l’attache à la boule; MMT5X7G man...
- Page 38 ROULEMENT À BILLES ET ENSEMBLE DE MOYEU AUCUNE PIÈCE N'EST PLUS CRITIQUE POUR LA PERFORMANCE FIABLE DE VOTRE REMORQUE QUE LES ROULEMENTS À BILLES, LE JEU ET LES JOINTS. POUR S'ASSURER QUE VOTRE REMORQUE FONCTIONNE DE FAÇON FIABLE, VOUS DEVEZ INSPECTER LES ROULEMENTS, LE JEU ET LES JOINTS ET REMBALLER SOIT RE - GRAISSER LES ROULEMENTS TOUS LES 12 MOIS OU 2000 MILES ( 3200 km ) CECI EST FACILEMENT TROUVÉ...
-
Page 39: Liste De Pièces
LISTE DE PIÈCES Qté. Essieu Goupille MMT5X7G man... - Page 40 SCHÉMA 25 26 v.171214...
Need help?
Do you have a question about the MMT5X7G and is the answer not in the manual?
Questions and answers