Table of Contents
Advertisement
Quick Links
Advertisement
Table of Contents

Related Manuals for TMT Automation ChowHUB

Summary of Contents for TMT Automation ChowHUB
- Page 1 User Manual For Universal Smartphone Control HUB www.tmt-automation.com...
-
Page 3: Table Of Contents
Specifications Installation guide Wire connection cycle mode Wire connection open/stop/close mode Apply for a new Chow account Connecting the ChowHUB to the Chow! App Setting of Chow!APP cycle mode Setting of Chow!APP open/stop/close mode Operation page Wireless door sensor Pairing remotes Account management page Push notification... - Page 4 This user manual is designed to provide indications of the ChowHUB and its features and functions ChowHUB is a device can upgrade the existing automation system to become a smartphone control unit through TMT Chow! APP ChowHUB can intergrade with other TMT IOT accessories such as ChowCAM and...
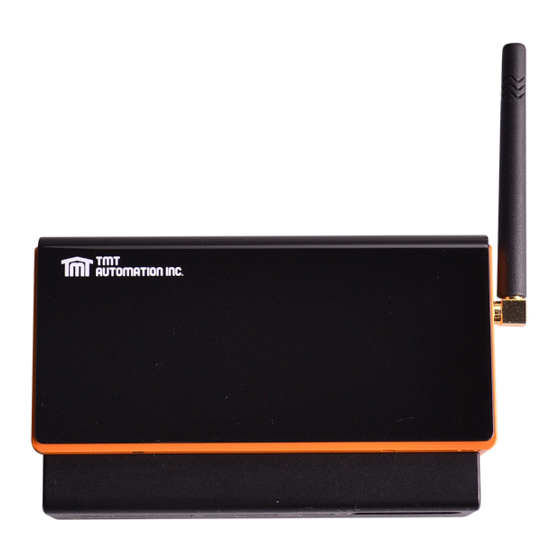
- Page 5 Kit contents Antenna ChowHUB Holder Door Status sensor Expansion screws Wire*3pcs Power plug Specifications Frequency 433 Mhz and 2. 4 GHz Working temperature -20°C~70°C Dimensions 56x110x35mm Power AC/DC , 12V/24V , 1A...
-
Page 6: Installation Guide P4
The ChowHUB will magnetically Attach the power plug to the be attached to the holder. ChowHUB. The blue LED will blink right after it’ s plug in, and the ChowHUB will be ready for pairing. -
Page 7: Wire Connection Cycle Mode P5
Wire connection cycle mode 1. Please connect terminals to the push button terminal of your gate automation. is the terminal for a wired limit switch that sends signal to your smart phone when triggered. ***Please refer to the manual of your automation to find the push button terminal*** IN AC 12~24V Wired door status sensor... -
Page 8: Wire Connection Open/Stop/Close Mode P6
Wire connection open/stop/close mode Before connection, please make sure your gate automation system has open/stop/close terminal. Is the terminal for a wired limit switch which sends signal to your smartphone when triggered. ***Please refer to the manual of your automation to find the open/stop/close terminal*** IN AC 12~24V Wired door status sensor... - Page 9 Output terminals 3 Outputs Outputs #1 Outputs #2 Outputs #3 (APP-Door1) (APP-Door2) (APP-Door3) ChowHUB terminal PB / PB / PB / Device terminal Push Push Push button button button Default Default Default NO Circuit NO Circuit NO Circuit Relay 1 Mode...
-
Page 10: Apply For A New Chow Account P8
Apply for a new Chow account 1. Please scan the QR code and download the Chow! App 2. Press sign up icon and press the agree icon to continue 3. Please type the following information for registration: a. Email (enter twice for verification) b. -
Page 11: Connecting The Chowhub To The Chow! App P9
5. Enter the password for the Wi-Fi. DO make sure entering the correct password. 6. Tap on the ChowHUB icon on the (Find) device page Set a PIN code for safety use. Once the PIN code is confirmed, the ChowHUB will appear on the main page for further operation. - Page 12 Setting of Chow!APP cycle mode 1. Fill in the name of the device 2. Select the (cycle mode) 3. Select (wireless door sensor). *** For the connection of wireless limit switch, please refer to Page 11 Wireless door sensor.*** 4. Select the corresponds door output (Door1 = Output 1) enter the door name choose the door type ( different icon) Garage door / Swing Gate / Sliding Gate...
-
Page 13: Operation Page
Operation page 1. Operation button 2. Switching bar for different device 3. Setting page a. Device information b. Edit or add devices c. Available accessories d. Parameter settings Wireless door sensor Door sensor Sensor Door sensor consists of a magnetic trigger and a sensor. - Page 14 Connect the Door sensor to Chow! APP 1. Tap the ChowHUB icon on the main page Entering the setting page Tap the (Edit or Add devices) Tap the (Pairing) 2. Align the trigger and sensor till the LED on the door sensor is ON.
-
Page 15: Pairing Remotes
Pairing remotes 1. Please enter the Chow! App and tap on the ChowHUB icon on the main page 2. Please enter the setting page by tap the icon 3. Enter the advanced page by enter the PIN code and find the remote learn function 4. - Page 16 Pairing remotes with ChowHUB 1. Press the RF learning button for 3 second the red LED will turn ON. 2. Press any button of a remote and the red LED will blink. 3. After 10 seconds, the red LED will turn OFF and end the remote learning mode.
-
Page 17: Account Management Page
Account management page Push notification 1. Press the icon at the button left to enter the account management page. 2. Tap the push notification setting. 3. Turn ON the switches of the notification. ** Please go to the settings page of your smartphone. Find TMT chow and allow the notifications.***... -
Page 18: Owner Shares Device
Owner shares device 1. Press the icon at the button left to enter the account management page. 2. Tap the manage shared device. 3. Enter the account which you are going to share. 4. Choose the device you are going to share and tap next. - Page 19 Question 1 The blue LED is NOT blinking when the ChowHUB connects to the power plug. Answer 1 Press the button and the blue LED will blink. Question 2 Blue and green LED blinks alternatively when connecting to Chow! App by the first user.
- Page 20 After defaulting, please follow the previous indications to reconnect the ChowHUB to Wi-Fi network. 1. Tap the ChowHUB icon on the main page for 3 seconds and delete the ChowHUB 2. Open the ChowHUB, press the button for 5 seconds and release it. The Green LED will blink once.
- Page 39 www.tmt-automation.com...
- Page 41 ChowHUB Chow! ChowHUB Chow! Chow! App Chow! App...
- Page 42 ChowHUB ChowHUB ChowHUB TMT Chow! ChowHUB TMT IOT ChowCAM ChowBELL Chow! Wi-Fi HUB Wi-Fi AC/DC 12-24V IN AC 12~24V 12V/1A...
- Page 43 ChowHUB 433 MHz and 2.4GHz IP44 -20 C~70 C 56x110x35mm AC/DC, 12V/24V, 1A...
- Page 44 ChowHUB ChowHUB ChowHUB ChowHUB...
- Page 45 IN AC 12~24V IN AC 12~24V...
- Page 46 IN AC 12~24V STOP CLOSE OPEN 13 14 12~24V 12~24V IN AC IN AC 12V / 24V 12V / 1A 12V / 24V 12V / 1A...
- Page 47 #1 ( #2 ( #3 ( ChowHUB PB / PB / PB / None None None ChowHUB NC-NO ; NC-NO NC - NC ; NC-NO...
- Page 48 Chow ! Chow! “ ” “ ” Chow! Chow!
- Page 49 ChowHUB Chow! ChowHUB Wi-Fi ChowHUB ***ChowHUB 2.4GHz Wi-Fi network ! *** ***ChowHUB Wi-Fi network Chow! “+” “ChowHUB” Wi-Fi ChowHUB “ ” ChowHUB ChowHUB *** ChowHUB ChowHUB Wi-Fi ChowHUB Wi-Fi Wi-Fi Wi-Fi 2.4GHz 5GHz Wi-Fi ChowHUB Wi-Fi...
- Page 50 Chow! “ ' ” “ ” Chow! “ ” “ ”...
- Page 52 Chow! ChowHUB " " " " ChowHUB(...
- Page 53 Chow! Chow! ChowHUB...
- Page 54 ChowHUB...
- Page 55 TMT Chow!
- Page 57 ChowHUB Chow! Wi-Fi Chow! ChowHUB Wi-Fi ChowHUB Wi-Fi Wi-Fi...
- Page 58 ChowHUB Wi-Fi ChowHUB ChowHUB ChowHUB ChowHUB Chow! “ ” “ PIN” Wi-Fi Chow! App “ ” Wi-Fi Wi-Fi 34100-206-04-A...
- Page 59 Benutzeranleitung Für universelles Smartphone Steuerungsnabe www.tmt-automation.com...
- Page 61 Spezifikationen Installationsanleitung Kabelverbindungs Zyklusmodus Kabelverbindung Öffnungs / Stopp / Schließmodus Beantragen Sie ein neues Chow Konto Anschließung des ChowHUB an die Chow! App Einstellung des Chow! APP Zyklusmodus Einstellung des Chow! APP Öffnungs / Stopp / Schließmodus Operationenseite drahtloser Türsensor Fernbedienungen Verknüpfung...
- Page 62 Einführung des ChowHUB Diese Benutzeranleitung enthält die Angabe auf den ChowHUB und sein Feature und seine Funktionen. ChowHUB ist ein Gerät, das das vorhandene Automatisierungssystem über TMT Chow! APP zu einer Smartphone Steuereinheit aufrüsten werden kann. ChowHUB kann mit anderen TMT IOT Zubehörteilen wie ChowCAM und ChowBELL in der Chow! APP kombiniert werden Produktübersicht...
- Page 63 Kit-Inhalt Die Antenna ChowHUB Der Halter Der Türstatus Sensor Die Expansionsschrauben Die Drähte *3Stck Stromanschluss Spezifikationen Frequenz 433 MHz und 2, 4 GHz IP-Schutzart IP44 Betriebstemperatur ~ 70 ℃ ℃ Abmessung 56 x 110 x 35mm Spannungsversorgung AC/DC, 12V/ 24V, 1A...
- Page 64 Halter. Befestigen Sie den Halter mit dem Expansionss- chrauben an der Wand. Der ChowHUB wird magne- Befestigen Sie den Stromanschluss tisch am Halter befestigt mit dem ChowHUB. Die blaue LED blinkt gleich nach dem Einstecken und der ChowHUB ist bereit zur Verknüpfung.
- Page 65 Kabelverbindungs Zyklusmodus 1. Bitte verbinden Sie Terminal mit den Push Button von Ihrer Tor Automation. Terminal ist für einen verdrahteten limit switch, der beim Auslösen ein Signal an Ihr Smartphone sendet ***Bitte finden Sie die Informationen über den push button Terminal von der Benutzeranleitung Ihrer Automation*** IN AC 12~24V verdrahteter Türstatus Sensor (optional)
- Page 66 Kabelverbindung Öffnungs / Stopp / Schließmodus Bitte stellen Sie sicher vor dem Anschluss, dass Ihr Tor Automation über ein Terminal zum Öffnen / Stoppen / Schließen verfügt. Terminal ist für einen verdrahteten limit switch, der beim Auslösen ein Signal an Ihr Smartphone sendet ***Bitte finden Sie die Informationen über den Öffnungs- / Stopp- / Schließ...
- Page 67 Ausgangsanschluss 3 Ausgänge Ausgang #1 Ausgang #2 Ausgang #3 (APP-Door1) (APP-Door2) (APP-Door3) ChowHUB Terminal Geräte Terminal Push Push Push Button Button Button Default Default Default keine Schaltung keine Schaltung keine Schaltung Relais 1 Modus Relais 2 Modus Relais 3 Modus...
- Page 68 Melden Sie ein neues Chow-Konto An 1. Bitte scannen Sie den QR Code und laden Sie die Chow! APP herunter 2. Bitte drücken Sie auf das “Sign up” Symbol und dann auf das “agree” Symbol, um fortzusetzen. 3. Bitte geben Sie die folgenden Informationen für die Registrierung ein: a.
- Page 69 ChowHUB zur weiteren Bedienung auf der Hauptseite angezeigt ** Der PIN Code ist nötig, damit weitere Benutzer auf den ChowHUB zugreifen können.*** ** Der PIN Code kann durch Drücken der Tasten (P) und (R) im ChowHUB zurückgesetzt werden, um die Werkseinstellung zu verwenden*** Machen Sie ein erfolgreiches ChowHUB Setup mit Ihrem Heim Wi-Fi Netzwerk.
- Page 70 Einstellung des Chow! APP Zyklusmodus 1. Geben Sie den Namen des Geräts ein 2. Wählen Sie den (Cycle mode) 3. Wählen Sie den (Wireless door sensor) *** Für die Verbindung des drahtlosen Limit Switch, bitte finden Sie die Information über drahtlosen Tür Sensors auf Seite 11*** 4.
- Page 71 Operationenseite 1. Bedientaste 2. Die Umschaltung für verschiedene Geräte 3. Einstellungsseite a. Geräteinformation b. Geräte bearbeiten oder hinzufügen c. verfügbares Zubehör d. Parametereinstellungen drahtloser Türsensor Türsensor Sensor Türsensoren bestehen aus einem magnetischen Auslöser und einem Sensor. Der Türsensor wird ein Signal senden, wenn der Türöffner die Schließposition erreicht magnetischer Auslöser Der Türsensor wird eine...
- Page 72 Verbinden Sie den Türsensor mit der Chow! APP 1. Drücken Sie auf das ChowHUB-Symbol auf der Hauptseite Rufen Sie der Einstellungsseite auf Drücken Sie auf (edit or add devices) Drücken Sie auf (Pairing) 2. Richten Sie den Auslöser und den Sensor aus, bis die LED am Türsensor leuchtet.
- Page 73 Fernbedienungen Verknüpfung 1. Bitte rufen Sie die Chow! APP auf und drücken Sie auf das ChowHUB-Symbol auf der Hauptseite. 2. Bitte rufen Sie die Einstellungsseite auf, indem Sie auf das Symbol tippen 3. Rufen Sie die fortschrittliche Seite auf, indem Sie den PIN-Code eingeben und die Fernlernfunktion suchen.
- Page 74 Pairing Fernbedienungen mit ChowHUB 1. Drücken Sie die RF-Lerntaste 3 Sekunden lang. Die rote LED wird aufleuchten. 2. Drücken Sie eine beliebige Taste einer Fernbedienung und die rote LED wird blinken. 3. Nach 10 Sekunden erlischt die rote LED und beendet den Fernlernmodus.
- Page 75 Kontoverwaltung Seite Push Benachrichtigung 1. Drücken Sie auf das Symbol links neben der Schaltfläche, um die Kontoverwaltung Seiteaufzurufen. 2. Tippen Sie auf die „Push Notification Settings“ 3. Schalten Sie die Benachrichtigungen ein. *** Bitte gehen Sie zur Einstellungsseite Ihres Smartphones. Finden Sie TMT Chow und lassen Sie die Benachrichtigungen zu.***...
- Page 76 Besitzer teilt Geräte 1. Drücken Sie auf das Symbol links neben der Schaltfläche, um die Kontoverwaltung Seite aufzurufen. 2. Tippen Sie auf das “Manage Shared device” 3. Geben Sie das Konto ein, das Sie freigeben möchten 4. Wählen Sie das Gerät aus, das Sie freigeben möchten, und tippen Sie auf „Next“.
-
Page 77: Faq
Die rote LED blinkt, wenn der erste Benutzer eine Verbindung zu Chow! APP verbindet. Antwort 3 Der ChowHUB kann die IP vom Router nicht identifizieren. Bitte schalten Sie den Router aus, schalten Sie ihn ein und stellen Sie die Verbindung wieder her, oder stellen Sie eine Verbindung zu einem anderen Router her. - Page 78 Befolgen Sie nach der Standardeinstellung die vorherigen Anweisungen, um den ChowHUB wieder mit dem Wi-Fi-Netzwerk zu verbinden. 1. Drücken Sie 3 Sekunden lang auf das ChowHUB Symbol auf der Hauptseite und löschen Sie den ChowHUB. 2. Öffnen Sie den ChowHUB, drücken Sie die Taste 5 Sekunden lang und lassen Sie sie los.
Need help?
Do you have a question about the ChowHUB and is the answer not in the manual?
Questions and answers