Table of Contents
Advertisement
Quick Links
255 South Taylor Avenue Louisville, Co 80027 U.S.A Tel: 303-495-2260x116 E-mail: sales@boulderamp.com Web: www.boulderamp.com
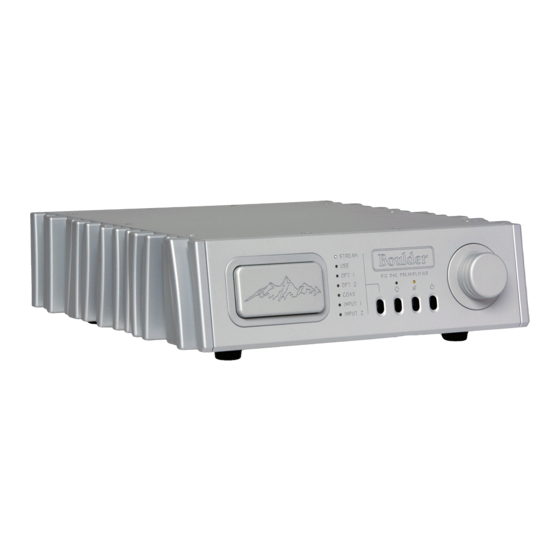
812 DAC Preamplifier
Boulder Amplifiers, Inc.
255 S. Taylor Avenue
Louisville, CO 80027
(303) 449-8220, x110
www.boulderamp.com
BoulderAmplifiersInc
@boulderamplifiers
@BoulderAmps
i
Advertisement
Table of Contents

Subscribe to Our Youtube Channel
Related Manuals for Boulder 812


Summary of Contents for Boulder 812
- Page 1 255 South Taylor Avenue Louisville, Co 80027 U.S.A Tel: 303-495-2260x116 E-mail: sales@boulderamp.com Web: www.boulderamp.com 812 DAC Preamplifier Boulder Amplifiers, Inc. 255 S. Taylor Avenue Louisville, CO 80027 (303) 449-8220, x110 www.boulderamp.com BoulderAmplifiersInc @boulderamplifiers @BoulderAmps...
- Page 2 About About Boulder Amplifiers, Inc. Boulder was founded in 1984 and is the last high-performance audio manufacturer operating in North America to still perform all of its own design, engineering and manufacturing in- house. While this form of production may be more costly than outsourcing, the resulting quality control and reliability of the finished products are never compromised.
- Page 3 Please take a few minutes to read through this instruction manual prior to using your 812. This will help you understand the many functions and capabilities of the device. It will also allow you to maximize the convenience and performance for which it was engineered.
-
Page 4: Table Of Contents
Connecting the Digital Inputs: ....5-11 Connecting the 812 to a Home Network ... 5-13 Connectiong the 812 to a Home Network ... 5-14... - Page 5 ....5-14 Connecting the 812 to Home Network Via Ethernet ..5-16 Connecting the 812 Internal WiFi to a Home Network .
- Page 6 What is Roon? ....6-25 Connecting to Roon on 812 ....6-25 Using Boulder Control App with Roon .
- Page 7 Weights and Dimensions ....8-40 812 DAC Preamplifier Dimensions ... . . 8-41 Troubleshooting ....8-42...
-
Page 8: Introduction
Introduction The 812 embodies years of development and is one of the most advanced audio components available. Here are some of the features that set the 812 apart from the competition: Analog Features: • Boulder rotary volume control. (100 dB range) •... -
Page 9: Unpacking And Care
The 812 weighs 18 lbs. (8.16 kg). Be sure to save all packing materials! The 812 is shipped in a foam wrap to protect the units fine finish. Try not to damage this wrap in the event that the unit must be transported elsewhere in the future. -
Page 10: How To Clean The Casework
Be sure to leave access to the AC mains and interconnect cables when installing the 812. Depending on how easy it is to access the back panel of the 812, it may be wise to pre-install the power and interconnect cables before placement. -
Page 11: Connections
Connect each digital source to one of the digital inputs provided on the rear panel of the 812. Later, you will be able to program each input with the source’s name and photo (please see Input Settings on page 28), so you may want to make a list of each source as you connect them. -
Page 12: Connecting The Analog Inputs
Connections Connecting the Analog Inputs (Back Panel) To get started listening, you only need to connect sources to the 812 as you would any other preamplifier. Please take note of the following: The 812 can be connected to many different types of analog sources and will provide excellent sound quality for each. -
Page 13: Connecting Headphone Outputs (Front Panel)
Connections Connecting Headphone Outputs (Front Panel) On the front of the 812 there is 4 outputs for different types of headphones. Left is the 4 pin XLR headphone output. Top middle Sony Pentaconn headphone output. Bottom middle is the 1/8 inch jack. On the right is the 1/4 inch headphone jack. You can use up to all 4 headphone outputs simultaneously with no fear of harming the amplifier or headphones. -
Page 14: Output Connections On The Back
Output Connections on the back There is one set of XLR analog output connections on the back of the 812 to go to an amplifier. When used as a preamplifier, these outputs can also serve as a fixed level output in "DAC Mode."... -
Page 15: Connecting To An Unbalanced Analog Source
Another option for connecting unbalanced sources is the Boulder ABL2 input adapter. It converts a balanced input into an RCA phono input at the rear of the 812. Like the above cable, the negative input of the 812 is connected to the ground of the RCA phono. However, this negative side will then share the shield wire with the chassis ground and will not have the best hum rejection. -
Page 16: Connection To Ac Mains
Connections Connection to AC Mains Your 812 is supplied with an AC mains power cord appropriate for the location where it was purchased. Connect the AC power cord to the Master AC Power Switch connection on the rear panel of the 812 as shown and plug the other end into AC mains. - Page 17 The Ethernet connections are for network streaming via a UPnP/DLNA media server, Roon interfacing and streaming, and Internet access to program input names or download software updates for the 812. The Ethernet jack should be connected to a network with an active Internet feed.
-
Page 18: Connecting The 812 To Home Network Via Ethernet
If the unit is OFF, turn the unit ON and take it out of Standby. You should be connected to your home network. If the unit is ON, the 812 will place itself in standby. After the boot up sequence, your 812 should automatically be connected to your home network. -
Page 19: Connecting The 812 Internal Wifi To A Home Network
The 812 must be connected in a system connected to speakers or headphones. Turn on the 812 and allow it to boot up. It will go into Standby when boot-up is complete. Turn the 812 ON from the front panel or from the Boulder Controller app. -
Page 20: Connecting An Apple Or Android Mobile Device To The 812
Connecting an Apple or Android Mobile Device to the 812 The 812 can easily be controlled via a mobile device as long as the 812 and the mobile device are on the same network and you have the Boulder Controller app. The app is available on the Apple App Store or on the Boulder website (www.boulderamp.com) for android users. -
Page 21: Using The App On The 812 Without Wifi Or Ethernet
Using the App on the 812 without WiFi or Ethernet It is possible to connect a mobile device or tablet directly to the 812 if you do not have a home network available. Distance from the 812 for control may be slightly limited and the 812 will not be able to download software updates. -
Page 22: Operation
Operation Front Panel Controls The 812 has four buttons on the front panel, they are (L to R) Input Select, Pre Amp / Headphone Output select, Mute, and Standby. The the front panel also has a volume knob with (100) 1 dB steps. -
Page 23: Volume
The volume can be adjusted in 100 equal steps. To adjust volume use the volume knob on the front panel. Or adjust volume using the Boulder Controller app or an RF remote. (Sold separately. Ask your Boulder dealer for more information) -
Page 24: Mute
Operation Mute It is possible to Mute the 812’s outputs so that they are reduced by a preprogrammed level. The Mute feature allows for temporary volume reduction without losing the original volume setting. For example, engaging the Mute function will attenuate the output to a level suitable for conversation. -
Page 25: Standby
NOTE: Because the 812 greatly reduces power consumption when in Standby mode, it is only necessary to place the unit in Standby when not in use. You do not need to turn the 812 off via the Master AC Switch on the rear panel of the unit. The 812 was designed for years of operation in this manner and no damage to the unit will occur. -
Page 26: Bluetooth
Operation Bluetooth To access Bluetooth the 812 must be on the "Stream" input in the Input selection. In the settings of your mobile device, go to Bluetooth, and select the 812. Once it is connected on your mobile device, select any audio from your mobile device, it should play directly to the 812. -
Page 27: What Is Roon
In the bottom right section of the screen, check the playback bar and make sure the “Zone” (the device Roon will play through) is the 812. If it is unnamed it will show the 812’s serial number. Once the Zone is selected for the 812, select the music you want to listen to, press Play, and enjoy. -
Page 28: Setup
-100 (100 dB of attenuation from maximum output) to 0 (no attenuation from maximum output). This is useful if you wish to know the actual level of attenuation for the 812 while it is in use. Volume readings will be indicated by a negative number, for example -47. This indicates 47 decibels of attenuation from maximum output. -
Page 29: Max Volume
The number below the center of the slider indicates where the Max Volume adjustment is set. The factory default Max Volume setting for the 812 is 100. Default Volume Setting the default volume means the volume will be set to the number you choose when coming out of standby or turning on the unit. -
Page 30: Mute Level
The volume of the 812 can be temporarily reduced when pressing the mute button. The Mute Level setting allows you to set the level of attenuation when the 812 is placed in Mute mode, from a minimum of 6 dB of attenuation to a maximum of 80 dB of attenuation. For example, you... -
Page 31: Balance
Operation Balance The balance slider is in the Settings under the volume drop down. It is to make the audio quieter into the left or right channel. Sliding the slider to the right decreases the audio into the left speaker or headphone. Sliding the slider to the left decreases the audio into the right speaker or headphone. -
Page 32: Input Settings
Input Image. Input Trim Any of the 812’s inputs can be programmed to unity gain. Input Trim allows you to reduce the volume of a selected input relative to all others so that they can be matched to the same level. -
Page 33: Theater Mode/Dac Mode
WARNING: Theater Mode/DAC Mode should be used with extreme caution, as there is no way to control the volume of the 812 while in Theater Mode! If it is programmed for an input that does not have externally controlled volume, damage to speakers or other components may occur! Any of the 812’s inputs can be programmed to the equivalent unity gain. -
Page 34: Output Settings
DAC Mode DAC mode allows the use of the 812 purely as a DAC that goes directly to a preamplifier. In this mode the output is fixed line level output on the XLR jacks on the rear of the unit. The analog inputs are not active in DAC Mode. -
Page 35: System Settings
The System Settings drop-down menu for the 812 can be accessed by selecting the settings within the Boulder controller app. The System Settings are used to adjust or monitor all of the internal functions of the 812. The following settings can be checked or adjusted from the System... - Page 36 Note: You can restore the WiFi defaults from the front panel. The 812 must be in standby. You hold the far left button down, the headphone/preamplifier exchange button, for 3 seconds, then take it out of standby.
-
Page 37: Factory Defaults
When the Factory Defaults button is pressed, a pop-up window will appear on the 812’s front panel display that will ask, “Are you sure you wish to set Factory Defaults (the unit will reset)?”... -
Page 38: Input Defaults
“Are you sure you wish to set the Input Defaults?” To reset the 812’s inputs to their original factory settings, press the Yes button. If you do not wish to restore the Input Defaults, press the No button. -
Page 39: Programming
Once the page is accessed, the various programming functions can be viewed, changed, and saved. To access the 812’s HTML page, you will need a computer that is connected to the same network as the 812 to enter the 812’s network address into a web browser. -
Page 40: Appendix
Appendix Technical Specifications Balanced Inputs 2 x 3�pin XLR Balanced Outputs 1 x 3�pin XLR Maximum Input Level 6.0 Vrms Maximum Output Level 14.0 Vrms THD+N, 2V Output, 2khz 0.0017% (�95.5 dB) Maximum Voltage Gain 19.4 dB Volume Range 100 dB Volume Steps 1.0 dB Frequency Response, 20 Hz to 5kHz... -
Page 41: Weights And Dimensions
Appendix Weights and Dimensions 812 Integrated Chassis: 12” W x 12” D x 3.25” H (12.5 lbs) 30.5 cm W x 30.5 cm D x 8.3 cm H (5.67 kg) Shipping: 24” W x 23” D x 14” H (18 lbs) 61 cm W x 59 cm H x 36 cm H (8.2 kg) -
Page 42: 812 Dac Preamplifier Dimensions
Appendix 812 DAC Preamplifier Dimensions 8-41... -
Page 43: Troubleshooting
Mobile device is on a different Connect 812 and mobile No Response to App network than 812 device to the same network 812 is unable to receive WiFi Move to a better location or signals use wired network connection 8-42... -
Page 44: Notes
Appendix Notes: 8-43...
Need help?
Do you have a question about the 812 and is the answer not in the manual?
Questions and answers