Table of Contents
Advertisement
Quick Links
IMPORTANT:
KEEP THIS BOOKLET IN THE PLACE PROVIDED ON THE CHILD RESTRAINT
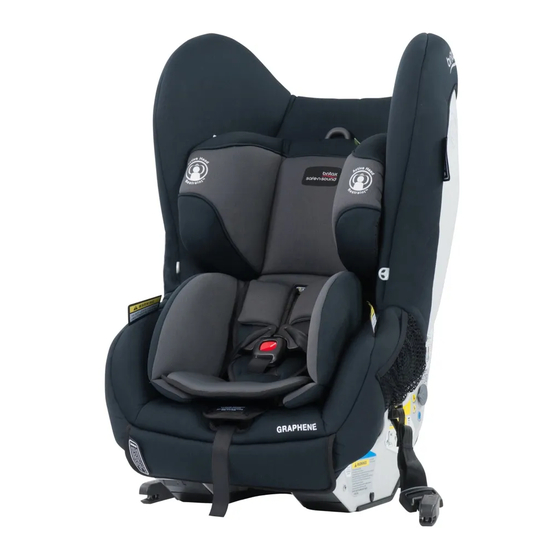
CONVERTIBLE CAR SEAT
WITH OPTIONAL ISOFIX COMPATIBILITY
Suitable for Birth to 4 years (approx)
Instructions for Installation & Use
REARWARD
FACING
Birth to 2-3
years (approx)
Series No. BS7300S-i20133
Series No. BS7300S-020133
If you have purchased an
ISOFIX compatible version
then ISOFIX compatible straps
Instructions for Installation & Use
FORWARD
FACING
12 months to 4
years (approx)
are fitted the seat.
1
Advertisement
Table of Contents

Related Manuals for Britax safe-n-sound BS7300S-i20133


Summary of Contents for Britax safe-n-sound BS7300S-i20133
- Page 1 CONVERTIBLE CAR SEAT WITH OPTIONAL ISOFIX COMPATIBILITY Suitable for Birth to 4 years (approx) Instructions for Installation & Use REARWARD FORWARD FACING FACING Birth to 2-3 12 months to 4 years (approx) years (approx) Series No. BS7300S-i20133 Series No. BS7300S-020133 If you have purchased an ISOFIX compatible version then ISOFIX compatible straps...
- Page 2 Harness Pull Straps not below green zone Press Fit firmly to the child Pull Remove firmly slack to car seat Pull to remove slack Push down Pull and tighten Push Store button strap twists Fully Lengthen top tether Attach Instructions for Installation & Use Instructions for Installation &...
- Page 3 Pull Press Harness Straps not below green zone Push button and Release cover de-latch Fit firmly to the Attach Push child down Pull Remove slack Pull to remove slack Pull to Push tighten button and lengthen Pull Push Store Attach button strap twists...
- Page 4 Pull Fit firmly to car seat Press Harness Fit firmly Straps to the not below child green zone Remove slack Pull Push down Pull Attach Push Pull to button remove slack Lengthen top tether Pull Store strap Remove slack Instructions for Installation & Use Instructions for Installation &...
- Page 5 Pull Store strap Press Harness Straps not below green zone Push down Fit firmly to the child Pull Remove slack Pull to tighten Pull Pull Push Attach button Lengthen top tether Remove slack Instructions for Installation & Use Instructions for Installation & Use...
- Page 6 To be used only in a rearward-facing position until the infants's shoulders either reach the lower shoulder Magagamit lamang sa isang nakaharap sa likod na posisyon hanggang sa maabot ng balikat ng sanggol ang alinman sa ibabang marka ng taas ng balikat (humigit-kumulang height marker (approximately 12 months of age) or reach the middle height marker (approximately 2 to 12 na buwang edad) o maabot ang panggitnang marka ng taas (humigit-kumulang 3 years of age).
- Page 7 Να χρησιμοποιείται μόνο σε θέση στραμμένο προς τα πίσω μέχρι οι ώμοι του βρέφους के व ल पीछे की तरफ मु ँ ह किये हु य े स् थ िति मे ं तब तक प् र योग करे ं जबतक या तो शिशु का कन् ध ा कन् ध े के निचले भाग के चिन् ह तक न είτε...
- Page 8 INSTRUCTIONS EXACTLY and use only Britax Safe-n-Sound recommended parts and accessories. If in doubt about the method of installation, consult Britax Childcare or agent, or a child restraint fitter or, in New Zealand, to consult the agent for the vehicle.
-
Page 9: Forward Facing
PAGE PAGE FORWARD FACING IMPORTANT INFORMATION AND WARNINGS FEATURES: FORWARD-FACING SHOULDER HEIGHT MARKERS SUITABLE FOR USE SHOULDER HEIGHT MARKERS A GROWING CHILD HOW TO SETUP SHOULDER HEIGHT MARKERS THE NEXT STEP HOW TO INSTALL USING SEATBELT HOW TO INSTALL USING ISOFLEX CONNECTORS REARWARD FACING HOW TO USE FEATURES: REARWARD-FACING... - Page 10 • Always secure the loose end of the top tether strap. Do not use the child restraint where this top tether faulty, cease using and seek repair by Britax. strap may fall into a split in the seat back or off the side of the seat.
-
Page 11: Shoulder Height Markers
• Britax recommends that you keep your child in a rearward facing restraint for as long as possible until facing while the infant can be the middle shoulder height marker is reached or child becomes uncomfortable. - Page 12 Next type of restraint that can be used in the car for your child. REARWARD FACING (Suitable up to 30mths approx) When your child has outgrown this seat, you can use: Newborn (Rearward Facing) Older Child (Rearward Facing) • Or a harnessed car seat with in-built harness suitable for children approximately 6 months to 8 years old.
- Page 13 13 14 28 29 (Harness strap not shown) 1. Adjustable Headrest incorporating HASSLE FREE HARNESS™ 2. Shoulder Pads (if supplied) ISOFLEX Connectors are 3. Padded insert (if supplied) Long or short stored on each side of the seat Messy Mat 4.
- Page 14 IS THERE ENOUGH ROOM To ensure that the space is sufficient, the 375mm purchaser should check the measurements between the vehicle’s rear and front seats in which the child restraint is intended to be used. 520mm Seat width 450mm DO NOT USE RESTRAINT IN REARWARD FACING MODE WITHOUT THE STABILISING BAR FULLY EXTENDED.
- Page 15 B. Lift the flap at the end of the seat to INSTALLING INTO VEHICLE REARWARD FACING Lift cover enough to access access the stabilising bar, pull out the stabilising bar The restraint is normally packaged in the fully upright forward facing mode. If you need to use it rearward stabilising bar and then gently push bar facing you must first fully recline the restraint.
- Page 16 D. Fully lengthen seatbelt and feed through INSTALLING INTO A VEHICLE REARWARD FACING the blue WITH SEATBELT. (REARWARD BELT PATH FACING) opening, between the restraint cover and the restraint shell following the belt path label and through A. Position restraint rearward facing in the chosen seatbelt slots in the opposite side of the seating position in the car where a child restraint.
- Page 17 G. If upper anchorage strap is folded up for storage F. Replace the centre panel flap, ensure the Fully press Adjuster Button (1) while undo storage strap to lengthen. Fully press adjuster harness buckle is through the panel. Connect to pulling Upper Anchorage Strap (2) to button (1) while pulling upper anchorage strap (2) to the back panel of the cover.
- Page 18 FITTING SUMMARY IMPORTANT: If using an Extension Strap, positioning the attachment clip above the child may lead to injury in an accident therefore make sure that the attachment clip is not positioned in front of the vehicle seat. Use a shorter extension strap or no extension strap. Leave one side of the tether strap slack to Hook Attachment Clip allow the baby to be placed in the restraint.
- Page 19 INSTALLING THE RESTRAINT INTO THE CAR ANGULAR ADJUSTMENT OF RESTRAINT (USING ISOFLEX CONNECTORS IF SUPPLIED TO THE CHILD RESTRAINT) Some vehicle seats have more rearward slope than others. If the angle of the seat causes the baby to To prevent damage to vehicle seat it may be necessary to remove or open a trim covering the ISOFIX low be too upright for comfort, the angle may be altered by placing a firm packing between the seat and the anchorages.
- Page 20 E. Press and hold the ISOFLEX adjuster release H. Push downwards on the seat to compress the seat button and pull the connector strap to fully into the vehicle. Whilst pushing into the seat, pull lengthen. Repeat for the other connector. on adjuster strap to remove all slack and tighten the ISOFLEX strap.
- Page 21 I. If upper anchorage strap is folded up for storage FITTING SUMMARY Fully press Adjuster Button (1) while undo storage strap to lengthen. Fully press adjuster pulling Upper Anchorage Strap (2) to button (1) while pulling upper anchorage strap (2) to lengthen.
- Page 22 If the car's upper anchorage fitting is behind the vehicle seat back you may need to use an extension strap ANGULAR ADJUSTMENT OF RESTRAINT as part of the top tether installation. Some vehicle seats have more rearward slope than others. If the angle of the seat causes the baby to be too upright for comfort, the angle may be altered by placing a firm packing between the seat and the IMPORTANT: If using an Extension Strap, positioning the attachment clip above the child may lead to underside of the base.
- Page 23 1. The shoulder straps must be positioned in slots which are nearest to the child's shoulders, but not lower ADJUSTING HASSLE FREE HARNESS™ HEADREST than the child's shoulders. There is only one set of slots so the seat will always have the shoulder straps in Correct fitment of the harness is very important as it restrains the child in the restraint.
- Page 24 HOW TO ADJUST HEADREST & HASSLE PLACING CHILD INTO RESTRAINT Pull FREE HARNESS™ A. Ensure the headrest and shoulder straps are adjusted to the correct height for your child (see page 45). A. Loosen the harness straps before adjusting the headrest. B.
- Page 25 - see previous page. Ensure that any slack in harness straps is removed. Do not use the restraint if straps do not tighten and contact BRITAX Childcare Customer Service. Shoulder Shoulder harness straps must fit firmly to the child.
- Page 26 H. Adjust the top tether strap by pulling adjustment REMOVING CHILD FROM RESTRAINT strap to remove slack as shown. A. Press top tether strap adjuster lever while pulling top Ensure the strap is not so tight as to lift the seat tether straps to slacken.
- Page 27 E. Press the blue button on left side (facing seat) and D. Remove the excess tether strap from pocket and fully Rotate forward Fully press Adjuster Button (1) while press top tether adjuster button (1) while pulling top gently push stabilising bar back and then down into the pulling Upper Anchorage Strap (2) to recessed area.
- Page 28 26 25 (Harness strap not shown) Long or short Messy Mat (If supplied) 1. Adjustable Headrest incorporating HASSLE FREE HARNESS™ ISOFLEX Connectors are 2. Shoulder Pads (if supplied) stored on each side of the seat 3. Fully adjustable 6 point Harness 4.
- Page 29 Once the child's shoulders reach the lower or middle shoulder height marker, the seat can be changed to the forward-facing position and used until the child's shoulders reach the upper shoulder height marker. Continue to use the restraint in forward-facing mode until the child's shoulders reaches the limit of the upper shoulder height marker.
- Page 30 INSTALLING INTO VEHICLE FORWARD FACING CONVERT THE RESTRAINT TO FORWARD FACING MODE (UPRIGHT OR RECLINED) A. Remove the installed rear facing child seat from the A. To convert the restraint to forward facing mode (from vehicle by disengaging the seatbelt or ISOFLEX rearward facing mode), simply pull the recline foot handle straps and upper anchorage strap as described on and rotate the foot to the forward facing reclined position.
- Page 31 D. Grasp the sash belt edge between thumb and INSTALLING INTO VEHICLE FORWARD FACING -WITH SEATBELT fingers in each hand. Slide the belt up into the lock-off slot to the top of the slot. If the sash belt is A. Position the restraint in forward facing mode Fit firmly and align restraint centrally with the chosen not slack it may not enter the lock-off slot.
- Page 32 H. If upper anchorage strap is folded up for storage undo Fully press Adjuster Button (1) while IMPORTANT : storage strap then lengthen. Fully press adjuster button pulling Upper Anchorage Strap (2) to (1) while pulling upper anchorage strap (2) to lengthen. lengthen.
- Page 33 Attachment Clip INSTALLING THE RESTRAINT INTO THE CAR Car's Upper (USING ISOFLEX CONNECTORS IF SUPPLIED WITH THE CHILD RESTRAINT) Anchorage Fitting To prevent damage to vehicle seat it may be necessary to remove or open a trim covering the ISOFIX low Top tether strap anchorages.
- Page 34 D. Press and hold the ISOFLEX strap adjuster F. Push downwards on the seat to compress the seat Tension indicator button and pull the connector strap to fully into the vehicle. Whilst pushing, pull on adjuster lengthen. Repeat for both connector straps. strap to remove all slack and tighten the ISOFLEX strap.
- Page 35 H. Fit the attachment clip on the upper anchorage strap to Attachment Clip the anchor fitting as shown. Make sure to remove as many twists as possible from the upper anchorage strap. Car's Upper Attachment Clip Anchorage Fitting Attach Top tether strap Always attach the hook and remove slack Pull to remove Car's Anchor Fitting...
- Page 36 Adjustment of the headrest automatically adjusts the ADJUSTING HASSLE FREE HARNESS™ HEADREST harness shoulder strap position. If the headrest has side Correct fitment of the harness is very important as it restrains the child in the restraint. The headrest must wings they should be just above the child's shoulders.
- Page 37 ADJUSTING HASSLE FREE HARNESS™ PLACING CHILD IN THE RESTRAINT Pull HEADREST A. Ensure the headrest and shoulder straps are A. Loosen the harness straps before adjusting the headrest. adjusted to the correct height for your child (see page 71. Loosen shoulder straps by pressing the B.
- Page 38 Make sure that nothing is obstructing harness straps and that child’s arms and legs are free with the straps in the correct location - see previous page. Do not use the restraint if straps do not tighten and contact BRITAX Childcare Customer Service. Refer to back cover for contact details.
- Page 39 REMOVE RESTRAINT FROM REMOVING CHILD FROM RESTRAINT VEHICLE FITTED WITH ISOFLEX A. Push and hold the harness adjustment lever while pulling both shoulder harness straps to slacken harness To store the ISOFLEX connectors on the inside of to the desired amount. the seat wings.
- Page 40 D. Remove the excess tether strap from pocket and Fully press Adjuster Button (1) while fully press top tether adjuster button (1) while pulling Upper Anchorage Strap (2) to pulling top tether strap (2) to slacken as shown. lengthen. In some vehicles loosening of the top tether strap may be difficult.
- Page 41 THIS RESTRAINT IS SUITABLE FOR USE ON AN AIRCRAFT WHEN B. The top tether is not required to be used to fit the child INSTALLED AS DIRECTED. restraint in an aircraft. Shorten the top tether strap and store in its storage pocket. Attach the tether clip to the HOW TO INSTALL USING AIRCRAFT LAP BELT elastic loop provided on the restraint as shown.
-
Page 42: Regular Care Of This Restraint
See next page. If any part of these parts show signs of deterioration, is cracked or broken, seek repair immediately - contact Britax Customer Service 1300 303 330 CLEANING CAR SEAT HARDWARE: Use only mild soap to clean all metal and plastic parts of your child’s restraint, using a damp sponge or cloth. -
Page 43: Buckle Operation
3-bar slide is fed through the same slots. assembly straps from restraint. If the Harness Buckle cannot be returned to its original working condition then contact BRITAX Customer Service for assistance. A. Remove the restraint from vehicle. B. Disengage the harness tongues from the harness buckle. - Page 44 C. Remove the cover by unclipping any press studs TO REMOVE COVER from the moulding and from the cover middle Unclip panel A. To remove headrest cover: press stud from Remove headrest cover by unclipping the press moulding studs next to the shoulder harness. At the back of the headrest hardware lift elastic loops over headrest and peel cover away from the seat.
-
Page 45: Very Important
To replace headrest cover for adjustable headrest with Metal Strap Connector side wings: Lift headrest cover over headrest, place elastic loops behind ONLY USE BRITAX SAFE-N-SOUND SEAT COVERS AND headrest and clip press studs together next to shoulder ACCESSORIES THAT ARE DESIGNED AND TESTED FOR USE harness. - Page 46 If an aftermarket into a forward position when the tongue are disengaged and accessory is used that is not recommended by Britax then ensure that the accessory is for this restraint and prevents the child from sitting on the buckle when boarding.
-
Page 47: Top Tether Strap
Long Messy Mat MESSY MAT™ (IF SUPPLIED) Consult the vehicle owner’s handbook for location of anchorage fittings or anchorage points and the (If supplied) possible use of spacers. Some vehicles may have an anchor fitting fitted by the vehicle manufacturer. If The Messy Mats have been specifically designed to protect your anchorage points cannot be found refer to car manufacturer or local child restraint fitting station or traffic vehicle seat from damage by the child restraint and children’s shoes... - Page 48 Extension Straps IF THE CAR IS FITTED WITH CHILD RESTRAINT UPPER ANCHORAGE FITTING Length 300mm (Use Britax Safe-n-Sound part 0035). UPPER ANCHORAGE POINT Fig.1. Length 600mm (Use Britax Safe-n-Sound part 0036). Attachment Bolt Available from all major child restraint retailers.
- Page 49 CAR INSTALLATION ACCESSORIES CLOTHING/BATHING (From retailers of Britax Safe-n-Sound products) Since it is often warmer in the car, dress the baby in light clothing. EXTRA ANCHOR KITS: Available for using the restraint in additional cars.
- Page 50 The Britax Safe-n-Sound Crash Exchange Program is a voluntary program designed to ensure that our children are safe and that any seat that may have experienced a severe crash is taken out of the market.
- Page 51 Scan QR code for features, how to use and installation. The Safe-n-Sound trademark, ISOFLEX and product names are the property of Britax Childcare Pty. Ltd. (Australia). The Britax trademarks are the property of Britax Childcare Holdings LTD, UK. We reserve the right to alter this product without notice.
Need help?
Do you have a question about the safe-n-sound BS7300S-i20133 and is the answer not in the manual?
Questions and answers