Advertisement
Quick Links
INSTALLATION INSTRUCTIONS
BEFORE BEGINNING | AVANT DE COMMENCER | ANTES DE EMPEZAR
•
Please read all instructions carefully.
•
Familiarize yourself with all parts (see
"PARTS") and check quantities.
•
Follow all safety precautions (see
"SAFETY PRECAUTIONS").
© ClosetMaid Corporation 2010 | Ocala, FL 34471 | 1-800-874-0008 | www.closetmaid.com
01-81362 06/10
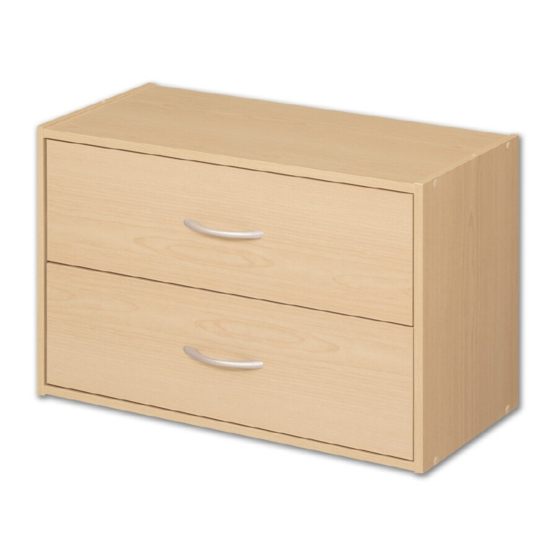
S S t t a a c c k k a a b b l l e e 2 2 D D r r a a w w e e r r O O r r g g a a n n i i z z e e r r
O O r r g g a a n n i i s s a a t t e e u u r r S S u u p p e e r r p p o o s s a a b b l l e e à à 2 2 T T i i r r o o i i r r s s
O O r r g g a a n n i i z z a a d d o o r r A A p p i i l l a a b b l l e e d d e e 2 2 R R e e p p i i s s a a s s
DIRECTIVES D'INSTALLATION
•
Prière de lire avec soin toutes les directives
fournies.
•
Se familiariser avec les pièces nécessaires à
l'installation (voir « PIÈCES ») et vérifier les
quantités présentes.
•
Respecter toutes les consignes de sécurité
(voir « CONSIGNES DE SÉCURITÉ »).
INSTRUCCIONES DE INSTALACIÓN
•
Lea todas las instrucciones cuidadosamente.
•
Familiarícese con todas las piezas (VEA
"PIEZAS") y verifique las cantidades.
•
Siga todas las precauciones de seguridad
(vea "PRECAUCIONES DE SEGURIDAD").
What you will need:
Vous aurez besoin de :
Va a necesitar:
Advertisement

Related Manuals for Emerson ClosetMaid Stackable 2 Drawer Organizer


Summary of Contents for Emerson ClosetMaid Stackable 2 Drawer Organizer
- Page 1 S S t t a a c c k k a a b b l l e e 2 2 D D r r a a w w e e r r O O r r g g a a n n i i z z e e r r O O r r g g a a n n i i s s a a t t e e u u r r S S u u p p e e r r p p o o s s a a b b l l e e à...
- Page 2 SAFETY PRECAUTIONS | CONSIGNES DE SÉCURITÉ | PRECAUCIONES DE SEGURIDAD MISE EN GARDE WARNING ADVERTENCIA • This unit contains small parts which • Ce module contient de petites pièces avec • Este producto contiene piezas pequeñas que could be a choking hazard for small lesquelles de petits enfants peuvent pueden causar peligro de asfixia a niños children.
- Page 3 PARTS | PIÈCES | PIEZAS top/bottom panel (1) panneau supérieur/inférieur (1) panel superiorinferior (1) right side panel (1) panneau latéral de droite (1) panel lateral derecho (1) left side panel (1) panneau latéral de gauche (1) panel lateral izquierdo (1) back panel (1) panneau arrière panel trasero...
- Page 4 HELPFUL HINTS | CONSEILS UTILES | CONSEJOS PRÁCTICOS PART IDENTIFICATION IDENTIFICATION DES PIÈCES IDENTIFICACIÓN DE LAS PIEZAS PART IDENTIFICATION SAMPLE EXEMPLE D’IDENTIFICATION DES PIÈCES MUESTRA DE IDENTIFICACIÓN DE LAS PIEZAS Use “PART IDENTIFICATION” picture (in • Note overall shape of part. Count and locate step) and exploded view (on previous page) Look for part letter “stamping”...
- Page 5 HELPFUL HINTS (CONT.) | CONSEILS UTILES (SUITE)| CONSEJOS PRÁCTICOS (CONT.) INSTALLING CAM LOCKS INSTALLER LES BOULONS À INSTALACIÓN DEL CIERRE VERROU DE LEVA • Identify arrow on head. Look • Arrow MUST point • Push cam lock all closely. toward hole in edge of the way down into •...
- Page 6 HELPFUL HINTS (CONT.) | CONSEILS UTILES (SUITE)| CONSEJOS PRÁCTICOS (CONT.) INSTALLING L-BRACKET INSTALLATION DU SUPPORT INSTALACIÓN DEL EN L SOPORTE EN FORMA DE L There are several "key points" to L-bracket Cette installation comprend quatre étapes Existen varios “puntos clave” para este paso installation step.
- Page 7 STEP 1 Attach frame slides to side panels. ÉTAPE 1 Fixer les glissières du tiroir aux panneaux latéraux. na los mecanismos de deslizamiento del cajón a los paneles PASO 1 laterales. SIDE PANEL FRAME SLIDE PANNEAU LATÉRAL GLISSIÈRE DE BÂTI PANEL LATERAL MECANISMOS DE DESLIZAMIENTO DE...
- Page 8 STEP 2 Attach right side panel to top panel. ÉTAPE 2 Fixer le panneau latéral de droite au panneau supérieur. PASO 2 Una el panel lateral derecho al panel superior. TOP/BOTTOM PANEL PANNEAU SUPÉRIEUR/ INFÉRIEUR PANEL SUPERIOR/ INFERIOR NOTE: • Top and bottom panel are the same! •...
- Page 9 Attach bottom panel to right side panel. Attach left side panel. STEP 3 Push on screw covers. ÉTAPE 3 Fixer le panneau inférieur. Fixer le panneau latéral de gauche. Pousser les capuchons de vis en place. PASO 3 Fije el panel inferior. Fije el panel lateral izquierdo. Empuje los tapones.
- Page 10 STEP 4 Attach back panel to back (unfinished) side of unit. ÉTAPE 4 Fixer le panneau arrière au côté arrière (brut) du module. Fije el panel trasero al lado trasero (sin acabar) de la unidad. PASO 4 FOR STACKING UNITS ONLY—DO THIS FIRST! FOR SINGLE &...
- Page 11 STEP 5 Attach unit to wall (at wall stud location). ÉTAPE 5 Fixer l’armoire au mur (vis-à-vis les montants de charpente). Fije la unidad a la pared (en la ubicación del montante de pared). PASO 5 WARNING All units MUST be fastened to the wall. When stacking units, the unit on the bottom must be attached to the wall first before setting another unit on top.
- Page 12 STEP 6 Insert dowels and cam locks into drawer sides. ÉTAPE 6 Insérer les goujons et les boulons à verrou dans les glissières du tiroir. PASO 6 Inserte las espigas y los cierres de leva en los lados del cajón. DRAWER SIDE CÔTÉ...
- Page 13 STEP 7 Attach drawer sides to drawer back. Slide in bottom. ÉTAPE 7 Fixer les côtés du tiroir à l’arrière de tiroir. Slide in bottom. Una los lados del cajón al panel trasero del cajón. Slide in PASO 7 bottom. DRAWER BACK ARRIÈRE (ACCENT) DE TIROIR PANEL TRASERO DEL CAJÓN...
- Page 14 STEP 8 Attach cam posts to drawer front. Attach handles. ÉTAPE 8 Attach cam posts to drawer front. Attach handles. Attach cam posts to drawer front. Attach handles. PASO 8 DRAWER FRONT DEVANT DE TIROIR PANEL DELANTERO DEL CAJÓN NOTE NOTE: REMARQUE : NOTA:...
- Page 15 STEP 9 Assemble drawer front to drawer. Attach drawer slides. ÉTAPE 9 Assemble drawer front to drawer. Attach drawer slides. Assemble drawer front to drawer. Attach drawer slides. PASO 9 NOTE: • See “HELPFUL HINTS” on page 5 for tightening cam locks. DRAWER SLIDE REMARQUE : GLISSIÈRE DE TIROIR...
- Page 16 STEP 10 Insert drawers. Install dowels or hole plugs. ÉTAPE 10 Insérer les tiroirs. Installer les goujons ou bouchons. Inserte los cajones. Instale las espigas o tapones de los PASO 10 agujeros de las espigas. O O R R O O U U FOR STACKING MODULES SUPERPOSÉS PARA APILAR...
Need help?
Do you have a question about the ClosetMaid Stackable 2 Drawer Organizer and is the answer not in the manual?
Questions and answers