EGO ST1300E Repair Manual Line
Hide thumbs
Also See for ST1300E:
- Operator's manual (321 pages) ,
- Operator's manual (93 pages) ,
- Operator's manual (17 pages)
Advertisement
Quick Links
Advertisement

Related Manuals for EGO ST1300E


Summary of Contents for EGO ST1300E
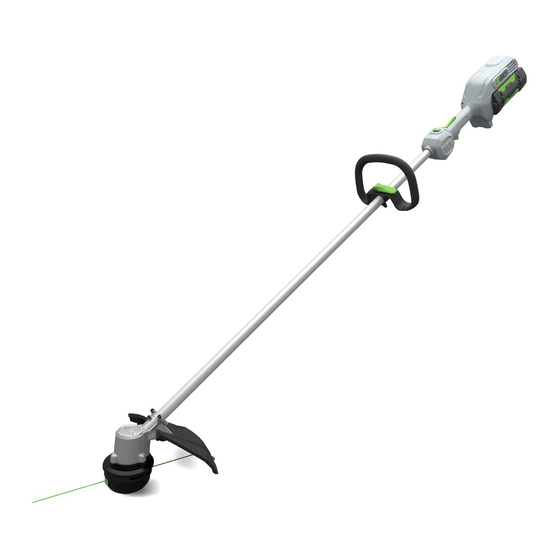
- Page 1 REPAIR GUIDELINE String Trimmer_ST1300E Version: 1 Issue Date: 02//2016...
- Page 2 Table of Contents Contents Page Troubleshooting Tool list Part 1: Replace the motor assembly 5-26 Part 2: Replace the PCBA 27-37...
- Page 3 Troubleshooting Fault Problem Possible Cause Test & Solution Position Replace the cutting line. (e.g. 2 mm Not feed line Poor cutting line Trimmer line nylon line) The cables that connect to motor are Open the motor housing, check the Motor loosed or fallen off from motor.
- Page 4 Tool List For Repair Tool List SPEC Remark Magnetic bits #1 , #2 phillips Socket wrench 13mm Hex wrench Electric soldering iron Heat gun Heat shrinkable sleeves Scissor To remove the shrinkable sleeve...
- Page 5 Part 1: Replace the Motor Assembly...
- Page 6 Replace the Motor 1. Stop the motor and remove the battery pack from the string trimmer. 2. Loosen the two combination screws in the guard with the M5 hex wrench, remove the guard from the shaft base. Combination screws Guard assembly Combination screws Description...
- Page 7 Replace the Motor 3. Press the two release tabs on the trimmer head base, pull the spool and spool retainer out. Spool retainer Release tab Description Part Number Spool 2824055002 Spool Spool Retainer 2824019002...
- Page 8 Replace the Motor 4. Hold the bump knob and pull it straight out. Remove the bump knob, compression spring and washer from the trimmer head base. Trimmer head base PULL Compression spring Description Part Number Bump knob Washer Bump Knob 2824022001 Compression Spring 3660582001...
- Page 9 Replace the Motor 5. Wear gloves and hold the trimmer head base with one hand, use a 13mm manual socket wrench to turn the hexagon nut counterclockwise to loosen it. Hexagon nut...
- Page 10 Replace the Motor 6. Hold the trimmer head base and pull it straight out from the motor shaft, remove the flange from the base. Outer flange Pull Trimmer head base Description Part Number Motor shaft Outer Flange 3520800001 Hexagon nut Hexagon Nut 5630271001 Trimmer Head Base...
- Page 11 Replace the Motor 7. Loosen the three screws on the shield cover, remove the shield cover from the motor assembly. Shield cover Washer Screw Description Part Number Including Spool, spool retainer, bump knob, compression Trimmer Head Set 2824421001 spring, washer, trimmer head base, hexagon nut Shield Cover 3127655001 Screw...
- Page 12 Replace the Motor 8. Loosen the eleven screws in the rear housing set, open the housing. NOTICE: During opening, the two spring pins may be remained in the right housing. If the rear housing set need replacing, take down the pins and assemble them to the new housing. Spring Pin Rear housing set Description...
- Page 13 Replace the Motor 9. Loosen the locking screw on the fixing ring, take out the shaft from the housings. Internal cables in the shaft Description Part Number Qty. Fixed Ring 3705178001 Plain Washer 5650005002 Tapping Screw 5610032004 Internal Cable 4860300002 Assembly...
- Page 14 Replace the Motor 10. Remove the heat-shrinkable sleeves from the connectors with a scissor. 11. Move the transparent sleeves aside, and pull the connectors to separate. Heat-shrinkable sleeve Transparent sleeve...
- Page 15 Replace the Motor 12. Take out the motor from the motor housing. 13. Remove the heat-shrinkable sleeves from the cables and disconnect the cables. Motor Motor housing...
- Page 16 Replace the Motor 14. Replace with a new motor. The motor housing can be replaced as well if it is broken or worn. 15. Place new heat-shrinkable sleeves through the cables. Connect the cables by electric soldering iron. Correct connection: Black to black, white to white, green to blue. Internal Cables Heat-shrinkable sleeves Motor housing...
- Page 17 Replace the Motor 16. Move the heat-shrinkable sleeves to cover the soldering points and use a hot air gun to shrink the sleeves. 17. Position the motor into the motor housing. Mount the shield cover on the motor assembly and lock it with three screws and washers.
- Page 18 Replace the Motor 18. Assemble the trimmer head set onto the motor shaft. a) Position the flange into the trimmer head base; NOTICE: the flat surface of the flange should be rested on the trimmer head base. Trimmer head base Outer flange Correct direction...
- Page 19 Replace the Motor b) Mount the trimmer head base together with the flange onto the motor shaft, lock the base with the hexagon nut. Hexagon nut...
- Page 20 Replace the Motor Mount the washer into the trimmer head base. d) Align the ribs in the bump knob with the slots in the trimmer head base, fix the bump knob onto the base. e) Press the bump knob until it is fully slid in position and locked on the base. Washer Align the ribs with slots in the base...
- Page 21 Replace the Motor Put the spool in the spool retainer and mount the spool retainer to the trimmer head base. Spool retainer Spool...
- Page 22 Replace the Motor 19. Assemble the connectors in the rear housing. a) Plug the three connectors and make sure they are fully insert in place. Correct connection: Black to black, white to white, green to blue. b) Move the transparent sleeves and the heat-shrinkable sleeves to cover the connectors and use a hot air gun to shrink the sleeves.
- Page 23 Replace the Motor 20. Fix the switches into the housing and align the cables in the grooves. Switches Cable alignment Cable alignment...
- Page 24 Replace the Motor 21. Align the locating pole on the left rear housing with the groove in the shaft(Fig. 2) so as to place the shaft into its position(Fig. 1). Lock the shaft by the fixed ring with tapping screw and plain washer. 22.
- Page 25 Replace the Motor 23. Close the rear housing, lock the housings with the eleven tapping screws. NOTICE: Mind the two spring pins(Fig. 3). They are may be remained in the right housing. In case they drop during disassembling, insert them into the holes either in the right or the left housing. Spring Pin...
- Page 26 Replace the Motor 24. Mount the guard assembly onto the shaft base and lock it with two combination screws. Combination screws...
- Page 27 Part 2: Replace the PCBA...
- Page 28 Replace the PCBA 1. Loosen the eleven screws in the rear housing set, open the housing. NOTICE: During opening, the two spring pins may be remained in the right housing. If the rear housing set need replacing, take down the pins and assemble them to the new housing. Spring Pin Rear housing set Description...
- Page 29 Replace the PCBA 2. Loosen the locking screw on the fixing ring, take out the shaft from the housings. Internal cables in the shaft Description Part Number Qty. Fixed Ring 3705178001 Plain Washer 5650005002 Tapping Screw 5610032004 Internal Cable 4860300002 Assembly...
- Page 30 Replace the PCBA 3. Remove the heat-shrinkable sleeves from the connectors with a scissor. 4. Move the transparent sleeves aside, and pull the connectors to separate. Heat-shrinkable sleeve Transparent sleeve...
- Page 31 Replace the PCBA Take out the PCBA from the housing. Replace it with a new PCBA. 6. The battery release button, latch, battery ejection lever, housings can be replaced if they are broken or worn. PCBA Latch Battery release Battery ejection button lever Description...
- Page 32 Replace the PCBA 7. Assemble the connectors in the rear housing. a) Plug the three connectors and make sure they are fully insert in place. Correct connection: Black to black, white to white, green to blue. b) Move the transparent sleeves and the heat-shrinkable sleeves to cover the connectors and use a hot air gun to shrink the sleeves.
- Page 33 Replace the PCBA 8. Fix the switches into the housing and align the cables in the grooves. Switches Cable alignment Cable alignment...
- Page 34 Replace the PCBA 9. Align the locating pole on the left rear housing with the groove in the shaft(Fig. 2) so as to place the shaft into its position(Fig. 1). Lock the shaft by the fixed ring and the tapping screw.. Groove in the shaft Place the shaft into this position...
- Page 35 Replace the PCBA 11. Replace the lock-off trigger, switch trigger or speed adjustments switch if they are broken. Compression spring 1 Lock-off trigger Speed adjustment switch Description Part Number Qty. Lock-off Trigger 3128088001 Compression spring 2 Compression Spring 1 3660453002 Compression spring 2 3660075001 Switch Trigger...
- Page 36 Replace the PCBA 10. Mount the lock-off trigger and switch trigger into the handle housing by aligning their fixing holes with the fixing poles in the handle. Make sure they are pushed into place. 11. Insert the speed adjustment switch into the handle housing slot as shown. 12.
- Page 37 Replace the PCBA 13. Close the rear housing, lock the housings with the eleven tapping screws. NOTICE: Mind the two spring pins(Fig. 3). They are maybe remained in the right housing. In case they drop during disassembling, insert them into the holes either in the right or the left housing. Spring Pin...
Need help?
Do you have a question about the ST1300E and is the answer not in the manual?
Questions and answers