Table of Contents
Advertisement
Advertisement
Table of Contents
Troubleshooting

Related Manuals for Yamaha Majesty YP125E


Summary of Contents for Yamaha Majesty YP125E
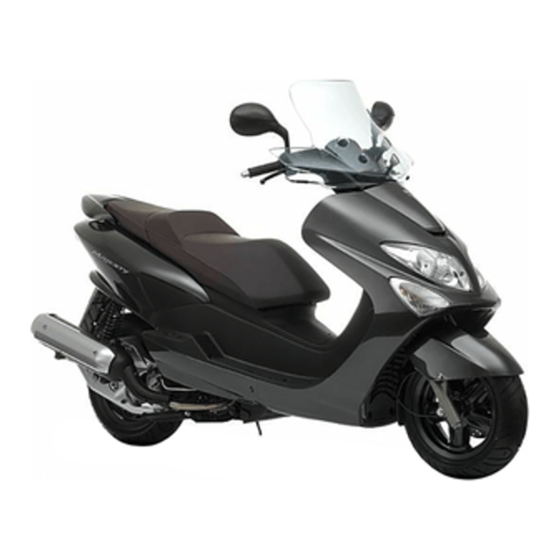
- Page 1 OWNER’S MANUAL YP125E YP180E 5XL-F819D-E3...
- Page 3 Welcome to the Yamaha world of motorcycling! As the owner of the YP125E/YP180E, you are benefiting from Yamaha’s vast experience and newest technology regar- ding the design and manufacture of high-quality products, which have earned Yamaha a reputation for dependability.
- Page 4 Yamaha continually seeks advancements in product design and quality. Therefore, while this manual contains the most current product information available at the time of printing, there may be minor discrepancies between your scooter and this manual. If you have any questions concerning this manual, please consult your Yamaha dealer. EWA12410 s WARNING PLEASE READ THIS MANUAL CAREFULLY AND COMPLETELY BEFORE OPERATING THIS SCOOTER.
- Page 5 IMPORTANT MANUAL INFORMATION EAUS1171 YP125/YP180 OWNER’S MANUAL ©2005 by YAMAHA MOTOR ESPAÑA S.A. 1st edition, September 2005 All rights reserved. Any reprinting or unauthorized use without the written permission of YAMAHA MOTOR ESPAÑA S.A. is expressly prohibited. Printed in Spain.
-
Page 6: Table Of Contents
TABLE OF CONTENTS SAFETY INFORMATION .....1-1 OPERATION AND IMPORTANT RIDING Checking and lubricating the POINTS ..........5-1 cables ..........6-16 DESCRIPTION........2-1 Starting a cold engine ......5-1 Checking and lubricating the Left view ...........2-1 Starting off ........5-2 centerstand and sidestand ..6-17 Right view .........2-2 Acceleration and deceleration ..5-2 Checking the front fork....6-17 Controls and Instruments ....2-3... -
Page 7: Safety Information
SAFETY INFORMATION EAU10260 Safe riding Many accidents involve inexpe- SCOOTERS ARE SINGLE TRACK Always make pre-operation rienced operators. In fact, many VEHICLES. THEIR SAFE USE AND checks. Careful checks may help operators who have been invol- OPERATION DEPENDENT prevent an accident. ved in accidents do not even UPON THE USE OF PROPER RIDING This scooter is designed to carry... - Page 8 Modifications made to this scooter other motorists can see you. ries. The use of a safety helmet is the not approved by Yamaha, or the The posture of the operator and single most critical factor in the pre- removal of original equipment, may passenger is important for proper vention or reduction of head injuries.
- Page 9 Since Yamaha cannot per weight distribution or 183kg, (403,5lb). When loading within test all other accessories that may be aerodynamic changes.
- Page 10 SAFETY INFORMATION Use caution when adding electri- Always turn the engine off before EAU10360 Further safe-riding points cal accessories. If electrical leaving the scooter unattended Be sure to signal clearly when accessories exceed the capacity and remove the key from the making turns.
- Page 11 SAFETY INFORMATION Always wear a helmet, gloves, trousers (tapered around the cuff and ankle so they do not flap), and a bright colored jacket. Do not carry too much luggage on the scooter. An overloaded scooter is unstable. Use a strong cord to secure any luggage to the carriers.
-
Page 12: Description
DESCRIPTION EAU10410 Left view 1. Headlight (page 6-20) 4. Centerstand (page 6-17) 2. Sidestand (page 3-8) 5. Air filter (page 6-11) 3. V-Belt case air filter (page 6-11) 6. Fuel tank cap (page 3-6) -
Page 13: Right View
DESCRIPTION EAU10420 Right view 7. Passenger handle 11. Storage compartment (page 3-7) 8. Rear shock absorber (page 3-8) 12. Battery/fuse box (page 6-18) 9. Seat (page 3-7) 13. Coolant reservoir (page 6-10) 10. Engine oil dipstick (page 6-7) 14. Radiator... -
Page 14: Controls And Instruments
DESCRIPTION EAU10430 Controls and instruments 15. Rear brake lever (page 3-6) 22. Front brake lever (page 3-5) 16. Left handlebar switch (page 3-4) 23. Right handlebar switch (page 3-4) 17. Speedometer (page 3-3) 24. Battery voltage (page 3-3) 18. Turn indicator lights (page 3-1) 25. -
Page 15: Instrument And Control Function
INSTRUMENT AND CONTROL FUNCTIONS EAU10450 EAUM1020 EWA10060 “ ” s WARNING Main switch The coolant temperature warning light Never turn the key to “OFF” or should come on when the key is tur- “LOCK” while vehicle ned to “h”. (See page 3-2.) moving, otherwise the electrical systems will be switched off, which EAU10700... - Page 16 1. Turn the key to “h”. The electrical circuit of the indicator ched on. 2. If the warning light does not light can be checked according to the come on, have a Yamaha dealer EAU11390 following procedure. Oil change indicator light “ ”...
-
Page 17: Speedometer Unit
INSTRUMENT AND CONTROL FUNCTIONS EAU11660 mate the distance that can be trave- NOTE: Speedometer unit led with a full tank of fuel. This infor- The odometer/tripmeter reading mation will enable you to plan future mode can be changed any num- fuel stops. -
Page 18: Clock
NOTE: 2. Press the “TRIP” button for two If the battery voltage drops to 10 V, seconds, and the hour display have a Yamaha dealer check the bat- will flash. tery. 3. Press the “TRIP” button to set the hours. -
Page 19: Front Brake Lever
INSTRUMENT AND CONTROL FUNCTIONS EAU12460 EAU12763 EAU12900 Turn signal switch “ ” Hazard switch “ ” Front brake lever To signal a right-hand turn, push this switch to “ ”. To signal a left-hand turn, push this switch to “ ”. -
Page 20: Rear Brake Lever
INSTRUMENT AND CONTROL FUNCTIONS EAU12950 EAUS1040 EAU13220 Rear brake lever Fuel tank cap Fuel 1. Rear brake lever 1. Aligning marks 1. Filling tube 2. Fuel tank cover 2. Fuel level 3. Fuel tank cap The rear brake lever is located on the Make sure that there is sufficient fuel left handlebar grip. -
Page 21: Seat
INSTRUMENT AND CONTROL FUNCTIONS ECA10070 NOTE: EAU14540 CAUTION Storage compartment Make sure that the seat is properly Immediately wipe off spilled fuel secured before riding. with a clean, dry, soft cloth, since fuel may deteriorate painted surfa- EAU14400 ces or plastic parts. Front storage compartment EAU13890 Seat... -
Page 22: Adjusting The Rear Shock Absorber Assemblies
INSTRUMENT AND CONTROL FUNCTIONS EWA10960 ECA10100 s WARNING CAUTION Spring preload setting: Minimum (soft): Do not exceed the load limit of Never attempt to turn an adjusting 10 kg (22,05 lb) for the storage mechanism beyond the maximum Standard: compartment. or minimum settings. -
Page 23: Sidestand Switch Operation Check
Yamaha dealer check the starting off. Therefore, check this system before riding. system regularly as described below and have a Yamaha dealer repair it if it does not function pro- perly. EAUT1091 Sidestand switch operation check 1. -
Page 24: Pre-Operation Checks
PRE-OPERATION CHECKS EAU15591 The condition of a vehicle is the owner’s responsibility. Vital compo- nents can start to deteriorate quickly and unexpectedly, even if the vehicle remains unused (for example, as a result of exposure to the elements). Any damage, fluid leakage or loss of tire air pressure could have serious consequences. -
Page 25: Pre-Operation Check List
• If necessary, add recommended brake fluid to specified level. • Check hydraulic system for leakage. • Make sure that operation is smooth. • Check cable free play. Throttle grip 5-2, 6-12 • If necessary, have Yamaha dealer adjust cable free play and lubricate cable and grip housing. - Page 26 PRE-OPERATION CHECKS ITEM CHECKS PAGE • Check for damage. • Check tire condition and tread depth. Wheels and tires 6-13 • Check air pressure. • Correct if necessary. • Make sure that operation is smooth. 3-5, 3-6, 6-15 Brake levers •...
-
Page 27: Operation And Important Riding Points
Do not crank the Consult Yamaha dealer engine more than 10 seconds on any regarding any control or func- one attempt. -
Page 28: Starting Off
OPERATION AND IMPORTANT RIDING POINTS EAU16760 EAU16780 EAU16791 Starting off Acceleration and Braking deceleration 1. Passenger handle 1. Close the throttle completely. 2. Apply both front and rear brakes The speed can be adjusted by ope- NOTE: simultaneously while gradually ning and closing the throttle. -
Page 29: Parking
If any engine trouble should occur Avoid prolonged operation above 1/3 during the engine break-in period, throttle. immediately have a Yamaha dealer After every hour of operation, stop the check the vehicle. engine, and then let it cool for five to... -
Page 30: Periodic Maintenance And Minor Repairs
The intervals given in the periodic rience required for a particular job, Consult a Yamaha dealer for proper maintenance and lubrication chart have a Yamaha dealer perform it for maintenance intervals. should be simply considered as a you. general guide under normal riding... -
Page 31: Periodic Maintenance And Lubrication Chart
The annual checks must be performed every year, except if a kilometer-based maintenance is performed instead. From 50000 km, repeat the maintenance intervals starting from 10000 km. Items marked with an asterisk should be performed by a Yamaha dealer as they require special tools, data and technical skills. ODOMETER READING (x 1000 Km) - Page 32 PERIODIC MAINTENANCE AND MINOR REPAIR ODOMETER READING (x 1000 Km) ANNUAL CHECK ITEM CHECK OR MAINTENANCE JOB √ √ √ √ √ √ 9 * Rear brake • Check operation, fluid level and vehicle for fluid leakage. •Replace brake pads. Whenever worn to the limit √...
- Page 33 PERIODIC MAINTENANCE AND MINOR REPAIR ODOMETER READING (x 1000 Km) ANNUAL CHECK ITEM CHECK OR MAINTENANCE JOB √ √ √ √ √ √ 24 * Front and rear brake • Check operation. switches √ √ √ √ √ Moving parts and cables •...
-
Page 34: Removing And Installing Cowlings And Panels
PERIODIC MAINTENANCE AND MINOR REPAIR EAU18711 EAU18790 EAU19210 Cowling B Panels Removing and installing cowlings and panels Cowling A 1. Panel 1. Panel 2. Screw (x1) 2. Screw (x4) To remove the cowling To remove the panel 1. Cowling Remove the screws, and then take Remove the screws, and then take the cowling off. -
Page 35: Checking The Spark Plug
Do not attempt to Clean the surface of the spark plug diagnose such problems yourself. gasket and its mating surface, and Instead, have a Yamaha dealer check then wipe off any grime from the the vehicle. spark plug threads. -
Page 36: Engine Oil
PERIODIC MAINTENANCE AND MINOR REPAIR EAUS1241 2. Start the engine, warm it up for To change the engine oil Engine oil several minutes, and then turn it off. 3. Wait a few minutes until the oil settles, remove the oil filler cap, wipe the dipstick clean, insert it back into the oil filler hole (without screwing it in), and then remove it... - Page 37 PERIODIC MAINTENANCE AND MINOR REPAIR 7. Add the specified amount of the To reset the oil change indicator recommended engine oil, and light then install and tighten the oil 1. Push and hold the “TRIP” button filler cap. MAXIMUM three seconds.
-
Page 38: Final Gear Oil
The final gear case must be checked for oil leakage before each ride. If any Tightening torque: leakage is found, have a Yamaha dea- Final gear oil filler bolt: 22 Nm (2,2 m•kgf, 15,91 ft•lbf) ler check and repair the vehicle. In... -
Page 39: Coolant
PERIODIC MAINTENANCE AND MINOR REPAIR EAU20070 NOTE: Tightening torque: Coolant The coolant level must be chec- Final gear oil drain bolt: ked on a cold engine since the 22 Nm (2,2 m•kgf, 15,91 ft•lbf) level varies with engine tempera- ture. Make sure that the vehicle is 4. -
Page 40: Air Filter And V-Belt Case Air Filter Elements
3. If the coolant is at or below the If water has been added to the Cleaning the air filter element minimum level mark, remove the coolant, have a Yamaha dealer front cowling by removing the check the antifreeze content of screws. -
Page 41: Adjusting The Carburetor
Therefore, all car- sary. buretor adjustments should be left to 6. Insert the air filter element into a Yamaha dealer, who has the neces- the air filter case. sary professional knowledge and 7. Install the air filter case cover by experience. -
Page 42: Tires
PERIODIC MAINTENANCE AND MINOR REPAIR EAU21540 total weight of rider, passenger, NEVER OVERLOAD Tires cargo, and accessories appro- MOTORCYCLE! Operation of ved for this model. an overloaded motorcycle may result in tire damage, loss of Tire air pressure (measured on control, or severe injury. - Page 43 2. Side face ding the tires, should be left to approved for this model by a Yamaha dealer, who has the The tires must be checked before Yamaha Motor España, S.A. necessary professional know- each ride. If the center tread depth ledge and experience.
-
Page 44: Adjusting The Brake Lever Free Play
Before riding, check that the brake and lubrication chart. To check the a Yamaha dealer adjust it. fluid is above the minimum level mark brake pad wear, measure the lining EWA10640 and replenish if necessary. -
Page 45: Changing The Brake Fluid
Yamaha dealer damaged or does not move smoothly, lity brake fluid, otherwise the rub- check the cause. have a Yamaha dealer check or repla- ber seals may deteriorate, cau- ce it. EAUM1360 sing leakage and poor braking Changing the brake fluid performance. -
Page 46: Checking And Lubricating The Centerstand And Sidestand
If any damage is found or the front The condition and operation of the fork does not operate smoothly, front fork must be checked as follows have a Yamaha dealer check or at the intervals specified in the perio- repair it. dic maintenance and lubrication chart. -
Page 47: Checking The Wheel Bearings
If any free electrolyte level. play can be felt, have a Yamaha 2. Remove cowling A. (See page 6-5) dealer check or repair the stee- 3. Check the electrolyte level in the ring. - Page 48 PERIODIC MAINTENANCE AND MINOR REPAIR EWA10770 Take care not to spill electroly- To store the battery s WARNING te on the drive chain, as this 1. If the vehicle will not be used for Electrolyte is poisonous and may weaken it, shorten chain more than one month, remove dangerous since it contains life and possibly result in an...
-
Page 49: Replacing The Fuse
ECA10670 Specified fuse: CAUTION damages. 20 A It is advisable to have a Yamaha dealer perform this job. EAUS1180 ECA10640 Replacing the fuse Headlight bulb CAUTION 1. Remove the front panel by remo- Do not use a fuse of a higher ampe- ving the screws. -
Page 50: Replacing A Front Turn Signal Light Bulb
Replacing the license plate screws. lens by removing the screw. light bulb 5. Have a Yamaha dealer adjust the 2. Remove the defective bulb by headlight beam if necessary. pushing it in and turning it coun- Front turn signal light bulb terclockwise. -
Page 51: Replacing The Tail/Brake Light Bulb Or A Rear Turn Signal Light Bulb
PERIODIC MAINTENANCE AND MINOR REPAIR EAUS1130 Rear turn signal light bulb Replacing the tail/brake light 1. Remove the tail/brake light lens bulb or a rear turn signal by removing the screws. 2. Remove the left or right turn sig- light bulb nal light bulb lens by pulling it backwards. -
Page 52: Troubleshooting
The following troubleshooting charts represent quick and easy procedures for checking these vital systems your- self. However, should your scooter require any repair, take it to a Yamaha dealer, whose skilled technicians have the necessary tools, experience, and know-how to service the scooter properly. -
Page 53: Troubleshooting Chart
PERIODIC MAINTENANCE AND MINOR REPAIR EAU25962 Troubleshooting chart EWA10840 s WARNING Keep away open flames and do not smoke while checking or working on the fuel system. 6-24... -
Page 54: Scooter Care And Storage
SCOOTER CARE AND STORAGE EAU26090 ducts onto seals, gaskets and thinner, fuel (gasoline), rust Care wheel axles. Always rinse the dirt removers or inhibitors, brake While the open design of a scooter and degreaser off with water. fluid, antifreeze or electrolyte. reveals the attractiveness of the tech- Cleaning Do not use high-pressure was-... - Page 55 SCOOTER CARE AND STORAGE After normal use ECA10790 6. Wax all painted surfaces. CAUTION Remove dirt with warm water, a mild 7. Let the scooter dry completely Do not use warm water since it detergent, and a soft, clean sponge, before storing or covering it.
-
Page 56: Storage
SCOOTER CARE AND STORAGE NOTE: 2. Drain the carburetor float cham- EWA10950 s WARNING Consult a Yamaha dealer for advice ber by loosening the drain bolt; To prevent damage or injury from on what products to use. this will prevent fuel deposits sparking, make sure to ground the from building up. - Page 57 SCOOTER CARE AND STORAGE information on storing the bat- tery, see page 6-18. NOTE: Make any necessary repairs before storing the scooter.
-
Page 58: Specifications
SPECIFICATIONS Dimensions Lubrication system Spark plug gap Wet sump 0.7-0.8 mm Overall length Engine oil Clutch 2030 m Overall width Type Clutch type 745 mm SAE10W30 or SAE10W40 SE type Dry, centrifugal automatic Overall height Engine oil quantity Transmission 1285 mm Periodic oil change Primary reduction system Seat height... - Page 59 SPECIFICATIONS Rear tire Recommended fluid Bulb voltage, wattage x quantity DOT 4 Type Headlight Rear brake Tubeless 12 V, 35 W / 35 W x 2 Size Type Tail/brake light 130/70-12 51L Single disc brake 12 V, 21 W / 5 W x 2 Manufacturer/model Operation Front turn signal light...
-
Page 60: Consumer Information
Record the key identification number, vehicle identification number and model label information in the spaces provided below for assistance when ordering spare parts from a Yamaha dealer or for reference in case the vehicle is stolen. KEY IDENTIFICATION NUMBER 1. Key identification number 1. - Page 61 1. Model label The model label is affixed to the bot- tom of the seat. (See page 3-7.) Record the information on this label in the space provided. This information will be needed when ordering spare parts from a Yamaha dealer.
- Page 62 INDEX Fuel ............3-6 Sidestand switch operation check ....3-9 Fuel tank cap ..........3-6 Speedometer unit ........3-3 Acceleration and deceleration ....5-2 Starting a cold engine........5-1 Adjusting the brake lever free play ..6-15 Starting off ..........5-2 Adjusting the carburetor ......6-12 Handlebar switches ........3-4 Storage............7-3 Adjusting the rear shock absorber Storage compartment ........3-7...
- Page 64 YAMAHA MOTOR ESPAÑA, S.A. PRINTED IN SPAIN 2005.09-Bengar Gràfiques, S.L.
Need help?
Do you have a question about the Majesty YP125E and is the answer not in the manual?
Questions and answers