Advertisement
Quick Links
Advertisement

Related Manuals for Blagdon KOI AIR 25


Summary of Contents for Blagdon KOI AIR 25
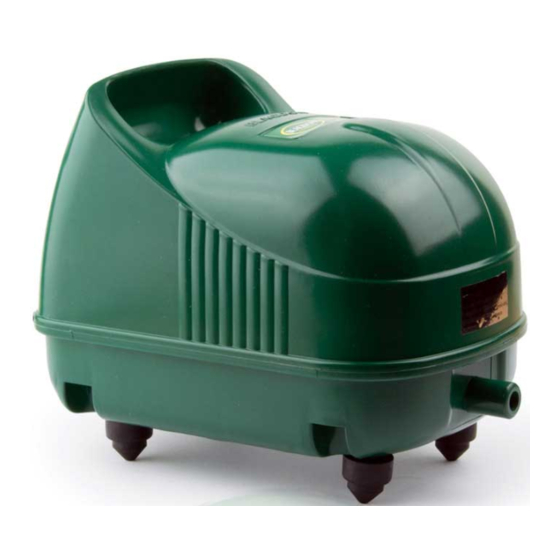
- Page 1 THE POND MASTERS GUIDE TO KOI AIR 25/50/65...
- Page 2 Use of a Blagdon Koi Air pump will dramatically increase the level of oxygen in the pond and reduce carbon dioxide levels, thus aiding in preventing the pond from stagnating, by injecting air into the water.
- Page 3 Location Connecting air line and air stones Maintenance Replacing the intake and outlet foams Replacing the flapper valves Koi Air 25 Replacing the flapper valves Koi Air 50/65 Replacing the diaphragm Koi Air 25 Replacing the diaphragm Koi Air 50/65...
- Page 4 2. GETTING TO KNOW YOUR KOI AIR 25 Name of part Code Name of part Code Air filter cover Outlet connector pipe (see No.25 for outlet Intake foam seal (see No.3 connector pipe clip) for replacement) 8 x outlet valved metal Intake foam filter &...
- Page 5 3. GETTING TO KNOW YOUR KOI AIR 25 22 33...
- Page 6 4. GETTING TO KNOW YOUR KOI AIR 50 / 65 Name of part Code Name of part Code Air filter cover Koi Air 50 12 x outlet valved Intake foam seal + 3 metal air divider 1021029 Intake foam filter 1021043 Koi Air 65 18 x outlet valved Intake foam filter (see No.2...
- Page 7 5. GETTING TO KNOW YOUR KOI AIR 50 / 65 24 30 22 35...
- Page 8 6. INSTALLATION Electrical Installation This apparatus is fitted with a 13 amp (BS 1363) plug with a 3 amp fuse. With this or any other type of plug an ASTA 3 amp or 5 amp fuse to BS 1362 must be fitted either in the plug or adaptor or at the distribution board.
- Page 9 7. INSTALLATION Location Install the pump in a dry weatherproof covered area, such as a shed or garage. Install the pump and mains connections where they will not come into contact with water. Ensure the pump is installed above the pond water level to avoid back siphoning of the pond water into the air pump in the event of the power supply to the pump being cut.
- Page 10 IMPORTANT: Before commencing any maintenance on your Koi Air pump, ensure it is isolated from the mains electricity supply. Replacing the Outlet Foams Step by step guide for Koi Air 25 See Diagram) 1. Remove the air filter cover part 1.
- Page 11 5. If you have a complete valve base including flappers code number 1019835 (see getting to know your KOI AIR 25 sections 2&3). This can now be directly replaced and the steps repeated in reverse order to reassemble. Follow steps 3 to 5 on both valve chambers of the pump, if not move to step 6.
- Page 12 Replacing the Diaphragm Locating Backboard Replacing the Diaphragm Step By Step guide for Koi Air 25 See Diagram) See replacing the flapper valves diagram (see section 9) for steps 1 to 4. 1. Remove the air filter cover part 1.
- Page 13 11. MAINTENANCE magnet frame. 13. Place the metal washers onto the thread then secure firmly with the nut. 14. The valve base should now be fixed onto the diaphragm base ring and screwed into the motor housing using the four screws and washers. Ensure that the outlet is on the side that will fit the L shaped pipe.
- Page 14 Both diaphragms may have failed see sections 10 & 11. Intake or outlet foams may be severely blocked see section 8. If none of the above resolves the fault contact Interpet (Blagdon) Consumer advice department (see faults problems procedure inside back cover.
- Page 15 3. Return pump to the point of purchase for inspection and advice (you will need proof of purchase). Consumer Advice contact details Interpet (Blagdon) Consumer Advice Department Vincent Lane, Dorking, Surrey RH4 3YX Telephone: 01306 743747 (Monday to Friday 10am to 4pm except Bank Holidays - Times may vary) Fax: 01306 876712 E-mail: customercare@interpet.co.uk...
- Page 16 Established over 40 years ago, Blagdon are committed to producing a comprehensive range of high quality, easy to use, pond equipment. An ongoing programme of research development ensures excellent performance and value for all their customers. This product excellence is demonstrated by Blagdon’s award winning...
Need help?
Do you have a question about the KOI AIR 25 and is the answer not in the manual?
Questions and answers